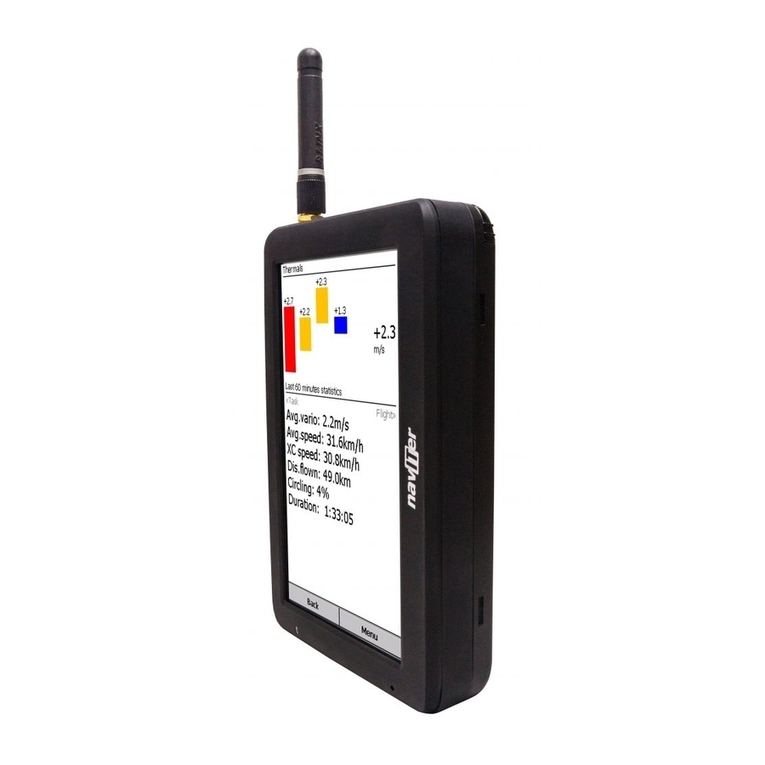
Naviter Oudie 2 User manual

© 2003 - 2014 ... Naviter d.o.o.
Manual for
Oudie 2 and Oudie IGC
Last modified 27.11.2014
version 6.0

SeeYou MobileI
© 2003 - 2014 ... Naviter d.o.o.
Table of Contents
Foreword 0
Part I Introduction 2
................................................................................................................................... 21 System requirements
................................................................................................................................... 32 Registering SeeYou Mobile
................................................................................................................................... 33 Starting SeeYou Mobile
Part II Getting started 5
................................................................................................................................... 51 Installing and uninstalling
................................................................................................................................... 62 Running SeeYou Mobile for the first time
................................................................................................................................... 73 Copying filesto SeeYou Mobile
................................................................................................................................... 84 Learning to use SeeYou Mobile
................................................................................................................................... 95 Connecting to the GPS Source
Part III How to 12
................................................................................................................................... 121 Using Profiles
................................................................................................................................... 132 Set takeoff altitude
................................................................................................................................... 143 Manage airspace warnings
................................................................................................................................... 154 Using Thermal Assistant
................................................................................................................................... 165 Entering the task
................................................................................................................................... 196 Flying badge, record and racing tasks
................................................................................................................................... 207 Flying Assigned Area tasks
................................................................................................................................... 228 Flying with the FAI Triangle Assistant
................................................................................................................................... 239 Flarm Radar
................................................................................................................................... 2510 Use Vario in Oudie IGC
................................................................................................................................... 2511 Finish flight
................................................................................................................................... 2512 Connect to the internet
Part IV Map page 28
................................................................................................................................... 291 Cursor info
.......................................................................................................................................................... 29Waypoints .......................................................................................................................................................... 30Flarm .......................................................................................................................................................... 30Airspace .......................................................................................................................................................... 31Task
................................................................................................................................... 312 Glider position
................................................................................................................................... 313 Arrow towardsthe North
................................................................................................................................... 324 Wind vector
................................................................................................................................... 325 Glideslope indicator
................................................................................................................................... 326 Speed to Fly indicator

IIContents
II
© 2003 - 2014 ... Naviter d.o.o.
................................................................................................................................... 327 Vector map
................................................................................................................................... 338 Flight trace
................................................................................................................................... 339 Terrain collision
................................................................................................................................... 3310 Airspace warning
................................................................................................................................... 3311 Navboxes
................................................................................................................................... 3312 Animation speed
................................................................................................................................... 3413 Task bar
................................................................................................................................... 3414 Command bar
Part V Information page 36
Part VI Statistics page 38
Part VII Menu 40
................................................................................................................................... 401 < Prev and Next >
................................................................................................................................... 402 Esc
................................................................................................................................... 403 Settings
................................................................................................................................... 414 Display options
................................................................................................................................... 415 Map orientation
................................................................................................................................... 416 Add Waypoint
................................................................................................................................... 427 Zoom
................................................................................................................................... 428 Wind
................................................................................................................................... 439 McCready & Altitude
................................................................................................................................... 4410 Goto
.......................................................................................................................................................... 45Details overview
.......................................................................................................................................................... 45Edit Waypoint.......................................................................................................................................................... 46Waypoint filter
................................................................................................................................... 4611 Task
.......................................................................................................................................................... 47List edit .......................................................................................................................................................... 47Map edit .......................................................................................................................................................... 48Edit Point .......................................................................................................................................................... 48Load task .......................................................................................................................................................... 48Task options .......................................................................................................................................................... 49Upload Task declaration
.......................................................................................................................................................... 49Multiple start points
................................................................................................................................... 4912 About
................................................................................................................................... 5013 Exit
................................................................................................................................... 5014 Team
................................................................................................................................... 5015 Save Settings
................................................................................................................................... 5016 Flarm points
................................................................................................................................... 5117 Switch Profile
................................................................................................................................... 5118 ConnectMe
................................................................................................................................... 5119 Logbook

SeeYou MobileIII
© 2003 - 2014 ... Naviter d.o.o.
.......................................................................................................................................................... 51Flight statistic and replay
Part VIII Settings 53
................................................................................................................................... 531 Map
.......................................................................................................................................................... 54Scheme properties
................................................................................................................................... 542 Airspace
................................................................................................................................... 553 Waypoints(Wpts)
................................................................................................................................... 554 Track & Target
................................................................................................................................... 565 OLC & FAI area
................................................................................................................................... 566 Task
................................................................................................................................... 577 Navboxes
.......................................................................................................................................................... 60Edit
................................................................................................................................... 618 Symbols
................................................................................................................................... 619 Warnings
................................................................................................................................... 6210 Thermal
................................................................................................................................... 6311 Polar
................................................................................................................................... 6312 Units
................................................................................................................................... 6313 Fonts
................................................................................................................................... 6414 Input
.......................................................................................................................................................... 65Port Settings
................................................................................................................................... 6515 Commands
................................................................................................................................... 6516 Setup Menu
................................................................................................................................... 6517 Files
................................................................................................................................... 6618 Log
................................................................................................................................... 6619 User Interface (UI)
................................................................................................................................... 6720 Flarm
................................................................................................................................... 6821 Miscellaneous(Misc)
................................................................................................................................... 6822 Hardware
.......................................................................................................................................................... 69Terminal
................................................................................................................................... 6923 LX1600
................................................................................................................................... 7124 Vario
................................................................................................................................... 7125 Oudie Live
Part IX Windows Mobile tips and tricks 73
Index 74

Part I

SeeYou Mobile2
© 2003 - 2014 ... Naviter d.o.o.
1 Introduction
SeeYou Mobile v6.0
SeeYou Mobile is a stand alone application for the Pocket PC environment which will help glider pilots at
all levels better understand soaring while it is happening.
Naviter is a Slovenian based software company. We focus on highly featured and easy to use software
for glider pilots. The needs of glider pilots worldwide are what we are interested in.
Naviter d.o.o.
Planina 3
4000 Kranj
Slovenia
email: info@naviter.com
web: http://www.naviter.com/
All rights reserved by Naviter d.o.o. 2003-2014
1.1 System requirements
There is a variety of options about which devices will run SeeYou Mobile.
Compatible Operating systems
. Windows CE 3.0
. Windows CE 5.0 (PNA)
. Windows CE 6.0 (PNA)
. Pocket PC 2002
. Pocket PC 2003 (aka Windows Mobile 2003)
. Windows Mobile 2003 Second Edition
. Windows Mobile 5.0
. Windows Mobile 6.0
. Windows Mobile 6.5
Compatible Processor types
. MIPS
. ARM
. Strong ARM
. X-Scale ARM
Compatible Displays
. Monochrome
. Color
. Portrait
. Landscape
. Any resolution
Required Memory
Depends mostly on the size of the terrain map. Without the map it is ~500KB. You can control the size of
the map through Mobile wizard in SeeYou.

Introduction 3
© 2003 - 2014 ... Naviter d.o.o.
1.2 Registering SeeYou Mobile
Unregistered version of SeeYou Mobile is 100% functional. It will however pop-up a dialog to ask for the
registration key every so often.
To be able to use SeeYou Mobile without interruption you should register SeeYou Mobile. A registration
key can be purchased online (http://www.naviter.com) or through our distributors worldwide. The
registration key allows you to install any upgrades free within the specified period. After this time, you
can still use SeeYou Mobile without limitations. To upgrade after the expiration of the upgrade key, you
need to purchase an upgrade to the original key.
To enter the registration key, go to the About dialog box in Menu > ">>>" > About . Enter your
name in the "Registered to" box and the key in the "Registration key" box and press Register. If the
registration is successful, you will see the information about the Serial number and Upgrade expiration
date below the box.
1.3 Starting SeeYou Mobile
You can start SeeYou Mobile by tapping on the SeeYou Mobile icon on the Today screen of your PDA.
If SeeYou Mobile is installed on SD Card and your device supports autorun, then it will run automatically
as soon as you insert the SD Card into the slot.
If you prefer to do it the hard way - SeeYou Mobile is installed in \Program Files\mSeeYou by default.
49 49

Part II

Getting started 5
© 2003 - 2014 ... Naviter d.o.o.
2 Getting started
This topic wants to cover some of the basic things you need to know about how to use your SeeYou
Mobile. If this is the first time you are using SeeYou Mobile please take a few moments to read about the
basics about how to use SeeYou Mobile:
. Installing and uninstalling
. Running SeeYou Mobile for the first time
. Copying files to SeeYou Mobile
. Learning to use SeeYou Mobile
. Connecting to the GPS Source
. Using profiles with SeeYou Mobile
. Flying badge, record and racing tasks
. Flying Assigned Area tasks
. Using Thermal Assistant
. Flying with the FAI Triangle Assistant
. Flarm Radar
2.1 Installing and uninstalling
Installing
The easiest way to install SeeYou Mobile on your Pocket PC is to download the installation file from
http://www.naviter.com
Run the downloaded file on your desktop PC and follow the instructions on the screen. Unless you change
something during the installation, it will be installed in \Program Files\mSeeYou folder on your device,
while terrain, airspace and waypoint files will be in \My Documents\mSeeYou folder.
A shortcut to SeeYou Mobile will be placed on the Today screen of your device. Use this icon to quickly
start the application.
Installing on a Storage Card
. Download SeeYou Mobile ZIP for Storage Card
. Insert Storage Card to your Card reader
. Unzip the contents of the downloaded ZIP file to the root of your Storage Card
. Make sure you keep the directory structure
. Insert the Storage Card to your PDA
You should now see the dialog asking you whether or not you wish to run SeeYou Mobile.
Uninstalling
To remove SeeYou Mobile from your device, you should go to Start > Settings > System > Remove
Programs. Select Naviter SeeYou Mobile and press the Remove button. It will remove the program files,
registry settings, terrain, airspace and waypoint files while recorded flights will remain on your device.
See also:
Getting Started
5
6
7
8
9
12
19
20
15
22
23
5

SeeYou Mobile6
© 2003 - 2014 ... Naviter d.o.o.
2.2 Running SeeYou Mobile for the first time
After successful installation , use the SeeYou Mobile icon on your Today screen to start the
application.
Unless you are connected to the GPS source already, it will inform you that a GPS input is unavailable and
ask you to select a new input. Click Yes and the Settings > Input dialog will be opened. To run an
already recorded demo flight, select File, then press OK in the command bar at the bottom of the screen.
What you get is the demo flight on a demo map with demo waypoints and demo airspace. The airplane
will takeoff at a 20:1 accelerated replay and the Navboxes will start to show values which the pilot would
have been looking at if he was flying with SeeYou Mobile on that particular flight.
The Map page display is divided into Header > Map with symbols > Command bar sections from top
to bottom.
Header
gives you information on GPS Status, the waypoint you are navigating to, system information like low
battery, volume control and lets you minimize the application (the X button). Note that the X does not
close SeeYou Mobile, it just minimizes it. This is different than what you are used to in the desktop PC.
Map with symbols
is where you will be looking for information all the time. You can tap the symbols to bring up additional
dialogs for
. Wind by tapping on the Wind vector
. Map orientation by tapping on the North arrow
. Flight properties dialog by tapping on the arrival altitude/MC symbol
. Move the glider if you tap on the glider. This is also a sort of Pan function for the map.
Tapping on a waypoint on the map gives you a list of Waypoints, sorted on distance from the tap. This is
a quick way to select a waypoint from a group of waypoints.
Dragging a line on the screen gives you a list of Waypoints, primarily sorted on the direction of the drag
and secondly on the distance from the glider. This is useful for searching for a waypoint that is not on the
screen, but you know it is in the specified direction.
The Navboxes are what you will use to display the information you need. Be it Final glide, Navigation,
Optimization or another issue, use Menu > Navboxes to select which items you want displayed.
Command bar
holds 5 shortcuts to specific actions. In addition to the Command bar, actions are also assigned to any
hardware buttons on the Pocket PC. You can select which buttons do which actions through Menu >
Settings > Commands .
The default actions for hardware buttons are
. Up = Previous waypoint
. Down = Next waypoint
. Left = Previous page
. Right = Next page
. Calendar = MacCready down
5
64
28
28
42
41
43
57
34
65

Getting started 7
© 2003 - 2014 ... Naviter d.o.o.
. Contacts = MacCready up
. Inbox = Previous page
. iTask = Next page
The default actions for software buttons from left to right (Command bar) are:
. Zoom
. Display options
. Goto
. Next page
. Menu
Try the functions of all of these buttons.
See also:
Getting Started
2.3 Copying files to SeeYou Mobile
Mobile Wizard connects SeeYou with SeeYou Mobile to send files to the Pocket PC. Mobile Wizard never
expires. That means you don't have to have a registered version of SeeYou to transfer all of the required
data to the Pocket PC.
1. Connect your Pocket PC to PC through Active Sync
2. Run SeeYou
3. Go to File > Mobile Wizard
First page of the Mobile wizard allows you to select the Items you wish to transfer to the device. You
can choose from
. Terrain (isolines)
. Terrain elevations (for AGL reading)
. Roads, Railroads, Rivers, Lakes and Towns
. Waypoints and Tasks
. Airspace
. Settings (Vector map color scheme, units, triangle properties, default observation zones)
Second page gives you the possibility to select basename and destination folder for the data you have
selected to upload on the first page.
. Files that will be created will have the same name as Basename and respective extensions CUB for
airspace, CIT for vector maps and CUP for waypoints and tasks.
. Destination folder can be either Pocket PC memory or local disk. Choose your preference through the
radio buttons.
. Use the Browse buttons to select the destination folder easily.
Third page asks you to draw a rectangle for the area you want to transfer to the Pocket PC.
Use Ctrl+Up, Ctrl+Down to zoom out and zoom in. Click on the the borders of the map to move
horizontally and vertically. This is the same procedure as in the other Map views in SeeYou.
Fourth page shows progress in transferring or saving files.
Once the transfer has completed successfully, you may close Mobile wizard with the Finish button.
42
41
44
40
5

SeeYou Mobile8
© 2003 - 2014 ... Naviter d.o.o.
If you get a connection error, first check whether or not SeeYou Mobile was closed on the Pocket PC. It is
important to understand the difference between the "X" button in Pocket PC and "X" button in desktop
Windows. The "X" on Pocket PC works more like "minimize" in Windows. To really quit SeeYou Mobile
you need to go to Menu > Next > "Exit".
You know SeeYou Mobile is not running when it is not listed under Start > Settings > System > Memory
> Running programs. If it's there, stop it.
Then you will be able to communicate with SeeYou Mobile through Mobile Wizard.
See also:
Getting Started
2.4 Learning to use SeeYou Mobile
There is two recommended options to learn SeeYou Mobile before you get airborne.
File replay
This is by far the most efficient way to learn SeeYou Mobile. What it does is it replays an already flown
flight and enables you to see the data you would have been looking at if you had SeeYou Mobile with you
on the particular flight.
In order to set this up, copy some of your flights from the desktop PC to your device. Then go to Menu >
Settings > Input , then change input to "File". Press the "..." button and choose a flight you wish to
replay. Alternatively you can go to Menu > Logbook > choose the flight you wish to replay > Tools >
Replay flight. Then use the buttons to change Waypoints, MacCready and pages. Tap on the screen to
see what happens and setup Navboxes to what you want them to be. Note that you can setup Navboxes
separately for each of the two Map pages.
A particularly useful way to replay a flight is if you managed to save a NMEA log of your flight. In the
NMEA log all of the messages that were sent to the device may be reproduced on screen, including other
Flarm data and its warnings. To replay a saved NMEA log you need to create a "TMP" folder in the root
of your Pocket PC memory, save the NMEA log as "nmeain.log" and select "File" as your input in Menu >
Settings > input.
Simulator
In the Simulator input mode, you can move the glider freely even without a prerecorded flight which
enables you to go places you haven't visited in the air yet. To move the glider, tap on it, then drag a line
out of the glider in the direction you want it to move. The longer the line, the faster it will go in the
specified direction.
Learning SeeYou Mobile on the ground will give you time to think about gliding, task and scenery in the
air rather than software.
SeeYou Mobile Simulator for desktop PC
In addition we have created a 100% functional copy of our software which runs on the desktop PC. This
program enables you to test all features of SeeYou Mobile at home without even having to buy a Pocket
PC before you decide that you would like to use SeeYou Mobile in flight.
5
64
57

Getting started 9
© 2003 - 2014 ... Naviter d.o.o.
See also:
Getting Started
2.5 Connecting to the GPS Source
In general - every GPS with an NMEA output is compatible with SeeYou Mobile. What you need is the
correct wiring and correct settings in the GPS device. Below is a list of devices with particularities that
you need to check before can make a successful connection.
To check whether or not Pocket PC is receiving data from the GPS, go to Menu > Settings > Harware >
Terminal. If you can see sentences being displayed in a once-per-second rate, then your Port Settings
are setup correctly.
It is assumed that SeeYou Mobile is configured to communicate on COM 1, Baud rate 4800, No Parity, 8
Bits and Stop bit 1. If not stated otherwise, these settings are assumed in Menu > Settings > Input >
Port Settings. It is also assumed that the Pocket PC COM cable is the one you can use to connect the
device to the PC through Active Sync. Note that proprietary cables can be made which can save you from
having to use a null-modem adapter by reversing pins Tx and Rx.
EXTERNAL WIRED GPS UNITS
These units connect to the Pocket PC through a COM cable connected to the connector at the bottom of
the Pocket PC device.
FLASH CARD/SLEEVE/BLUETOOTH GPS DEVICES
An overwhelming number of these devices is available worldwide. No standardization has been achieved
between the manufacturers. That means that each device connects to the PDA with different settings,
sometimes even by a single manufacturer. We therefore ask you to use this table as reference and help
us build a better database by telling us how your device connects to SeeYou Mobile. Your best reference
is the manual for your device.
Examples for external wired GPS units:
LX NAV
V7, S80 are fully supported. Cables are available from Naviter or LX NAV.
LX Navigation
. Cables: LX Navigation supplies cables, mounts and splitters to connect their instruments with PDA. We
suggest you use these cables.
. Setup: NMEA must be setup to output ONLY these sentences: GPRMC, GPGGA and LXWP_. LXWP_ is
only available in newest firmware versions.
. LX 1600 is delivered with all required cables from the factory. To communicate both ways with the unit
you MUST setup Menu > Settings > Hardware > Device > LX 1600.
. When connected to LX 7007 version 1.04 or higher, Menu > Settings > Input > Port Settings > Speed
must be 19200bps due to the default settings on the LX 7007.
Garmin
. Cables: Use the supplied Garmin PC cable, a male/male null-modem adapter and the Pocket PC COM
cable.
. GPS Setup: Interface must be setup to "NMEA Out".
5

SeeYou Mobile10
© 2003 - 2014 ... Naviter d.o.o.
SDI Posigraph
. Cables: LX Navigation supplies cables, mounts and splitters to connect Posigraph to the PDA. We
suggest you use these cables.
. Setup: Press Setup, then select Setup > Output. Select Output NMEA to Y, Output WINP to Y.
Volkslogger
. Cables: Fa. Garrecht Avionik supplies cables and mounts to connect Volkslogger to the PDA. We suggest
you use these cables.
. Setup: SeeYou Mobile MUST be setup to communicate with Volkslogger by selecting Menu > Settings >
Hardware > Device > Volkslogger.
Flarm
. Cables: Widely available through 3rd party vendors
. Setup: Menu > Settings > Input should be 19200bps if you are to receive additional messages about
the other Flarms in vicinity
Cambridge models 10, 20 & 25
. Setup: SeeYou Mobile MUST be setup to communicate with Cambridge GPS-NAV by selecting Menu >
Settings > Hardware > Device > Cambridge GPS-NAV
Cambridge 302
. Cables:
. Setup: SeeYou Mobile can communicate with 302 both ways. It MUST be setup to Menu > Settings >
Hardware > Device > Cambridge 302. You can choose which data you wish to send and receive.
Printtechnik GR 1000
. Setup: NMEA Output must be set to "NMEA A"
Examples of Bluetooth, Card or Sleeve GPS units.
Navman Sleeve
. Setup: Go to Menu > Next > Input > Port Settings. Change Port to 4 or 6 (depends on the model),
Speed to 57000, Parity None, Bits 8, Stopbits 1. Check Menu > Settings > Hardware > Terminal to see if
Pocket PC is receiving sentences from the GPS.
TomTom
. Their devices are easy to connect in general. However, the TomTom application may not close the COM
port properly on some devices. We suggest you make a soft reset before the flight and NOT use the
TomTom software during the flight. See also our Support forum
Asus GPS Mouse
. Connects without setting up anything beyond the default settings.
See also:
Getting Started 5

Part III

SeeYou Mobile12
© 2003 - 2014 ... Naviter d.o.o.
3 How to
The How to Chapter will cover the basics and some details about how to use your Oudie most effectively.
Using Profiles
Setting the takeoff altitude
Managing airspace warnings
Using the Thermal Assistant
Entering the task
Flying badge, record and racing tasks
Flying the Assigned Area tasks
Flying with the FAI Triangle Assistant
Using the Flarm Radar
Use Vario in Oudie IGC
Finish flight
Connect to the internet
3.1 Using Profiles
If you feel no need to use more than one set of navboxes or fly more than one sailplane ignore this
feature and go read the next chapter.
If however you fly several types of gliders or fly at different locations you are
likely to be fed up with changing the polar, terrain, waypoint and airspace files
each time before the flight. Profiles were added in SeeYou Mobile 5.0. You can
have separate setups for each of your club's gliders plus one profile for the
competition you are attending shortly. Here's how it works.
1. When you first ran SeeYou Mobile, a Default profile was created. Anything
you have changed in the application was stored to this profile. Now comes a
day when you fly the single seater of your club with a significantly different
polar and GPS source than the one you have used previously. To avoid
entering the polar, header and hardware data each time you go fly this glider,
you may create a new profile by going to Menu > Settings > Misc and click
the "Manage Profiles..." button.
2. You get to choose to either
. Copy current profile (which makes an exact copy of your current settings)
. Create a new profile (which creates a copy of the default settings)
. Delete a profile
You may give the new profile a name according to what you are going to use it
for. Be it "ASW 27", "LX 1600" or "World Gliding Championships".
3. Next time you start SeeYou Mobile you will have two (or more) profiles to
choose from. You have 10 seconds to select a profile. If you do nothing, the
profile you used last is loaded.
4. After you have loaded the profile for the first time you will want to set it up
12
13
14
15
16
19
20
22
23
25
25
25
68

How to 13
© 2003 - 2014 ... Naviter d.o.o.
according to your preferences. Here is a handful of settings you will probably
want to change before use:
Links to Terrain, Airspace and Waypoint files
Pilot name and Glider type settings
Hardware that is connected to SeeYou Mobile
Navboxes for Map1
Navboxes for Map2 (they are separate, remember?)
See also:
Getting Started
3.2 Set takeoff altitude
Setting the takeoff altitude correctly could be the difference between a successful and a frustrating end
of the flight.
An Oudie 2 without being connected to an external source of pressure data will only use GPS altitude.
There is little to nothing you can do with that and this is the reason why such flights are ok to record the
joy and excitement about the flight but are insufficient to provide proof or staying outside official airspace
regardless if this is in a competition or on a record flight.
Oudie IGC and Oudie 2 connected to an external source of pressure data will record extremely accurate
altitudes. The altitude in the Oudie IGC and all other IGC approved flight recorders is recorded at the
standard pressure of 1013.25 hPa. In order to know you current altitude above mean sea level and your
current flight level altitude the altitudes need to be corrected to correspond with the real world.
There are several ways how Oudie / SeeYou Mobile can correct the takeoff altitude. It will typically
assume that the pressure recorded by the pressure sensor is relative to the standard atmosphere
pressure of 1013.25 hPa (but it is even possible to correct for that, see below). It is quite possible to
correct the altitudes to QNH automatically with the data which is available to Oudie. If you get the from
an external source (such as the ATC tower or the competition task sheet) then it is possible to enter the
values manually as well.
In order to correct the takeoff altitude you need to go to Menu > MC & Alt. dialog.
By default the Auto QNH checkbox is checked. Auto QNH will try to correct the takeoff altitude to your
current altitude by searching for a nearby airport or by using the Ground elevation at your location or (if
all else fails) using a very much averaged GPS altitude (but the latter is only a fallback and should not
normally happen since there is a worldwide terrain database already installed on each Oudie). Auto QNH
setting will give you a very good idea about the current pressure level and it works automatically without
your input.
If you want to change the altitude manually you should disable the Auto QNH navbox and enter the
takeoff altitude manually. If the Linked checkbox is checked (which it is by default) then the pressure
level will increase accordingly.
Typically in a competition you could get a complete set of data from the competition organization. In this
case remove the Auto QNH checkbox AND the Linked checkbox. Enter the takeoff altitude AND the QNH
65
66
68
57
57
5

SeeYou Mobile14
© 2003 - 2014 ... Naviter d.o.o.
pressure given from the competition then press ok. This way you will see exactly the same altitudes
during your flight as the ones that you will be scored by later in the evening. DO NOT set the "linked"
checkbox back in this case because it will change the pressure level back to the "linked" value.
3.3 Manage airspace warnings
Avoiding forbidden airspace is often just as important as navigating in general. It can however be much
trickier than finding the right valley to go down to since the airspace structure is very abstract and often
complicated. SeeYou Mobile will be your best friend if you use the whole potential of what it's got to
offer.
1. Airspace Warning
The first stage - let's name it the Airspace Warning - is often merely
informative. The screen will display an orange banner at the top of the page
and highlight the airspaces you are about to encounter. It will also display a
line with distances from your position to the narest position of each airspace
you are about to encounter. And it will beep briefly.
You get to choose to turn the airspace warning off for the airspace which is
listed in the banner. You can turn it off for either
. Today - until next takeoff
. 5 minutes - note that this number is user selectable through Menu > Settings
> Warnings)
. Ignore - for as long as you are flying towards it it won't beep again)
2. Airspace Alarm
Once you come too close for comfort an airspace alarm will sound. It gives you
a red banner at the top where you can read all about the airspace in question
and it will highlight the airspace in question. It will also draw the line to the
closest point of the airspace and it will give you a sound alarm continuously.
You still get to choose to turn this alarm off for
. Today - until next takeoff
. 5 minutes - user selectable in Menu > Settings > Warnings
. Mute - continue to display everything but stop the sound alarm
After you have pressed Mute you can still Ignore this airspace alarm.
3. Helpful Navboxes
There are three airspace related navboxes which will give you a good overview of the airspace situation
if you are familiar with what they are displaying:
1. "Nearest airspace - Horizontally" gives you the distance from your position to the nearest position of an
airspace where you are not horizontally inside (i.e. you are not below this airspace yet)
2. "Horizontally nearest airsapce - Altitude" gives you the altitude difference towards the horizontally
nearest airspace. The altitude difference is negative if you are below horizontally nearest airsapce. It is
positive if you are above and "Inside" if you are about to hit the lateral borders of the airspace in

How to 15
© 2003 - 2014 ... Naviter d.o.o.
question.
3. "Nearest airspace - Vertically" gives you the altitude difference towards the airspace above or below
the glider. The value is negative if you are below the airspace. It is positive if you are above, "Inside" if
you are already inside an airspace and "N/A" if there is no airspace at your location.
In addition to the airspaces there is also a very useful Action which can be assigned to any Navbox. It is
the action "Highlight nearest airspace" and it is assigned to the "Nearest airspace - Horizontally" by
default. If you touch a Navbox which has this action assigned to it, SeeYou Mobile will highlight the
airspace in question. It will link the glider with the airspace and display the distance from the glider to the
airspace.
4. Screen taps
In addition to all the above you may tap anywhere on the screen and then choose "Airspace" to quickly
access the list of airspaces at the location of the tap. With this list you can quickly change the visibility of
the airspaces or simply get an overview of what lies ahead. You can also change the properties of an
airspace such as lower or upper limit.
With this information airspace navigation should be easy and understandable even in a rather complex
airspace environment.
Read also:
. Setting up the Warnings
. Changing properties of an airspace
. Loading (multiple) airspace files
3.4 Using Thermal Assistant
Thermal assistant is a feature of SeeYou Mobile which should help you get centered in a lift more quickly
if you decide to follow its instructions.
Thermal assistant analyses the lift in your thermal. It calculates the average and follows how strongly the
vario values change in each circle.
It uses three ways to catch your attention:
1. You may choose between Bubbles or a Zoomed map which shows the best part of the lift. Bubbles
are disabled by default, zooming in is enabled.
2. Thermal Assistant audio warning goes off if variance is large enough (see Settings - Thermal ).
It whistles a selected amount of seconds or degrees (see Settings - Thermal ) before the glider will
reach the same part of the circle where maximum lift was reached in the previous circle.
3. Thermal assistant graphics is displayed if variance for displaying the thermal assistant is large
enough (see Settings - Thermal ). The size of the bubbles represents the amount of lift. The color of
the bubble is relative to the MacCready setting. Red is better thank MC, blue is more than 0.5m/s (1kts)
less than MC, yellow is in between. The arrow is pointing towards the maximum of the lift in the previous
circle while the length of the arrow is how "strong" the advice is to move your circle elsewhere. The
62
62
62

SeeYou Mobile16
© 2003 - 2014 ... Naviter d.o.o.
arrow is longer if variance is larger.
Your job:
. find a thermal
. start circling
. look outside
. observe the thermal clues
. observe traffic in your vicinity
. make use of Assistant's suggestions
Assistant's job:
. analyze the thermal
. find the strongest lift in the circle
. make audio and visual suggestions
We were not trying to develop a Thermal
Wizard, just an Assistant for the times
when you are tired or have better things
to do than focus 100% on the thermal. It
will only sound a bell if the thermal varies
significantly in strength.
If you would like to display Thermal assistant regardless of the current vario variation, feel free to
navigate to the Menu and press the Thermal Assistant button. To close the Thermal Assistant, just tap
the screen anywhere.
We will be happy if you continue to enjoy soaring and if you never find the need to use the Thermal
Assistant at all :-)
See also:
Getting Started
Settings - Thermal
3.5 Entering the task
This is a tutorial about entering the task in SeeYou Mobile. We have had the privilege to look over the
shoulder many impressively experienced pilots who have found a very difficult way to enter a task into
SeeYou Mobile.
Please read this because entering the task is just that - enter the waypoint names and go. No setting up
of observation zones is neccessary. Tutorial will focus on entering the demo task. The default one in the
evaluation version of SeeYou Mobile. The task will become a 500km FAI triangle in the south-eastern
5
62
Other manuals for Oudie 2
1
This manual suits for next models
1
Table of contents
Other Naviter Car Navigation System manuals
Popular Car Navigation System manuals by other brands

Sanyo
Sanyo NV-E7000 - Portable GPS And Mobile DVD Entertainment... Installation and operation manual

Snooper
Snooper S7000 quick start guide

Toyota
Toyota TNS 700 installation instructions

Mio
Mio Digiwalker C710 user manual

Blaupunkt
Blaupunkt TravelPilot 300 Operating and installation instructions

Garmin
Garmin NavComm SL30 installation manual