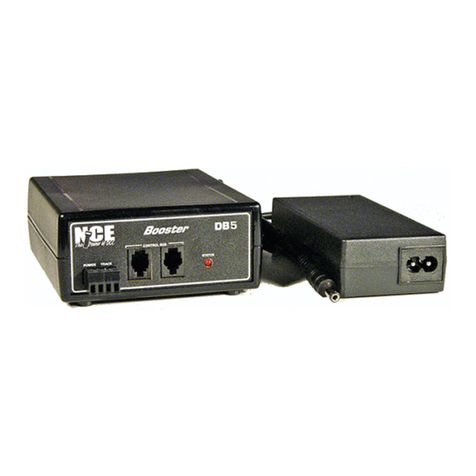
NCE SB3A Quick start guide

NCE SB5
Smart Booster v 1.65B
The SB5 Smart Booster adds expanded and updated features to a Power Cab
DCC system. The first and most noticeable feature is additional power (5 Amps)
to run trains and accessories.
Your PowerCab used with the SB5 can now be unplugged and used in true
walk around fashion. It no longer needs to remain connected for the system to
work.
Up to 6 cabs can be used with the SB5 (Cab address range 2 through 7).
Equipped Cabs have up to six recalls each when used with the SB5.
Additional 5 Amp boosters (DB5) may be added to the SB5 for even more
power handling on larger layouts.
This manual covers only the addition and installation of the SB5 to a Power Cab
system. For operation consult your Power Cab manual.
The SB5 does NOT have a programming track output. The basic Power Cab
provides this capability.
© 2013 NCE Corporation Page 1
INSTALLING THE NCE SB3A/SB5 UPGRADE CHIP
1. Unplug the SB3A/SB5.
2. Remove the 2 screws that hold the top to the bottom of
the case.
3. Carefully work the top of the case up and off. Set aside.
4. Locate the
Microprocessor chip
along the right hand
side of the case. It is
the largest chip
inside the SB3A/SB5.
5. Use a small Flat screw driver or hobby knife to
separate the
Microprocessor chip from
the socket. Make sure you
pry BETWEEN the socket
and the chip. Work end to
end lifting a little on one end, then a little on the other end.
Pry the Microprocessor chip straight up from the socket. You will no longer need
this chip but hang on to it for the time being.
6. The new Microprocessor chip may come to you with its legs
slightly splayed outward. You will need to bend these legs so
that they are straight down from the sides of the chip. Place the
chip on a flat, hard surface as shown in the diagram and bend
the body of the chip so that the legs are straight. Repeat with
the opposite side legs.
7. There is a small “U” shaped indent or dimple in one end of the chip.
This is the TOP of the chip. Place the chip on the socket with this “U”
shape toward the rear of the case.
8. Align the legs to the socket. When satisfied that ALL of the legs are in
line with a socket position, press the new chip down into the socket.
Work from end to end, press a little on one end, then a little on the other
end. Keep doing this until the Microprocessor chip is FULLY seated in
the socket.
9. Examine the installation to ensure ALL 28 of the legs have
engaged the socket correctly.
10. Replace the top of the case and the 2 screws that hold the top to
the bottom. DO NOT OVERTIGHTEN THE SCREWS. You could
inadvertently break the screw boss inside the case.
11. Plug the SB3A/SB5 back into your railroad and enjoy the greatest train control in model
railroading!
Make sure none of the legs
are bent under or outside
the socket.
Pry here
Do Not pry here
Dimple
“U” shaped
indent
Correct
Splayed
Microprocessor
U Shaped Indent

Page 2
Use only the power supply included with the SB5. Use of another supply will void the
warranty.
Power Connection:
The round connector plug from the power supply goes into the round power socket
marked Power.
Track Terminals:
Strip 1/4 inch of insulation from the
ends of your Track Bus wires coming
from your track. Remove the Track
connector plug from the SB5, it just
pulls out. Insert the wires into the two
pin plug. Tighten the screws so that
they are snug. Not too tight, just snug.
Insert this plug in the two pin socket
on the SB5 marked Track.
Cab Bus - 6 Wire (RJ-12) Socket:
For small layouts and for checking out the system before final wiring, the Cabs can be
directly connected to the SB5. For larger layouts this jack provides the ability to connect a
longer/larger bus.
You may plug a cab directly into either of the cab bus jacks or a cab bus cable may be
used to connect to additional UTP connector panels around the layout.
Control Bus - 4 Wire (RJ-H) Socket:
Connect the 4 pin cable from this socket to the first DB5 or PB105 Booster. This is the low
level DCC signal that will be amplified by the power booster(s).
StatusLight:
Thislightisalwaysonexceptwhenashortcircuitoccurs(see“shortcircuitprotection”below).
GroundScrew:
ThescrewontherearoftheSB5isused
toconnecttheSB5toothergroundscrews
onDB5Boosters.Wedonotrecommend
connectingtoearthgroundorhouse
ground.
ShortCircuitProtection:
The P514 Power Supply that is supplied with the SB5 incorporates internal short circuit
protection that will shut down track power in the event of a short circuit. The unit will
attempt to re-energize the track every 3-4 seconds until the short is cleared. The Status
LED conveys status of the track power. The LED will ‘blip’ each time the P514 attempts to
restore track power, steady ‘on’ of the LED indicates track power is restored.
The circuit protection of the SB5/P514 is not intended to
protect the booster from long term short circuits. Do not allow
a long term short circuit to persist for more than 3 or 4
minutes or damage may result. Therefore we strongly
recommend an external short circuit protection device. This
can be as simple as one or more automotive tail light bulbs
such as an #1156 or similar wired in series with the track
power output of the booster. NCE makes a variety of circuit
POWER TRACK
CONTROL BUS CAB BUS
STATUS
SB5 Face Plate
To Track
Connecting wireConnecting wire
SB5 Rear PanelDB5 Rear PanelDB5 Rear Panel

Expanded Use of NCE Products
Products Shown Above:
SB5 -.................................5240031
DB5 -.................................5240032
PowerCab -.......................5240025
UTP Panel -.......................5240207
EB1 Circuit Breakers.........5240225
RB02 Radio Base Station. 5240023
Cab06pr Radio Throttle.....5240044
P514
UTP
DB5 Booster Smart Booster - SB5
P514
EB1
EB1
STATUS STATUS
Power
Cab
EB1
EB1
Control Bus
Cable
Cab Bus
Cable
Cab Bus
Cable
Cab Bus
Cable
Track Bus
Wires
Track Bus
Wires
Ground Wire
RB02
Page 6 Page 3
protection devices and circuit breakers such as the CP6 and the EB1. This provides a
means to divide your layout into separate power “districts.” A short or derailment in one
district will only affect that section of track without shutting down other sections of the
layout.
ConnectingExtraBoosters:
The Control Bus output connector is used to connect additional boosters to the SB5. See
diagram on page 6.
LayoutWiring:
For runs up to about 25 feet (8 meters), we recommend #16 gauge wire as a layout “track
power bus”. If you need more than 25 feet #14 gauge is a better choice. For power drops
from the track to the bus #20, #22 or #24 gauge wire is sufficient if you keep the length to
18 inches or less. With code 83 or larger rail keep your drops 6 feet (2 meters) or less
apart. Code 70 and smaller rail should be about every 3 feet (1 meter).
While it is not absolutely required, we suggest twisting the track power bus wires together
(2 to 4 turns per foot). Don’t bother twisting short power runs or power drops.
ElectricalSpecifications:
P514 Power Supply (included) Replacement part number 5240238
Maximum continuous track current (with cooling) 5.1 Amps
Factory track voltage setting: 12 or 13.8 Volts. Selectable by switch on P514
STATUS
Layout
UTP Panel
ProCab
NCE PROCAB
RB02
Up to 4 Throttles and
Radio Base Station,
Etc.
Optional Expansion

Page 4
Available Connections:
1- Two position TRACK output power connector
1- CONTROL BUS output connector
2- Cab bus “RJ” connectors
1- DC Power connector
1- Ground screw on rear of box
Indicator Lights:
1- DC power on (red LED)
DCCSpecificationsoftheSB5:
Maximumnumberofcabs(throttles):6-CabAddressesMUSTbeintherangeof2through7
Plus USB, AIU, Mini Panel accessories in address range of 8 through 10
Maximum number of simultaneous trains: 18
Functions controlled: 29
Locomotive address range: 1-127 (short), 0-9999 (long)
Accessory address range: 1-2044
Signal address range: 1-2044
Maximum number of advanced consists: 16 (addresses 112-127)
Maximum number of old consists: 36 (6 per cab)
Maximum number of Recalls: 6 per cab
Resetting(Rebooting)theSystem:
The SB5 has a large power storage capability. This stored up power will continue to
operate the microprocessor in the SB5 for up to 15 seconds after power is removed. To
reset the system, turn the power off for at least 20 seconds (wait until the red DC power
LED goes completely out). If you see the “NCE SB5” message on your cab when you re-
apply power, the system has properly reset to normal power up condition. If the above
message does not appear during the power up process remove power and wait a bit
longer before restoring it.
ReturningtheSystemtoOriginalFactorySettings:
At the “normal display” press <PROG/ESC> followed by <5>. Press <ENTER> about ten
times until the “RESET SYSTEM?” Prompt appears. Press <6> followed by <1> to reset
the system to factory default condition. This takes about
10 seconds.
UsingaProgramTrack:
The SB5 is a combination command station and booster,
it does not have a dedicated Program Track. It does have
the ability to Program on the Main. To access the NCE
Program Track, you will need to have available, the
original set up of the Power Cab and use it connected to a
separate piece of track that you can use as the Program
Track.
SB5BoosterMode:
You can disable the command station portion of the SB5 to use it as a “Dumb Booster”
with another DCC system. To set the SB5 to booster only mode:
1. Move the small switch on the bottom of the SB5 toward the rear of the box.
2. Connect a PowerCab or ProCab to the SB5.
PCP
Program/Test Track
P114
Power Cab
a. Press <PROG/ESC> followed by <5> to see the SET CMD STATION prompt on the
LCD of the cab
b. Press <ENTER> repeatedly until you see “ENABLE BOOSTER”
c. Press <1> to enable booster only mode
d. The status LED on the SB5 should start flashing rapidly indictaing that there is no DCC
signal present and the SB5 is now in Booster mode.
The “Control Bus” jack on the front of the SB5 becomes a DCC signal input rather than a
DCC signal output. Connect your DCC signal here.
To return the SB5 to normal command station mode, just reverse the above process
(switch toward front of box, disable booster mode in SET CMD STATION).
Note: When in Booster mode cabs connected to the SB5 will still appear to work normally
except the word “BOOSTER” will replace the fast clock display. These cabs will not be
able to affect actual operation of trains or accessories.
Copyright & Trademarks
Copyright © 1994-2013 NCE Corporation. The identifying product terms Power Cab, Power Pro, PH-Pro, and
ProCab are trademarks of NCE Corporation. The look and feel of this software and its interaction with the user
through the ProCab or Power Cab is copyright NCE Corporation. The distinctive shape of the ProCab and Power
Cab with LCD and thumbwheel is a trademark of NCE Corporation. All non-NCE brands and product names
mentioned are likely to be trademarks or registered trademarks of their respected companies.
Limited Warranty
NCE guarantees that when used with the factory supplied Power Supply, every Power Cab and Smart Booster DCC
System is free from physical defects in material and workmanship for a period of 1 year. Use of a different Power
Supply will void the warranty.
Within the first year full repair or replacement will be made to the original purchaser of any item that has failed due
to manufacturer defect. Should the item no longer be produced and the item not repairable a similar item will be
substituted at the manufacturer’s discretion. The customer pays only shipping to the NCE Warranty Center. Please
save your original receipt as a photocopy of it may be requested. NCE returns the items UPS ground unless other
arrangements are made in advance. After the first year a fair and reasonable service charge may be placed on each
failed item returned for repair.
This warranty is not valid if the customer has intentionally misused, miswired, performed any unauthorized
alterations to the product, used the incorrect Power Supply or removed any product protection devices. In this case
a service charge will be applied for all repairs and replacements. To protect the warranty, please contact the
Warranty Center for authorization prior to altering any product. In no event will NCE’s liability exceed the price paid
for the product from direct, indirect, special, incidental or consequential damages resulting from the use of the
product, it’s accompanying software or its documentation. NCE makes no warranty or representation, expressed,
implied or statutory with respect to its products or the contents or use of this documentation and accompanying
software and specifically disclaims its quality, performance, merchantability, or fitness for any particular purpose.
NCE reserves the right to revise or update its products, software, or documentation without obligation to notify any
individual or entity.
Please contact the Warranty Center for specific shipping instructions and any service charges before returning any
product for service.
NCE Warranty Center - 585-265-0230
Page 5
This manual suits for next models
1
Other NCE Extender manuals