NComputing MX100D Quick reference guide

General Deployment Guidelines for MX100D KB0001606020
Page 1of 5Senthil Kumar P | Technical Manager APAC | 20-06-2016
General Deployment Guidelines for MX100D
Introduction
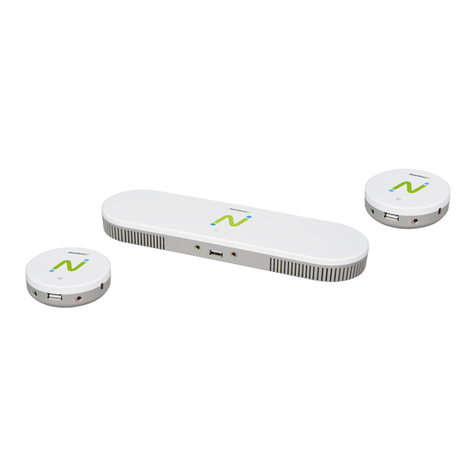
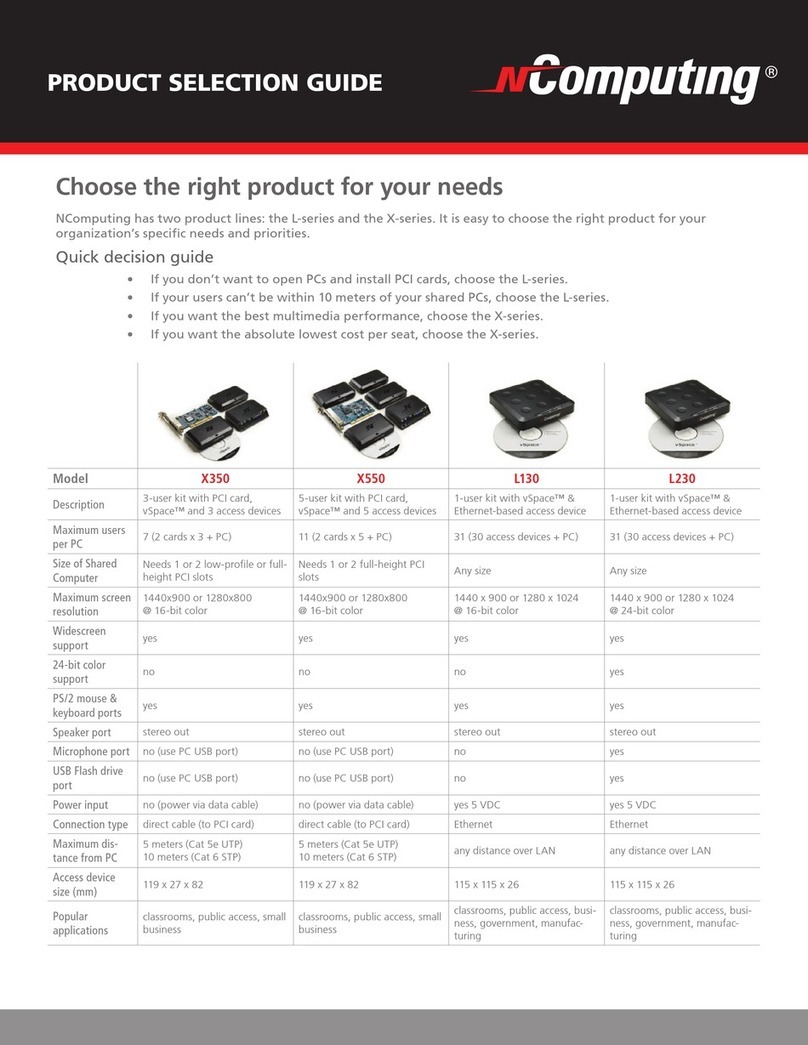
MX-series Models Each M-series kit includes three access clients. A central, Large Client which is
connected via Ethernet to your existing network environment, and two Small Clients which connect to the
Large Client. Each of the three clients affords their users an independent desktop experience. The following
tables provide some comparative information between the larger and small clients.
The deployment guidelines are presented in the following main sections:
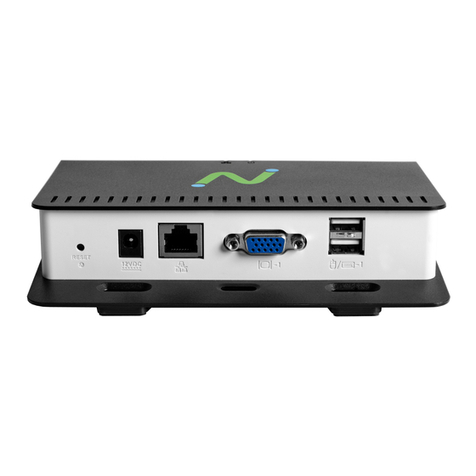
1
Headphone (Audio-Out)
8
Primary VGA
2
USB 2.0
9
Primary Keyboard & Mouse ( USB 2.0)
3
Microphone (analog-in)
10
Satellite 2 VGA
4
Satellite 3 Link (USB 2.0)
11
Satellite 2 Line (USB 2.0)
5
Satellite 3VGA
12
Mouse ( USB 2.0)
6
DC Power (only Standard Edition Model)
13
Link to Primary (USB 2.0)
7
RJ45 - LAN/Host PCIe Direct Connect & Power
14
Keyboard ( USB 2.0)
Specification
Description.
MAXIMUM NUMBER OF USERS*
9 User Per PCie Direct Card.
Supported Windows OS
Windows 7, 8.1 Pro 64bit. Windows Server 2008 R2, 2012 R2,
WMS 2012.
vSpace Support
8.4
USB PORTS AT the Access Device.
3x USB 2.0 (compatible)
Peripherals Support
Printer and Pen drive support at the Primary device. HID or true
2.0 USB devices are supported.
VIDEO RESOLUTION
up to 1920*1080 Max, FullHD support
Max Distance Between Primary and Satellite
device
5 Meter ( use compliance VGA and 2.0 USB cables)
USB Head Set
At the Primary and Satellite device.
Primary Device
Satellite Device

General Deployment Guidelines for MX100D KB0001606020
Page 2of 5Senthil Kumar P | Technical Manager APAC | 20-06-2016
*NComputing MX100 -series access devices use remote USB 1.1 or 2.0 to provide transparent USB
redirection. **Video acceleration powered by Numo™
You can peruse this entire document. Or, click on the links above to jump to specific sections of interest
Step 1 Pre-Deployment
System Requirement.
MX100D can support up to 9 Users per PCIe card, MX100D client connections per server, the server
specifications will vary by the number of users connecting to the server and the average applications used
by the users. The tables below provide an estimated hardware specifications of their chosen host systems.
NComputing recommends you always test your environment in advance of deployment to ensure it meets
your expectations.
MX100D Host Sizing
Work load
Number of Users
CPU
RAM
Windows boot Storage
Low Workload
3 to 6
Core i3 6100
4 GB DDR4
250 SSD
Low Workload
3 to 9
Core i3 6300
8 GB DDR4
250 SSD
Medium Work load
3 to 6
Core i3 6300
8 GB DDR4
250SSD
Medium Work load
3 to 9
Core i5 6400
8 GB DDR4
250SSD
High work load
3 to 6
Core i5 6400
8 GB DDR4
250SSD
High work load
3 to 9
Core i5 6500
8 GB DDR4
250SSD
Primary Device
Satellite
Device
Satellite
Device

General Deployment Guidelines for MX100D KB0001606020
Page 3of 5Senthil Kumar P | Technical Manager APAC | 20-06-2016
The number of users that your installation will support depends upon the host’s configuration and
your end--‐users’ performance expectations. Performance results are highly dependent upon the
individual host hardware, memory, applications being used, and OS and network conditions within
any LAN.
Host requirements will vary, please test your multi--
‐
user environment before deployment.
32--‐bit operating systems are not supported with MX100D. For additional sizing
guidelines refer to the following Knowledge ease articles: aScaling vSpace Deployments
cDeployment Checklist.
Perform the steps below to prepare the operating system on the host system.
Ensure that the operating system/service pack you intend to use is supported
Review Microsoft’s operating system licensing guidelines. In general, you need to
purchase and run the Microsoft®Windows Server®operating system software that is
appropriate for your needs. You must also obtain the appropriate number of Microsoft
client access licenses that are necessary for the number of users or devices that access
and use the server. Go to www.ncomputing.com/mslicensing for more information.
For each MX100D device you will need:
A. USB Keyboard and mouse
B. Monitor MAX up to 1920x1080 resolution support.
C. A category 5/6 network cable to connect to the PCie card LAN port.
D. Satellite device must be with in MAX 5 Meter. ( use compliance VGA and 2.0 USB cables)
E. Optional: speakers, headphones, microphones and USB peripherals
Step 2 Host Deployment/Tuning
Below are the basic steps you need to perform to deploy and tune a host system.
Install a clean copy of the operating system.
Perform Windows updates on the operating system.
Update your system drivers.
For updated device drivers and BIOS versions, consult your motherboard manufacturer’s website.
Be sure to check for updates for:
Motherboard BIOS and drivers
PCI drivers
NIC drivers
Audio drivers
Video drivers
NOTE: For Windows 8.1 and 2012 R2 server OS versions already incorporated with MX100D Marvell's
PCie card driver (Separate drivers installation not required).
Click on the below to Download
vSpace 8.4
MX100 Device
Firmware
PCie card
Driver
Quick installation
guide MX100D.
Quick installation guide
MX100S.

General Deployment Guidelines for MX100D KB0001606020
Page 4of 5Senthil Kumar P | Technical Manager APAC | 20-06-2016
Configure Firewall and Antivirus Software for vSpace
Antivirus, firewall and other types of security software can sometimes interfere with the initial configuration
or continued operation of the vSpace software. Before installing vSpace, make sure you DISABLE any
anti-virus or firewall software on the host system. You can re-enable this software after installing vSpace.
NOTE:
When dealing with certain firewall applications, you may need to make sure that the NComputing .exe
files have proper access permission to the network.
These .exe files include: KMSERVC.EXE, BOOTSRV.EXE, KMMSG.EXE, KMUPDATE.EXE,
KMREGWIZ.EXE Within the Exceptions tab of the Windows Firewall the ports that should be opened are:
TCP-Protocol: 27605, 27615, 3581, 3597, 3645, 3646, 3725
UDP-Protocol: 1027, 1283, 3581, 3725
Perform Windows Tuning Tasks
The default configurations on many systems are not optimized for a multi-user environment. Below is an
overview of the steps you should perform to streamline your host system, including its operating system,
to achieve optimal performance and compatibility
Tuning for Compatibility
Users on NComputing access devices are treated as remote users for some settings and policies. The
section below provides an overview of how to configure remote users.
Remote User Configuration
By default, Windows only allows Terminal Services (TS) or Remote Desktop Services (RDS) logins for
administrators and Remote Desktop users. In order for users to be able to log into the host system, they
need to be a member of the Remote Desktop user group. Please refer to the Enable Remote Desktop
User Access for vSpace on Windows document in the knowledge base for more information.
Data Execution Prevention Configuration
To help ensure NComputing’s services are able to run properly, you should set Data Execution
Prevention (DEP) to “Turn on DEP for essential Windows programs and services only.”
Apply the Desired “Look and Feel” for Your Selected OS Environment
For Server 2008 R2 deployments, launch the Windows Server Manager and enable the “Desktop
Experience” feature under the Roles section, and then turn on the “Themes” service under the Services
section. Users will then be able to select a Theme. (Windows Multipoint™Server 2012 pre-configures
this.)
The list below defines the other compatibility tuning tasks you should perform. Please refer to the
appropriate Windows tuning document (mentioned above) for your vSpace version for information.
Remove the Internet Explorer Enhanced Security Module.
Disable CD-ROM auto-play (if your system administrator recommends this).
Disable User Account Controls.
Disable the “First Run” page in Internet Explorer.
General Deployment Guidelines for MX100D KB0001606020
Page 5of 5Senthil Kumar P | Technical Manager APAC | 20-06-2016
Tuning for Performance
To optimize performance, you should also perform certain tuning tasks (summarized below) on the host
system.
Configure Power Management Settings
It is recommended that you disable all hibernation and power-saving features on the host system to
prevent complications with user sessions and terminal connections. The operating system power options
setting should be configured for “high performance
Create the Desired User Accounts
Add user accounts to your host system via your operating system’s administration tools.
Step 3 NComputing Installation
After you have performed the above steps, you are ready to install on the host system the vSpace
software you downloaded during the pre-deployment phase.
Connect and Activate Access Devices
After installing vSpace, follow the instructions in your access device’s user manual to connect peripherals
to your access device, connect the access device to the host system and activate the access device.
The basic steps are as follows:
1. Set up the access device and connect it to your network.
2. Connect the access device to your host system and then run the License Wizard to activate the
connected device(s).
Use NC Console to Administer Access Devices
The NComputing Management Console is a component of the vSpace software, which you install on the
host system. One of the console’s most powerful features is the ability to create and save device-
configuration profiles that you can easily apply to access devices across the network. In addition, you can
remotely configure other access device settings, including:
Update the firmware on multiple access devices.
Remotely view and monitor access device sessions (this can greatly facilitate troubleshooting, for
example).
Enable and configure NComputing’s video compression and streaming feature, which you can
use to minimize network traffic between access devices or lower the CPU load on the host
system.
Enable and disable USB devices connected to access devices.
Monitor, disconnect & stop user sessions. View and manage different host systems on a network.
Define server groups. You can combine several host system servers into a server group and then
configure access devices to connect to servers in a specific group. Used in conjunction with the
auto-connect feature, server groups provide auto-failover capabilities. If an access device is
unable to connect to one of the host servers in a group, it will attempt to connect to the next
server in the group, and so on.
Other NComputing Server manuals

NComputing
NComputing L130 User manual

NComputing
NComputing L130 User manual

NComputing
NComputing N400 User manual

NComputing
NComputing L130 User manual

NComputing
NComputing L130 User manual

NComputing
NComputing L300 User manual

NComputing
NComputing M300 User manual

NComputing
NComputing MX100S User manual

NComputing
NComputing OfficeStation L110 User manual
Popular Server manuals by other brands

Inspur
Inspur NF5448A6 Product White Paper

Avocent
Avocent Cyclades CS Quick installation guide

Gigabyte
Gigabyte GS-R227E-RH System installation guide

Sun Microsystems
Sun Microsystems Sun Fire V480 Parts installation and removal guide

Motorola solutions
Motorola solutions Avigilon VMA-AIA1-CG1 user guide

Acer
Acer M19A System user guide