manuals.online logo
Brands
  1. Home
  2. •
  3. Brands
  4. •
  5. NCR
  6. •
  7. Rack & Stand
  8. •
  9. NCR 7360-K401 Manual

NCR 7360-K401 Manual

This manual suits for next models

1

Other NCR Rack & Stand manuals

NCR XL Stand User manual

NCR

NCR XL Stand User manual

NCR 7707-K903 Manual

NCR

NCR 7707-K903 Manual

NCR 7746-K152 Manual

NCR

NCR 7746-K152 Manual

NCR 7702 K320 Manual

NCR

NCR 7702 K320 Manual

NCR RealPOS XR8 User manual

NCR

NCR RealPOS XR8 User manual

NCR 7702-K321 Manual

NCR

NCR 7702-K321 Manual

NCR SelfServ 90 User manual

NCR

NCR SelfServ 90 User manual

NCR 7403-K325 User manual

NCR

NCR 7403-K325 User manual

NCR 7360-K903 Manual

NCR

NCR 7360-K903 Manual

NCR 7403 K141 Manual

NCR

NCR 7403 K141 Manual

NCR 7761-K153 Manual

NCR

NCR 7761-K153 Manual

NCR 7761-K463 Manual

NCR

NCR 7761-K463 Manual

NCR 7403-K454 Manual

NCR

NCR 7403-K454 Manual

NCR 7761-K002 Manual

NCR

NCR 7761-K002 Manual

NCR 7707-K553 Manual

NCR

NCR 7707-K553 Manual

NCR 5964-K030 User manual

NCR

NCR 5964-K030 User manual

NCR Ingenico Lane 7000 Manual

NCR

NCR Ingenico Lane 7000 Manual

NCR Verifone VX805 User manual

NCR

NCR Verifone VX805 User manual

NCR VOYIX 7772 Manual

NCR

NCR VOYIX 7772 Manual

NCR 5968-K024 Manual

NCR

NCR 5968-K024 Manual

NCR 1668-K105 Manual

NCR

NCR 1668-K105 Manual

NCR 7772 Series User manual

NCR

NCR 7772 Series User manual

NCR C600 User manual

NCR

NCR C600 User manual

NCR 7350-K804 Manual

NCR

NCR 7350-K804 Manual

Popular Rack & Stand manuals by other brands

Dynex DX-MP3MT Quick setup guide

Dynex

Dynex DX-MP3MT Quick setup guide

Konig & Meyer 24185 manual

Konig & Meyer

Konig & Meyer 24185 manual

ECG LD 326501 instruction manual

ECG

ECG LD 326501 instruction manual

Philips SB7S19S/00 quick start guide

Philips

Philips SB7S19S/00 quick start guide

Woodline KIT-250 lb instructions

Woodline

Woodline KIT-250 lb instructions

ricoo S1222 installation instructions

ricoo

ricoo S1222 installation instructions

Kanto P301 user manual

Kanto

Kanto P301 user manual

VidaBox VB MNT FFS2 installation guide

VidaBox

VidaBox VB MNT FFS2 installation guide

PROEL PLWIN60C user manual

PROEL

PROEL PLWIN60C user manual

AllMounts PLB-43S instruction manual

AllMounts

AllMounts PLB-43S instruction manual

VMP VH-001 instruction sheet

VMP

VMP VH-001 instruction sheet

Nederman SYSTEM 920/400 instruction manual

Nederman

Nederman SYSTEM 920/400 instruction manual

Glasdon ORBIS POST MOUNTING KIT installation guide

Glasdon

Glasdon ORBIS POST MOUNTING KIT installation guide

Songmics LGR105 manual

Songmics

Songmics LGR105 manual

Grape GM401 user manual

Grape

Grape GM401 user manual

FourStarGroup 11225296 manual

FourStarGroup

FourStarGroup 11225296 manual

CHIEF FLR100 installation instructions

CHIEF

CHIEF FLR100 installation instructions

FEC XDCAM EX PMW-EX30 manual

FEC

FEC XDCAM EX PMW-EX30 manual

manuals.online logo
manuals.online logoBrands
  • About & Mission
  • Contact us
  • Privacy Policy
  • Terms and Conditions

Copyright 2025 Manuals.Online. All Rights Reserved.

Kit Instructions
PIN Pad Arm
7360-K401
Issue B
DRAFT
ii
The product described in this document is a licensed product of NCR Corporation.
NCR is a registered trademark of NCR Corporation. NCR FastLane SelfServ™ Checkout is a trademark of NCR Corporation in the
United States and/or other countries. Other product names mentioned in this publication may be trademarks or registered
trademarks of their respective companies and are hereby acknowledged.
The terms HDMI and HDMI High-Definition Multimedia Interface, and the HDMI Logo are trademarks or registered trademarks of
HDMI Licensing LLC in the United States and other countries.
Where creation of derivative works, modifications or copies of this NCR copyrighted documentation is permitted under the terms
and conditions of an agreement you have with NCR, NCR's copyright notice must be included.
It is the policy of NCR Corporation (NCR) to improve products as new technology, components, software, and firmware become
available. NCR, therefore, reserves the right to change specifications without prior notice.
All features, functions, and operations described herein may not be marketed by NCR in all parts of the world. In some instances,
photographs are of equipment prototypes. Therefore, before using this document, consult with your NCR representative or NCR
office for information that is applicable and current.
To maintain the quality of our publications, we need your comments on the accuracy, clarity, organization, and value of this book.
Please use the link below to send your comments.
EMail: [email protected]
Copyright © 2021
By NCR Corporation
864 Spring St. NW
Atlanta, GA 30308
United States
All Rights Reserved
DRAFT
iii
Revision Record
Issue Date Remarks
AJan 2018 First release.
BAug 2021 Updated Kit Contents.
DRAFT
7360-K401 PIN Pad Arm
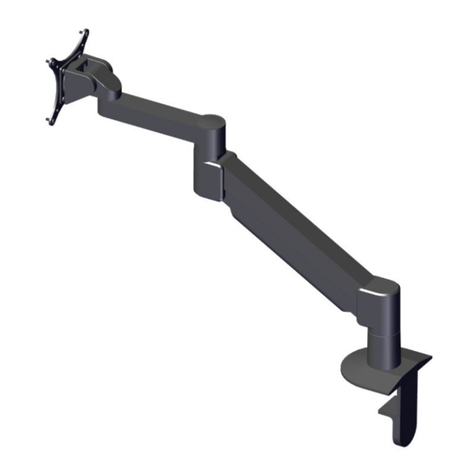
This kit contains a PIN Pad Arm for the NCRFastLane SelfServ™ Checkout (7360) unit.
Kit Contents
Part Number Description
497-0530413 7360-K401 Pin Pad Arm Kit
006-8611479 Cable Clamp, 1/2" (3 pcs)
006-8624300 Washer, Nylon, Black, M10 Screw, 10.5 mm ID, 22
mm OD (2 pcs)
009-0006593 Screws M4 x 10 (3 pcs)
009-0006599 Screw Hex M6 x 12 MC COMB (3 pcs)
497-0518399 Pin Pad Pivot Mount
DRAFT
2 7360-K401 PIN Pad Arm
Part Number Description
497-0527280 PIN Pad Arm Assembly
006-8625487 Nut - M10, 1.5 pitch, nylon lock, flange
006-8622405 Thumb Screw, Knurled Knob, M4 x 10 mm, Stainless Steel
006-8626347 Washer Flat Nylon Black 4.5 mm I.D, 10.36 mm O.D, 1.57
mm Thk.
* 497-0423108 Instructions Kit (Reference Sheet)
DRAFT
7360-K401 PIN Pad Arm 3
Installation Procedures
To install the PIN Pad Arm, follow these steps:
1. Do any of the following, if necessary:
• Remove the No PIN Pad Blanking Plate, if the unit was not configured with a
PIN Pad Arm. For more information, refer to Removing No PIN pad Blanking Plate
on page5.
• Remove the existing PIN Pad Mount. For more information, refer to Removing
Existing PIN Pad Mount on page8.
• Remove the existing PIN Pad Arm. For more information, refer to Removing
Existing PIN Pad Arm on page9.
2. Secure the PIN pad Arm to the Tower Frame using three screws, as shown in the
image below.
DRAFT
4 7360-K401 PIN Pad Arm
3. Position the PIN Pad Arm as shown in the image below.
4. Install the PIN pad Mount to the PIN pad Arm and fasten it using the allen key.
DRAFT
7360-K401 PIN Pad Arm 5
Removing No PIN pad Blanking Plate
To remove the No PIN pad Blanking Plate, follow these steps:
1. Unlock the tower frame using a key.
2. Raise the Terminal Display.
DRAFT
6 7360-K401 PIN Pad Arm
3. Loosen the star-shaped washer around the key lock assembly by turning it
counterclockwise.
4. Remove the back panel with the No PIN pad Blanking Plate from the tower
assembly.
DRAFT
7360-K401 PIN Pad Arm 7
5. Push the No PIN pad Blanking Plate out of the back panel.
DRAFT