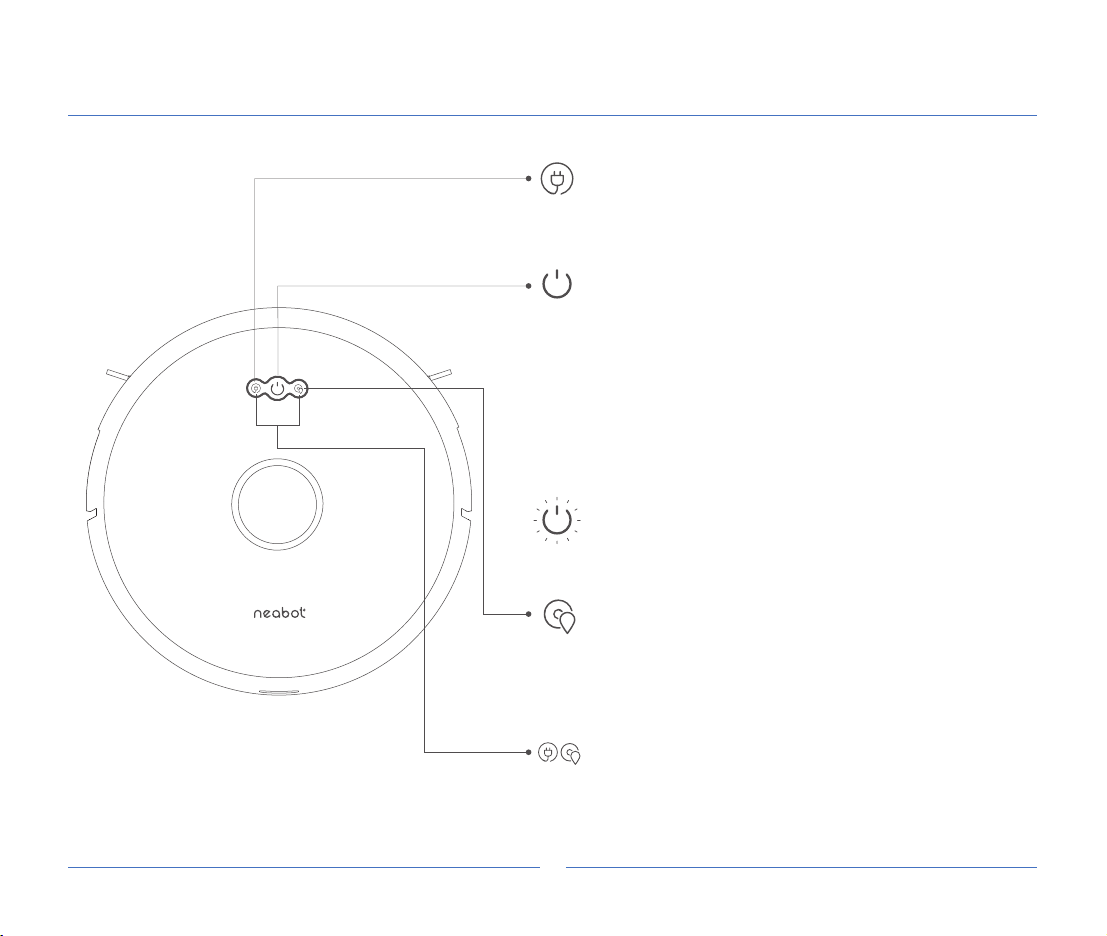
About Your Robot Vacuum
Front View
4
Recharge
Short press to recharge.
During the recharging process, short press to pause,
press again to continue recharging.
Start/Pause
Short press to clean all, and automatically recharge
after cleaning.
During cleaning, short press to pause, press again to
continue cleaning.
In shutdown mode, long press for 5s to turn on.
In standby mode, long press for 5s to shut down.
Note: when the neabot is charging on the
charging station, it will automatically turn on, and it
cannot be turned off during charging.
Spot Cleaning
Short press the spot cleaning button to start. This
mode is used to clean a square area of
1.6*1.6m/5.2*5.2ft centered on the robot. After the
cleaning is finished, the robot will automatically
return to the starting position and stop working.
Network Configuration
Long press the spot cleaning button and the recharge
button for 5 seconds to reset the WiFi.
Light Indication
The robot is cleaning: White light flashes.
The robot is charging: Orange light is on.
The robot is fully charged: White light is on.