use is marked “center positive”, which generally is indicated by the symbol
Many 9V (and Roland/BOSS) adaptors are center negative
, and should not
be used.
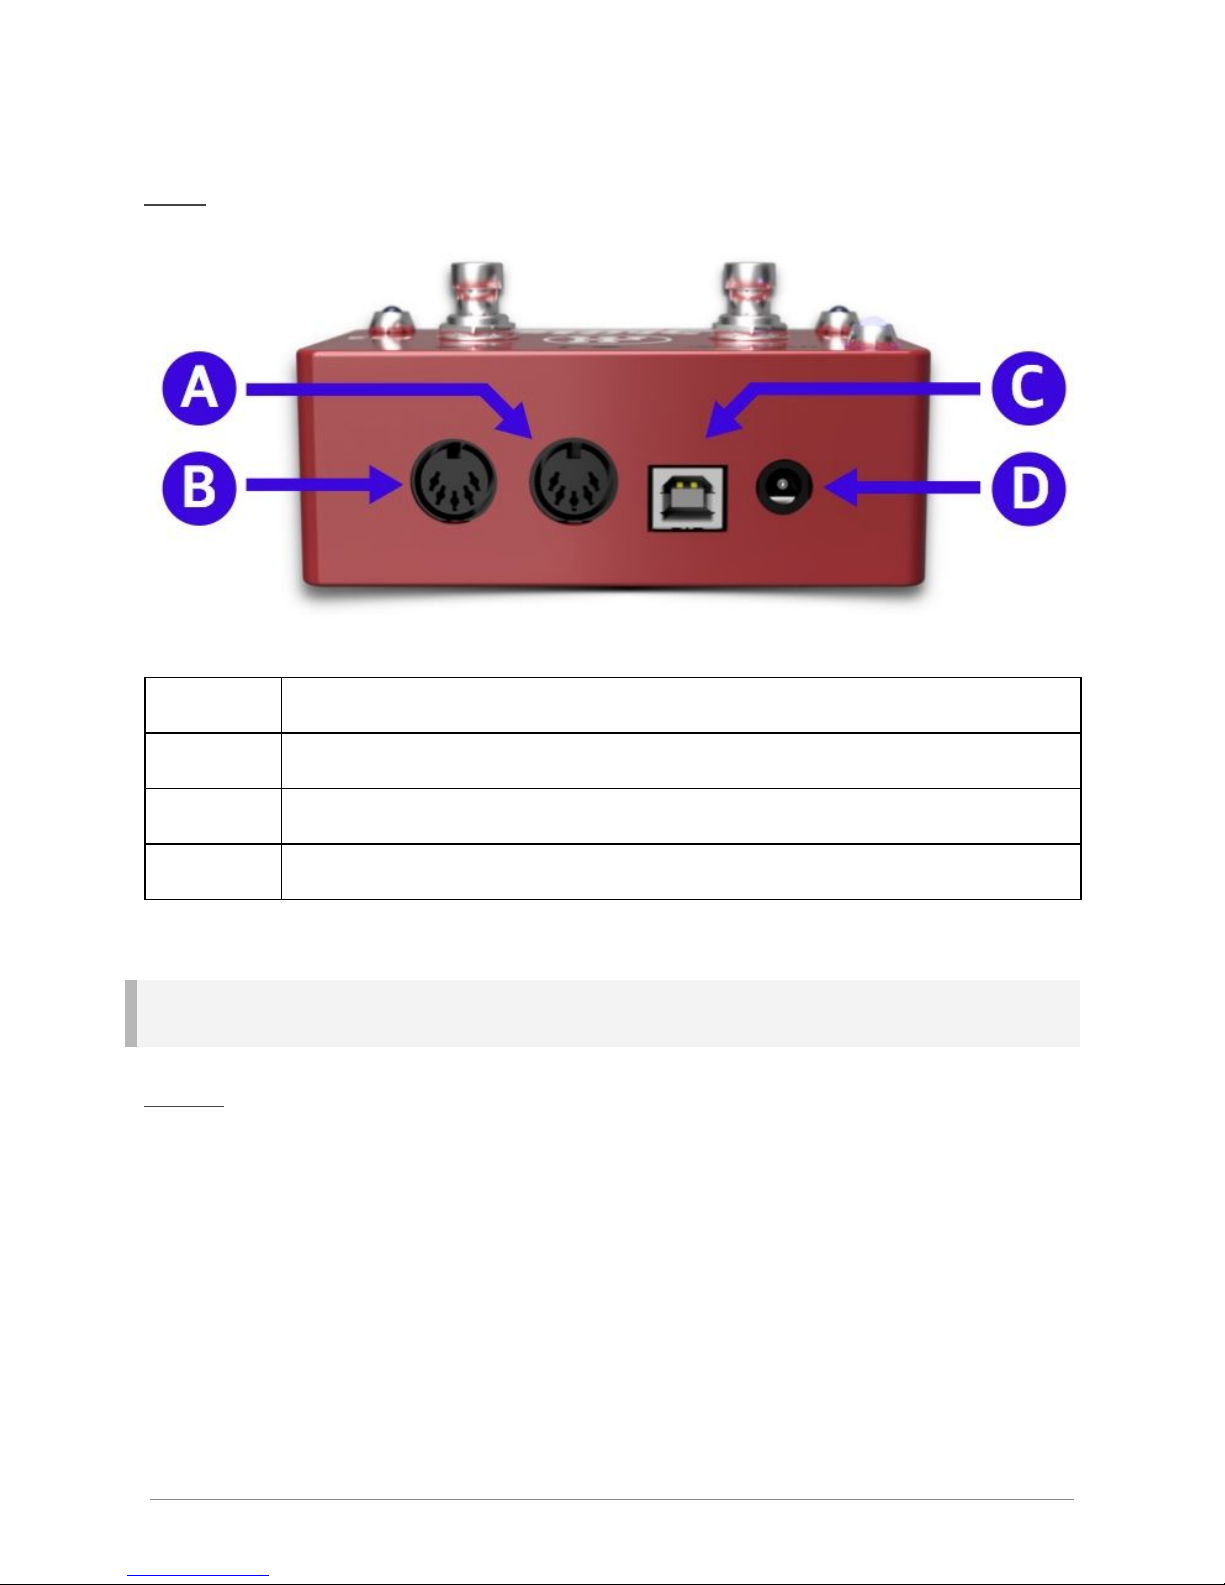
MIDI In
Connect your Zendrum or instrument to the MIDI In jack, which can be
identified by the symbol .
Take care when connecting non-Zendrum instruments as phantom power
is always delivered through the MIDI In jack. This typically won’t be a
problem for most devices as the two pins used to deliver power are usually
ignored.
MIDI Out
If your sound source requires a MIDI Din connection, then hook it up to the
Shifter’s MIDI Out connection, identified by the symbol . This jack also
doubles as a (soft) MIDI Thru port.
USB
The USB connector is used to connect the device to your computer if you
are using it as a sound source. The USB connection is also used to
program your device via the ZDS Shifter Web Application.
The USB port can also power the Shifter, however, it cannot also power
your Zendrum. If you are using wireless or are powering your Zendrum
from a battery or elsewhere, then powering the Shifter from the USB port
alone is perfectly fine.
© Nebiru Software, 2018 5