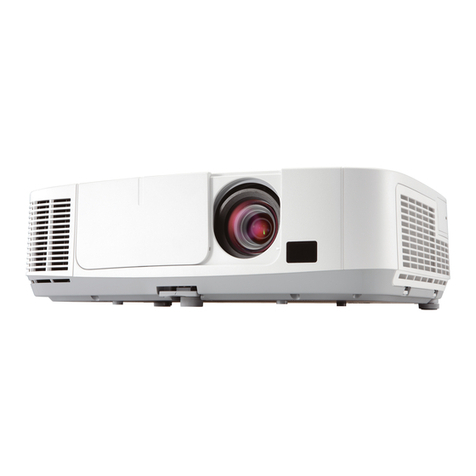
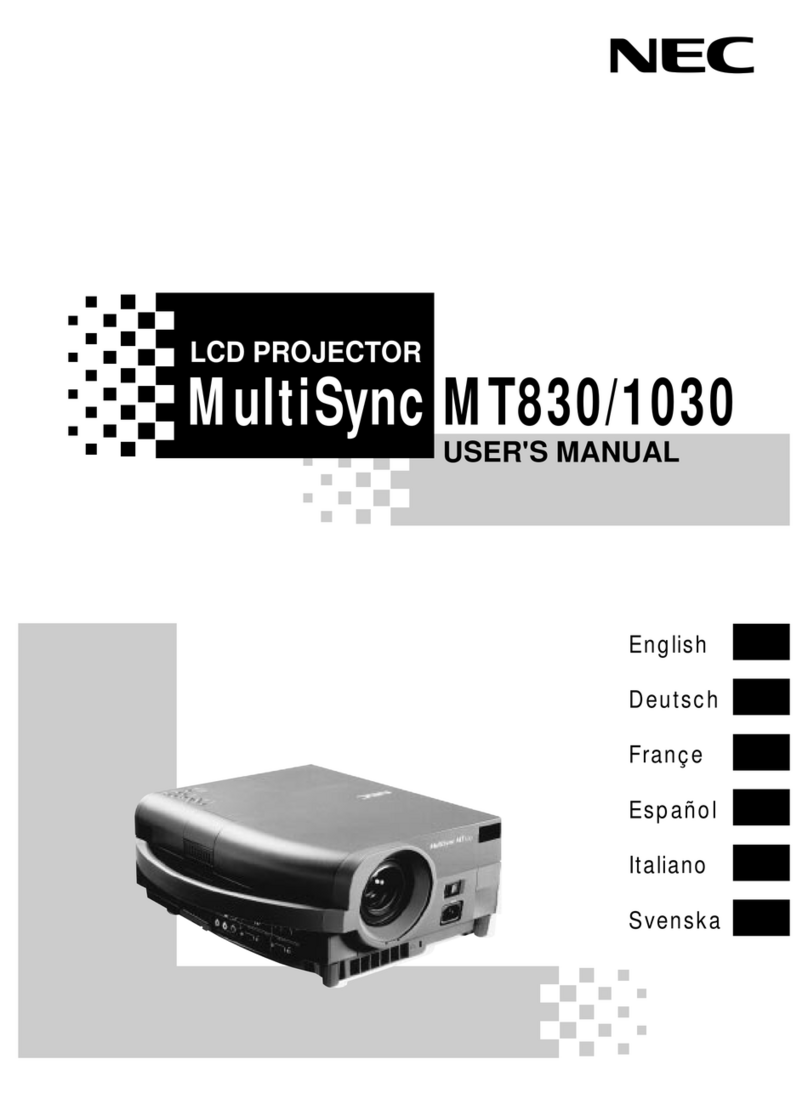
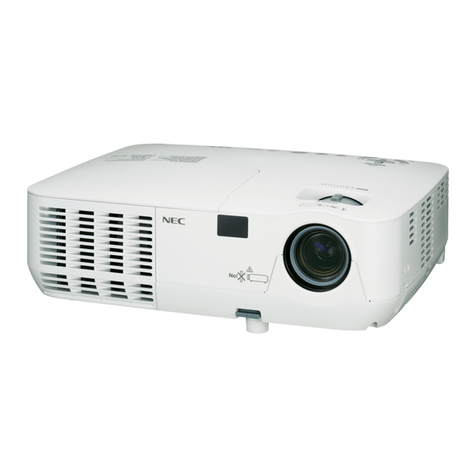
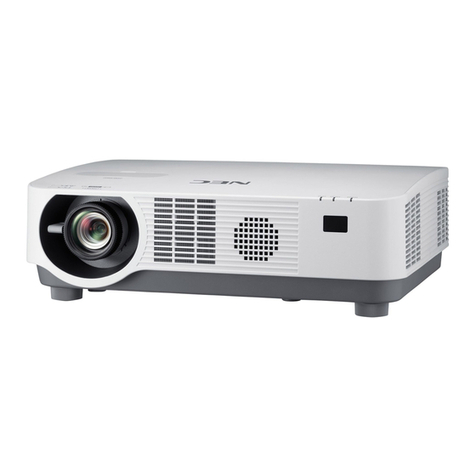
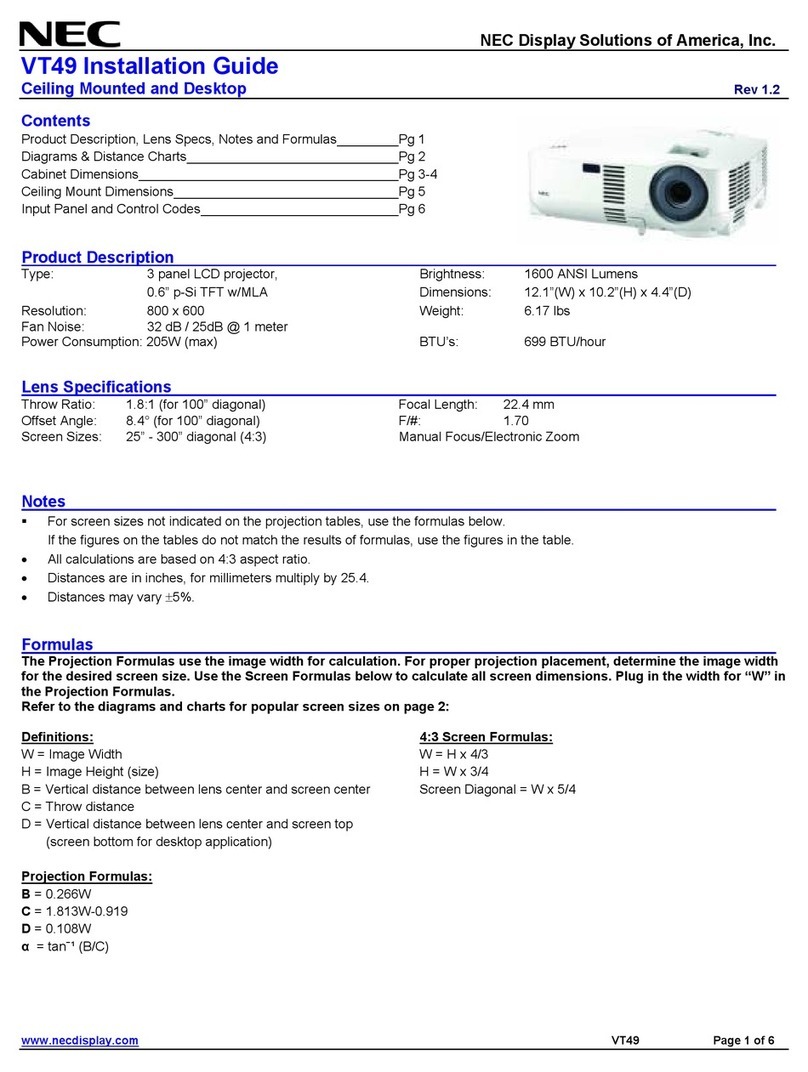
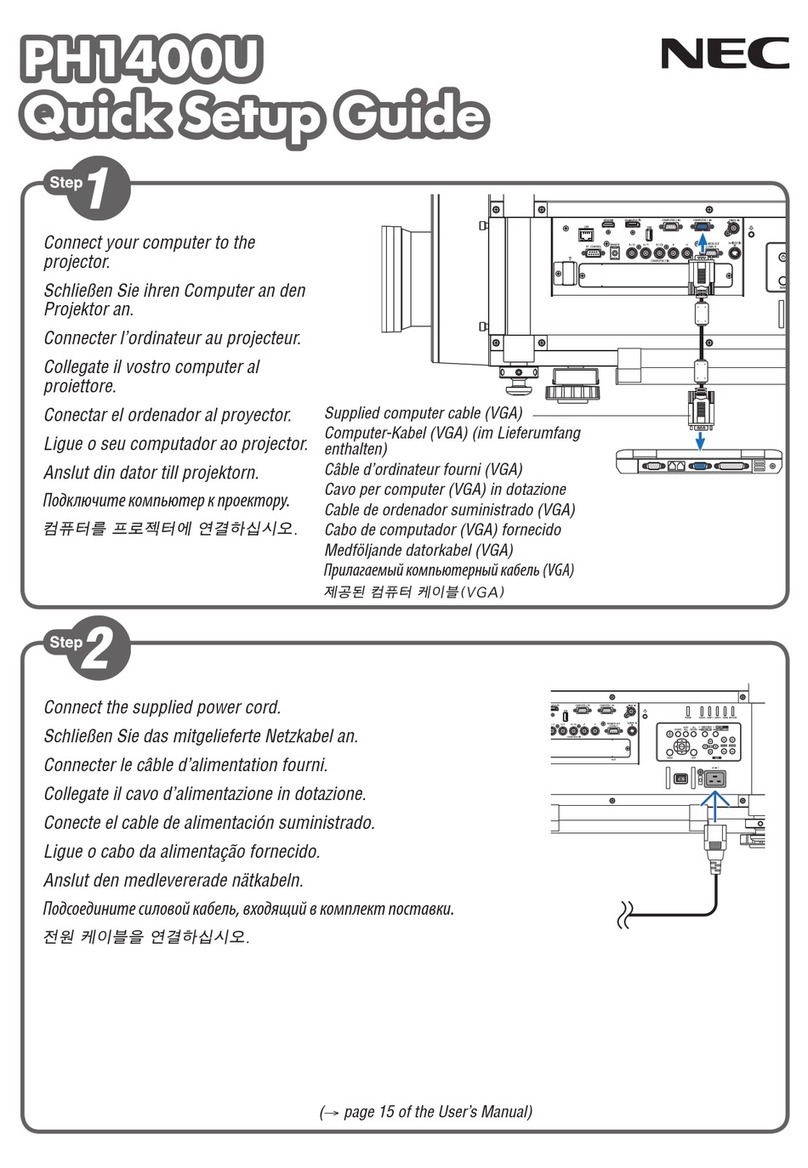
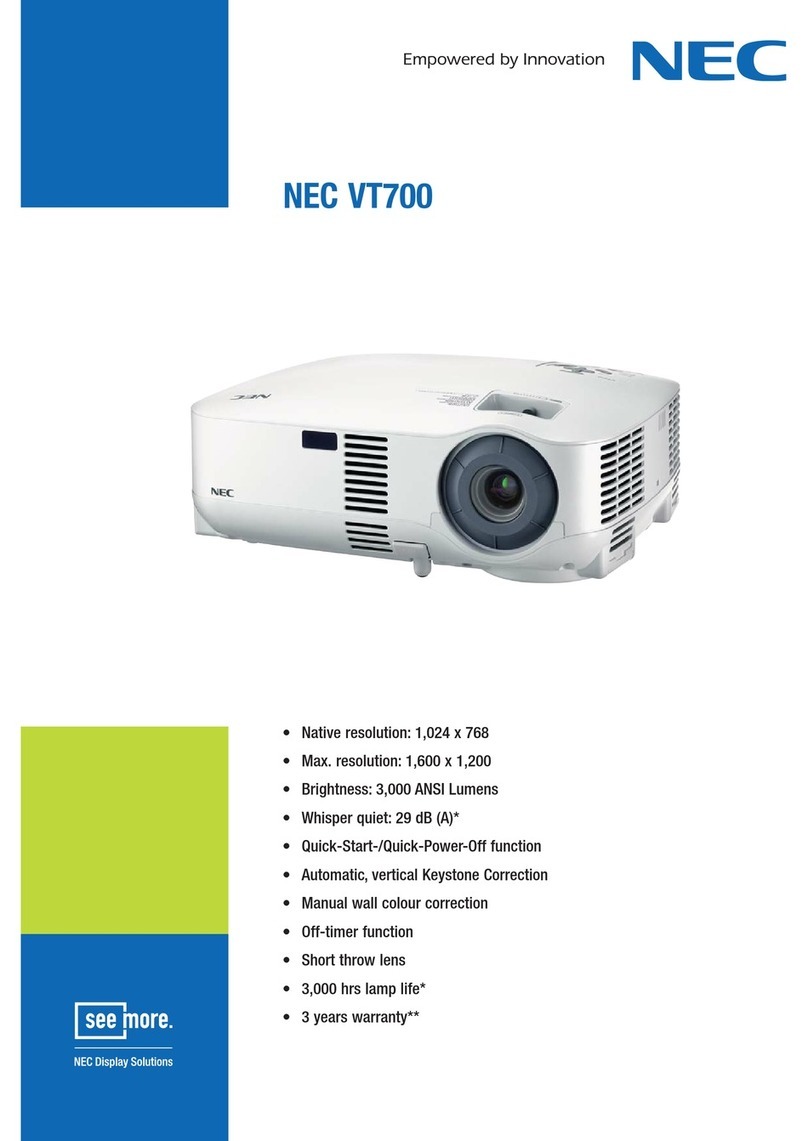
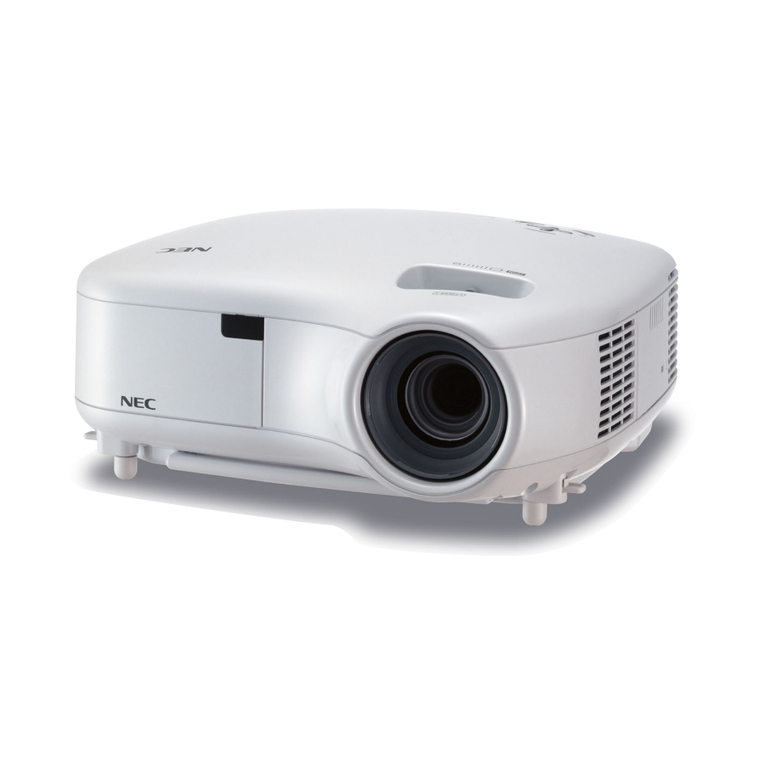
NEC NP1200 Series User manual

LCD Projector
NP3200/NP2200/NP1200
User’s Manual
The NP3200 is not distributed in North America.

1st edition, October 2009
• IBMisatrademarkorregisteredtrademarkofInternationalBusinessMachinesCorporation.
• Macintosh,MacOSXandPowerBookaretrademarksofAppleInc.,registeredintheU.S.andothercountries.
• Microsoft,Windows,WindowsVista,InternetExplorer,.NETFrameworkandPowerPointareeitheraregistered
trademarkortrademarkofMicrosoftCorporationintheUnitedStatesand/orothercountries.
• MicroSaverisaregisteredtrademarkofKensingtonComputerProductsGroup,adivisionofACCOBrands.
• VirtualRemoteToolusesWinI2C/DDClibrary,©NicomsoftLtd.
• Otherproductandcompanynamesmentionedinthisuser’smanualmaybethetrademarksorregisteredtrade-
marksoftheirrespectiveholders.
NOTES
(1)Thecontentsofthisguidemaynotbereprintedinpartorwholewithoutpermission.
(2)Thecontentsofthisguidearesubjecttochangewithoutnotice.
(3)Greatcarehas beentakeninthepreparationofthismanual; however,should younoticeanyquestionable
points,errorsoromissions,pleasecontactus.
(4)Notwithstandingarticle(3),NECwillnotberesponsibleforanyclaimsonlossofprotorothermattersdeemed
toresultfromusingtheProjector.

i
Important Information
Safety Cautions
Precautions
Pleasereadthismanualcarefullybeforeusing yourNECNP3200/NP2200/NP1200projectorandkeepthemanual
handyforfuturereference.
CAUTION
Toturnoffmainpower,besuretoremovetheplugfrompoweroutlet.
Thepoweroutletsocketshouldbeinstalledasneartotheequipmentaspossible,andshouldbeeasily
accessible.
CAUTION
TOPREVENTSHOCK,DONOTOPENTHECABINET.
THEREAREHIGH-VOLTAGECOMPONENTSINSIDE.
REFERSERVICINGTOQUALIFIEDSERVICEPERSONNEL.
Thissymbolwarnstheuserthatuninsulatedvoltagewithintheunitmaybesufcienttocauseelectrical
shock.Therefore,itisdangeroustomakeanykindofcontactwithanypartinsideoftheunit.
Thissymbolalertstheuserthatimportantinformationconcerningtheoperationandmaintenanceofthis
unithasbeenprovided.
Theinformationshouldbereadcarefullytoavoidproblems.
WARNING: TOPREVENTFIREORSHOCK,DONOTEXPOSETHISUNITTORAINORMOISTURE.
DONOTUSETHISUNIT’SPLUGWITHANEXTENSIONCORDORINANOUTLETUNLESSALLTHE
PRONGSCANBEFULLYINSERTED.
DOC Compliance Notice (for Canada only)
ThisClassBdigitalapparatusmeetsallrequirementsoftheCanadianInterference-CausingEquipmentRegulations.
Acoustic Noise Information Ordinance-3. GSGV (for Germany only):
Thesoundpressurelevelislessthan70dB(A)accordingtoISO3744orISO7779.
CAUTION
Avoiddisplayingstationaryimagesforaprolongedperiodoftime.
DoingsocanresultintheseimagesbeingtemporarilysustainedonthesurfaceoftheLCDpanel.
Ifthisshouldhappen,continuetouseyourprojector.Thestaticbackgroundfrompreviousimageswill
disappear.

ii
Important Information
RF Interference (for USA only)
WARNING
TheFederalCommunicationsCommissiondoesnot allowanymodications orchangestothe unit EXCEPT
thosespeciedbyNECDisplaySolutionsofAmerica,Inc.inthismanual.Failuretocomplywiththisgovernment
regulationcouldvoidyourrighttooperatethisequipment.Thisequipmenthasbeentestedandfoundtocomply
withthelimitsforaClassBdigitaldevice,pursuanttoPart15oftheFCCRules.Theselimitsaredesignedto
providereasonableprotectionagainstharmfulinterferenceinaresidentialinstallation.Thisequipmentgenerates,
uses,andcanradiateradiofrequencyenergyand,ifnotinstalledandusedinaccordancewiththeinstructions,
maycauseharmfulinterferencetoradiocommunications.However,thereisnoguaranteethatinterferencewill
notoccurinaparticularinstallation.
Ifthisequipmentdoescauseharmfulinterferencetoradioortelevisionreception,whichcanbedeterminedby
turningtheequipmentoffandon,theuserisencouragedtotrytocorrecttheinterferencebyoneormoreofthe
followingmeasures:
•Reorientorrelocatethereceivingantenna.
•Increasetheseparationbetweentheequipmentandreceiver.
•Connecttheequipmentintoanoutletonacircuitdifferentfromthattowhichthereceiverisconnected.
•Consultthedealeroranexperiencedradio/TVtechnicianforhelp.
ForUKonly:InUK,aBSapprovedpowercablewithmoldedplughasaBlack(veAmps)fuseinstalledforusewith
thisequipment.Ifapowercableisnotsuppliedwiththisequipmentpleasecontactyoursupplier.
Turkish RoHS information relevant for Turkish market
EEE Yönetmeliğine Uygundur.
EU-widelegislationasimplementedineachMemberStaterequiresthatusedelectricalandelectronic
productscarryingthemark(left)mustbedisposedofseparatelyfromnormalhouseholdwaste.Thisin-
cludesprojectorsandtheirelectricalaccessoriesorlamps.Whenyoudisposeofsuchproducts,please
followtheguidanceofyourlocalauthorityand/orasktheshopwhereyoupurchasedtheproduct.
Aftercollectingtheusedproducts,theyarereusedandrecycledinaproperway.Thiseffortwillhelpus
reducethewastesaswellasthenegativeimpactsuchasmercurycontainedinalamptothehuman
healthandtheenvironmentattheminimumlevel.
ThemarkontheelectricalandelectronicproductsonlyappliestothecurrentEuropeanUnionMember
States.
Disposing of your used product
WARNING TO CALIFORNIA RESIDENTS:
Handlingthecablessuppliedwiththisproductwillexposeyoutolead,achemicalknowntotheStateofCalifor-
niatocausebirthdefectsorotherreproductiveharm.WASH HANDS AFTER HANDLING.

iii
Important Information
10°
Place the projector in a horizontal position
Thetiltangleoftheprojectorshouldnotexceed10degrees,norshouldtheprojectorbeinstalledinanywayother
thanthedesktopandceilingmount,otherwiselamplifecoulddecreasedramatically.
Important Safeguards
Thesesafetyinstructionsaretoensurethelonglifeofyourprojectorandtopreventreandshock.Pleaseread
themcarefullyandheedallwarnings.
Installation
•Donotplacetheprojectorinthefollowingconditions:
-onanunstablecart,stand,ortable.
-nearwater,bathsordamprooms.
-indirectsunlight,nearheatersorheatradiatingappliances.
-inadusty,smokyorsteamyenvironment.
-onasheetofpaperorcloth,rugsorcarpets.
•Ifyouwishtohavetheprojectorinstalledontheceiling:
-Donotattempttoinstalltheprojectoryourself.
-Theprojectormustbeinstalledbyqualiedtechniciansinordertoensureproperoperationandreducethe
riskofbodilyinjury.
-Inaddition,theceilingmustbestrongenoughtosupporttheprojectorandtheinstallationmustbeinaccor-
dancewithanylocalbuildingcodes.
-Pleaseconsultyourdealerformoreinformation.
WARNING
•Donotcoverthelenswiththelenscaporequivalentwhiletheprojectorison.Doingsocanleadtomeltingof
thecapduetotheheatemittedfromthelightoutput.
•Donotplaceanyobjects,whichareeasilyaffectedbyheat,infrontoftheprojectorlens.Doingsocouldlead
totheobjectmeltingfromtheheatthatisemittedfromthelightoutput.

iv
Important Information
Fire and Shock Precautions
• Ensurethatthereissufcientventilationandthatventsareunobstructedtopreventthebuild-upofheatinside
yourprojector.Allowatleast4inches(10cm)ofspacebetweenyourprojectorandawall.
• Donottrytotouchtheventilationoutletontheleftfront(whenseenfromthefront)asitcanbecomeheatedwhile
theprojectoristurnedon.
• Preventforeignobjectssuchaspaperclipsandbitsofpaperfromfallingintoyourprojector.Donotattempttore-
trieveanyobjectsthatmightfallintoyourprojector.Donotinsertanymetalobjectssuchasawireorscrewdriver
intoyourprojector.Ifsomethingshouldfallintoyourprojector,disconnectitimmediatelyandhavetheobjectre-
movedbyaqualiedservicepersonnel.
• Donotplaceanyobjectsontopoftheprojector.
• Donottouchthepowerplugduringathunderstorm.Doingsocancauseelectricalshockorre.
• Theprojectorisdesignedtooperateonapowersupplyof100-240VAC50/60Hz.Ensurethatyourpowersupply
tsthisrequirementbeforeattemptingtouseyourprojector.
• Donotlookintothelenswhiletheprojectorison.Seriousdamagetoyoureyescouldresult.
• Donotplaceanyobjects,whichareeasilyaffectedbyheat,infrontofaprojectorexhaustvent.
Doingsocouldleadtotheobjectmeltingorgettingyourhandsburnedfromtheheatthatisemittedfromtheex-
haust.
• Handlethepowercablecarefully.Adamagedorfrayedpowercablecancauseelectricshockorre.
- Donotuseanypowercablesthanthesuppliedone.
- Donotbendortugthepowercableexcessively.
- Donotplacethepowercableundertheprojector,oranyheavyobject.
- Donotcoverthepowercablewithothersoftmaterialssuchasrugs.
- Donotheatthepowercable.
- Donothandlethepowerplugwithwethands.
• Turnofftheprojector,unplugthepowercableandhavetheprojectorservicedbyaqualiedservicepersonnel
underthefollowingconditions:
- Whenthepowercableorplugisdamagedorfrayed.
- Ifliquidhasbeenspilledintotheprojector,orifithasbeenexposedtorainorwater.
- Iftheprojectordoesnotoperatenormallywhenyoufollowtheinstructionsdescribedinthisuser’smanual.
- Iftheprojectorhasbeendroppedorthecabinethasbeendamaged.
- Iftheprojectorexhibitsadistinctchangeinperformance,indicatinganeedforservice.
• Disconnectthepowercableandanyothercablesbeforecarryingtheprojector
• Turnofftheprojectorandunplugthepowercablebeforecleaningthecabinetorreplacingthelamp.
• Turnofftheprojectorandunplugthepowercableiftheprojectorisnottobeusedforanextendedperiodoftime.
• WhenusingaLANcable:
Forsafety,donotconnecttotheconnectorforperipheraldevicewiringthatmighthaveexcessivevoltage.

v
Caution on Handling the Optional Lens
Whenshippingtheprojectorwiththeoptionallens,removetheoptionallensbeforeshippingtheprojector.Thelens
andthelensshiftmechanismmayencounterdamagecausedbyimproperhandlingduringtransportation.
Donotholdthelenspartwhencarryingtheprojector.
Doingsocouldcausethefocusringtorotate,resultinginaccidentaldroppingoftheprojector.
Lamp Replacement
• Toreplacethelamp,followallinstructionsprovidedonpage79.
• Besuretoreplacethelampwhenthemessage[THE LAMP HAS REACHED THE END OF ITS USABLE LIFE.
PLEASE REPLACE THE LAMP.]appears.Ifyoucontinuetousethelampafterthelamphasreachedtheend
ofitsusablelife,thelampbulbmayshatter,andpiecesofglassmaybescatteredinthelampcase.Donottouch
themasthepiecesofglassmaycauseinjury.
Ifthishappens,contactyourdealerforlampreplacement.
A Lamp Characteristic
Theprojectorhasahigh-pressuremercurylampasalightsource.
Alamphasacharacteristicthatitsbrightnessgraduallydecreaseswithage.Alsorepeatedlyturningthelampon
andoffwillincreasethepossibilityofitslowerbrightness.
CAUTION:
Whenremovingthelampfromaceiling-mountedprojector,makesurethatnooneisundertheprojector.Glass
fragmentscouldfallifthelamphasbeenburnedout.
Important Information
Remote Control Precautions
• Handletheremotecontrolcarefully.
• Iftheremotecontrolgetswet,wipeitdryimmediately.
• Avoidexcessiveheatandhumidity.
• Donotheat,takeapart,orthrowbatteriesintore.
• Ifyouwillnotbeusingtheremotecontrolforalongtime,removethebatteries.
• Ensurethatyouhavethebatteries’polarity(+/−)alignedcorrectly.
• Donotusenewandoldbatteriestogether,orusedifferenttypesofbatteriestogether.
• Disposeofusedbatteriesaccordingtoyourlocalregulations.
Note for US Residents
Thelampinthisproductcontainsmercury.PleasedisposeaccordingtoLocal,StateorFederalLaws.
CAUTION
•
Always carryyourprojectorbythecarryinghandle.Beforedoingso,besuretolockthecarryinghandleinplace.
Tolockthecarryinghandle,see“Tolockthecarryinghandle”onpage6.
• Donotusethetilt-footforpurposesotherthanoriginallyintended.Misusessuchasusingthetiltfoottocarry
orhang(fromthewallorceiling)theprojectorcancausedamagetotheprojector.
• Donotsendtheprojectorinasoftcasebyparceldeliveryserviceorcargoshipment.Theprojectorinsidethe
softcasecouldbedamaged.
• Select[HIGH]inFanmodeifyoucontinuetousetheprojectorforconsecutivedays.(Fromthemenu,select
[SETUP]→[OPTIONS(1)]→[FANMODE]→[HIGH].)
• BeforeusingDirectPowerOff,besuretoallowatleast20minutesimmediatelyafterturningontheprojector
andstartingtodisplayanimage.
• Donotunplugthepowercablefromthewalloutletorprojectorwhentheprojectorispoweredon.Doingsocan
causedamagetotheACINconnectoroftheprojectorand(or)theprongplugofthepowercable.
ToturnofftheACpowersupplywhentheprojectorispoweredon,useapowerstripequippedwithaswitch
andabreaker.
• Donottrytotouchtheventilationoutletontheleftfront(whenseenfromthefront)asitcanbecomeheated
whiletheprojectoristurnedonandimmediatelyaftertheprojectoristurnedoff.
• DonotturnofftheACpowerfor60secondsafterthelampisturnedonandwhilethePOWERindicatoris
blinkinggreen.Doingsocouldcauseprematurelampfailure.

vi
Important Information
About High Altitude mode
• Set[FANMODE]to[HIGHALTITUDE]whenusingtheprojectorataltitudesapproximately5500feet/1600me-
tersorhigher.
Usingtheprojectorataltitudesapproximately5500feet/1600metersorhigherwithoutsettingto[HIGHALTI-
TUDE]cancausetheprojectortooverheatandtheprotectorcouldshutdown.Ifthishappens,waitacouple
minutesandturnontheprojector.
• Usingtheprojectorataltitudeslessthanapproximately5500feet/1600metersandsettingto[HIGHALTITUDE]
cancausethelamptoovercool,causingtheimagetoicker.Switch[FANMODE]to[AUTO].
• Usingthe projectorataltitudesapproximately5500feet/1600metersorhighercanshortenthelifeofoptical
componentssuchasthelamp.
About Copyright of original projected pictures:
Pleasenotethatusingthisprojectorforthepurposeofcommercialgainortheattractionofpublicattentioninaven-
uesuchasacoffeeshoporhotelandemployingcompressionorexpansionofthescreenimagewiththefollowing
functionsmayraiseconcernabouttheinfringementofcopyrightswhichareprotectedbycopyrightlaw.
[ASPECTRATIO],[KEYSTONE],Magnifyingfeatureandothersimilarfeatures.

vii
Table of Contents
Important Information............................................................................................i
1. Introduction.......................................................................................................... 1
What’sintheBox?......................................................................................................... 1
IntroductiontotheProjector .......................................................................................... 2
CongratulationsonYourPurchaseoftheProjector ................................................. 2
Featuresyou’llenjoy: .............................................................................................. 2
Aboutthisuser’smanual.......................................................................................... 3
PartNamesoftheProjector .......................................................................................... 4
Front/Top.................................................................................................................. 4
Rear ......................................................................................................................... 4
Bottom...................................................................................................................... 5
CarryingtheProjector.............................................................................................. 5
TopFeatures ............................................................................................................ 7
TerminalPanelFeatures .......................................................................................... 8
PartNamesoftheRemoteControl ............................................................................... 9
BatteryInstallation ................................................................................................. 10
OperatingRangeforWirelessRemoteControl...................................................... 10
RemoteControlPrecautions.................................................................................. 11
2. Installation and Connections ................................................................... 12
SettingUptheScreenandtheProjector..................................................................... 12
SelectingaLocation[NP3200/NP2200/NP1200]................................................... 12
MakingConnections.................................................................................................... 13
ConnectingYourPCorMacintoshComputer......................................................... 13
ConnectinganExternalMonitor ............................................................................ 16
ConnectingYourDVDPlayerwithComponentOutput........................................... 17
ConnectingYourVCR............................................................................................. 18
ConnectingtoaNetwork........................................................................................ 19
ConnectingtheSuppliedPowerCable .................................................................. 20
3. Projecting an Image (Basic Operation) .............................................. 21
TurningontheProjector .............................................................................................. 21
NoteonStartupscreen(MenuLanguageSelectscreen)...................................... 22
SelectingaSource ...................................................................................................... 23
Selectingthecomputerorvideosource................................................................. 23
AdjustingthePictureSizeandPosition....................................................................... 24
Adjustingthepositionofaprojectedimage ........................................................... 25
Adjustingthefocus(Focusring) ............................................................................ 26
Finelyadjustingthesizeofanimage(Zoomlever)................................................ 26
AdjustingtheTiltFoot ............................................................................................ 27
CorrectingKeystoneDistortion.................................................................................... 28
CorrectingKeystoneDistortion .............................................................................. 28
Adjustingwiththeremotecontrol........................................................................... 28
Adjustingfromthemenu........................................................................................ 29
OptimizinganRGBImageAutomatically .................................................................... 30
AdjustingtheImageUsingAutoAdjust.................................................................. 30
AdjustingVolumeUp&Down...................................................................................... 30
viii
Table of Contents
7TurningofftheProjector .............................................................................................. 31
8AfterUse...................................................................................................................... 31
4. Convenient Features..................................................................................... 32
TurningofftheImageandSound ................................................................................ 32
FreezingaPicture ....................................................................................................... 32
EnlargingaPicture ...................................................................................................... 32
ChangingEcoMode.................................................................................................... 33
CheckingEnergy-SavingEffect[CARBONMETER]................................................... 34
PreventingtheUnauthorizedUseoftheProjector[SECURITY] ................................. 35
7UsingtheOptionalRemoteMouseReceiver(NP01MR) ............................................ 38
8NetworkSettingbyUsinganHTTPBrowser............................................................... 40
9UsingtheVGASignalCabletoOperatetheProjector(VirtualRemote) ..................... 43
ControllingtheProjectoroveraLAN(PCControlUtilityPro4)................................... 48
5. Using On-Screen Menu................................................................................ 50
UsingtheMenus.......................................................................................................... 50
MenuElements............................................................................................................ 51
ListofMenuItems ....................................................................................................... 52
MenuDescriptions&Functions[SOURCE] ................................................................ 54
MenuDescriptions&Functions[ADJUST].................................................................. 55
MenuDescriptions&Functions[SETUP].................................................................... 63
7MenuDescriptions&Functions[INFO.] ...................................................................... 74
8MenuDescriptions&Functions[RESET].................................................................... 76
6. Maintenance ...................................................................................................... 77
CleaningorReplacingtheFilter .................................................................................. 77
CleaningtheCabinetandtheLens ............................................................................. 78
ReplacingtheLamp..................................................................................................... 79
7. Using Optional Lenses ................................................................................. 82
TableofThrowDistancesandScreenSizesforOptionalLenses .............................. 82
LensShiftAdjustableRange ....................................................................................... 83
ReplacingwithOptionalLens...................................................................................... 84
8. Appendix............................................................................................................... 86
Troubleshooting ........................................................................................................... 86
IndicatorMessages................................................................................................ 86
Specications .............................................................................................................. 89
CabinetDimensions .................................................................................................... 91
ScreenSizeandProjectionDistance .......................................................................... 92
[NP3200/NP2200/NP1200].................................................................................... 92
PinAssignmentsofD-SubCOMPUTER1InputConnector ....................................... 94
MiniD-Sub15PinConnector ................................................................................ 94
CompatibleInputSignalList........................................................................................ 95

ix
Table of Contents
7PCControlCodesandCableConnection................................................................... 96
PCControlCodes.................................................................................................. 96
CableConnection .................................................................................................. 97
PCControlConnector(D-SUB9P)........................................................................ 97
8TroubleshootingCheckList.......................................................................................... 98
9TravelCareGuide....................................................................................................... 100

1
1. Introduction
What’s in the Box?
Makesureyourboxcontainseverythinglisted.Ifanypiecesaremissing,contactyourdealer.
PleasesavetheoriginalboxandpackingmaterialsifyoueverneedtoshipyourProjector.
Lens cap
(24FT9741)
Batteries (AAA × 2)
VGA signal cable
(7N520073)
NEC Projector CD-ROM
User’s Manual (7N951381)
For North America only
Registrationcard
Limitedwarranty
For customers in Europe:
YouwillndourcurrentvalidGuarantee
PolicyonourWebSite:
www.nec-display-solutions.com
• Securitysticker
(24L67991)
• Anti-theftscrewforlens×1
(24V00841)
• ImportantInformation(ForNorthAmerica:
7N8P9891)(ForOthercountriesthanNorth
America:7N8P9891and7N8P9901)
• QuickSetupGuide(7N8P9881)
Projector
Powercable
(ForNorthAmerica:7N080236)
(ForEuropeandothercountries:7N080022)
Remotecontrol
(7N900881)

2
1. Introduction
Introduction to the Projector
ThissectionintroducesyoutotheNP3200/NP2200/NP1200projectoranddescribeskeyfeaturesandcontrols.
Congratulations on Your Purchase of the Projector
TheNP3200/NP2200/NP1200isasophisticatedXGAprojectorthatproducesanenhanceddisplay.Withthe
NP3200/NP2200/NP1200youwillbeableto project images up to 500"(measureddiagonally). Enjoycrispand
sharplargescreendisplayfromyourPCorMacintoshcomputer,DVDplayer,VCR,satellitehookup,HDTVsource.
TheNP3200/NP2200/NP1200providesforenhancedsecurityoptionstohelpdeterprojectortheftandprovidesfor
projectorcontrolthroughthePCcontrolport(D-Sub9Pin)andLANsupport.Withinputandoutputexibility,long
lamplifeandafullfunctionremote,theNP3200/NP2200/NP1200letsyouenjoylargerthanlifeviewingfromacom-
pactandeasytosetupanduseprojector.
Features you’ll enjoy :
• LCDprojectorwithhighresolutionandhighbrightness
Highresolutiondisplay-uptoUXGAcompatible,XGAnativeresolution.
• Extensiveoptionallens
Onestandardlensandvetypesofoptionallensesareavailable
• Lensshiftmechanismoffersinstallationexibility
Manuallensshiftthatcanbeadjustedbyturningdialsonthetopoftheprojector
• Quickstart&QuickPowerOff
Fiveseconds*afterturningonthepower,theprojectorisreadytodisplayPCorvideoimages.
*Thequickstarttimeisonlywhen[STANDBYMODE]issetto[NORMAL]intheon-screenmessage.Thepro-
jectorcanbeputawayimmediatelyaftertheprojectorispowereddown.
• DirectPowerOff
Theprojectorhasafeaturecalled“DirectPowerOff”.Thisfeatureallowstheprojectortobeturnedoff(even
whenprojectinganimage)byusingtheMainPowerSwitchordisconnectingtheACpowersupply.
ToturnofftheACpowersupplywhentheprojectorispoweredon,useapowerstripequippedwithaswitchand
abreaker.
NOTE: Before using Direct Power Off, be sure to allow at least 20 minutes immediately after turning on the projector and
starting to display an image.
• AutoPowerOn,andAutoPowerOfffunctions
TheAUTOPOWERON(AC),AUTOPOWERON(COMP1/2),AUTOPOWEROFF,andOFFTIMER features
eliminatetheneedtoalwaysusethePOWERbuttonontheremotecontrolorprojectorcabinet.
• Lessthan1Winstandbyconditionwithenergysavingtechnology
Selecting[POWER-SAVING]for[STANDBYMODE]fromthemenucanputtheprojectorinpower-savingmode
thatconsumesonly0.4W(100-130VAC)/0.5W(200-240VAC).
• CarbonMeter
Thisfeaturewillshowenergy-savingeffectintermsofCO2emissionreduction(kg)whentheprojector’s[ECO
MODE]issetto[ON].
TheamountofCO2emissionreductionwillbedisplayedintheconrmationmessageatthetimeofpower-off
andintheINFOoftheon-screenmenu.
• IntegratedRJ-45connectorforwirednetworkingcapability
AnRJ-45connectorisequippedasstandardfeature.
• TheprojectorcanbecontrolledfromacomputeroveraLAN
ConnectingtheprojectortoanetworkallowstheAlertMailsettingandtheprojectorcontrolfromacomputervia
thenetwork.
Todoso,youmusthaveanexclusiveapplication“PCControlUtilityPro4”installedonyourcomputerfromthe
suppliedNECProjectorCD-ROM.

3
• Avarietyofinputportsandacomprehensivearrayofsystemcontrolinterfaces
Thisprojectorsupportsinputsignalsonthefollowingports:BNC,DVI-D,15pinD-Sub,compositeandS-video.
• WallColorCorrection
Built-inWallColorCorrectionpresetsprovideforadaptivecolorcorrectionwhenprojectingontonon-white
screenmaterial(orawall).
• Sixpicturepresetmodesforuseradjustablepictureandcolorsettings
Eachpicturepresetmodecanbecustomizedandmemorizedaccordingtoyourpreference.
• Preventingunauthorizeduseoftheprojector
Enhancedsmartsecuritysettingsforkeywordprotection,cabinetcontrolpanellocktohelppreventunauthorized
access,adjustmentsandtheftdeterrence.
• ThesuppliedremotecontrolallowsyoutoassignaCONTROLIDtotheprojector
Multipleprojectorscanbeoperatedseparatelyandindependentlywiththesamesingleremotecontrolbyas-
signinganIDnumbertoeachprojector.
About this user’s manual
Thefastestwaytogetstartedistotakeyourtimeanddoeverythingrightthersttime.Takeafewminutesnowto
reviewtheuser’smanual.Thismaysaveyoutimelateron.Atthebeginningofeachsectionofthemanualyou’llnd
anoverview.Ifthesectiondoesn’tapply,youcanskipit.
1. Introduction

4
1. Introduction
Part Names of the Projector
Controls
(→page 7)
Built-inSecuritySlot( )*
ZoomLever
(→page 26)
Lens Cap
RemoteSensor
(→page 10)
Focus Ring
(→page 26)
LensShiftDial(Right/Left,Up/Down)
(→page 25)
AdjustableTiltFootLever
(→page 27)
* ThissecurityslotsupportstheMicroSaver®SecuritySystem.MicroSaver®isaregisteredtrademarkofKens-
ingtonMicrowareInc.ThelogoistrademarkedandownedbyKensingtonMicrowareInc.
Ventilation(inlet)/Filter
(→page 77)
AdjustableTiltFoot
(→page 27)
Lens
Front/Top
Ventilation(inlet)/Filter
(→page 77)
StereoSpeaker(5W×2)
AC Input
Connectthesuppliedpowercable’sthree-pinplughere,
andplugtheotherendintoanactivewalloutlet.
(→page 20)
MainPowerSwitch
Whenyouplugthesuppliedpowercableintoanactive
walloutletandturnontheMainPowerswitch,thePOW-
ERindicatorturnsorangeandtheprojectorisinstandby
mode.
(→page 21)
RemoteSensor
(→page 10)
Ventilation (outlet)
Heatedairisexhaustedfrom
here.
Rear
TerminalPanel
(→page 8)
LampCover
(→page 79)
LENS RELEASE Button
(→page 84)

5
1. Introduction
Bottom
CarryingHandle
Carrying the Projector
Alwayscarryyourprojectorbythehandle.
Ensurethatthepowercableandanyothercablesconnectingtovideosourcesaredisconnectedbeforemovingthe
projector.
Whenmovingtheprojectororwhenitisnotinuse,coverthelenswiththelenscap.
NOTE: To stand the projector on its end, do so by holding the cabinet, not by holding the carrying handle.
Doing so can cause damage to the carrying handle.
Anti-theftScrewforLens
(→page 85)
Lock

6
1. Introduction
Tolockthecarryinghandle
1. Carefully place the projector on its end.
2. Pull up the carrying handle with the catch pressed down.
3. Press down the left and right locks to set the carrying handle
in place.
• Toplacebackthecarryinghandle,pressuptheleftandright
locksandpulldownthecarryinghandle.

7
1. Introduction
Top Features
1. POWER Button ( ) (ON / STAND BY) (→ page
21,31)
NOTE: To turn on the projector, press and hold this button
for a minimum of 1 second. To turn off the projector, press
this button twice.
2. POWER Indicator (→page21,31,86)
3. STATUS Indicator (→page21,31,86)
4. LAMPIndicator(→page79,86)
5. SOURCEButton(→page23)
6. AUTOADJUSTButton(→page30)
7. KEYSTONE Button (→page28)
8. MENU Button (→page50)
9. / Volume Buttons ( ) (→page
30)
10. ENTER Button (→page50)
11. EXIT Button (→page50)
11
1 4
23
567
10
98

8
1. Introduction
Terminal Panel Features
1. COMPUTER1IN/ComponentConnector(MiniD-
Sub15Pin)(→page13,16,17)
AUDIOIN(StereoMiniJack)(→page13,16,17)
2. COMPUTER2IN/Component(R/Cr,G/Y,B/Cb,H,
V)Connectors(BNC×5)(→page13,18)
AUDIOIN(StereoMiniJack)(→page13)
3. COMPUTER3(DVI-D)INConnector(24Pin)
(HDCPcompatible)(→page15)
AUDIOIN(StereoMiniJack)(→page15)
4. S-VIDEOINConnector(MiniDIN4Pin)(→page
18)
5. VIDEOINConnector(RCA)(→page18)
6.
VIDEO/S-VIDEOAUDIOL/MONO,R(RCA)(→
page18)
7. MONITOR OUT Connector (Mini D-Sub 15 Pin)
(→page16)
8. AUDIOOUT(StereoMiniJack)(→page16)
9.
PCCONTROLPort(D-Sub9Pin)(→page96,97)
UsethisporttoconnectyourPCorcontrolsystem
tocontrolyourprojectorviaaserialcable.This
enablesyoutocontroltheprojectorusingserial
communicationprotocol.Acommerciallyavailable
RS232Ccrosscableisrequiredtousethisport.You
canalsocontrol the projector byusing PC Control
UtilityPro4containedonthesuppliedNECProjec-
torCD-ROM.TodosoyoumustrsthavePCCon-
trolUtilityPro4installedonyourPC(→page48).If
youarewritingyourownprogram,typicalPCcontrol
codesareonpage96.
10.LANPort(RJ-45)(→page19)
Theactualappearanceoftheterminalpanelmaydifferslightlyfromthatshowninthedrawing,butthisdoesnotaf-
fecttheprojector’sperformance.
679
10 2
154 8
3

9
1. Introduction
Part Names of the Remote Control
+
3
7
5
6
1
2
10
12
13
11
14
9
4
8
26
27
28
16
17
22
24
25
21
15
20
19
18
23
29
1. Infrared Transmitter
(→page10)
2. POWER ON Button
(→page21)
3. POWER OFF Button
(→page31)
4,5,6.COMPUTER1/2/3Button
(→page23)
7. AUTOADJ.Button
(→page30)
8. VIDEO Button
(→page23)
9. S-VIDEOButton
(→page23)
10. VIEWER Button
(notavailableonthisseriesofprojectors)
11. ID SET Button
(→page68)
12. Numeric Keypad Button/CLEAR Button
(→page68)
13. FREEZE Button
(→page32)
14.AV-MUTEButton
(→page32)
15.MENUButton
(→page50)
16. EXIT Button (→page50)
17. Button (→page50)
18. ENTER Button (→page50)
19. MAGNIFY (+)(–) Button
(→page32)
20.MOUSEL-CLICKButton*
(→page38, 39)
21.MOUSER-CLICKButton*
(→page38, 39)
22. PAGE /Button*
(→page38, 39)
23. ECO MODE Button (→page33)
24.KEYSTONEButton
(→page28)
25.PICTUREButton
(→page55, 56)
26. VOL. (+)(–) Button
(→page30)
27. ASPECT Button
(→page60)
28. FOCUS/ZOOM Button
(notavailableonthisseriesofprojectors)
29. HELP Button
(→page74)
* ThePAGE/,MOUSEL-CLICKandMOUSER-CLICKbuttonsworkonlywhentheoptionalremotemouse
receiver(NP01MR)isconnectedwithyourcomputer.
Other manuals for NP1200 Series
1
This manual suits for next models
2
Table of contents
Other NEC Projector manuals

NEC
NEC DLP CINEMA NC1600C User manual

NEC
NEC WT610E User manual

NEC
NEC LT155 - MultiSync UXGA DLP Projector Assembly instructions

NEC
NEC GP-3000 User manual

NEC
NEC LT260 Series User manual

NEC
NEC M350X User manual

NEC
NEC NC3240S Instruction Manual

NEC
NEC NP200 - XGA DLP Projector User manual

NEC
NEC NP41 - TECHNISCHE DATEN User manual

NEC
NEC NEC PH1400U User manual