Nectre Fireplaces NBO Manual

NECTRE
WOOD STOVES
Installation & Operating Instructions
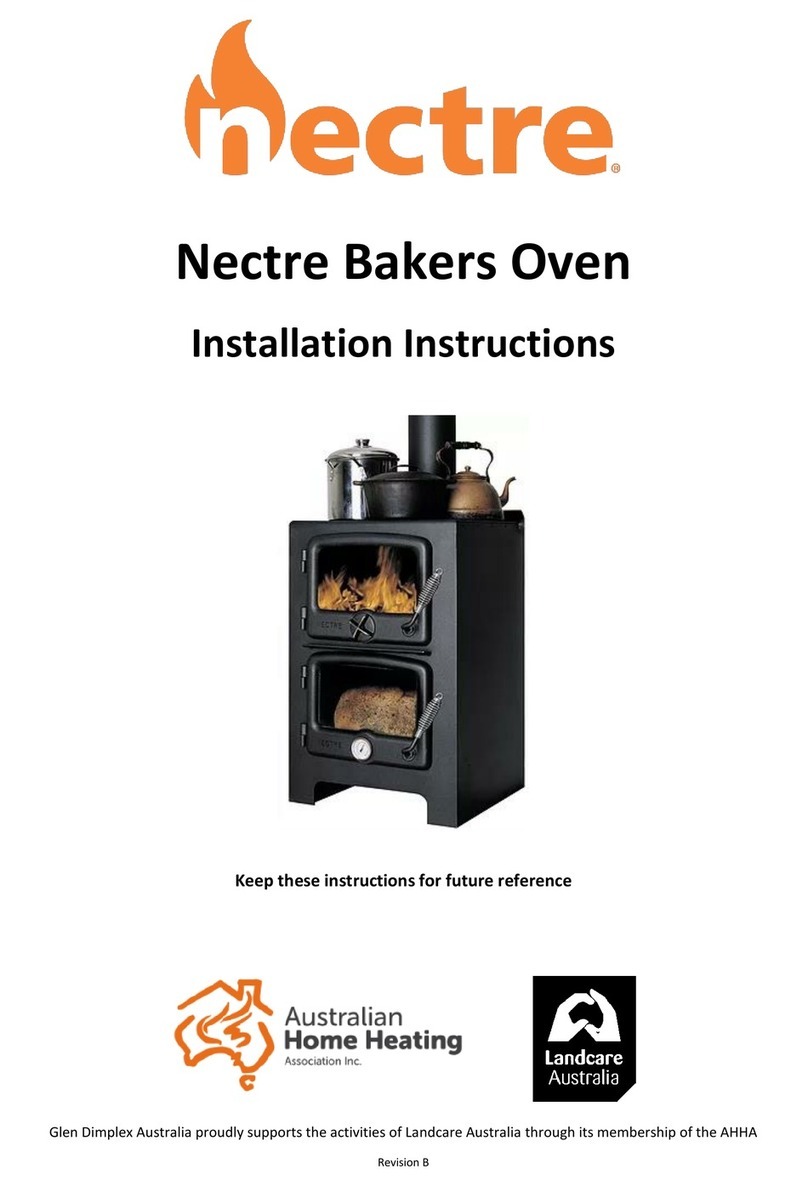
Baker’s Oven
Model: NBO
10
Tested to EN12815

Introduction
Thank you for purchasing a Nectre Baker’s Oven. The Baker’s Oven co bines a wood-
fuelled heater with an oven and cook top. The oven will cook anything fro crispy bread to
succulent roasts. The cook top takes four large saucepans and features two re ovable rings
for wok-style cooking.
Best of all, your Baker’s Oven will spread war th throughout your kitchen and living area
while it cooks.
Technical Data
Please refer to attached technical drawing for other di ensions not listed here.
Specification Baker’s Oven
No inal heat output 10.6 kW
Total efficiency 77.3%
Mean CO E ission (at 13% O2) 0.55%
Mean flue gas te perature 274.9°C
Flue ass gas flow 8.483 g/s
Mini u flue pipe dia eter 150 / 6 inches
Mini u flue draft 1.0 – 1.2 w.g.
Appliance size (W x D x H) 550 x 535 x 825
Oven size (W x D x H) 360 x 340 x 280 (34 Litres)
Firebox size (W x D x H) 360 x 340 x 395
Total weight of appliance 120kg
Roo Output
In nor al operation the Baker's Oven can be controlled using the pri ary air vent to produce
the following heat output range:
Roo heat output: 5.5 kW – 10.6kW

Operating Instructions
The Nectre Baker’s Oven has the firebox at the top and the oven below. Heat is directed
around the oven by closing the da per located next to the flue outlet on top of the stove. The
da per is closed when the lever is in the up position.
Necessary air for co bustion is provided via two air controls. Pri ary air is provided via an
adjustable spindle located on the front of the firebox door, while secondary air enters via an
inlet at the top of the door seal allowing the air to ‘wash’ over the glass door keeping it free
fro sooty deposits.
Before lighting your Baker’s Oven ensure that the da per control is open (the control lever is
in the down position).
This appliance has been developed to burn wood only. Burn only dry, well-seasoned
hardwood such as Ash, Beech or Oak, which should have been cut, split and stacked for at
least 12 onths, with free air ove ent allowing it to dry out. Burning wet or unseasoned
wood will create tar deposits in the stove and chi ney/flue and will not produce a satisfactory
heat output.
Lighting the Stove
•To light the stove, first ake sure that the da per is open (down position) and the
pri ary air spindle control on the firebox door is fully open.
•Light a fire using finely chopped wood and establish it so that it has plenty of fla es.
As soon as the fire is going briskly, close the da per. This directs the fla es and flue
gases down the sides and around the oven.
•Keep the fire burning briskly until the oven is up to te perature. NOTE: the
te perature gauge on the oven door is only a guide to the te perature in the oven.
We have found that when the gauge is reading around 100°C, the internal oven
te perature is ore like 180°C. It is a good idea to use a eat ther o eter when
cooking.
•To add ore fuel to the fire, it is advisable to open the da per (down position) before
opening the door. When the firebox is loaded and the door shut, then close the
da per (up position). This will avoid having s oke co e into the roo .
•Typically the refuelling period is approxi ately every 60 to 90 inutes.
Operation when Cooking:-
Always have a brisk fire using s all pieces of wood that provide plenty of fla es. This type of
fire will aintain the oven te perature. The hot plates ay be re oved using the hot-plate
tool provided to enable wok-style cooking directly on the fire.
Operation when Heating:-
1. Increase Heat Output
To increase the heat output fro the fire, use larger pieces of wood, ensure the da per is in
closed (up position), and use the spindle tool to open the pri ary air inlet until the level of
burning is reached.
With the pri ary air spindle fully open, the fire will burn very hot, and the wood won’t last long.
More i portantly the unit ay over heat. In the event of over heating co pletely close the
pri ary air spindle until the level of burning is reduced to a safe level.
2. Background heating with longer Burn Ti e
For background heating and increased burn ti e, use larger pieces of wood, ensure the
da per is closed, and using the spindle tool reduce the pri ary air inlet until it's al ost
closed. In this ode, the wood will burn for extended periods of ti e, however, the oven
te perature will drop.

I portant Notes
•First ti e the fire is lit, the appliance will give off so e fu es while the paint cures.
•The surfaces of this appliance get hot when the fire has been lit. Please ensure that
children, the elderly, and the infir are ade aware of this.
•Do not use fla able liquids or aerosols to start or rekindle the fire.
•Never burn woods containing paint, glue, or any other che icals.
•Do not use the fire as an incinerator only burn appropriately seasoned wood.
•Do not overload the appliance with wood.
•Do not operate stove with the firebox door open.
•Do not operate the appliance with a cracked glass.
•Ensure adequate ventilation as described in the installation instructions.
•This appliance should be aintained and operated at all ti es in accordance with
these instructions.
•Occasional local weather conditions ay cause downdraught in the flue and cause
the appliance to e it fu es. In these circu stances, the appliance should not be
used. This can generally be resolved by extending the flue or fitting a specialist cowl.
•In the event of a chi ney fire, close the pri ary air spindle control to suffocate the
fire.
•After a prolonged period of no use, the chi ney and the appliance should be checked
for blockages prior to lighting.
Maintenance
No unauthorised odification of this appliance should be carried out.
The Baker’s Oven requires little aintenance, however the flue and oven base should be
periodically checked by a co petent engineer for soot/creosote build up that ay require
cleaning. Inside the oven is a re ovable base plate. This plate should be lifted out and any
soot underneath re oved. The hot plates can also be re oved for cleaning. The glass on the
firebox and oven doors can be cleaned with steel wool and water. It is not advisable to use a
cleaner that contains caustic che icals, and abrasive cleaners.
A etal strip at the top of the firebox door can be adjusted in and out with the allen key
provided. The strip should be set leaving a gap of 1 between the edge of the strip and the
front of the Baker’s Oven. This gap provides the secondary air supply.
The fire operates best when there is a certain a ount of ash left in the botto of the firebox.
When re oving excess ash, ensure to leave a ini u 10 thick bed of ash in the botto
of the firebox.

Replace ent co ponents
Reco endation
Only replace ent parts authorised by the anufacturer ay be used.
Firebricks
In nor al use, these can last for any years. It is possible however, to crack the if logs are
continually ja ed against the or if frequently struck with a poker.
Check periodically for seriously cracked firebricks, which can be replaced with new ones
available fro your dealer.
Glass Door Panel
The door glass is resistant to extre e te peratures. However, on occasion it can crack if for
exa ple closing the door against a protruding log. If the glass has cracked, do not operate
the stove until the glass has been replaced with a new one available fro your dealer.
Door Rope
The door seal is a braided heat resistant rope. If it detaches fro the groove in the door, or
needs to be replaced, it can be fixed using silicone.
Firebox side shields
The internal sides of the firebox are protected by 6 thick steel sheets. Over ti e these can
burn through. In such an event, new ones can be sourced fro your dealer, and re-hung
inside the firebox.
Key Environ ental Considerations
To ini ise the i pact on the environ ent the following issues need to be considered when
proposing to install the Baker's Oven:
•Local authorities (Councils) ust be consulted for any restrictions that ay apply to
the use of wood burning appliances in certain areas such as s oke free zones.
•The appliance ust be correctly sized to suit the space and necessary clearances
ust be strictly adhered to.
•The appliance and flue syste ust be correctly installed to the current regulations
(local, national and European) in force at the ti e.
•The appliance ust be correctly operated.
•The appliance and flue syste ust be properly aintained.
•It is also i portant to ensure that the dwelling to be heated is insulated and is as
energy efficient as is practical.
•Only wood ust be used when firing the appliance.
The selection, installation, correct use and aintenance of the appliance and flue syste are
discussed in ore detail in the following sections of these instructions.

Installation
IMPORTANT – The installation of the Baker’s Oven ust co ply with current local, national,
and/or European regulations applicable to wood burning appliances.
Clearances
The clearances fro the appliance to co bustible aterials ust not be less than the
following:-
•Rear 250
•Side 450
If the appliance is placed in the corner of a roo , the ini u clearance fro the corner
edge of the appliance to the nearest co bustible surface is 250 .
If the walls adjacent to the appliance are a non-co bustible aterial and ini u 75
thick, then the ini u clearance is 25 .
Never store any fla able aterials near the stove.
Hearth Require ents
The hearth on which the Baker’s Oven is to be placed should be constructed of non-
co bustible aterial in accordance with Building Regulations Approved Docu ent J (Section
2 – Hearths).
The hearth should extend a ini u 300 in front of the Baker’s Oven.

Flue / Chi ney Require ents
IMPORTANT - The stove ust not be installed into a chi ney that serves any other heating
appliance, i.e. ust not be fitted as part of a shared flue.
The flue ust eet the following conditions:-
•This appliance ust be installed into a ‘Class 1 Chi ney’. If there is no existing
chi ney, then an approved solid fuel, factory built, prefabricated block type or a twin
walled, stainless steel flue can be used. Get advice fro a qualified chi ney installer
e.g. a HETAS registered engineer.
•The flue dia eter to fit the appliance ust be 150 / 6 inches.
•To perfor satisfactorily, the chi ney/flue height ust not be less than 4.6 etres
fro the base of the appliance.
•The top of the flue pipe ust be a ini u of 600 above the ridge of the roof if
the flue penetrates the roof within 3 etres of the ridge. Or if ore than 3 etres
horizontally fro the roof line, have a ini u height of 1 etre.
•If the upward draft is insufficient or periodic down drafting occurs and the appliance
s okes or only burns slowly, it can be resolved by extending the flue or fitting a
specialist cowl.
•All flue pipe has to be suitable for solid fuel and fitted in accordance with building
regulations, whilst co plying with local and current legislation and anufacturer’s
instructions.
•Both the chi ney and flue ust be accessible for periodic cleaning.
•If the appliance is fitted into an existing chi ney, ensure that it is sealed at the base
of the chi ney with a register plate and fit the flue pipe up through the plate and
continue the flue until it ter inates outside the chi ney in accordance with Building
Regulations Approved Docu ent J.
Ventilation
The burning of wood involves oxygen consu ption. It is i portant that the roo in which the
appliance is installed should be sufficiently ventilated.
Insufficient ventilation ay disrupt the co bustion process and cause the s oke flow through
the chi ney to be interrupted, which ay lead to s oke e issions into the roo .
The Baker's Oven requires ventilation in accordance with Building Regulations Approved
Docu ent J. If necessary, you can install a ventilation grill to provide a constant flow of fresh
air in the roo . This precaution is particularly necessary in well-insulated roo s with
echanical ventilation. Be sure that the ventilation grill is not liable to any for of blockage.
Ensure not to use other air-consu ing appliances, such as heaters, cooking hoods, bathroo
ventilators, in the sa e roo or in the house while the stove is burning, or ake sure to have
an extra ventilation grill installed for these appliances.
Lighting the Baker's Oven
Prior to lighting the Baker's Oven, check the etal strip at the top of the firebox door. The strip
should be set leaving a gap of 1 between the edge of the strip and the front of the Baker’s
Oven. This gap provides the secondary air supply and can be adjusted in and out with the
allen key provided. If this gap is set too wide, the burn rate of the stove will be difficult to
control. If the gap is set too close, the air-wash over the glass will not function correctly.

Warranty
Pecan Engineering Pty. Ltd. warrants this stove to be able to operate under nor al use and
service and within 5 years fro the date of the original purchase on the ter s herein shall
repair or replace without cost to the original custo er any part thereof which shall be returned
to our factory, transportation charges prepaid and which our inspection shows would prevent
operation. This warranty does not apply to firebricks, firebox shields, door seal, glass, nor
discolouration of the surface or tarnishing of gold/silver fittings all of which require nor al
service to aintain the .
Under the ter s of this warranty, Pecan Engineering Pty. Ltd. assu es no responsibility for
the labour costs involved in re oving or replacing the stove. Nor shall Pecan Engineering Pty.
Ltd. be liable for any injury, loss, or da age (direct, indirect or consequential) arising out of
the use or inability to use the product, or its re oval and replace ent. All other stove
warranties, expressed or i plied are excluded to the extent possible to law. Any clai s
against Pecan Engineering Pty. Ltd. ust be brought within Australian Jurisdiction.
The Retailer does not have the authority to alter this warranty.
For further infor ation, contact:
Nectre Wood Stoves UK Distributor:
Nectre (UK)
Web: www.nectre.co.uk
Phone: +44 (0) 1584 861628
Nectre Manufacturer:
Pecan Engineering Pty. Ltd.
13 Acorn Road, Dry Creek
South Australia, 5094
Australia
Phone: +61 8349 8332
Table of contents
Other Nectre Fireplaces Oven manuals
Nectre Fireplaces
Nectre Fireplaces N550 Instruction Manual

Nectre Fireplaces
Nectre Fireplaces N550 User manual

Nectre Fireplaces
Nectre Fireplaces Baker's Oven User manual

Nectre Fireplaces
Nectre Fireplaces Big Bakers User manual
Nectre Fireplaces
Nectre Fireplaces Baker's Oven User manual

Nectre Fireplaces
Nectre Fireplaces Baker's Oven Manual

Nectre Fireplaces
Nectre Fireplaces Big Bakers User manual

Nectre Fireplaces
Nectre Fireplaces Baker's Oven Manual

Nectre Fireplaces
Nectre Fireplaces N550 Service manual

