Nefit ModuLine 300 User manual

For the user and installer
6 720 646 264 (12/2010) NL
Operating manual
thermostat
ModuLine 300

2
Nefit B.V. • http://www.nefit.nl
Operating manual ModuLine 300 • edition 12/2010
Technical specifications are subject to change without prior notice.
Contents
1 Brief outline 4
1.1 Overview buttons 4
1.2 Display symbols 5
1.3 Overview 6
2 Introduction 10
2.1 General 10
2.2 Function-overview 11
2.3 Check version number 11
3 Installation 12
3.1 Choose installation location 12
3.2 Assemble wall panel 12
3.3 Assemble (disassemble) thermostat 13
3.4 Commissioning the thermostat 14
3.5 Setting the date and time 14
3.6 After a power failure 14
4 Set-up time program 15
4.1 Set-up temperature level 15
4.2 Set-up time program 16
5 Menu 1 – Time program 17
5.1 View or change switching point(s) 17
5.2 Insert switching point(s) 18
5.3 Remove switching point(s) 18
5.4 Enter new time program 18
5.5 Change temperature level 19
5.6 Reset the time program to factory settings 19
6 Menu 2 – Operating settings 20
6.1 Domestic hot water operation 20
6.2 Room temperature at off-function 21
6.3 DHW at off-function 21
6.4 Advance pre-heating 22
6.5 Button illumination 22
6.6 Summer-/wintertime change over 23

3
Technical specifications are subject to change without prior notice.
Operating manual ModuLine 300 • edition 12/2010
Nefit B.V. • http://www.nefit.nl
Contents
6.7 Reset operating settings to factory settings 23
7 Service menu 24
7.1 Access code 24
8 Service menu 3.1 – General service-settings 25
8.1 Set-up language 25
8.2 PID-setting 25
8.3 Calibrate room temperature 26
8.4 Calibrate time 26
8.5 Do you use a solar cylinder module 27
8.6 Set-up heating circuit 27
8.7 Reset factory settings 27
9 Remedy malfunctions 28
9.1 Remedy malfunctions 28
9.2 Remedy malfunctions (for installer) 29
10 Technical data 31
11 Glossary 32
12 Fill in schedules 33
12.1 Fill in schedule time program 33
Safety regulations
Never remove the thermostat.
Avoid high temperatures, moisture and dusty environment.
Do not use water or cleaning agents when cleaning.
This can lead to short circuit or damage of the thermostat.
Interrupt the power supply of tthe boiler before starting the
installation.

4
Nefit B.V. • http://www.nefit.nl
Operating manual ModuLine 300 • edition 12/2010
Technical specifications are subject to change without prior notice.
Brief outline1
1Briefoutline
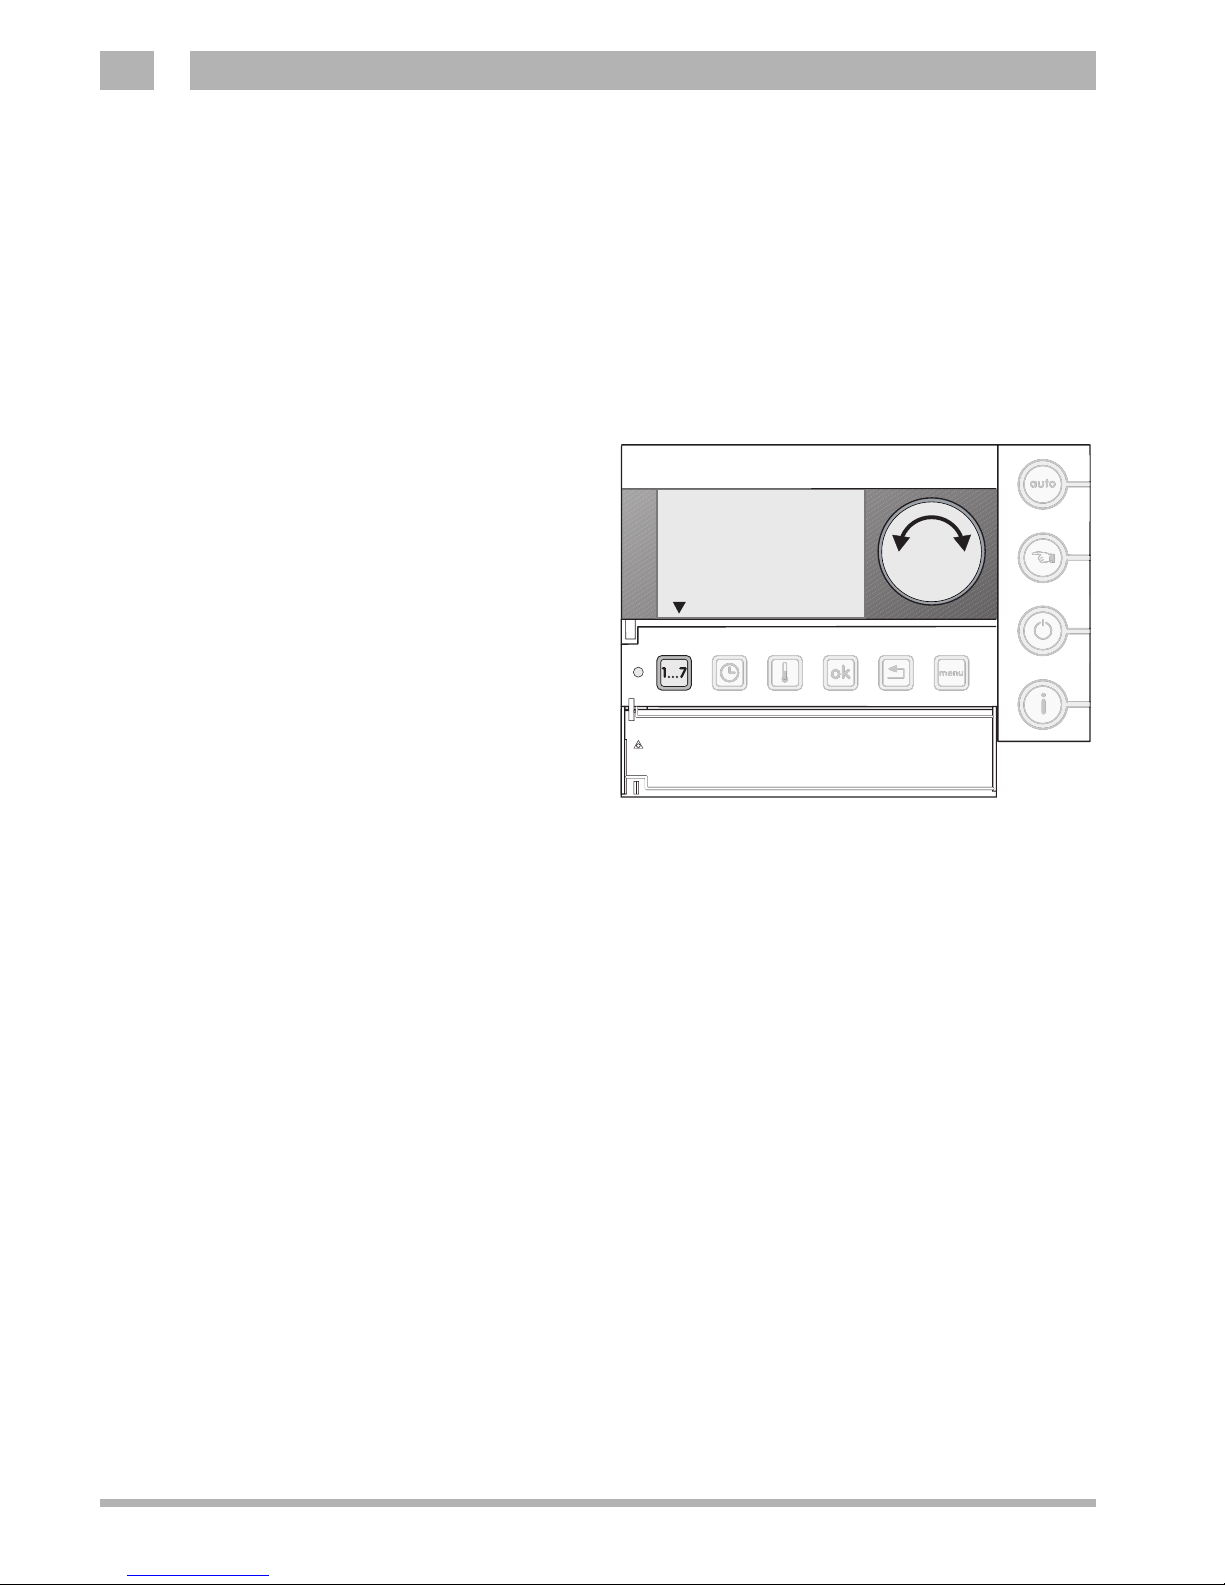
1.1 Overview buttons
Fig. 1 Overview ModuLine 300
09:18 06.01.08
21
5˚C
1
2
3
45
10 911121314
6
7
8
pos. description buttons
1cover (use the recess on the left to open the cover)
2standard view is activated when cover is closed
3display
4set-up button
pos. button for basic functions pos. button for additional functions
5auto-operation (set program) 9menu
6manual operation 10 back
7off-function 11 OK
8information 12 temperature
13 time
14 date

5
Technical specifications are subject to change without prior notice.
Operating manual ModuLine 300 • edition 12/2010
Nefit B.V. • http://www.nefit.nl
Brief outline 1
1.2 Display symbols
Explanation of the symbols in the standard view
When button illumination is turned off (→paragraph 6.5):
Fig. 2 Standard display ModuLine 300
09:18 06.01.08
21
5˚C
17
16
15
pos. description standard display
15 time and date
16 measured room temperature
17 symbol view
symbol explanation
Boiler is operating
Arrow points to the button to be operated.
Domestic hot water (DHW) operation is turned off
symbol explanation
Auto-operation (time program) is turned on.
Manual operation is turned on.
Boiler is turned off, freeze protection is active.
DHW operation according to paragraph 6.3.

6
Nefit B.V. • http://www.nefit.nl
Operating manual ModuLine 300 • edition 12/2010
Technical specifications are subject to change without prior notice.
Brief outline1
1.3 Overview
Change temperature:
- During "auto-operation"
zChange the temperature by turning the
set-up button.
- During "manual operation"
zChange the temperature by turning the
set-up button.
De-activating the central heating
The space heating is turned off with the "off-
function".
Domestic hot water is available depending on
the setting.
Fig. 3 Change temperature - auto-operation
Ingestelde
ruimtetemperatuur
21.5
°C
The adjusted temperature remains
active till the following switching point
in the time program. The set
temperature setting of the time
program is then taken over again.
Fig. 4 Change temperature - manual operation
Ingestelde
ruimtetemperatuur
18.5
°C
An adjustment during "manual
operation" remains maintained till:
– the next manually change is made;
– it is switched to "auto-operation".
Fig. 5 De-activating the central heating
Vorstbescherming
actief. Ingestelde
ruimtetemperatuur:
7.0
°C
The "off-function" can be adjusted to
own desire. This applies to the set-up
of the room temperature and
domestic hot water setting,
→paragraph 6.2 and 6.3.

7
Technical specifications are subject to change without prior notice.
Operating manual ModuLine 300 • edition 12/2010
Nefit B.V. • http://www.nefit.nl
Brief outline 1
Request information
Via this button the following information is
successively displayed:
– the set temperature during the day program
or manual operation;
– the boiler water pressure1);
– the flow temperature of the boiler;
– the operating mode.
Set-up time
Use the button "time" and the set-up button to
change the time.
zKeep the button "time" pressed and turn the
set-up button to change the hours.
zRelease the button "time".
zKeep the button "time" pressed again and
turn the set-up button to change the
minutes.
Set-up temperature levels
Use the button "temperature" to change a
temperature level.
zPress the button "temperature" briefly.
zPress the button "temperature" to select the
desired temperature level.
zKeep the button "temperature" pressed and
turn the set-up button to adjust the
temperature (→also paragraph 4.1).
Fig. 6 Request information
Dagprogramma CV-1
21.0
16.0
ma 09:18 18.0°C T2
1) This information is only shown, if the boiler supports this function.
Fig. 7 Set-up time
Tijd: Stel uren in
--:--
Druk toets onder pijl
en draai ronde knop
Fig. 8 Set-up temperature levels
Temp. nacht (T1)
16.0°C
Druk toets onder pijl
en draai ronde knop

8
Nefit B.V. • http://www.nefit.nl
Operating manual ModuLine 300 • edition 12/2010
Technical specifications are subject to change without prior notice.
Brief outline1
Navigate
- Enter the menu
zBriefly press the button "menu".
zSelect with the set-up button the desired
menu.
zPress the button "OK" to enter the selected
menu.
- Browse / next step
Use the set-up button to browse through the
menu, or to go through the time program.
zTurn the set-up button to browse through
the menu.
- Confirm
Use the button "OK" to confirm the question
asked on the display or to enter a menu.
zBriefly press the button "OK".
Fig. 9 Enter the menu
09:18 06.01.08
21
5°C
09
:
1
8
06
.
01
.
0
8
2
1
5
°
C
Fig. 10 Browse through the menu
Menu-------------2
Gebruiksinstellingen
Me
n
u
-----
-
-
-----
-
2
Geb
r
ui
k
s
i
nste
lli
n
g
e
n
Fig. 11 Confirm
Gebruiksmenu------2.8
Toetsverlichting?
aan
G
e
b
ru
ik
s
m
e
n
u
-
-
-
-
-
-
2
.
8
Toets
v
e
r
l
ichti
n
g
?
a
a
n

9
Technical specifications are subject to change without prior notice.
Operating manual ModuLine 300 • edition 12/2010
Nefit B.V. • http://www.nefit.nl
Brief outline 1
- Change setting
Use the button "OK" and the set-up button to
change the settings in the menu.
zKeep the button "OK" pressed and turn
the set-up button.
- Return to the menu / standard display
Use the button "return" to return to the menu
or standard display.
Fig. 12 Change settings
Gebruiksmenu
------
2.8
Toetsverlichting?
aan
G
e
b
r
u
i
k
s
m
e
m
n
u
-
-
-
--
-
2
.
8
T
o
e
t
s
v
e
r
l
i
c
h
t
i
n
g
?
a
a
n
Fig. 13 Return to the menu
Gebruiksmenu------2.8
Toetsverlichting?
aan
G
e
b
ru
ik
s
m
e
n
u
-
-
-
-
-
-
2
.
8
Toets
v
e
r
l
ichti
n
g
?
a
a
n
By closing the cover, the standard
display is activated immediately.
10
Nefit B.V. • http://www.nefit.nl
Operating manual ModuLine 300 • edition 12/2010
Technical specifications are subject to change without prior notice.
Introduction2
2Introduction
Congratulation with the purchase of this
thermostat ModuLine 300.
The thermostat ModuLine 300 is intended for
operating and regulating the Nefit boiler in
your home.
The ModuLine 300 can be connected to all
boilers, which are listed in table 1.
Advice:
zHave the installer explain the thermostat.
zRead this manual carefully before use.
2.1 General
The ModuLine 300 thermostat is easy to
operate. At the right side of the display are
four buttons. These buttons allow to quickly
switch between the time program and manual
operation, or information be obtained of the
settings of the thermostat and the boiler.
At the bottom of the cover are a number of
buttons for the set-up of the thermostat
function. Usually, these settings only have to
be carried out the first time.
During the navigating, there appear
accompanying texts on the display. By means
of "question and answer" can set-ups easily
be carried out.
Installation, maintenance en repairs
may only be carried out by accredited
installation companies.

11
Technical specifications are subject to change without prior notice.
Operating manual ModuLine 300 • edition 12/2010
Nefit B.V. • http://www.nefit.nl
Introduction 2
2.2 Function-overview
In the following table is information provided,
about which functions of the thermostat are
supported by the boiler.
2.3 Check version number
This document applies to the ModuLine 300
with version number 3.01 and higher.
zCheck the version number by taking the
thermostat of the wall panel and place it
back again.
While communication is established with the
boiler, the version number is shown at the
lower right in the display.
Type boiler TopLine ProLine SmartLine Elite EcomLine Economy
connect without
RCC-module zzzzzz
connector connection
in boiler orange orange orange orange 3 and 4 3 and 4
illuminated display zzzz
pressure reading zzzz
Table 1 Function-overview
Fig. 14 Check version number
Thermostaat zoekt
verbinding met ketel
(UBAx)
Even geduld aub.
Th
ermostaat
z
o
ek
t
ve
r
b
in
d
i
n
g
me
t
k
ete
l
(UBAx
)
Even geduld
a
u
b
.
ModuLine 300 Vx.xx
12
Nefit B.V. • http://www.nefit.nl
Operating manual ModuLine 300 • edition 12/2010
Technical specifications are subject to change without prior notice.
Installation3
3 Installation
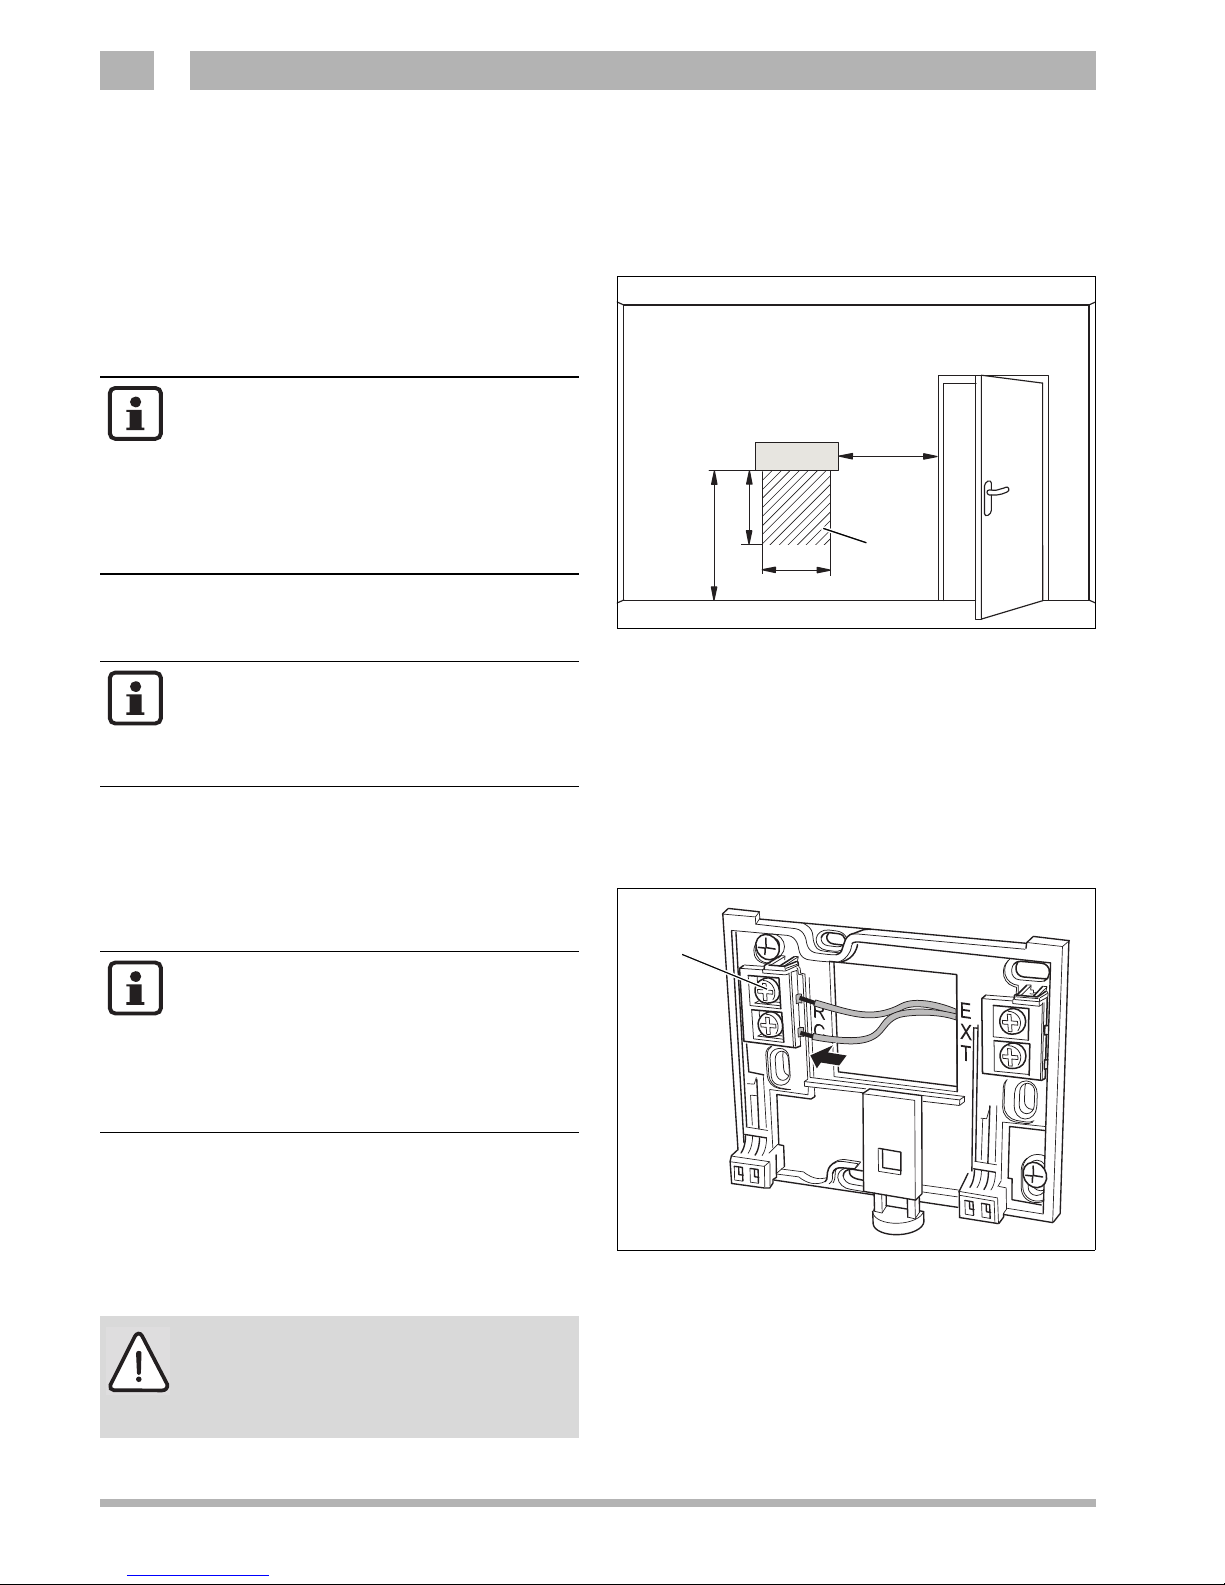
3.1 Choose installation location
Installation in the living room
zAttach the thermostat to an interior wall of
the reference room (Fig. 15).
zEnsure sufficient free space around the
thermostat (Fig. 15, pos. 1).
3.2 Assemble wall panel
The wall panel can directly be attached to the
wall or on a junction box.
zRemove the plug of the boiler from the
socket.
zConnect the cable of the thermostat to the
cable clamps "RC" (Fig. 16, pos. 1). The
connection order of the wires is arbitrary.
Fig. 15 Installation location in the living room
(dimensions in m)
pos. 1: Free space at the bottom of the thermostat
1
ModuLine
≥1.0
≥0.6
≥1.2
≥0.75
A reference room is a room (e.g. the
living room) where:
– the temperature can be measured,
which is representative for the
whole house;
– one spends most of its time.
Do not install the thermostat too close
to sources of heat, such as a radiator,
lamp or television. These can
influence the control.
Fig. 16 Connect thermostat cable
1
Ensure at installation on a junction
box, that possible draught from the
junction box cannot influence the
measurement of the room
temperature. If necessary, fill up the
junction box with insulation material.
NOTE!
Do not connect the wires to the
"EXT"-connection.
13
Technical specifications are subject to change without prior notice.
Operating manual ModuLine 300 • edition 12/2010
Nefit B.V. • http://www.nefit.nl
Installation 3
zConnect the thermostat cable to the boiler
in accordance with table 1 on page 11.
3.3 Assemble (disassemble) thermostat
3.3.1 assemble thermostat
zHook the thermostat at the back of the base
panel (Fig. 17, step 1).
zPress the bottom of the thermostat against
the base panel, until an audible "click"
(Fig. 17, step 2). The thermostat is then
locked into the wall panel.
3.3.2 Disassemble thermostat
zUnlock the thermostat by pressing the
button (Fig. 18, step 1).
zTilt the bottom of the thermostat
zRemove the thermostat (Fig. 18, step 2).
– The ModuLine 300 is directly
connected to the boiler (Ætable 1
on page 11).
– The thermostat is not suitable for
use with a MBC2-controller.
Fig. 17 Lock the thermostat into place
Fig. 18 Disassemble thermostat
14
Nefit B.V. • http://www.nefit.nl
Operating manual ModuLine 300 • edition 12/2010
Technical specifications are subject to change without prior notice.
Installation3
3.4 Commissioning the thermostat
zTurn on the boiler. As a result, the
thermostat is also provided with electricity.
The thermostat establishes connection with
the boiler. On the display appears the text:
"Even geduld aub".
3.5 Setting the date and time
At the initial commissioning or after the
thermostat was not supplied with electricity
for more than 10 hours, the date and time
must be set.
zFollow the instructions on the display to set
the date and time.
3.6 After a power failure
After a power failure all settings are retained.
Except for the date and time. These are
retained for 10 hours. Provided, however, that
the thermostat has been connected for at
least 4 hours.
zCheck the date and time setting according
to paragraph 3.5.
Fig. 19 Set-up date and time
Datum: Stel jaar in
--.--.--
Druk toets onder pijl
en draai ronde knop

15
Technical specifications are subject to change without prior notice.
Operating manual ModuLine 300 • edition 12/2010
Nefit B.V. • http://www.nefit.nl
Set-up time program 4
4 Set-up time program
The time program consists of a number of
switching points. Each switching point is
composed out of day, time and temperature.
4.1 Set-up temperature level
zPress the button "menu". The menu time
program appears in the display.
zPress the button "OK" to enter the menu.
zSelect with the set-up button
"Temperatuurniveaus wijzigen?".
zPress the button "OK".
zSelect with the set-up button the
temperature level that must be adjusted.
zKeep the button "OK" pressed and turn the
set-up button to change the setting.
Fig. 20 Time program
Menu
-------------
1
Klokprogramma
The set-up of the time program is
easy, if first the temperature levels
and switching points in the schedule
on page 33 are filled in.
Fig. 21 Set-up temperature levels
Klokprogramma
------
1.5
Temperatuur Nacht
(T1) wijzigen?
16°C

16
Nefit B.V. • http://www.nefit.nl
Operating manual ModuLine 300 • edition 12/2010
Technical specifications are subject to change without prior notice.
Set-up time program4
4.2 Set-up time program
zPress the button "menu".
zThe menu time program appears in the
display.
zPress the button "OK" to enter the menu.
zSelect with the set-up button "Nieuw
klokprogramma invoeren?".
zPress the button "OK".
zKeep the button "OK" pressed and turn the
set-up button to confirm the question
asked.
Enter switching points
zKeep the button "day" pressed and select
with the set-up button the desired day or
day-series (Fig. 22).
zKeep the button "time" pressed and turn the
set-up button to set-up the desired time
(Fig. 23).
zKeep the button "temperature" pressed and
select with the set-up button the desired
temperature level (Fig. 24). The switching
point is graphically shown in the display.
Repeat these steps for the other switching
points.
Fig. 22 Set-up day time program
09:18 06.01.08
21
5°C
Klokprog. invoeren
21.0
16.0
Kl
o
k
p
ro
g
. invoe
r
e
n
21
.
0
16
.
0
Fig. 23 Set-up time in time program
09:18 06.01.08
21
5°C
Klokprog. invoeren
21.0
16.0
Kl
o
k
p
ro
g
. invoe
r
e
n
21
.
0
1
6
.
0
Fig. 24 Set-up temperature time program
09:18 06.01.08
21
5°C
Klokprog. invoeren
21.0
16.0
Kl
o
k
p
ro
g
. invoe
r
e
n
21
.
0
16
.
0

17
Technical specifications are subject to change without prior notice.
Operating manual ModuLine 300 • edition 12/2010
Nefit B.V. • http://www.nefit.nl
Menu 1 – Time program 5
5 Menu 1 – Time program
In the menu "klokprogramma" adjustments can be made in the time program, such as
e.g. advancing the time of a switching point.
5.1 View or change switching point(s)
At this function, the time time program can be
glanced through step by step. Furthermore,
the time and temperature of a switching point
can be changed here.
zSelect "Schakelpunt(en) bekijken of
wijzigen?".
zSelect, by turning the set-up button, the
switching point that must be changed.
zTo change the time:
Keep the button "time" pressed and turn the
set-up button to adjust the time.
zTo change the temperature:
Keep the button "temperature" pressed and
turn the set-up button to adjust the
temperature.
The switching point is changed and is
graphically shown in the display.
Fig. 25 Change switching point - time
Schakelpunt wijzigen
21.0
16.0
Ma
07:00
18.0
°
C
T2
The selected switching point is
graphically shown in the display.

18
Nefit B.V. • http://www.nefit.nl
Operating manual ModuLine 300 • edition 12/2010
Technical specifications are subject to change without prior notice.
Menu 1 – Time program5
5.2 Insert switching point(s)
At this function, a switching point can be
inserted in the time program.
zSelect "Schakelpunt(en) invoegen?".
zKeep pressure the button "day" and select
with the set-up button the desired day.
zKeep the button "time" pressured and turn
the set-up button to set-up the desired time.
zKeep pressure the button "temperature"
and select with the set-up button the
desired temperature level.
The switching point is inserted and is
graphically shown in the display.
5.3 Remove switching point(s)
With this function, switching points can be
removed from the time program.
zSelect "Schakelpunt(en) invoegen?"
zSelect, by turning the set-up button, the
switching point that must be removed.
zKeep pressure the button "OK" and turn the
set-up button until "ja" appears on the
screen. The switching point is removed and
is no longer graphically shown in the
display.
5.4 Enter new time program
Here you can enter an entirely new time
program, that satisfies your specific
wishes,Æchapter 4 "Set-up time program".
Fig. 26 Change switching point - day
Schakelpunt invoegen
21.0
16.0
Ma
0
7:
00
1
8
.
0°C
T2
The time program can consist of
maximum 42 switching points.
Fig. 27 Remove switching point
Schakelpnt verwyderen
21.0
16.0
ma 07:00 20.0°C ja

19
Technical specifications are subject to change without prior notice.
Operating manual ModuLine 300 • edition 12/2010
Nefit B.V. • http://www.nefit.nl
Menu 1 – Time program 5
5.5 Change temperature level
With this function. the temperature levels can
be changed,Æparagraph 4.1.
5.6 Reset the time program to factory settings
With this function, the time program can be
reset to the factory setting. The current time
program will be overwritten.
zSelect "Klokprogramma terug naar
fabrieksinstelling?".
zKeep he button "OK" pressed and turn the
set-up button to confirm the question asked
(2x).
Temperature level Factory setting
T1 (night) 16 °C
T2 (day-low) 18 °C
T3 (day-middle) 20 °C
T4 (day-high) 21 °C
Tabel 2 Factory settings - temperature levels
Factory setting Time Temperature Temperature level
Mon - Fri
07:00 – 09:00 21 °C T4 day-high
09:00 – 17:00 20 °C T3 day-middle
17:00 – 23:00 21 °C T4 day-high
as of 23:00 16 °C T1 night
Sat - Sun 08:00 – 23:00 21 °C T4 day-high
23:00 – 08:00 16 °C T1 night
Table 3 Factory settings time program

20
Nefit B.V. • http://www.nefit.nl
Operating manual ModuLine 300 • edition 12/2010
Technical specifications are subject to change without prior notice.
Menu 2 – Operating settings6
6 Menu 2 – Operating settings
In the operating menu, a number of specific
functions can be set-up, such as e.g. advance
pre-heating or domestic hot water (DHW)
operation.
6.1 Domestic hot water operation
At this function can be chosen, when DHW
must be available. There are three setting
possibilities:
1. On (factory setting)
Always DHW available.
2. Off
Continuously off, DHW is not available.
3. Unison
Unison with the time program.
During the night temperature (T1) the
DHW function is turned off.
30 Minutes before the start of the day
program, DHW is available.
30 Minutes after the end of the day
program, the DHW function is turned off.
zSelect the desired setting.
Fig. 28 Menu 2 - Operating settings
Menu-------------2
Gebruiksinstellingen
Fig. 29 Set-up DHW operation
Gebruiksmenu
------
2.1
Warmwaterbedrijf?
Aan
Use the setting "meeschakelen" only
for boilers with an internal DHW tank
or plate hate exchanger. Only then
energy is saved.
Table of contents
Other Nefit Thermostat manuals

Popular Thermostat manuals by other brands

Johnson Controls
Johnson Controls TEC2102-3 installation instructions

BECA
BECA BAC-8000 Series user guide

White Rodgers
White Rodgers 1F86-241 Installation and operation instructions

White Rodgers
White Rodgers 1F78H installation instructions

Emos
Emos P5616OT manual

Crestron
Crestron DIN-TSTAT-FCU installation guide
 71 PI manual")


Honeywell
Honeywell L641AI039 Product data

ICM Controls
ICM Controls SC 4811 Installation, operation & application guide

Jackson Systems
Jackson Systems Wireless Comfort WCT-32 user manual

Carrier
Carrier A99068 Homeowner's guide

Honeywell
Honeywell T8611 owner's guide

Ambient
Ambient WT Installation and operating instructions