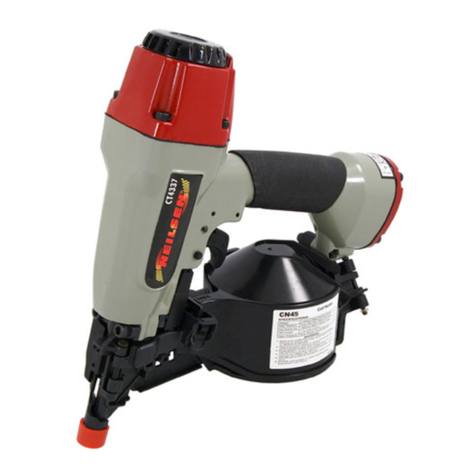
Neilsen CT3320 User manual

34 DEGREE ANGLED AIR STRIP NAILER
CT3320
INSTRUCTION MANUAL
IMPORTANT:
These instructions accompanying the product are the original instructions. This
document is part of the product, keep it for the life of the product passing it on to
any subsequent holder of the product. Read all these instructions before
assembling, operating or maintaining this product.
Cannon Tools Limited
Address: 20 Station Road, Rowley Regis, West Midlands, B65 0JU.U.K.


1
EC DECLARATION OF CONFORMITY
We CANNON TOOLS LTD
20 Station road, Rowley Regis, West Midlands,B65 0JU.U.K.
Declare that the following machine complies with the appropriate basic safety
and health requirements of the EC Directive based on its design and type, as
brought into circulation by us.
In case of alteration of the machine, not agreed upon by us, this declaration will
lose its validity.
Product description: 34 DEGREE ANGLED AIR STRIP NAILER
Model: CT3320
Applicable EC Directives:
EC Machinery Directive 2006/42/EC
Harmonized standards
EN ISO 11148-13:2018
20 Station Road, Rowley Regis, West Midlands, B65 0JU.U.K.
Mr. Gurcharan Tony Singh Sanghera
Managing Director
CANNON TOOLS LTD
2021-01-15

2
1. SPECIFICATION
Air pressure: 5-8 Bar
Air inlet: 1/4"
Nail type: 50-90mm long, 2.87-3.8mm diameter,
34o clipped head nails
Magazine capacity: 80pcs
Warning: Wear approved safety glasses and ear defenders.
2. IMPORTANT SAFETY INFORMATION
a). Read the instruction manual fully. Do not attempt any operation until you have
read and understood this manual.
b). Most important you must know how to safety start and stop this machine,
especially in an emergency.
c). Keep the work area tidy and clean.
d). Keep bystanders away. Especially for children. All onlookers and passersby
must be restricted from entering the work area for their own protection.
e). Use safety glasses and ear protection, the tool operator and all person in the
work area must permanently operate to prevent some foreign mattes strafe into
eyes. Maybe the noise would harm your hearing, wear the ear protection to
safeguard.
f). Protective gloves and non-skid foot wear is recommended.
g). Never wear loose clothing or jewelry as they can be caught in moving parts.
h). Never use oxygen, combustible or any other bottle gas as a power source or
would cause explosion and serious personal injury.
i). Only connect tool to air supply with a coupling that will release all pressure
from the tool when disconnected.
j). Disconnect tool from air supply before finishing operation or performing
maintenance.
k). Do not operate the tool if under the influence of alcohol or drugs.
l). Do not aim the tool at anyone in case of danger while you are operating it and
do not remain any fasteners in the channel when you finish your work.
m). Do not soak tool with cleaning solution. Such solutions can damage internal
parts.
n). Do not place your hand or any part of your body in the fastener discharge are
of the tool when connecting or disconnecting air supply.
o). Do not carry shoot the tool into open space as this may result in injury.
p). Disconnect and house all power tools that are not in use.
q). Do not overload or misuse the tool. All tools are designed for a purpose and
are limited to what they are capable of doing. Overloading a tool will result in tool
failure and user injury.
r). Maintain your tools correctly. A well maintained tool will do the job safely.
Replace any damaged or missing parts immediately with original parts from the
manufacturer.

3
3. TECHNICAL DESCRIPTION

4
4. FUNCTIONAL DIAGRAM
Air tools are cycled by a compressed air operated single piston design, the
following illustrations show the four functional cycles that occur when the tool is
operated to drive a fastener.
FIG.1 AT REST FIG.2 DRIVING STROKE
FIG.3 END OF STROKE TRIGGER STILL PULLED FIG.4 RETURNING
RESERVOIR OF HIGH PRESSURE AIR

5
5. UNPACKING AND CHECKING
Carefully remove the product from the packaging and examine it for any sign of
damage that may have happened during shipping. Lay the contents out and
check them against the parts shown below. If any part is damaged or missing;
please contact the seller and do not attempt to use the air nailer.
Accessories: 5pcs Allen wrench, a bottle of nailer oil

6
6. AIR SUPPLY
Air Supply
To prevent explosion: Use only clean, dry, regulated, compressed air
to power this tool. Do not use oxygen, carbon dioxide, combustible
gases, or any other bottled gas as a power source for this tool.
(1) Use dry compressed air filtered oil and water.
(2) The compressed air pressure can not exceed to 8bar. A pressure-charged
valve should be set between the tool and compressed air it there is a high
pressure air source.
(3) To avoid high noise, fast worn and misfire, do not work on minimum operation
pressure.
(4) The great enough power of compressor and the big air container can keep
the tool stable.
(5) A quick-action connector is assembled between the tool and air source.

7
7. USING THE TOOL
7.1 POWER SOURCE
This tool applies to normal air compressor and is designed to operate in clean,
dry and compressed air at regulate pressures between 5~8bar.
Place two or three drops of air tool oil into the tool’s air inlet at the beginning of
workday and try it twice or three times.
7.2 How to Use
1. Make sure that the tool is off and
disconnected from the compressor.
Pull the pusher back, engaging the
Latch.
2.Load the nails by holding the nailer
down with the magazine tilled
downward. Insert the nails into
magazine.
3. Release the Latch and pusher,
slid the pusher against the nails.
4. Connect with air source.
5. Hold the handgrip with one hand and press the cover with another hand.
6. Depress the safety and in touch with the workpiece.
7. Shoot the trigger when the tool point to the workpiece.
8. Remove the tool from the workpiece after nailing.
9. After use, to prevent accidents:
a. Release the Trigger.

8
b. Detach the air supply.
c. change the Mode Switch to setting.
d. Disengage the pusher by pulling it back slightly to disengage fastener
strip, press and hold pusher Lever, and slide pusher to front of Magazine.
e. Empty the Magazine.
f. Attempt to discharge the tool into a piece of scrap wood to ensure that it is
disconnected and is incapable of driving any fasteners.
g. Release the Trigger again.
h. Clean and oil the Drive Guide and Magazine. Clean external surfaces with
clean, dry cloth.
i. Store indoors out of children’s reach.
Note:
(1) Check the tool carefully to make sure that all the fitting pans and fastening
parts are tight before operating the Air strip Nailer.
(2) Do not use the overlapped nails as the deformed nails may result in injury.
(3) Invoid operating in the empty nail condition as it may make the tool fatigue to
be damaged.
(4) Fobid to depress the trigger and take the tool in connection with the
compressed air to go around.
(5) Turn off air source when not in use.
(6) Do not allowed to have the remainder-nail in magazine after finishing work.

9
8. LUBRICATION AND MAINTENANCE
8.1. Disconnect the air supply from the tool before lubricating.
8.2. Your tool requires lubrication before you use it for the first time.
8.3. Wipe off excessive oil at the exhaust. Excessive oil will damage o-rings of
tools. If in-line oiler is used, manual lubricating through the air inlet is not required
on a daily basis.
8.4. Turn the tools so the inlet is facing up hand put one drop of high-speed
spindle oil. Never use detergent oil or additives. Operate the tool briefly after
adding oil.
CLEARING A JAMMED FASTENER
▲Disconnect air tool from air hose.
▲Pull back the pusher until it latches at the end of the magazine.
▲Remover jammed fastener.
▲Press the latch button and slide the pusher forward.
EVERY-DAY MAINTENANCE CHECKS
Before connection to the air supply:
. Drain the compressor reservoir of condensate.
. Drain the air lines of condensate.
. Drain the combined separator filter, regulator,water trap.
. Fill up the combined separator filter, regulator, lubricant reservoir.
. Check the line pressure is correct for the tool.
9. DISPOSAL
At the end of the machine's working life, or when it can no longer be repaired,
ensure that it is disposed of according to national regulations.
Contact your local authority for details of collection schemes in your area.
In all circumstances:
Do not dispose of this tool with domestic waste.
Do not incinerate.
During decommissioning of the equipment, certain hazards should be understood and
avoided:
. Only with the line pressure released shall the equipment be disassembled.
.Goggles should be worn.

10
10. EXPLANATION OF SYMBOLS
WARINING!
In accordance with essential safety standards of applicable
European directives
First read the instruction manual.
Wear safety glasses and ear protection.

11
11. EXPLODED VIEW

12


CANNON TOOLS LTD
Add: 20 station road, Rowley Regis, west midlands,B65 0JU.U.K.
Made in China
Table of contents
Other Neilsen Nail Gun manuals
Popular Nail Gun manuals by other brands

Makita
Makita AN451 instruction manual

Metabo HPT
Metabo HPT Strap-Tite NR3665DA Instruction and safety manual

HIKOKI
HIKOKI NR 90AES1 Handling instructions

Campbell Hausfeld
Campbell Hausfeld CHN101 Operating instructions & parts manual

Logan
Logan F500-2 instruction sheet

Bostitch
Bostitch GF28WW Operation and maintenance manual

Makita
Makita AN250HC user manual

Central Pneumatic Professional
Central Pneumatic Professional 92918 Assembly and operating instructions

Craftsman
Craftsman Easy Fire 0993056 manual

RGN
RGN CN565X operating manual

Central Pneumatic
Central Pneumatic 97586 Assembly and operating instructions

Power Fist
Power Fist 8558777 user manual