NEO STEAM 1500 RGBA User manual

P. 1
- Neo Steam 1500 RGBA
USER MANUAL / MANUAL DE USUARIO
PLEASE READ THE INSTRUCTIONS CAREFULLY BEFORE USE
POR FAVOR LEA LAS INSTRUCCIÓNES ANTES DE USAR
STEAM
1500 RGBA
Professional fog machine with RGBA effect

P. 2
Neo Steam 1500 RGBA -
English version
1. OVERVIEW
STEAM 1500 RGBA
Professional fog machine with RGBA eect
Steam 1500 RGBA is a professional 2-in-1 fog ma-
chine that has 28 RGBA 3W LEDs, adding an attrac-
tive visual eect to its original function. Thanks to
the incorporation of amber LEDs to the classical
RGB mix, the xture achieves a very complete and
attractive color mix, standing out naturally in any
given situation. With an output of 40,000 cubic feet
per minute and a 2L (67 Oz.) tank capacity, Steam
1500 RGBA is itself a high performance fog machine,
beyond its attractive visual eect. The xture has
6 DMX modes (9 DMX channels max) and includes
a wireless remote control that allows four dierent
programs to be run at a distance.
Source & Optics
• Light source: 28 RGBA (8R, 7G, 9B, 4A) 3W LEDs
• LEDs life: 50,000 hours
Output
• Smoke output: 40,000 cubic feet per minute
• Warm up time: 9 minutes
• Tank: 2 lts./ 67 Oz.
• Liquid consumption: 150 ml/min / 5 oz/min
Control
• Operational modes: DMX, Wireless remote con-
trol, LED patterns & manual
• DMX channels: 1/2/3/5/7/9
Physical
• DMX connectors: 2 XLR connectors
(XLR-3 In & Out)
• Remote control connector: 1 TRS/1/4”
connector
• 4-digit LED display
• Dimensions: 458x307x207 mm. / 18x12x8.1 in.
• Weight: 10.7 Kg. / 23.5 Lbs.

P. 3
- Neo Steam 1500 RGBA
English version
2. WARNING
Like all electronic products, Steam 1500 RGB
must be used with safety precautions in mind.
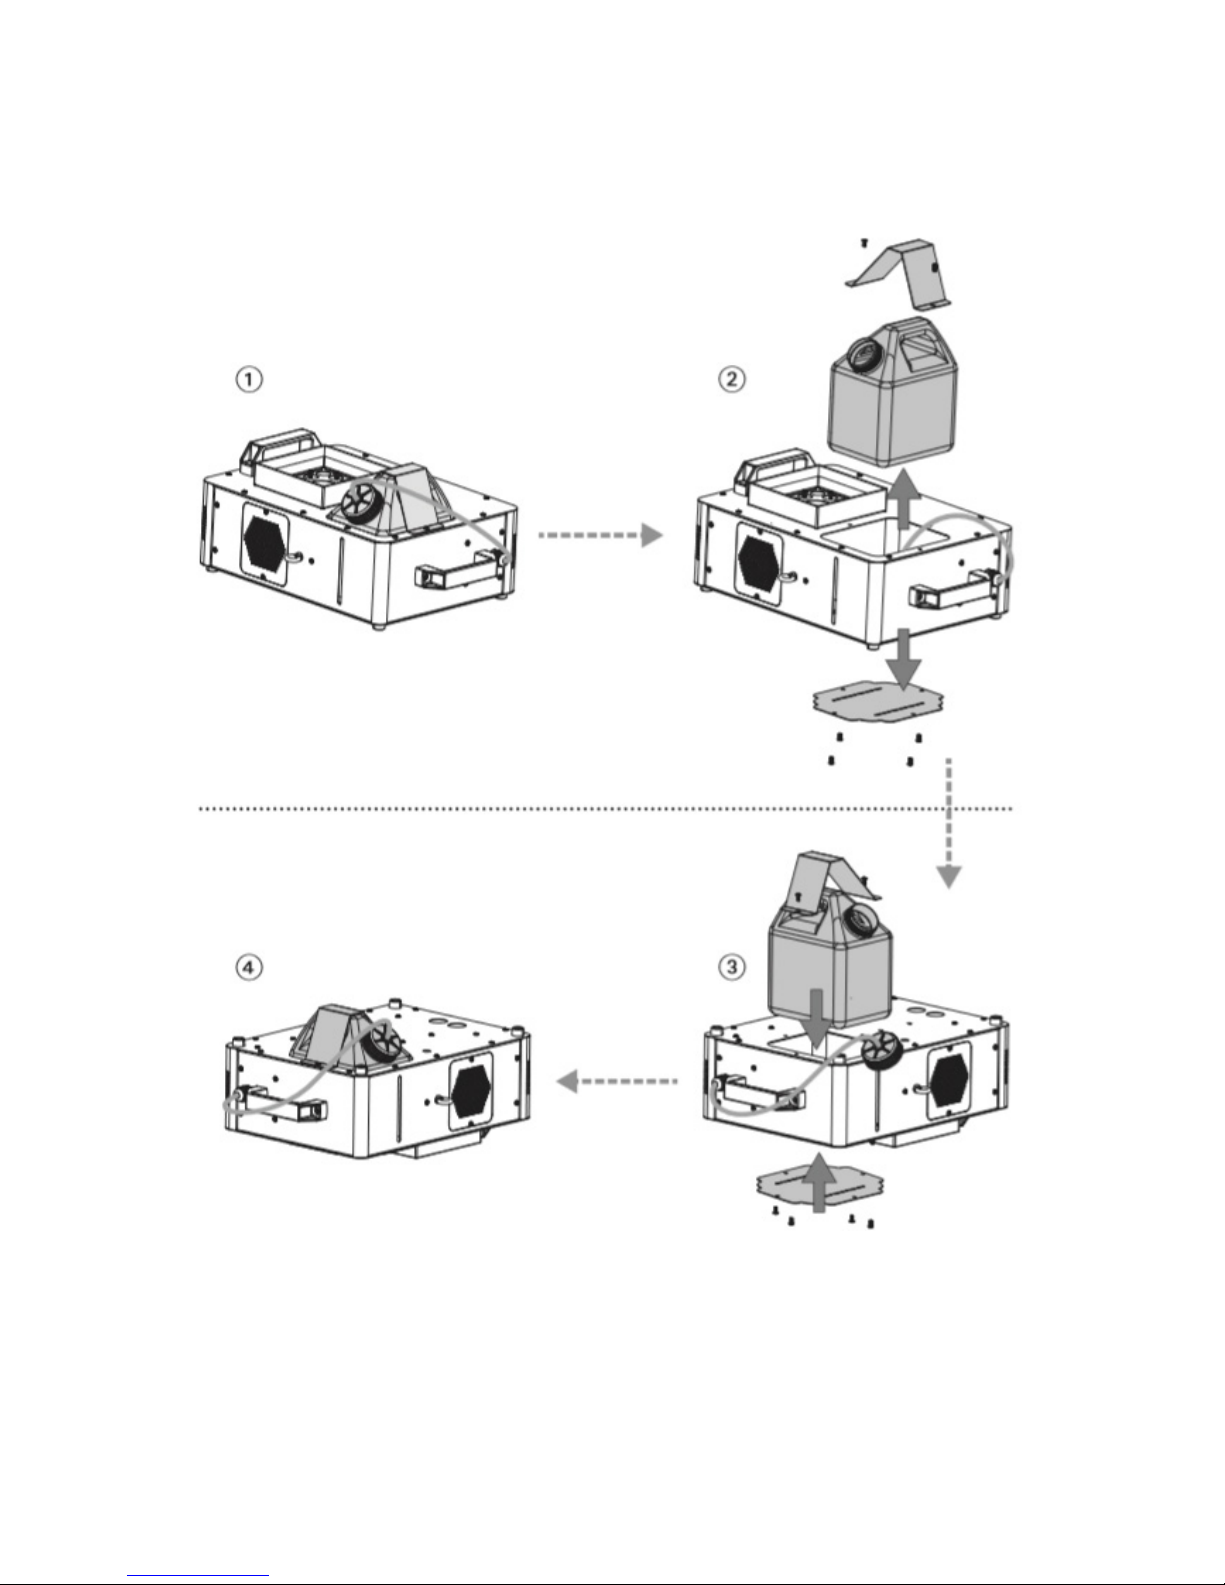
Fill enough fog uid before plugging in, empty
uid tank when not in use or moving.
• Use only appropriate, grounded electric power
supply for your unit. See your product speci-
cation label for appropriate power supply. This
appliance must be earthed.
• Disconnect from electric mains power supply
when not in use, when lling the fog uid tank, or
when changing a fuse. Keep unit dry. If moisture
or liquids enter the fog machine case, immedi-
ately disconnect power supply. Contact a service
technician to determine safety for use.
• Keep machine in at position, never put it in
tilted place.
• Before moving fog machine, always drain fog
uid into the tank and tighten the tank cap se-
curely to avoid spilling.
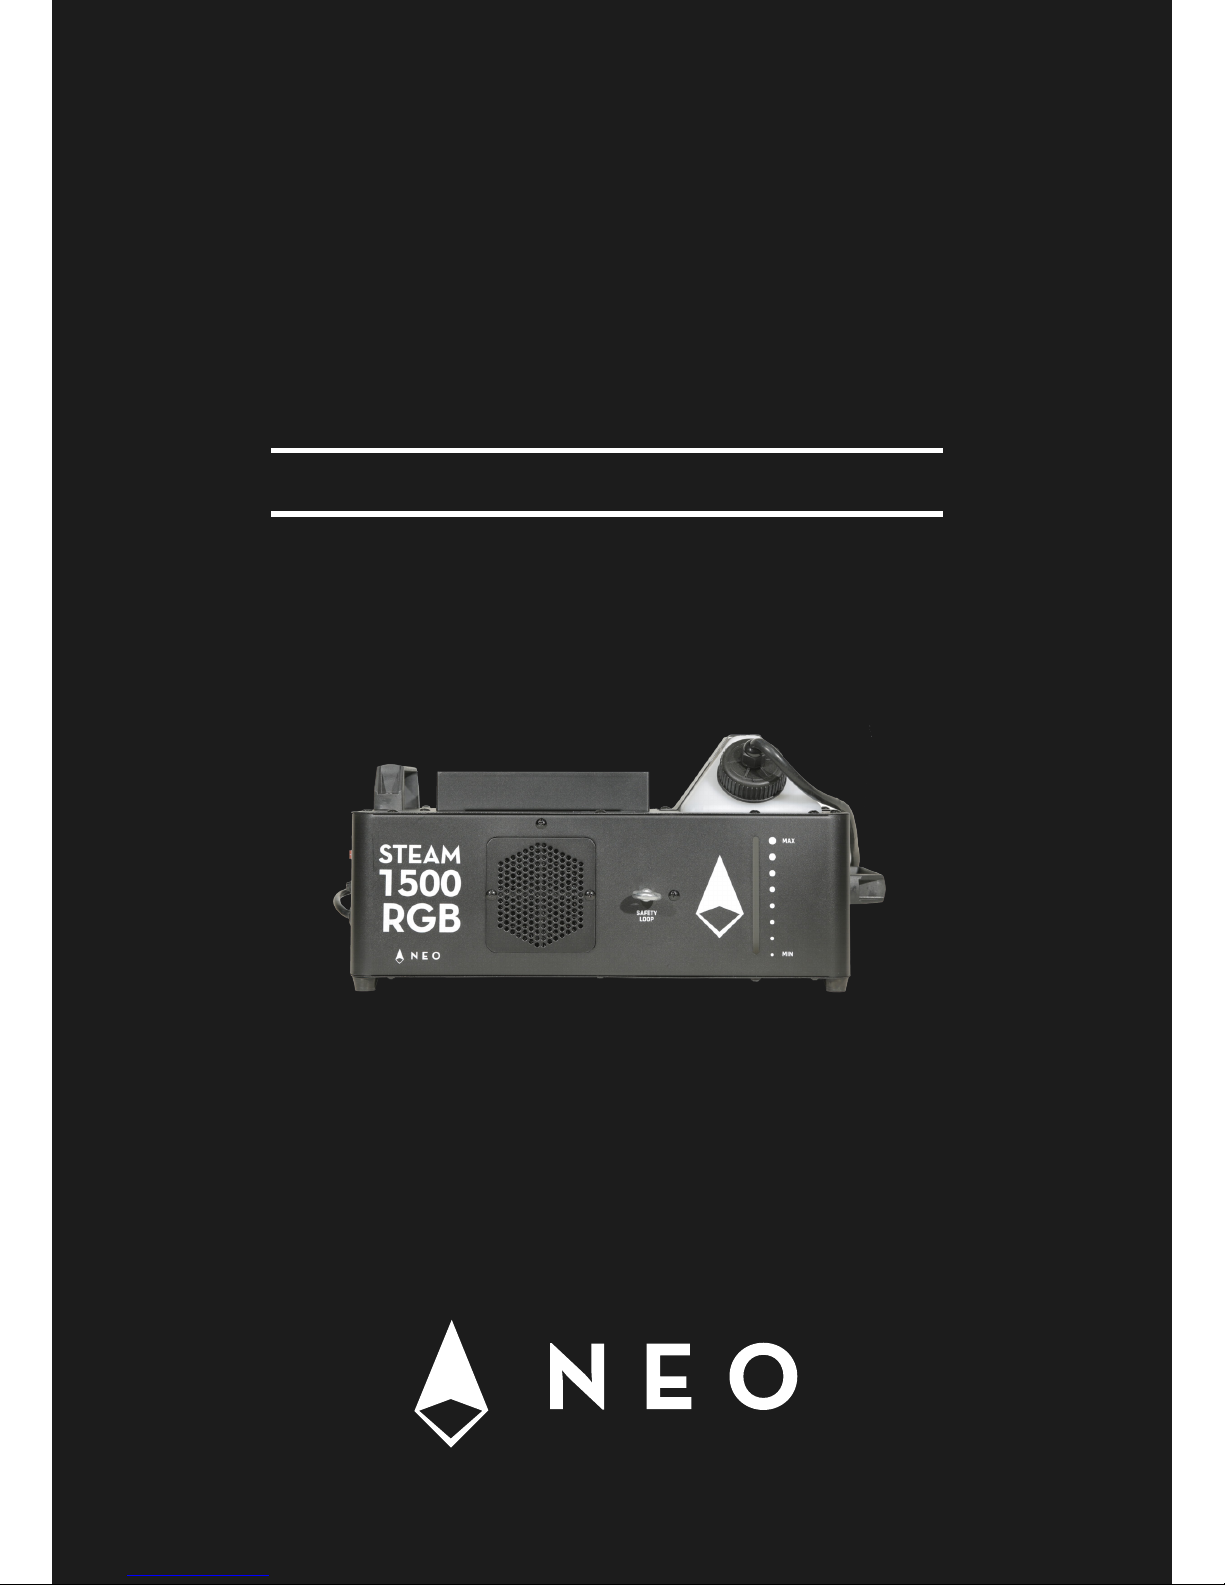
• Thank you for selecting our Steam 1500 RGB DMX
fog machine, you already own the high-tech,
professional DMX Fogs! Better read the manual
thoroughly before operation, follow instruction
will help you have a smooth handling with Steam
1500 RGB to achieve the most satisfactory fog
eect, it will also assist unit to further prolong
life time as a whole.
• Without user-serviceable parts in the package,
please contact your local agent or qualied
technician for servicing.
• Without changeable structure by non-qualied
user, please do not open the up cover or have
any change at will, otherwise, it may cause acci-
dent!
• Fog machine is for adult use. Keep out of
reach of children. Never leave the unit running
unattended.
• Fog machine nozzle gets hot over 200 degrees
(centigrade) during use. Don’t touch! Maintain a
safe distance over 100CM. Never aim the nozzle
directly at people.
• Keep case closed while operating. Put fog ma-
chine in dray place. Do not insert objects into
air vents. Allow 20cm space or above around the
machine for proper ventilation.
• Keep fog machine away from ames and
ammable items. Never aim the nozzle at open
ames or sparks. Use only high quality wa-
ter-based fog uid. Never put ammable sub-
stances into the tank.
• Machine must cool down before cleaning,
servicing or storing.
• Never put any ammable material (lipid, gas,
perfume etc.) into the tank, read the user manu-
al thoroughly before operation.
• Better use our high quality water-based fog uid,
random use with other fog uid may jam the
pipe, or even erode the components inside.
• Keep suicient fog uid in tank. Operating the
unit without suicient fog uid, the pump will
stop working.
• If any abnormal running occurs, stop it immedi-
ately, empty the uid, and bring the done up unit
(recommend original box) to your agent or dealer
for servicing. Make sure all uid is empty from
the tank before moving or shipping.
• Never drink fog uid. If ingested, call a doctor
immediately. If uid contacts eyes or skin, rinse
skin thoroughly with water.
• Read user manual instructions thoroughly before
operating. Follow the instruction. Never remove
warning or informative labels from the unit.
Important Safeguards
• Read all instruction.
• Products for indoor use only. Keep away
fromliquids. Never operate in rain or in damp
conditions.
• Unit must be grounded.

P. 4
Neo Steam 1500 RGBA -
English version
• Don not open unit, risk of electric shock.
• Keep machine in at position, never put it in
tilted place.
• Do not immerse in any liquid.
• Save these instructions.
Caution
There are no user serviceable parts inside this unit.
Do not attempt any repairs yourself, doing so will
void your manufactures warranty. In the unlikely
event your unit may require service please contact
your local dealer.
Particular Warning
Please install the product correctly according to
the instruction of the user manual. To avoid any
accident, it is not allowed to install the product
with any way not instructed on the user manual. If
accident happens because users do not install the
product according to the instruction of the user
manual, the manufacturer will not take any respon-
sibility.
Please note
Specications and improvements in the design
of this unit and this manual are subject to change
without any prior written notice.
Important
The wires in this mains lead are colored in accord-
ance with the following code.
EU
Green and Yellow – Earthed (E)
Blue – Neutral (N)
Brown – Live (L)
Warning: This appliance must be earthed.
USA
Green and Yellow – Earthed (E)
White – Neutral (N)
Black – Live (L)
Warning: This appliance must be earthed.

P. 5
- Neo Steam 1500 RGBA
English version
3. FUNCTIONS
A. 26 LEDs
B. Handle
C. Fog Fluid Tank
D. Tank Fixed Cover
E. Safety Loop
F. Power Switch
G. LED display
H. Menu
I. Up
J. Down
K. Enter
L. Manual Fog
M. DMX 3 pin XLR Input
N. DMX 3 pin XLR Output
O. Control Socket Connection
P. Electric Power Cord
Q. NFB
R. Visible Fog Fluid Level Indicator
S. M10*P1.5 C Clamp Installation

P. 6
Neo Steam 1500 RGBA -
Description
1. Built-in function of led lighting control allows
easy control led patterns through by LED display.
Like ames, burst etc. LED could be turn on sep-
arately without fog output under DMX operation
mode.
2. When hanging Steam 1500 RGB upside down,
just loosen the screws of the tank xed ring and
back board to change the position of the tank.
3. Visible fog uid level indicator on rear.
4. Special instant stopping function, CO2 eect
alike.
5. DMX on board, 6 DMX modes for choice; 1CH,
2CH, 3CH, 5CH, 7CH & 9CH, operate by any addi-
tional DMX controller.
6. Manual fogging can be operated directly from
the back panel of the machine.
7. Aluminum die-cast design functioned with
high-eective heating module prevents clog-
ging. Unique design that can be earthed directly
without aecting normal working of the thermo
system and DMX control circuit. There won’t be
danger of accidental human body’s electric
shock.
8. High output fog machine, approx. 40,000 cu./
min output.
9. Electronic Thermo Sensing (ETS) – electronic
heater stay hot at all times between fog blasts.
10. Direct thermal protection.
11. Operate by wireless controller (DZ-2). Simple and
humanized design makes Steam 1500 RGB easier
for use.
4. GETTING READY
All products are thoroughly tested at the factory
and shipped in perfect condition. If damage has oc-
curred during shipping, or if components are miss-
ing, please contact your local dealer immediately.
Mouting
Loosen the few screws of the tank xed cover,
replace the tank down to the bottom, then put the
tank x cover to the tank again, and tighten the
screws. See Illustration next page.
Set Up
1. Open the shipping carton and carefully remove
the unit from the shipping carton.
2. Be sure to remove packing material from
around the fog machine, especially near the
nozzle.
3. Set the fog machine on a dry, at surface.
4. Place the feeder tube with lter deep inside the
full fog uid tank. Use only high quality, wa-
ter-based fog uid.
5. Firmly attach the remote control mechanism
to socket on the back of the unit. Or use DMX
control setting on the back of the unit.
6. Plug mains power cord from the fog machine
into appropriate power supply socket. Wait
about 9 minutes for heating element to heat up.
7. Refer to your controller manual for operation
details. (Appendix A )
8. If fog is emitted continuously for a long time,
the heating element temperature may drop,
shutting o fog production. If so, please do not
activate for emission. Wait briey. When the
heating element temperature rises, fog emis-
sions can be resumed.
English version

P. 7
- Neo Steam 1500 RGBA
Mounting reference
English version

P. 8
Neo Steam 1500 RGBA -
English version
Functions of the buttons
MENU: Button for color macro setting of each chan-
nel, and DMX address setting.
ENTER: Button for the rst layer and the second
layer of menu.
UP: Button for increasing numerical value
DOWN: Button for decreasing numerical value.
Press ”UP” or “Down” 15 seconds can change value
continuously and fast.

P. 9
- Neo Steam 1500 RGBA
English version
System Menu
• When shot down, the present function status
will be saved automatically and continue
when powered on next time.

P. 1 0
Neo Steam 1500 RGBA -
5. OPERATION
Stand-alone
Please put the Steam 1500 RGB on a dry and at
surface.
1. Plug mains power cord from the fog machine
into appropriate power supply socket.
2. Primary power on, LED display (G of gure)
shows “8888”, and 26 LEDs (A of gure) around
the nozzle all light up. Please check if the LED
letters shown on the display lack of strips, and
then show the current soware version.
3. 2 seconds aer it switches to working status:
Heating up, it shows “HEAt”. Setting function
value is allowed when heating up. With no op-
eration aer 4 seconds, it goes back to “HEAt”
status.
4. Wait about 9 minutes for heating element to
heat up.
5. Push the Manual Fog button (L of gure) to
smoke.
• Manual fogging is available under any con-
trol mode and always executing the Color
Macro of CHA.
Remote Control Operation
For best result, use DZ-2 wireless controller.
1. Firmly attach the remote control to socket (O of
gure) on the back of the unit.
2. Plug mains power cord from the fog machine
into appropriate power supply socket.
3. LED display (G of gure) shows “8888”, and 26
LEDs (A of gure) around the nozzle all light
up. Please check if the LED letters shown on the
display lack of strips, and then show the cur-
rent soware version.
4. 2 seconds aer it switches to working status:
Heating up, it shows “HEAt”. Setting function
value is allowed when heating up. With no op-
eration aer 4 seconds, it goes back to “HEAt”
status.
5. Wait about 9 minutes for heating element to
heat up.
6. Except “dx” and “A.xxx”, under any other status,
wireless control is available while DMX control
is not available.
7. Refer to your controller manual for controller
operation details. (Appendix A )
• Manual fogging could be work with remote
control operation at the same time.
• When shot down, the present function status
will be saved automatically and continue
when powered on next time.
Important Remark
When the green LED on the controller lights up, it
does not mean that the machine has got complete-
ly heated, but just means that the machine reaches
an enough temperature for fogging.
Check the red dot in the middle of CH.A (or others
like CH.b etc.) on the LED display to know whether
the machine has completed heating up or not. If
the red dot is ashing, heating is not completed
yet, and duration of fogging is only 1-3 seconds. If
the red dot is lighted and does not ash, heating is
completed, and duration of each fogging can reach
8-9 seconds.
DMX Control Operation
Use LED Display to set the unit to the desired
DMX512 address. Refer to DMX channel in chart.
1. Connect the DMX 512 controller cable to the in-
put socket (M of gure) of the fog machine unit.
Make sure the signal cable polarity is correct.
2. Plug mains power cord from the fog machine
English version

P. 11
- Neo Steam 1500 RGBA
into appropriate power supply socket.
3. LED display (G of gure) shows “8888”, and 26
LEDs (A of gure) around the nozzle all light
up. Please check if the LED letters shown on the
display lack of strips, and then show the current
soware version.
4. 2 seconds aer it switches to working status:
Heating up, it shows “HEAt”. Setting function
value is allowed when heating up. With no op-
eration aer 4 seconds, it goes back to “HEAt”
status.
5. Wait about 9 minutes for heating element to
heat up.
6. There are 6 DMX modes for choice; 1CH, 2CH,
3CH, 5CH, 7CH, & 9CH please choose the mode
by menu: It shows”d1” to “d9”.
7. When completed heating, it shows control
mode: It shows “.dx” or “A.xxx”, please set the
unit to the desired DMX 512 address, and DMX
control available, wireless control not available.
Your Steam 1500 RGB is now ready for opera-
tion with your DMX controller.
8. If desired, connect another fog machine: Plug
one end of another signal cable in to the output
socket (N of gure) on the back of the rst
Steam 1500 RGB; plug the other end of the
signal cable to the input socket on the back of
the second Steam 1500 RGB. Follow the same
procedure to link more fog machine, if desired;
whole link is daisy chain.
• Manual fogging could be work with DMX
control operation at the same time.
• When shot down, the present function status
will be saved automatically and continue
when Powered on next time.
• If the red dot before the letters or in the
middle of the letters (.dx or A.xxx) on the
display is ashing, heating is not completed
yet, and duration of fogging is only 1-3 sec-
onds. If the red dot is lighted and does not
ash, heating is completed, and duration of
each fogging can reach 8-9 seconds.
English version

P. 12
Neo Steam 1500 RGBA -
6. DMX CHART
1 Ch mode
2 Ch mode
3 Ch mode
5 Ch mode
7 Ch mode
CH1
FOG & CH.A COLOR MACRO
32-255 = MAX FOG, Random Color Chang
0-31=OFF
CH1 CH2
FOG COLOR MACROS
32-255 = MAX FOG Color Macro 1~29
(please see gure 3 - color macro list)
0-31=OFF
CH1 CH2 CH3
FOG COLOR MACROS STROBE
32-255 = MAX FOG Color Macro 1~29
(please see gure 3 -
color macro list)
160-255 Random Strobe (Slow>Fast)
0-31=OFF
96-159 Pulse-Eect in sequence
32-95 Strobe Eect (Slow > Fast)
0-31 Strobe O
CH1 CH2 CH3 CH4 CH5
FOG RED GREEN BLUE AMBER
32-255 MAX FOG 1-255 MIN to MAX 1-255 MIN to MAX 1-255 MIN to MAX 1-255 MIN to MAX
0-31=OFF 0=OFF 0=OFF 0=OFF 0=OFF
CH1 CH2 CH3 CH4 CH5 CH6 CH7
FOG RED GREEN BLUE AMBER STROBE MASTER
DIMMER
32-255 MAX
FOG
1-255 MIN
to MAX
1-255 MIN to
MAX
1-255 MIN to
MAX
1-255 MIN to
MAX
160-255 Ran-
dom Strobe
(Slow>Fast)
1-255 MIN to
MAX
English version

P. 13
- Neo Steam 1500 RGBA
7. COLOR MACRO LIST
9 Ch mode
0-31=OFF 0=OFF 0=OFF 0=OFF 0=OFF 96-159
Pulse-Eect
in sequence
0=OFF
32-95 Strobe
Eect
(Slow > Fast)
0-31 Strobe
O
CH1 CH2 CH3 CH4 CH5 CH6 CH7 CH8 CH9
FOG RED1 GREEN1 BLUE1 AMBER RED2 GREEN2 BLUE2 MASTER
DIMMER
32-255
Max Fog
1-255 MIN
to MAX
1-255 MIN
to MAX
1-255 MIN
to MAX
1-255 MIN
to MAX
1-255 MIN
to MAX
1-255 MIN
to MAX
1-255 MIN
to MAX
1-255 MIN
to MAX
0-31=OFF 0=OFF 0=OFF 0=OFF 0=OFF 0=OFF 0=OFF 0=OFF 0=OFF
Value Color Value Color
0-7 OFF 128-135
Red_1 = 185 Red_2 = 100
Green_1 = 55 Green_2 = 70
Blue_1 = 233 Blue_2 = 167
Amber = 0
8-15
Red_1 = 255 Red_2 = 0
Green_1 =0 Green_2 = 0
Blue_1 = 0 Blue_2 = 0
Amber = 0
136-143
Red_1 = 63 Red_2 = 25
Green_1 = 69 Green_2 = 32
Blue_1 = 18 Blue_2 = 177
Amber = 255
16-23
Red_1 = 0 Red_2 = 0
Green_1 =255 Green_2 = 0
Blue_1 = 0 Blue_2 = 0
Amber = 0
144-151
Red_1 = 0 Red_2 = 0
Green_1 = 254 Green_2 = 125
Blue_1 = 0 Blue_2 = 125
Amber = 33
24-31
Red_1 = 0 Red_2 = 0
Green_1 = 0 Green_2 = 0
Blue_1 = 255 Blue_2 = 0
Amber = 0
152-159
Red_1 = 0 Red_2 = 0
Green_1 = 200 Green_2 = 200
Blue_1 = 200 Blue_2 = 139
Amber = 0
English version

P. 14
Neo Steam 1500 RGBA -
32-39
Red_1 = 0 Red_2 = 0
Green_1 = 0 Green_2 = 0
Blue_1 = 0 Blue_2 = 0
Amber = 255
160-167
Red_1 = 45 Red_2 = 122
Green_1 = 0 Green_2 = 0
Blue_1 = 156 Blue_2 = 77
Amber = 0
40-47
Red_1 = 0 Red_2 = 0
Green_1 =255 Green_2 = 0
Blue_1 = 0 Blue_2 = 255
Amber = 0
168-175
Red_1 = 200 Red_2 = 177
Green_1 = 0 Green_2 = 0
Blue_1 = 235 Blue_2 = 220
Amber = 0
48-55
Red_1 = 255 Red_2 = 0
Green_1 = 0 Green_2 = 0
Blue_1 = 0 Blue_2 = 255
Amber = 0
176-183
Red_1 = 80 Red_2 = 55
Green_1 = 178 Green_2 = 55
Blue_1 = 44 Blue_2 = 166
Amber = 255
56-63
Red_1 = 255 Red_2 = 0
Green_1 = 0 Green_2 = 0
Blue_1 = 0 Blue_2 = 0
Amber = 255
184-191
Red_1 = 130 Red_2 = 75
Green_1 = 222 Green_2 = 170
Blue_1 = 28 Blue_2 = 195
Amber = 111
64-71
Red_1 = 255 Red_2 = 0
Green_1 = 0 Green_2 = 255
Blue_1 = 0 Blue_2 = 0
Amber = 0
192-199
Red_1 = 0 Red_2 = 88
Green_1 = 142 Green_2 = 48
Blue_1 = 0 Blue_2 = 200
Amber = 200
72-79
Red_1 = 0 Red_2 = 0
Green_1 = 0 Green_2 = 0
Blue_1 = 255 Blue_2 = 0
Amber = 255
200-207
Red_1 = 255 Red_2 = 255
Green_1 = 0 Green_2 = 0
Blue_1 = 0 Blue_2 = 0
Amber = 0
80-87
Red_1 = 0 Red_2 = 255
Green_1 = 255 Green_2 = 0
Blue_1 = 0 Blue_2 = 0
Amber = 0
208-215
Red_1 = 0 Red_2 = 0
Green_1 = 255 Green_2 = 255
Blue_1 = 0 Blue_2 = 0
Amber = 0
88-95
Red_1 = 128 Red_2 = 77
Green_1 = 100 Green_2 = 0
Blue_1 = 50 Blue_2 = 165
Amber = 0
216-223
Red_1 = 0 Red_2 = 0
Green_1 = 0 Green_2 = 0
Blue_1 = 255 Blue_2 = 255
Amber = 0
96-103
Red_1 = 77 Red_2 = 77
Green_1 =210 Green_2 = 0
Blue_1 = 56 Blue_2 = 0
Amber = 234
224-231
Red_1 = 0 Red_2 = 0
Green_1 = 0 Green_2 = 0
Blue_1 = 0 Blue_2 = 0
Amber = 255
104-111
Red_1 = 82 Red_2 = 134
Green_1 = 0 Green_2 = 0
Blue_1 = 99 Blue_2 = 222
Amber = 50
232-239
Red_1 = 255 Red_2 = 255
Green_1 = 255 Green_2 = 255
Blue_1 = 255 Blue_2 = 255
Amber = 255
English version

P. 15
- Neo Steam 1500 RGBA
112-119
Red_1 = 0 Red_2 = 210
Green_1 = 79 Green_2 = 50
Blue_1 = 0 Blue_2 = 50
Amber = 220
240-247
Random_1
120-127
Red_1 = 63 Red_2 = 145
Green_1 = 75 Green_2 = 166
Blue_1 = 0 Blue_2 = 100
Amber = 44
248-255
Random_2
8. TROUBLESHOOTING
This troubleshooting guide is meant to help solve
simple problems. If a problem occurs, carry out the
steps below in sequence until a solution is found.
Once the unit operates properly, do not carry out
following steps. If the problem persists, refer servic-
ing to a qualied technician.
Power Connected but No Fog
Is Emitted
1. Check the power supply. Plug the unit into
grounded electric power supply socket with
proper voltage.
2. Check your controller if in correct connection,
test the battery if power enough for wireless
controller.
3. Check your DMX address setting.
4. Disconnect fog machine from electric power
supply. Replace fuse with one of the same type.
Other Abnormal Situations that Could Make
Heater & Pump Stop Working
• Flashing and showing ”Erro” means heater is
too hot or thermos sensor is cut.
English version

P. 1 6
Neo Steam 1500 RGBA -
9. MAINTENANCE
Before doing maintenance, please make sure that
the power is cut, the power cord is unplugged, and
the machine itself has cooled down. The mainte-
nance must be done by qualied person.
• The fog liquid is not allowed to get dirty. Be
sure to always clean or replace the caps on the
fog liquid vessel and tight the cover of the fog
machine liquid tank immediately aer lling.
• Periodically check the connecions among
the oil tube, the pump and the heater to see
if there’s oil leaking. If positive, lock tight the
connections carefully with proper tool.
• PC board should be kept from being dirtied
with oil. In case this happened, dismantle care-
fully the PCB, and have it brushed clean both
sides with dilute alcohol. Leave it dry itself,
then install it back. Make sure all wires are well
connected.
• Clean the metal cover with dry cloth.
English version

P. 17
- Neo Steam 1500 RGBA
APPENDIX – A DZ-2
Wireless Remote Control Operation
The Steam 1500 RGB is designed with wireless
remote controller. Workable remote distance
possibly extends to 30 meters. Detail operation as
bellows;
A. Four-channel wireless remote control trans-
mitter: Key A, B, C, D respectively “CH.A, CH.b,
CH.c, CH.d”. Each channel can be individually set
its Color Marco (see “SYSTEM MENU” instruction)
by menu of the machine. Send smoke signals when
the button is pressed, release the button to stop
smoke.
B. Receiver:
• Red LED: Power indication. Once the fog ma-
chine is plugged, the red LED on this receiver
of remote controller will light up. Unplug the
power, the red LED o.
• Green LED: Status indication.
1. Warm-up, the green LED goes out.
2. Warm-up is completed, the green LED light up.
• In the warm-up is completed, the green LED
light up period, if the receiver receives a valid
signal emitted by the transmitter, the green
LED o. If the transmitter stop signal, then
restore the green LED lights while stopped
puing smoke.
• The fog machine is o emission for about 9
minutes during warm-up and re-heating cycles
(about 80 seconds), and turns on when the
temperature reached again.
Important Remark
When the green LED on the controller lights up, it
1. 1/4” stereo jack
2. Button
3. Green LED (fog)
4. Red LED (power)
English version

P. 18
Neo Steam 1500 RGBA -
Design and product specications are subject to change without prior notice.
English Version
does not mean that the machine has got complete-
ly heated, but just means that the machine reaches
an enough temperature for fogging. Check the red
dot in the middle of CH.A (or others like CH.b etc.)
on the LED display to know whether the machine
has completed heating up or not. If the red dot is
ashing, heating is not completed yet, and duration
of fogging is only 1-3 seconds. If the red dot is light-
ed and does not ash, heating is completed, and
duration of each fogging can reach 8-9 seconds.
Specification of Compatible
Controllers
Model DZ-2
Eective Distance (open space, no barrier) Up to 30 m
Connector 1/4” stereo jack
Function Control 4 color macros
Dimension (LxWxH)
Receiver 91×58×29mm with 600mm cable
(stereo jack included).
Transmitter 63×39×14mm
Weight Receiver 85g / Transmitter 31g

P. 1 9
- Neo Steam 1500 RGBA
1. DESCRIPCIÓN
STEAM 1500 RGBA
Máquina de humo profesional con efecto RGBA
Steam 1500 RGBA es una maquina de humo profe-
sional 2-en-1 que cuenta con 28 LEDs RGBA de 3W,
agregandole un atrayente efecto visual a su función
original. Gracias a la incorporación de LEDs ámbar
a la clásica mezcla RGB, el equipo logra una mezcla
de color muy completa y atractiva. Con una salida
de 40.000 pies cúbicos por minuto y un tanque con
una capacidad de 2 litros, Steam 1500 RGBA es una
máquina de humo de gran caudal y desempeño que
está diseñada para ser instalada . El equipo trabaja
en hasta 9 canales DMX e incluye, por último, un
control remoto inalámbrico que permite ejecutar a la
distancia cuatro programas diferentes.
Fuente & Ópticas
• Fuente de luz: 28 LEDs RGBA (8R, 7G, 9B & 4A)
de 3W
• Vida útil promedio: 50.000 horas
Salida
• Salida: 40.000 pies cúbicos por minuto
• Tiempo de calentamiento: 9 minutos
• Tanque: 2 lts. / 67 Oz.
• Consumo de líquido: 150 ml/min / 5 oz/min
Control
• 29 macros de color
• Modos de operación: DMX, control remoto in-
alámbrico (incluido), patrones LED & manual
• Canales DMX: 1/2/3/5/7/9
Físico
• Conectores DMX: 2 conectores XLR (XLR-3 de
entrada & salida)
• Conector control remoto: 1 conector TRS 1/4”
• Display LED de 4-digitos
• Dimensiones: 458x307x207 mm. / 18x12x8,1
pulg.
• Peso: 10,7 Kg. / 23,5 Lbs.
Versión Español

P. 2 0
Neo Steam 1500 RGBA -
Versión Español
2. ADVERTENCIA
Como con cualquier dispositivo electrónico,
tome todas las precauciones necesarias para uti-
lizar su Steam 1500 RGBA. Antes de conectar el
equipo, procure llenar el tanque con la cantidad
de líquido necesario. Vacíe el tanque durante los
periodos de inactividad.
• Utilice únicamente conexiones con toma a tie-
rra para suministrar corriente a la unidad. Para
obtener más información sobre la fuente de
alimentación, reérase a las especicaciones
técnicas de la unidad. Este producto debe
conectarse a una toma a tierra.
• Desconecte la unidad del suministro eléctrico
cuando esté en desuso, cambie el fusible o car-
gue el tanque. Mantenga la unidad seca y lim-
pia. En caso de que haya ingresado líquido en el
producto, desconéctelo de inmediato. Póngase
en contacto con el servicio técnico autorizado
de inmediato.
• Utilice el producto sobre una supercie plana
sin inclinaciones.
• Procure vaciar el tanque y asegurar el tapón del
tanque antes de transportar la unidad.
• El equipo no contiene piezas que puedan ser
reparadas por el usuario. En caso de precisar
asistencia, póngase en contacto con el servicio
técnico autorizado.
• Por su seguridad, está prohibida la introduc-
ción de modicaciones no autorizadas en el
equipo.
• Mantenga el producto fuera del alcance de
niños y usuarios inexpertos. No deje la unidad
en funcionamiento y sin supervisión.
• La boquilla de la unidad alcanza una tempe-
ratura de 200°C durante su funcionamiento. ¡No
la toque! Instale el equipo a una distancia mí-
nima de 100 cm de otros objetos o personas. No
apunte la salida de humo directamente hacia
las personas.
• Mantenga la cubierta cerrada durante el fun-
cionamiento de la unidad. Instale la unidad en
un ambiente bien ventilado y con circulación de
aire. Evite introducir objetos en las ranuras de
ventilación. Mantenga una distancia mínima de
20 cm entre la unidad y la pared o el techo para
garantizar una correcta ventilación.
• Mantenga la unidad alejada de objetos ina-
mables y llamas expuestas. No apunte la salida
de humo hacia llamas o chispas. Utilice única-
mente líquido para humo de primera calidad
y a base de agua. Nunca introduzca líquidos
combustibles en el tanque de la unidad.
• Permita que la unidad se enfríe antes de re-
alizar cualquier tarea de mantenimiento.
• Utilice únicamente el líquido de humo a base
de agua recomendado por Ampro. Cualquier
otro tipo de líquido puede generar obstrucción
y oxidación de los componentes.
• Verique que la unidad cuente con suciente
líquido de humo en el tanque. Poner la unidad
en marcha sin líquido puede dañar el motor y el
calentador.
• Desconecte el equipo de inmediato si observa
un funcionamiento anómalo. Escurra todo el
líquido del tanque, coloque la unidad en su em-
balaje original y llévelo a su distribuidor para
que lo revise. Procure vaciar el tanque antes de
transportar la unidad.
• No beba el líquido de humo. En caso de in-
gerirlo, llame al médico de inmediato. Evite el
contacto con los ojos y la piel. En caso de que
ocurra, lave con abundante agua.
• Lea atentamente el manual antes de utilizar el
equipo. Procure seguir todas las instrucciones y
advertencias. No retire las etiquetas informati-
vas o de advertencias de la unidad.
Instrucciones de seguridad
• Lea todas las instrucciones.
Table of contents
Languages:
Other NEO Fog Machine manuals
Popular Fog Machine manuals by other brands

Beamz Pro
Beamz Pro 160.507 V1.0 user manual

Curtis Dyna-Fog
Curtis Dyna-Fog SUPERHAWK II 1 Series Installation, Operation, Service and Maintenance Instructions

PFX
PFX Professional Haze Pro 1000 instruction manual

Hygeniq
Hygeniq FOGGER 1.0 user manual

Monacor
Monacor IMG STAGELINE FM-910 instruction manual

Antari
Antari ICE Product guide