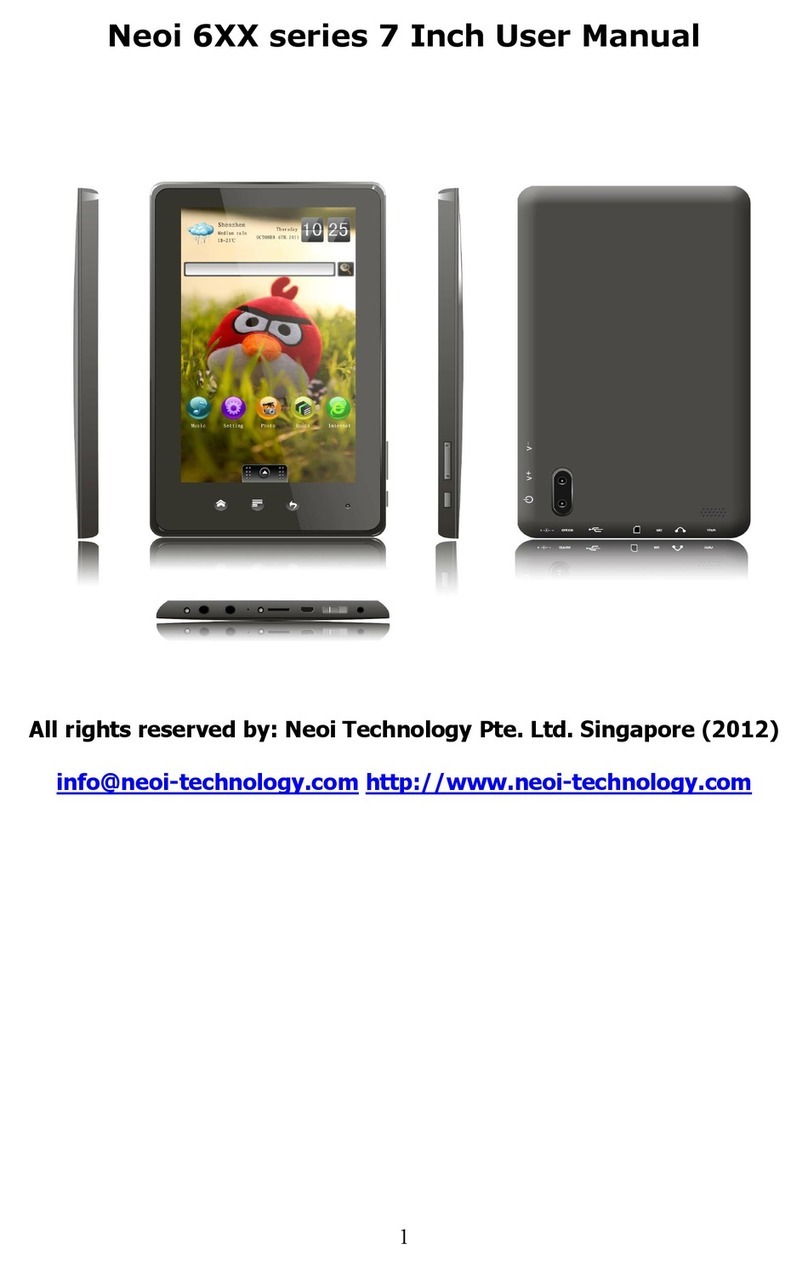
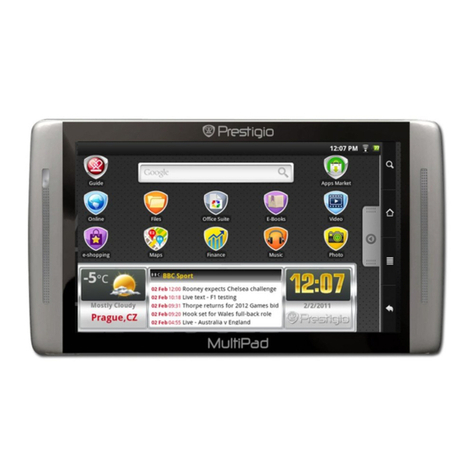
Neoi 610 User manual

NEOI 610
User Manual
All rights reserved by: Neoi Technology Pte Ltd Singapore (2012)
info@neoi-technology com http://www neoi-technology com

Table of Contents
Basic Introduction ................................................................................................................... 1
Quick Start .............................................................................................................................. 2
Battery management and charging ................................................................................ 2
Boot and Shutdown ...................................................................................................... 3
Connect with PC ........................................................................................................... 4
Interface Introduction .............................................................................................................. 5
Bottom ar of the Interface ........................................................................................... 5
The HOME Screen menu.............................................................................................. 6
Desktop ........................................................................................................................ 7
Basic Operation ....................................................................................................................... 7
Date and time settings: ................................................................................................. 8
Display settings ............................................................................................................ 8
Wireless Connection: .................................................................................................... 9
Applications install and uninstall ................................................................................ 10
Browser ...................................................................................................................... 12
Video player: .............................................................................................................. 12
Music player: .............................................................................................................. 12
Photo Browser ............................................................................................................ 13
Camera ....................................................................................................................... 14
Sound Recorder .......................................................................................................... 15
Market ........................................................................................................................ 16
Frequently Asked Questions .................................................................................................. 16
Important Safety Precautions ................................................................................................. 18

1
Basic Introduction
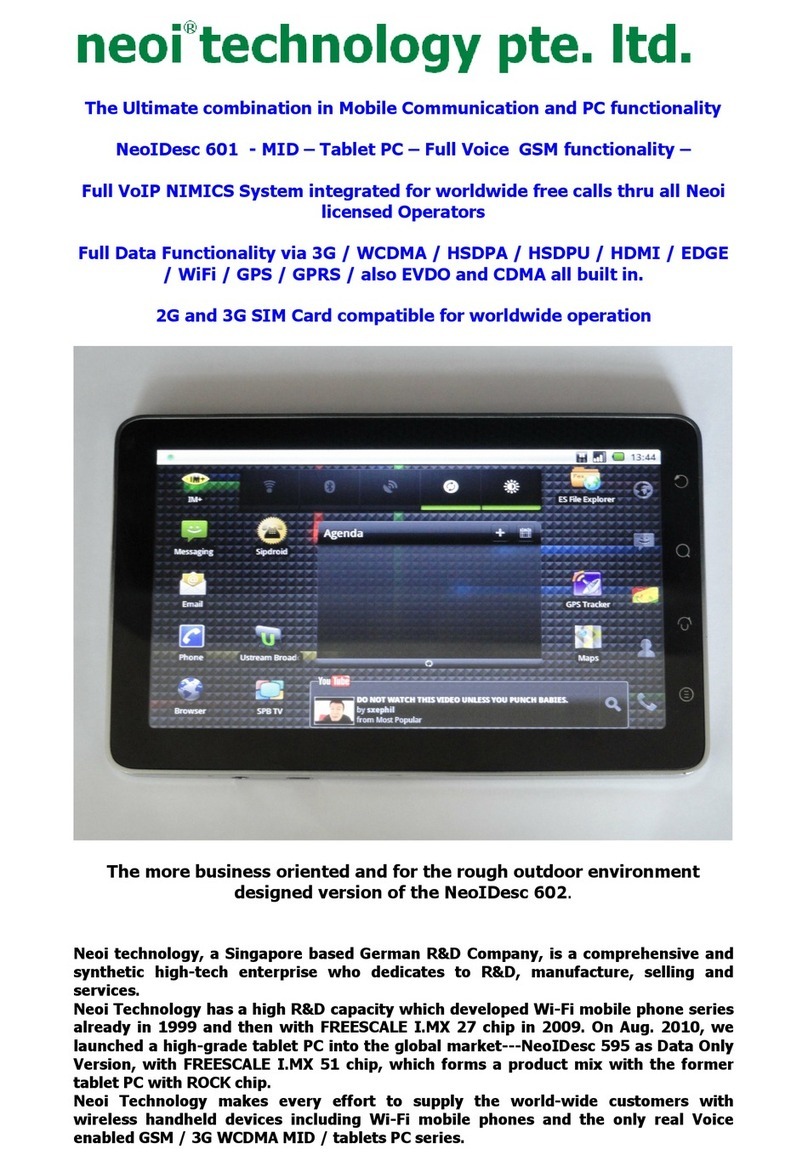
l CPU: Boxchip A10 Cortex A8 1.5Ghz
l Display:9.7 " 1024 * 768 IPS LCD
l Camera: Build-in
.3M pixel Front camera for Video Calls, 5MP Back side Camera
for Crystal clear HD Pictures
l Operating System: Google Android 4.0 – can e upgraded as availa le
l Network Connection: Built-in 802.11 /g/n wireless
l Audio format: MP3,WMA,MP2,OGG,AAC,M4A ,FLAC,APE, WAV
l Video format: max 2160p full HD video
AVI,3GP,MP4,MPG,RM,RMVB,MOV,FLV,WMV,MKV) , allows Video
Conference with NIMICS Communicator – Glo al Free Calls
l TOUCH PANNEL: Multi-touch Capacitive screen, IPS, 10 point multi Touch
l Language: support multiple language up to 125
l Audio and video input / output:
Built-in stereo speakers
Headphone output
HDMI 1080p HD output
Online Streaming from Neoi Market
l Ports: mini USB*1(OTG) ,mini USB(HOST)*1,mini HDMI*1,Earphone * 1, TF
card slot * 1,DC IN*1,Reset*1
l Buttons: Back/Power/Vol+/Vol-

2
Quick Start
Battery management and charging
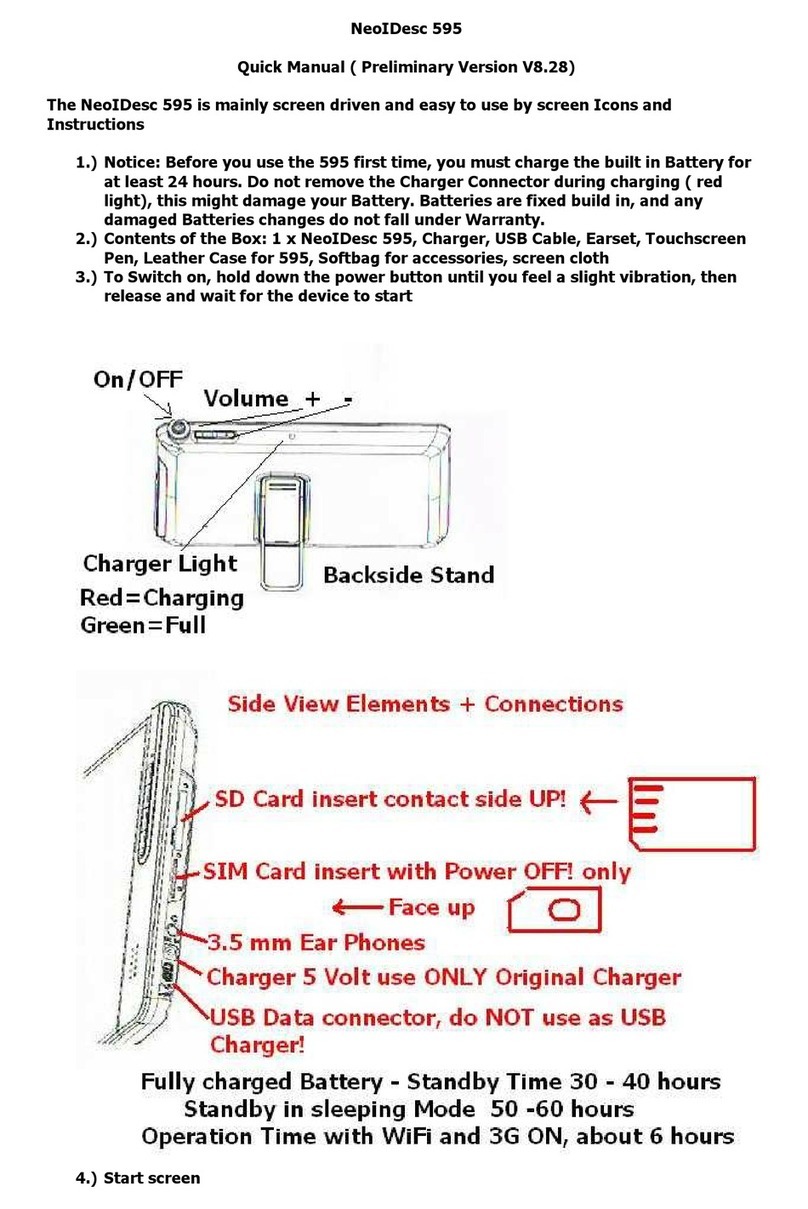
Before using this device, please charge it fully. Put the charger adapter into the DC jack,
the device will start to charge.
TIPS
:
Ø This device adopts uilt-in polymer attery. Only the specified charger should e
used. Please ALWAYS charge the Batteries 100% after usage or a minimum of 10 hours
charging. BEFORE first Usage , Batteries MUST e charged for 24 hours, or Battery
Warranty might e void! When it is charging, the icon of attery will e rolling.
when the charging finish, the attery icon will turn green and stop rolling.

3
Ø If you do not use this device for a long time, please charge/release it once one
month to avoid deep discharge.
Ø When it is power off ecause of low attery, connect to the charger, the device will
indicate “low power” or “charging”, please wait for a second until the machine can turn to
the main interface once the power is enough.
Ø The uilt-in polymer attery should e charged regularly. The damage caused y
attery over-consuming is not included in the warranty.
Boot and Shutdown
Boot: Press and hold the power utton, the system will enter the oot process
System has een started, entering the Android system:
The system enters the default home interface.

4
Shutdown: Press the power utton, pop-up Power off ,Click OK, you can safely shut
down.
Connect with PC
By mini USB (OTG) interface of the device, You can connect with PC y mini USB ca le
attached with the device. USB Data transferring is availa le. You can operate the files
through the PC.
When your device is connected successfully, to pull
the notification area of the status
ar, can see the following icon

5
Then click to enter the next
Click , Then the device can transmission data with PC.
Note: The device also supports the FAT32 format for external devices, for example U disk,
Micro SD card to Transfer data
Interface Introduction
Bottom bar of the Interface
A. WIFI signal status icon: If connected to the WIFI wireless network, the icon will e

6
displayed
B. OTG connect icon: If the device connected to the PC, will show the OTG connected
icon.
C. Time display: Display the time of the current system, which has een set.
D. Battery status icon: Displays the current attery level and the charging status.
E. Menu, Home, Back, virtual uttons
The HOM Screen menu
Press the menu icon on the device, it will display a home screen menu as
following:
Wallpaper: Users can replace the wallpaper with you wishes.
Manage apps: It can quickly open a list of all applications.
S
Settings: Fast access to system settings, user can choose “Wireless & networks”,
“Display”, “Date & time” etc, for personalized settings.

7
Desktop
When sliding around with your finger to switch the main screen, the desktop fixed on the
main screen, will not move. User could drag the application icon placed on the desktop
area in the main screen.
Basic Operation
Click the "Settings" icon in the main applications area, you can open the system
settings interface, as shown elow:

8
Select the appropriate operation of the relevant items, such as: wireless and network,
Display, date and time settings, a out Device, etc
Date and time settings:
Click "Date & time" to enter the Date and time settings interface:
Select to set the date, select the time zone, set the time, time format, date format and other
information.
For example, choose to set the date, as follows:
Select +: that the increase of 1 unit,
Select -: that the reduction of 1 unit.
Also you can choose the num er, enter the input mode. Directly entering the desired
num er, then click “Done” to set the Date.
Display settings
In the settings interface choose " Display " to enter the display settings interface, select
"Brightness", Pull the progress ar to adjust the rightness ,as elow interface:

9
Click Sleep, Adjust the inactivity time of the device. You can press power key to activate
the device. When display "Screen locked" interface, follow the prompts to unlock it.
Wireless Connection:
Click the main menu "Settings" icon, go to "Settings" screen, click on "Wireless and
networks" into the "Wireless and networks settings" interface. Turn on Wi-Fi switch, the
Wi-Fi module uilt-in the device will search AP lists automatic , click the searched AP can
e used, will pop up settings dialog, please follow the prompts to complete the WIFI
network links. Some encrypted network, need to enter a valid key. As shown elow:

10
According to the a ove method to connected Wi-Fi, as shown elow:
Applications install and uninstall
Note: Please install ONLY applications that have been tested
and approved by Neoi Technology. To make your decision easier
please go to the NeoiMarket and re er to approved APK or Neoi
Devices.

11
Install applications
1. First you should select the Unknown sources which allow installation of non-Marekt
apps
2. Copy the APK installer software to Micro SD or NAND FLASH.
3. click File Manage to find the app directory, then Select applications to install
Users can "Android market" online installation, or download via the computer, or online
through the machine uilt-in rowser to download and install.
Uninstall applications

12
Pitch on the item "Settings - Apps –DOWNLOAD ", select the appropriate application has
een installed, click the applications which you need to uninstall
Browser
When the network connected, open the We rowser enter the URL, you can quickly
rowse the We ; or through the main desktop search ar enter the URL, open the we
page.
Video player:
Online video: The product supports flash 11.0 online video play ack.
Local video: Click the Super-HD Player icon , The Player can loading new al ums
and photos automatically which stored in local disk or micro SD card, then select the
videos to play ack
Music player:
Click the music icon , you can enter the music player interface.

13
Click the music files you will enter the player to play music
Click “ ”
Play the previous music, long press to fast reverse.
Click “ ”
Click it to suspend, the icon turn to “ ” ,click and return to the
normal playing again.
Click “ ”
To play the next song, long press to do function.
Click “ ”
To display the present playing list.
Click “ ”
To select the random playing mode.
Click “ ”
To select the repeat playing mode.
Photo Browser
Click to get into Photo Browser directly. there will list all the picture files and
video files. As shown elow:

14
Select a picture file, enter the picture play ack interface, as shown elow. Can select
"Zoom", "narrow" "set" and "delete" etc operation.
Camera
Click the Camera icon in the applications menu, as shown elow
Click the camera shutter to take photos or videos

15
Sound Recorder
Click the recorder icon in the applications menu, as show elow:
Note: Select "Record" utton to record, when it is completed, select "Stop"

16
utton . At this point you can find the recordings folder in the file rowser,
which saved the recordings.
Market
Click the icon into the "NeoiMarket" interface. If you have no Gmail
account, should create a Gmail account and signup / sign in into the NeoiMarket . The
NeoiMarket will also allow you to access the Google Market / in
areas where Google does not allow access . Select “Accept” to enter market, as shown
elow
Frequently Asked Questions
Android
Q: What Android OS version is on my Device?
A:

17
APK
Q: What is APK?
A: APK is Android Package acronym that Android installation package.
Q: How to obtain the APK?
A: You can download via PC-side installation thru USB or SD card., you can also access
"Neoi Market" online ( http://www.neoimarket.com )to download and install.
mail
Q: Can I use any of my personal email addresses to send/receive email?
A: The device supports POP3 and SMTP accounts. Some free email accounts are not
supported on mo ile devices. Check with your email provider to see if you account is
supported.
Q: Which media cards are compatible with my Device?
A: micro SD cards.
Music
Q: What type of music files can I play on my device?
A: MP3,WMA,MP2,OGG,AAC,M4A ,FLAC,APE, WAV . You can also access the large
Data Base of the NeoiMarket Music files once you are a mem er of NeoiMarket.
Photos
Q: What type of photo files can I view on my device?
A: JPG, JPEG, BMP , JPG and PNG.
Video
Q: What type of video files can I play on my device?
A: AVI
3GP
MP4
MPG
RM
RMVB
MOV
FLV
WMV,MKV(max 2160p full
HD video). Allows the Content streaming directly from NeoiMarket.
Q: Can I play YouTube videos on my device?
A: Yes. You can tap the YouTu e application icon to quick access videos.

18
Wi-Fi
Q: Do I need a Wi-Fi adapter to connect to the Internet?
A: No. The Wi-Fi adapter is uilt-in to the device.
Important Safety Precautions
Always follow these asic safety precautions when using your Ta let. This reduces the risk
of fire, electric shock, and injury.
Ø Do not expose this product to rain or moisture.
Ø Keep the device out of direct sunlight and heat sources.
Ø Protect the power cord. Route power cords so that they are not likely to e walked
on or pinched y items placed on or against them. Pay particular attention to the point
where the cord attaches to the device.
Ø Only use the AC adapter included with the device. Using any other power adapter
voids your warranty.
Ø Do not remove the cover. There are no user-servicea le parts inside.
Ø Clean your Device
Treat the screen gently. To clean fingerprints or dust from the screen, we recommend using
a soft, non-a rasive cloth such as a camera lens cloth.
For all other Questions consult the Neoi Technology only services at
http://www.neoi-technology.com , http://www.neoi.de , http://www.neoimarket.com ,
http://www.nimics.net or
eMail to: info@neoi-technology.com for your nearest service station or any question.
Neoi Products are worldwide protected under various copyrights, Trademark registrations,
patents, licenses. Any violation, copy or what so ever will e handled under applica le
local laws.
Table of contents
Other Neoi Tablet manuals
