Neptune Dartmouth Mast Post & Light User manual

Neptune, Blagrove, Swindon, Wiltshire SN5 8YG
t : 01793 427300 | f : 01793 427399 | e : info@neptune.com
neptune.com
Dartmouth Mast Post & Light
Installation & Care Guide
Thank you for purchasing the Neptune Mast Post and Light, we hope that it gives you years of enjoyment. To get the best from this Neptune
product, please read the care details below.
Care
If your Teak post requires cleaning, this can be done with a normal household bristle brush (not too hard) and some warm, mildly soapy
water. Wash the post down after cleaning with clean water. We do not recommend the use of high pressure hoses and steel wool or steel wire
brushes, as any residue left in the grain will rust and discolour the wood.
Treatment
Your Dartmouth Mast Post has not been treated with any special timber oil, as its natural oils will protect it against the weather. However if you
wish you can treat the post with Teak oil: follow the manufacturer’s instructions.
Timber
The Dartmouth Mast Post and Light is made from premium Teak, which was chosen for its graceful aging and hard wearing properties. Teak
is a dense, course grained hardwood used for centuries in furniture making. Teak is renowned for being the world’s best wood for outdoor
furniture and ttings due to its natural high oil content. It will weather to a beautiful silver grey colour and last for many years.
During the rst 12 months of weathering you may nd the grain lifts slightly and small cracks may appear on the end grains. Please rest
assured this will not aect the structure of your post and the grain lifting will subside over time. The lifted grain can be removed if desired, by
simply rubbing down the surface of the wood with some ne grade (180-240 grit) sandpaper (being sure to work in the direction of the timber
grain) during the initial weathering. Over time the teak will weather naturally to a smooth silvery grey.

Neptune, Blagrove, Swindon, Wiltshire SN5 8YG
t : 01793 427300 | f : 01793 427399 | e : info@neptune.com
neptune.com
20
54
115
60
Concrete
Armoured Cable
Gravel
Ground level
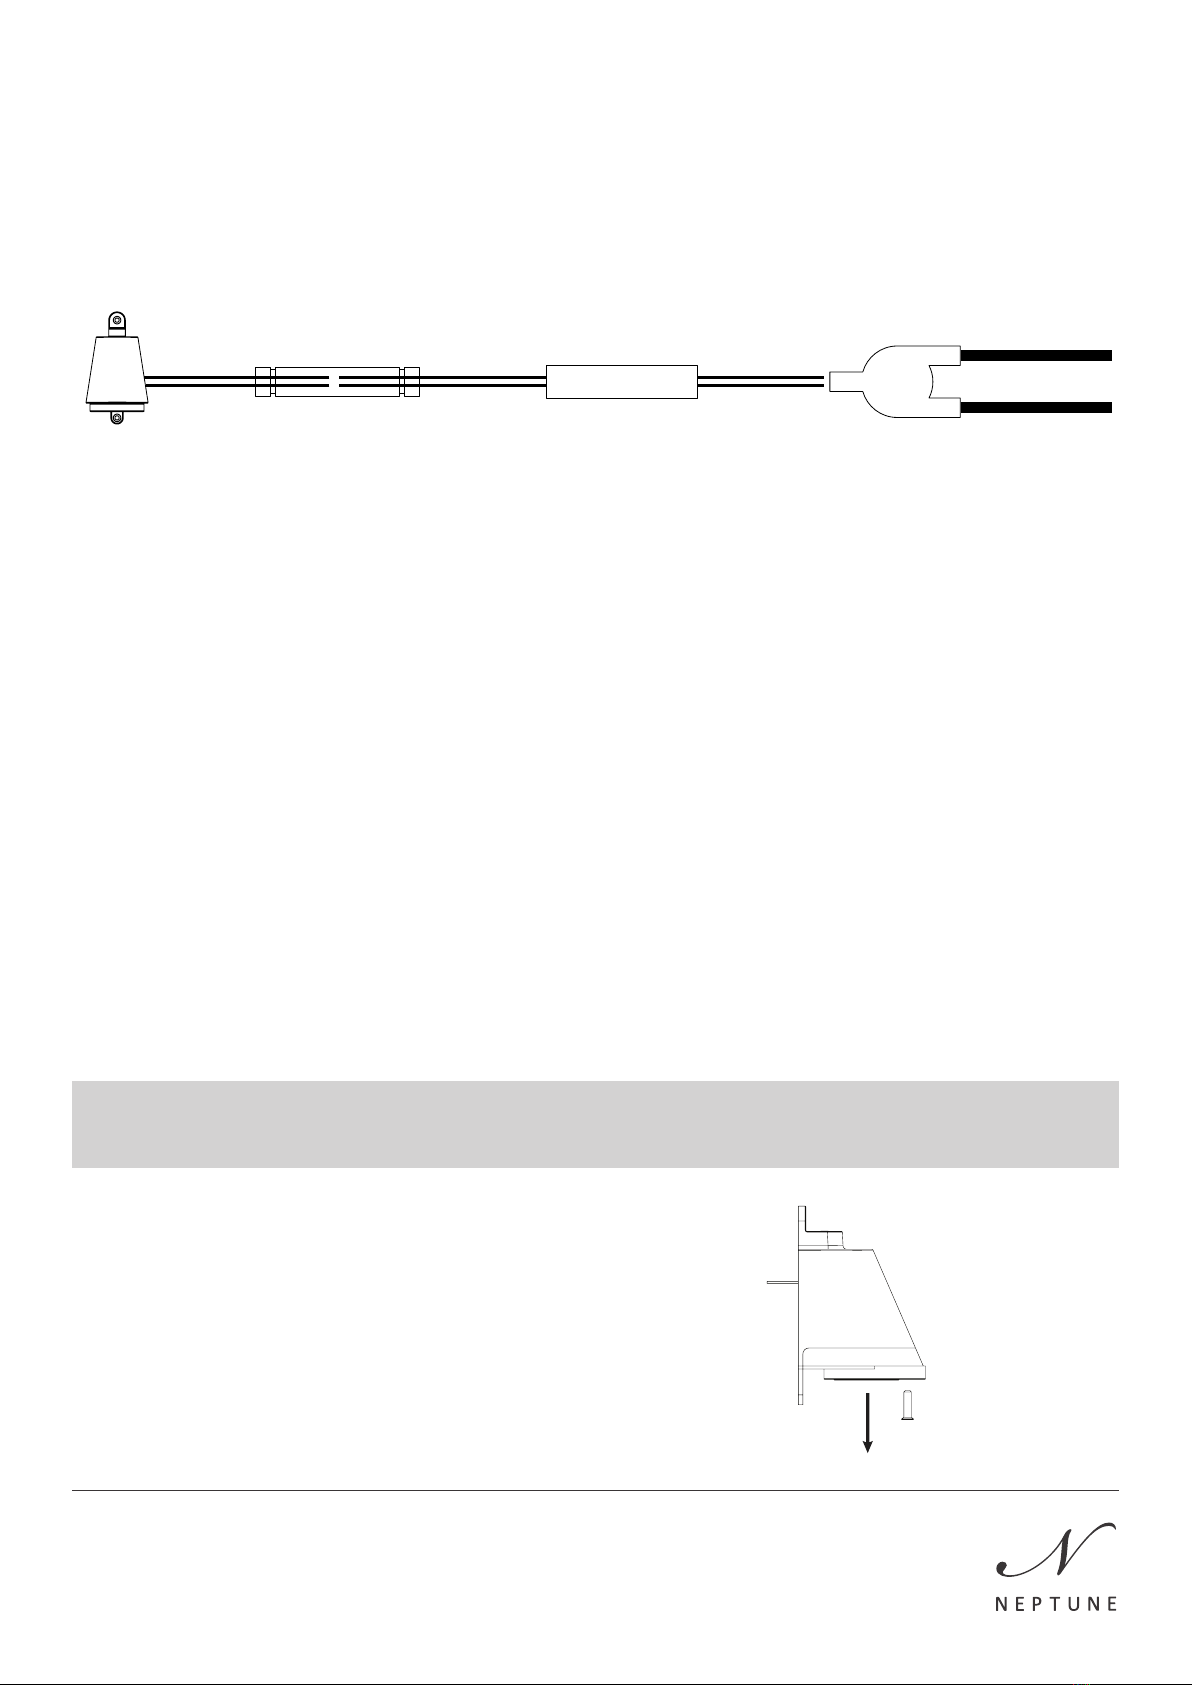
Transformer
‘Y’ Conduit Box
Black Connector
Armoured cable
IMPORTANT: Parts of this process are only suitable for a qualied electrician to carry out. Please do not attempt
them yourself. Ensure all electrical cabling is isolated and not live before commencing any work.
Stage 1: Preparation
1. Select where you would like to place the mast light. Dig a trench from your power source to this spot. To ensure that the cable
cannot be accidentally cut by a spade or fork, make sure it is at least 30cm deep.
2. Dig a square hole, 30cmx 30 cm and 60cm deep.
3. Fill the bottom 30cm of the hole with gravel (we recommend Pea Gravel) to ensure good drainage.
4. Run armoured cable from the power source. Run 3m into the hole and through the mast in a loop.
5. Place the mast in the hole, ensure it is level and then use concrete to secure it in place. Concrete mix: Mix ‘All-In’ aggregate with
ordinary cement in a ratio of 4:1 with enough water to thoroughly mix together and bind. The concrete should not slump or run.
Stage 2: Installation
IMPORTANT: Electrical connections must only be made by a qualied electrician.
1. Decide where you need the light to shine, and then drill a 10mm hole in the post following the guide in the image below:
20
54
115
60
Concrete
Armoured Cable
Gravel
Ground level
Transformer
‘Y’ Conduit Box
Black Connector
Armoured cable
Neptune, Blagrove, Swindon, Wiltshire SN5 8YG
t : 01793 427300 | f : 01793 427399 | e : info@neptune.com
neptune.com
2. Thread the light’s wiring through the hole.
3. Drill a hole for the screw that will ax the light to the pole that is thinner than the thread of the screw (this is known as a Pilot
Hole), this protects the wood against splitting.
4. Ax the light to the wooden post using the screws provided.
5. Thread the light cable all the way through the black connector provided. Tighten the top glands, but only thread the bottom
glands cap on without tightening it.
6. Connect the light to the transformer provided. Pull the connected wires back into the black connector and tighten the bottom
glands to waterproof the wire.
7. Check the armoured cable is not live, then cut the loop after the point it passes through the post.
8. Thread both ends into the bottom of a Y Conduit Box, and thread the light’s cable into the top. Wire the two together in the way
shown in the illustration below:
Stage 3: Finishing
1. Put the armoured cabling and the transformer back into the post.
2. Replace the removable top.
3. Fill in the trench with soil.
Replacing the bulb
The Dartmouth Mast Light, which is IP65-rated with an IP67-rated transformer, takes a 12V, LED bulb with a GU5.3 ttingbulb. To change it,
follow these steps:
IMPORTANT: TAKE CARE when releasing the bulb as it is spring loaded.
1. Unscrew the screw just above the face of the light.
2. Carefully pull the bulb out of its socket and push in the replacement bulb.
3. Screw the glass fascia back into place.
20
54
115
60
Concrete
Armoured Cable
Gravel
Ground level
Transformer
‘Y’ Conduit Box
Black Connector
Armoured cable
Table of contents
Popular Landscape Lighting manuals by other brands

Cooper Lighting
Cooper Lighting ACORN ACN-2 brochure

Cooper Lighting
Cooper Lighting Lexington LXF70SR2554 Specification sheet

Volt
Volt VSM-2407 installation instructions

LIGMAN
LIGMAN LA-30036 installation manual

WAC Lighting
WAC Lighting Fuego EIR3SF installation instructions

AMP Lighting
AMP Lighting VAC-ZWM1-BBZ Installation & maintenance guide


Volt
Volt VAL-2101-0-BBZ installation instructions

Thorlux Lighting
Thorlux Lighting Canolux LED manual

Landscape Vibrations
Landscape Vibrations CRISP 6 install guide

Malibu Boats
Malibu Boats LZ418 instructions

Cooper Lighting
Cooper Lighting MCGRAW-EDISON WBG Specification sheet

Heitronic
Heitronic 37285 Installation and operating instructions