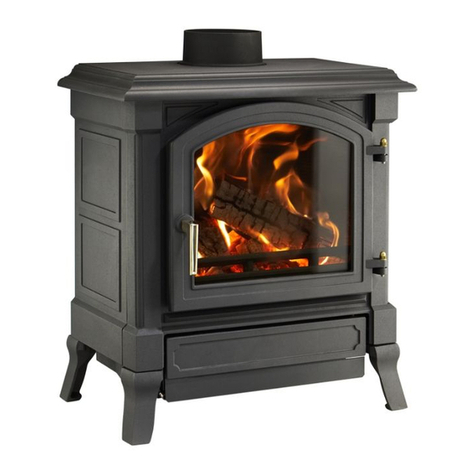
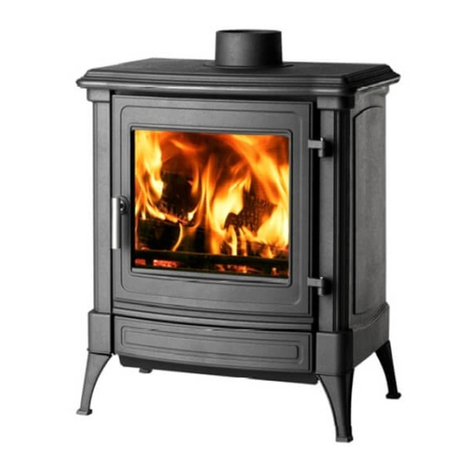
NESTOR MARTIN STANFORD 9 User manual

C07100DA352
1
STANFORD 9
STANFORD 12
STANFORD 9 PLUS
STANFORD 12 PLUS

C07100DA352
2

C07100DA352
3
STANFORD 9
STANFORD 12

C07100DA352
4
STANFORD 9+
STANFORD 12+

C07100DA352
5
ENGLISH
Stanford 9
Stanford 9+
Stanford 12
Stanford 12+

C07100DA352
6
ENSURE THAT THIS MANUAL REMAINS WITH THE APPLIANCE AND PASSED TO THE USER AFTER INSTALLATION .
DO NOT STORE OR USE PETROL OR OTHER FLAMMABLE VAPOURS AND LIQUIDS IN THE VICINITY OF THIS OR ANY
OTHER APPLIANCE
WARNING:
Improper installation, adjustment, alteration, service or maintenance can cause injury or
property damage. Refer to this manual for assistance or consult a qualified (experienced)
installer.
SPECIAL OPERATING INSTRUCTIONS
Due to high temperatures the appliance should be located out of traffic and away from
furniture and draperies.
Advise all adults and especially children to be alert to the hazard of high temperatures
and that they should stay away to avoid burns.
Supervise young children when they are in the same room as the appliance and/or use
a fire guard.
It is imperative that the control compartments and circulating air passageways of the
appliance be kept clean.
The appliance should be inspected before use and the chimney cleaned at least
annually. More frequent cleaning may be required due to poor operation, installation, or low
quality fuel.
Your Cast lron heating appliance has been carefully constructed to give satisfaction
and optimum service. You could not have made a wiser choice. The efficiency of the
equipment will depend on close attention in the following recommendations.
ACCESSORIES SUPPLIED FOR THE FIRE.
Poker
Forked bandle to remove ash pan
Hooked handle for air adjustment and operating oscillating grate.
Triangular feet to hearth spacers.
Glove.
OPERATING FOR THE FIRST TIME OR AFTER LONG PERIODS OF
NO USE.
It is important that 2 or 3 small fires are burned in the appliance before the appliance
is operated at maximum. This will allow the cast iron construction to settle and the painted
coating of cast black stoves to cure. While the paint cures a pungent smell may be detected.
Open windows to vent the smell and smoke.
OPERATORS INSTALLATION GUIDE
The appliance must be installed in compliance with current regulations
(Building Regulations j 1/2/3). It must be placed at least 40 cm (16’’) away
from any combustible materials. lt may be necessary to protect the wall and

C07100DA352
7
surrounding materials. The appliance must be placed on a solid, fire proof
hearth conforming to the current regulations. Ensure that the chimney is
free from soot and debris and is as straight as possible. (Fig 1) the chimney
must be impermeable and its sides not too rough. The connection between
the unit and the chimney must be airtight and made with noncombustible
materials, protected against oxidation (enameled or stainless steel flue
pipe).
If the chimney is in poor condition or creates a poor chimney draught, consider lining
the flue. It is very important that the chimney does not create an excess draught. Consider
planning for the inclusion of a draught stabilizer in the installation, Alternatively
(recommended) a chimney cowel, designed to stabiliser flue conditions. The Aerocowel is
one such cowel sold for this purpose.
Stove flue outlet sizes
Stanford 9 Internal: 125 mm Stanford 12 Internal: 153 mm
Extemal: 139 mm Extemal: 167 mm
The chimney will be sufficiently high and clear of the house ridge by at least
1 meter to prevent any down draught. It will be protected by insulating
material in order to reduce the risk of soot stains in the top part of the flue
and possibly be fitted with a cowl to keep out the rain.
FIG.1
5
Good
Bad
Thermostat setting.
Adjust to 5 mm of opening.
When the stove is cold.
5 mm for wood and coal
O mm for coal only.

C07100DA352
8
AIR SUPPLY TO APPLIANCE.
A room air entry opening or openings is or are needed. These must have a
total free area of at Ieast 550mm2per kW of rated output above 5kW. Where
a flue stabiliser is used the total free area should be incraesed by 300mm2
for each kW of rated output.
LIGHTING AND OPERATING WITH WOOD
Place tightly rolled paper, wond kindling or firelighters together with some
small logs on the oscillating grate. Light the paper or firelighters. Open air
wash control n° 1, Ieave the stove door slightly ajar, open thermostat no.2.
Open the direct draught damper (3) to warm the chimney (pull the handle to the right)
After about 10 minutes (more time for poorly drawing chimneys) when combustion is well
under way, close the direct draught damper (3) (push the handle to the left) close the
thermostat n° 2. Adjust the tempo of the fire by means of the air wash control n° 1.
OPERATION WITH WOOD
The air wash control n° 1 enables the tempo of the stove to be adjusted by the size of
the intake opening. With the tool provided the control can be adjusted to the heat output
required.
OVER NIGHT BURNING
If you fill your appliance with wood and close all air supplies, you will, no
doubt, easily achieve overnight burning though it is probable that the glass
1
-
+

C07100DA352
9
door will become dirty. To keep the glass clean, we recommend you do not
shut the damper completely but to leave it slightly open, depending on how
the chimney draws, to achieve slow burning for a maximum of 10 hours.
With a good drawing chimney the air wash control n° 1 will need to be
closed further than with poor drawing chimneys.
FUELLING THE STOVE WITH WOOD
It possible use the loading door.
To prevent smoke blowing into the room follow these recommendations:
Firstly open air wash control n°1, allow fire to recover.
Close air wash control n° 1, and open door open the damper (3). Rake the embers towards
the front of the stove and spread evenly. If there are logs only partially burned rake these to
the front of stove.
Feed the logs to the embers. Load logs evenly across the base being cautious not to place
wood in front of the rear edge of the log guard.
Open the air wash control n° 1 to its maximum, open the stove door a fraction and leave to
burn for 5 to 10 minutes. Then close the stove door close the damper (3). Adjust the air wash
control n° 1 depending on the tempo of the stove required.
High combustion temperatures are the secret to clean glass operation. When loading wood
add one or two logs at a time depending on size. Loading the appliance full of damp wood on
a low fire, is certain to cause low combustion efficiency resulting in tar and dirty glass.
(note : always allow the stove to recover before closing for long burning)
ASH REMOVAL WITH WOOD
Empty the ash pan regularly to prevent the ash from spilling over. Do not
allow ash to build up and touch the under side of the grate.
To remove the ash from the stove, operate the oscillating grate using the handle n° 4.
Open the ashpan door by turning clockwise the handle. Remove the ashpan and empty it.
Put the ashpan back and close the ashpan door by turning the handle counterclockwise. This
door must be closed to prevent damage to the stove.
A layer of ash left over the grate when burning wood will protect the grate and retain heat so
encouraging clean combustion.
The tool provided for removal of the ash pan should not be used alone to carry the ash
pan. Use the glove and hold ash pan on both sides.
4

C07100DA352
10
OPERATING WITH COAL
Note: air wash control n° 1 must always be closed.
LIGHTING COAL
Place some tightly rolled paper/fire lighters and a little coal and kindling on
the grate. Open the direct draught damper (3) (pull the handle to the right).
Close air wash control n° 1, open the thermostat n°2 - light the paper and
leave it to ignite the kindling. After about 10 minutes (or longer with a poor
drawing chimney) when the fire has taken hold open the door and feed the
stove with coal, banking it up over the oscillating grate. Close the door.
Adjust the tempo of the fire by means of thermostat n° 2.
Close the direct draught damper (3)(push the handle to the left).
1
-
+

C07100DA352
11
OPERATION WITH COAL
Thermostat n° 2 enables you to regulate the tempo of the stove by adjusting
the air intake opening. The thermostat will automatically control the fire
depending on the position it is set. The thermostat responds to both the
stove and room temperature. ( - = low heat output + = maximum heat output)
for normal operation use 1/2 to 3/4 position. For slow burning do not
completely shut off the thermostat (the thermostat has to be set with a 5
mm minimum opening) (see page 3).
FUELLING THE STOVE WITH COAL
To prevent smoke blowing into the room to be heated and to recover the fire to burn
up quickly, follow these recommendations:
Open the thermostat n° 2, allow the fire to recover. Open the damper (3). Close thermostat n° 2, open
the door. Feed in the coal making a heap on the embers over the oscillating grate. Close the door and,
open thermostat n° 2 to its maximum and leave the fire to burn for 5 to 10 minutes. Close the damper.
Adjust the thermostat n°2 depending on the tempo of the stove and the heat required.
ASH REMOVAL COAL
Empty the ash pan regularly to prevent the ash from spilling over and obstructing the
passage of air to the grate. (Do not allow ash to build up and touch the under side of the
grate). To remove the ash from the stove, operate the oscillating grate using handle n° 4.
Open the ashpan door by turning clockwise the handle. Remove the ashpan and empty it.
Put the ashpan back and close the ashpan door by turning the handle counterclockwise. This
door must be closed to prevent severe damage to the stove.
The tool provided for removal of the ash pan should not be used alone to carry the ash
pan. Use the glove and hold ash pan on both sides.
FUELS
Wood (seasoned)
Lignite briquettes (brown coals)
reconstituted wood Iogs
Peat (Peat briquettes)
Smokeless coal
4

C07100DA352
12
Wood
Use dry wood which by definifion must be wood which has been dried under cover for more
than 18 months, in which case the logs contain less than 20% moisture.
Anthracite of a minimum size of 20x30 mm (3/4"x 1. 1/4"), lumps weighing at least 20 grames
(6-7 oz.) and coal briquettes (ovoids /eggs). There are many trade name fuels available most
of which are suitable. Do not use petroleum based fuels such as petro coke, this will cause
domage to the stove.
WOOD
WHAT IS THE BEST WOOD FOR THE FIRE?
Some woods are easier to light than others. Those which take the best are :
hornbeam, beech, oak. Whereas aspen, birch and lime burn easily but they do not last as
long. Then come the softwoods and conifers. However, this list is only given as a guide as
the best fire wood is only the driest wood.
WHAT ARE THE DRAW BACKS OF DAMP WOOD?
Damp wood has far Iess heating power, this lowers the combustion temperature of
the fire therefore, the output. It is difficult to light, burns badly and gives off smoke. Above all
the use of damp wood causes the formation of deposits (tarring and soot staining) in the
chimney flue and the glass door.
WHAT IS TARRING AND SOOT STAINING IN THE CHIMNEY?
When the smoke arrives in the chimney at low temperature, part of the water vapour which
they convey condenses. The heaviest constituants are deposited on the inside of the flue. this is
TARRING. the mixture oxidises in the air and forms brownish patches. That is SOOT STAINING. Four
essential points for avoiding these drawbacks, use dry wood, use a stove designed for wood, connect
it to a chimney with thick walls and of suitable cross-section (size and height), ensure the connecting
pipes are as short as possible. (Horizontal pipes should be no mort than 6" 150mm).
FLUE GAS TEMPERATURE
The most important aspect of stove operation is maintaining a high combustion
temperature. If the combustion of the fuel is at the correct temperature, most of the soots and
tars (hydrocarbons) are burned. These hydrocarbons when not burned can be seen as tar
and creosote deposits on the internal surfaces of the stove, glass and chimney surfaces. To
assist in maintaining these temperatures a surface maunted, stove thermometer is a must.
It is recommended that you heat your stove to at least 400°F before reducing the air
controls. After reloading this procedure should always be carried out. If the wood is not quite
as dry as it should be, to assist for a short period, smokeless coal can be added with the wood
to raise the combustion temperture.
STORAGE TIME FOR WOOD
Wood supplied in ready-cut lengths stored immediately under a ventilated shelter
dries quicker than wood stocked in high piles. Quarters (split wood) dry quicker than round
logs. Wood which is too small to split must be drained, by removing some of the bark. Round
logs left in the open for more than a year end up rotten. The drying time for the fire wood
must be at Ieast 18 months to 2 years. This period can be shortened (12 to 15 months) if the
wood is cut to the right length and immediately stored under a ventilated shelter.

C07100DA352
13
MAINTENANCE OF THE GLASS.
Properly operated, your glass doors will not get coated with thick tar like
conventional stoves. If this does occur you may have to resort to using a
glass cleaner. However by using the correct dry fuels and or smokeless
coal , much of the tar on the glass will burn clean, when the appliance is run
at high temperature.
Clean the ceramic glass when cold using commercial products sold for the purpose or
warm water with a drap of vinegar.
OTHER MAINTENANCE
At the end of each heating season or more often if the use of the stove or the fuel make it
necessary, clean the unit the flue outlet and the chimney.
For cleaning purposes the baffle plates can be removed without any tools, This gives
access to the cleaning flap of the smoke flue and it is even possible to reach the flue outlet.
SUMMER SHUT DOWN
Remove all remaining ash and cinders from the unit, close all the stove
doors. If the room is damp, possibly place some absorbent crystals inside
the stove and/or disconnect it completely from the chimney.
FAULTY OPERATION
This is mainly due to the chimney not drawing adequately. Examine the following points:
The chimney section must be adequate (64 sq. in) and the flue must not be obstructed by
debris or soot.
The flue outlet of the flue connecting pipe is pushed too far into the chimney.
The connection between the unit and the chimney is not airtight or the chimney is permeable
(cracks, etc.).
The chimney is too low compared with surrounding obstacles, i.e., trees, high buildings etc.
This may be the cause of too little drawing or down-draughts.
Note :
For maximum output of the appliance a draught of at least 0.06" water gauge must be
achieved. The flue draught must not exceed 0. 08 " water gauge.
Excess draught should be avoided under all circumstances. If it is found that the chimney only over
draws in windy conditions, cowls such as the Aerocowel (trade name) are very good at controlling
these conditions. If the chimney over draws in normal operation a draught stabiliser must be fitted and
correctly calibrated.
FUME EMISSION
Properly installed and operated this appliance will not emit fumes in your room. Fumes may
occur from de ashing and refuelling. Persistent fume emission must not be tolerated. If this occurs do
not use appliance. Inspect installation for blockage or consult your installing engineer.

C07100DA352
14
ENAMELLED MODELS
The cracking which occurs in the enamel and which in the trade we call crazing cannot qualify as a manufacturing
defect. This cracking is the result of a difference in the coefficient of expansion between the cast iron and the enamel; it has no
detrimental effect on the adhesion of the enamel.
WARNING FOR YOUR SAFETY
Have your stove fitted by a professional.
In the event of problems contact him immediately.
Ask him to obtain originaI NESTOR MARTIN parts for you - beware of imitations.
When you have found the part you require note the part nurnber.
Quote this part number to your retailer who will be able to order it for you from NESTOR
MARTIN Distributors

C07100DA352
15
Top flue outlet configeration
STANFORD 9
(not protection plates are used for rear flue outlet)
When using rear flue outlet fit top flue protector
plate before fitting cover plate. This protection
plate prevents damage to the flue outlet blanking
plate
STANFORD 12
When using rear flue outlet fit top flue protector
plate before fitting cover plate. This protection
plate prevents damage to the flue outlet blanking
plate
When using top flue outlet fit flue
protection tube.
This protection tube prevents damage to the flue
outlet.
When using top flue outlet fit flue
protection tube.
This protection tube prevents damage to the flue
outlet.

C07100DA352
16
WARRANTY
NESTOR MARTIN guarantees this equiment against any manufacturing or material defect for the time periods stipulated below.
This warranty is subject to the conditions listed below.
The warranty card must be returned to the manufacturer within 15 days of installation. This warranty is limited to the
replacement of faulty, malfunctioning or damaged parts ard does not cover labor costs. All labor costs are the responsibility of
the appliances owner.
Two Years
Five Years
Door handles
Enamelled or lacquered parts
Thermostat
Air intake system
Combustion Chamber
Not covered by this warranty:
-rust or corrosion due to condensation
-the window glass, as well as all other parts in direct contact with the fire (the grate, the grate holder, the baffle, the cast-iron
heat shields.
-grazing : the fine cracking the fine cracking which occurs on enamelled parts in no case constitutes a manufacturing defect.
This cracking is the result of a different in the coefficient of expansion between the cast iron or the metal plate and the
enamel ; it has no detrimental effect on the adhesion of the enamel.
-Noises due to contraction/dilatation during the ignition or extinguishing of the appliance.
NESTOR MARTIN warrants the equipement to be free of defects in materials and workmanship. This warranty is subject to the
terms specified below. This warranty gives you specific legal rights, and you may also have other right which vary from state to
state. This warranty is limited to parts replacement and does not include any labor allowance. Any service charges for parts
replacement are your responsibility.
All warranty service and/or replacement of parts must be performed for you by an individual or servicing company, which has
been qualified by NESTOR MARTIN distributors.
You may obtain the benefits of warranty coverage on a failed part by having the servicing company
replace the part and return it to the NESTOR MARTIN distributor for inspection. If the failure is
covered by warranty, there will not be any charge for the replacement part. Transportation charges for
the shipment of the replacement part and the return of the failed part is your responsibility. Any such
warranty replacement or repair shall be subject to the terms and conditions of this warranty for the
remainder of the original period of coverage. This warranty does not cover any failures or operating
difficulties due to accident, abuse, misuse, alteration, misapplication, improper installation or improper
maintenance or service. Any implied warranties of merchantability and fitness applicable to the
equipment are limited in duration to the period of coverage of this express written warranty. Some
states do not allow limitation on how long an implied warranty lasts, so this limitation may not apply to
you.
NESTOR MARTIN IS NOT LIABLE for any special, indirect or consequential damages. Some states do not allow the exclusion
or limitation of incidental or consequential changes, so this limitation or exclusion may not apply to you.
NESTOR MARTIN does not authorize any person or company to assume for it any other obligation or liability in connection with
the sale application engineering, installation, use, removal, return, or replacement of its equipement, and no such
representations are binding on NESTOR MARTIN.
DETACH AND RETURN TO NESTOR MARTIN WARRANTY CARD.
NAME………………………………………………………………………………………….
ADDRESS…………………………………………………………………………………….
MODEL………………………………………………. DATE PURCHASE………………
SERIAL………………………………………………. PURCHASE PRICE……………..
WHERE PURCHASE………………………………………………………………………..
SUGGESTIONS, COMMENTS…………………………………………………………….
RETAIN A COPY FOR YOUR RECORDS

C07100DA352
17

C07100DA352
18

C07100DA352
19

C07100DA352
20
Other manuals for STANFORD 9
1
This manual suits for next models
3
Table of contents
Other NESTOR MARTIN Wood Stove manuals
Popular Wood Stove manuals by other brands
Vesta
Vesta v4 Installation and operating instructions
AGA
AGA Shawbury Installation and operating insctructions
Jøtul
Jøtul 602 B-C Installation and operator's manual
Drolet
Drolet Myriad II DB03051 Installation and operation manual

Wood master
Wood master CleanFire 400 owner's manual
Blaze King
Blaze King PF-202 Owner's installation and operation book
