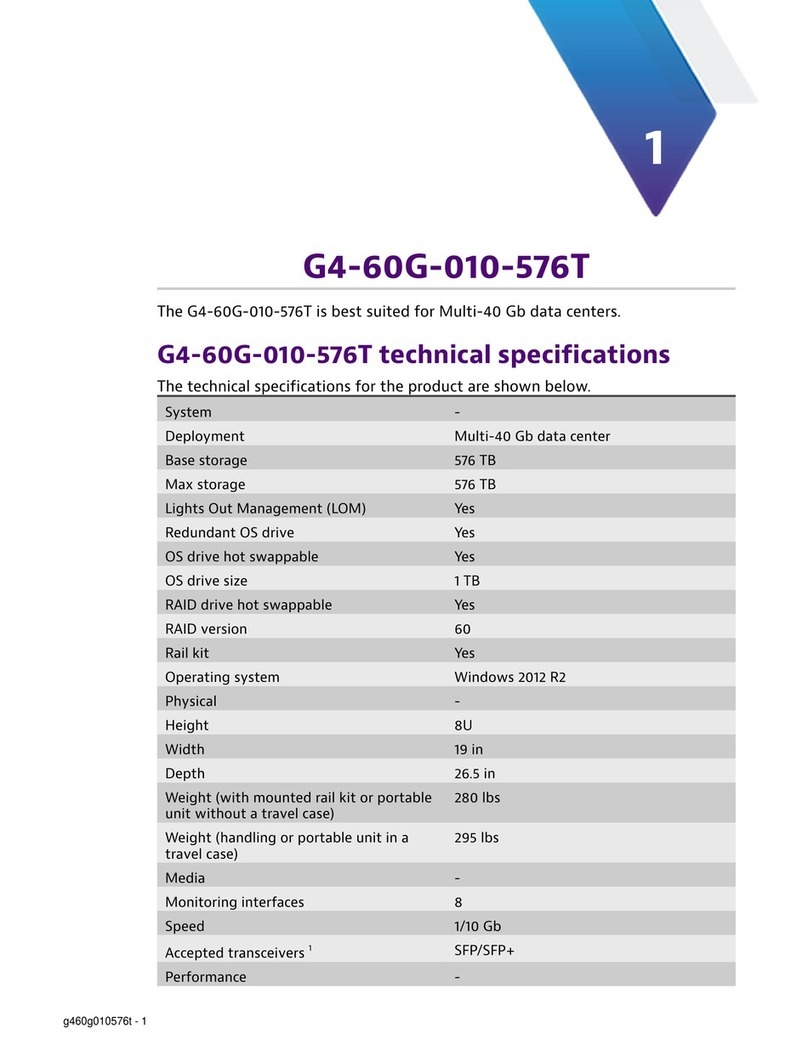
Netberg Demos R420 M2 User manual

Netberg Demos R420
M2 server. User manual.

Netberg Demos R420 M2 server. User manual.

iii
Table of Contents
1. Safety Information .............................................................................................................. 1
1.1. Conventions ............................................................................................................ 2
1.2. Acronyms ................................................................................................................ 3
1.3. Safety Information ................................................................................................... 6
1.3.1. Important Safety Instructions ......................................................................... 6
1.4. Disclaimer ............................................................................................................... 7
2. About the Server ............................................................................................................... 8
2.1. Introduction ............................................................................................................. 9
2.2. System Features ................................................................................................... 10
2.3. Package Contents ................................................................................................. 13
2.4. A Tour of the System ............................................................................................ 14
2.4.1. System ....................................................................................................... 14
2.4.2. System Front View ..................................................................................... 16
2.4.3. System Rear View ...................................................................................... 17
2.4.4. Buttons and System LED description ........................................................... 18
2.4.5. LED Status Definition .................................................................................. 19
3. Installing Hardware ........................................................................................................... 21
3.1. Safety Measures ................................................................................................... 22
3.2. Top Cover ............................................................................................................. 23
3.2.1. Removing a Top Cover ............................................................................... 23
3.2.2. Installing a Top Cover ................................................................................. 23
3.3. Power Supply Unit ................................................................................................. 25
3.3.1. Removing a Power Supply Unit ................................................................... 25
3.3.2. Installing a Power Supply Unit ..................................................................... 26
3.4. Hard Disk Drives ................................................................................................... 27
3.4.1. 3.5” SATA / SAS HDDs .............................................................................. 27
3.4.2. Removing a 3.5” Hard Drive tray ................................................................. 27
3.4.3. Installing a 3.5” Hard Drive tray ................................................................... 28
3.4.4. 2.5” SATA / SAS HDDs .............................................................................. 29
3.4.5. Removing a 2.5” Hard Drive tray ................................................................. 30
3.4.6. Installing a 2.5” Hard Drive tray ................................................................... 31
3.5. Mainboard Modules ............................................................................................... 33
3.5.1. Removing a Mainboard Module ................................................................... 33
3.5.2. Installing a Mainboard Module ..................................................................... 34
3.6. Heat Sink .............................................................................................................. 35
3.6.1. To remove the heat sink ............................................................................. 35
3.6.2. To install the heat sink ................................................................................ 35
3.7. Processor .............................................................................................................. 36
3.7.1. To remove a processor ............................................................................... 36
3.7.2. To install a processor ................................................................................. 38
3.8. Memory ................................................................................................................. 39
3.8.1. DDR4 3 slots per channel (SPC) DIMM population configuration .................... 39
3.8.2. DDR4 2 slots per channel (SPC) DIMM population configuration .................... 40
3.8.3. To remove a DIMM .................................................................................... 41
3.8.4. To install a DIMM ....................................................................................... 41
3.9. Interposer Board ................................................................................................... 43
3.10. To remove the interposer board ........................................................................... 44
3.10.1. To install the interposer board ................................................................... 45
3.11. Expander Board .................................................................................................. 46

Netberg Demos R420
M2 server. User manual.
iv
3.11.1. To remove the expander board ................................................................. 46
3.11.2. To install the expander board .................................................................... 47
3.12. Rear HDD Assembly ........................................................................................... 48
3.12.1. To remove the rear HDD .......................................................................... 48
3.12.2. To install the rear HDD ............................................................................. 48
3.12.3. To remove the rear HDD backplane .......................................................... 49
3.12.4. To install the rear HDD backplane ............................................................. 50
3.13. X16 Riser Card ................................................................................................... 51
3.13.1. To remove the expansion card .................................................................. 51
3.13.2. To install the expansion card ..................................................................... 52
3.13.3. To remove the X16 riser card .................................................................... 52
3.13.4. To install the X16 Riser Card .................................................................... 53
3.14. Fan Duct ............................................................................................................. 54
3.14.1. To remove the fan duct ............................................................................. 54
3.14.2. To install the fan duct ............................................................................... 54
3.15. Motherboard ........................................................................................................ 55
3.15.1. To remove the motherboard ...................................................................... 55
3.15.2. To install the motherboard ......................................................................... 55
3.16. Strong Plate ........................................................................................................ 56
3.16.1. To remove the strong plate ....................................................................... 56
3.16.2. To install the strong plate .......................................................................... 57
3.17. Power Distribution Boards .................................................................................... 58
3.17.1. To remove the power distribution boards .................................................... 58
3.17.2. To install the power distribution board ........................................................ 60
3.18. System Fans ....................................................................................................... 61
3.18.1. To remove a system fan ........................................................................... 61
3.18.2. To install a system fan .............................................................................. 61
3.18.3. To remove the fan control board ................................................................ 62
3.18.4. To install the fan control board .................................................................. 62
3.19. Middle Plane ....................................................................................................... 63
3.19.1. To remove the middle planes .................................................................... 64
3.19.2. To install the middle planes ....................................................................... 65
3.20. 12x3.5” SATA / SAS HDD Backplane ................................................................... 66
3.20.1. To remove the backplane .......................................................................... 66
3.20.2. To install the backplane ............................................................................ 68
3.21. 24x2.5” SATA / SAS HDD Backplane ................................................................... 69
3.21.1. To remove the backplane .......................................................................... 69
3.21.2. To install the backplane ............................................................................ 72
3.22. HBA Card ........................................................................................................... 73
3.22.1. To remove the HBA card .......................................................................... 73
3.22.2. To install the HBA card ............................................................................. 74
3.23. OCP Card ........................................................................................................... 75
3.23.1. To remove the OCP card .......................................................................... 75
3.23.2. To install the OCP card ............................................................................ 76
3.24. Front Panel ......................................................................................................... 77
3.24.1. To remove the front panel ......................................................................... 77
3.24.2. To install the front panel ........................................................................... 78
3.25. Sensor Board ...................................................................................................... 79
3.25.1. To remove the sensor board of 12 x 3.5” HDD Server ................................. 79
3.25.2. To install the sensor board of 12x3.5” HDD Server ..................................... 80
3.25.3. To remove the sensor board of 24 x 2.5” HDD Server ................................. 80

Netberg Demos R420
M2 server. User manual.
v
3.25.4. To install the sensor board of 24 x 2.5” HDD Server ................................... 81
4. Connectors ...................................................................................................................... 82
4.1. Motherboard Connectors ........................................................................................ 83
4.1.1. 12 x 3.5” HDD Backplane Connectors ......................................................... 86
4.1.2. 24 x 2.5” HDD Backplane Connectors ......................................................... 87
4.2. Bridge Board Connectors ....................................................................................... 89
4.3. Middle Plane Connectors ....................................................................................... 90
4.3.1. Upper Middle Plane Connectors .................................................................. 90
4.3.2. NIC Middle Plane Connectors ..................................................................... 90
4.3.3. NTB Middle Plane ...................................................................................... 91
4.4. Power Distribution Board Connectors ..................................................................... 92
4.5. Rear HDD Backplane Connectors .......................................................................... 93
4.6. Expander Board Connectors .................................................................................. 94
4.7. Fan Control Board Connectors ............................................................................... 95
4.8. Interposer Board Connectors ................................................................................. 96
4.9. Sensor Board Connectors ...................................................................................... 97
5. Cable Routing .................................................................................................................. 98
5.1. Cable Routing for 12 x 3.5” Hard Drives Configuration ............................................. 99
5.2. Cable Routing for 24 x 2.5” Hard Drives Configuration ........................................... 100
6. BIOS .............................................................................................................................. 101
6.1. BIOS Setup Utility ............................................................................................... 102
6.1.1. Entering BIOS Setup ................................................................................. 102
6.1.2. Main features ........................................................................................... 102
6.1.3. Setup Page .............................................................................................. 102
6.1.4. Keyboard Commands ................................................................................ 103
6.1.5. Menu Selection Bar .................................................................................. 105
6.1.6. Server Platform Setup Utility Screens ........................................................ 105
6.2. Main ................................................................................................................... 106
6.3. Advanced Screen ................................................................................................ 107
6.3.1. Processor Configuration ............................................................................ 108
6.3.1.1. Advanced Power Management Configuration ................................... 110
6.3.1.2. CPU P State Control ...................................................................... 111
6.3.1.3. CPU C State Control ...................................................................... 112
6.3.1.4. CPU T State Control ...................................................................... 113
6.3.1.5. CPU Advanced PM Tuning ............................................................. 114
6.3.1.6. Energy Perf BIAS ........................................................................... 115
6.3.2. QPI Configuration ..................................................................................... 116
6.3.3. Memory Configuration ............................................................................... 117
6.3.4. Memory Thermal ....................................................................................... 119
6.3.4.1. Memory Power Savings Advanced Options ...................................... 120
6.3.4.2. Memory RAS Configuration ............................................................ 121
6.3.5. IIO Configuration ....................................................................................... 122
6.3.5.1. IIO0 Configuration .......................................................................... 123
6.3.5.2. Socket 0 PcieD00F0-Port0/DMI ...................................................... 124
6.3.5.3. IIO1 Configuration .......................................................................... 125
6.3.5.4. IOAT Configuration ........................................................................ 126
6.3.5.5. Intel VT for Directed I/O (VT-d) ....................................................... 127
6.3.6. PCH Configuration .................................................................................... 128
6.3.6.1. PCI Express Configuration .............................................................. 129
6.3.6.2. PCI Express Root Port x ................................................................ 130
6.3.6.3. PCH SATA Configuration ............................................................... 131

Netberg Demos R420
M2 server. User manual.
vi
6.3.6.4. SATA Mode Options ...................................................................... 132
6.3.6.5. USB Configuration ......................................................................... 133
6.3.6.6. Security Configuration .................................................................... 134
6.3.6.7. Platform Thermal Configuration ....................................................... 135
6.3.7. Server ME Configuration ........................................................................... 136
6.3.8. Runtime Error Logging .............................................................................. 137
6.3.8.1. Whea Settings ............................................................................... 138
6.3.8.2. QPI Error Enabling ......................................................................... 139
6.3.8.3. Memory Error Enabling ................................................................... 140
6.3.8.4. IIO Error Enabling .......................................................................... 141
6.3.8.5. PCI/PCI Error Enabling ................................................................... 142
6.3.9. AST2400 Super IO Configuration ............................................................... 143
6.3.9.1. Serial Port 1 Configuration .............................................................. 144
6.3.9.2. Serial Port 2 Configuration .............................................................. 145
6.3.10. Serial Port Console Redirection ............................................................... 146
6.3.10.1. COM0 Console Redirection Settings .............................................. 147
6.3.10.2. COM1 Console Redirection Settings .............................................. 149
6.3.10.3. Legacy Console Redirection Settings ............................................ 151
6.3.10.4. Console Redirection Settings ........................................................ 152
6.3.11. PCI Subsystem Settings .......................................................................... 153
6.3.12. Network Stack Configuration .................................................................... 154
6.3.13. CSM Configuration .................................................................................. 155
6.3.14. Trusted Computing .................................................................................. 156
6.3.15. USB Configuration .................................................................................. 157
6.4. Server Management ............................................................................................ 159
6.4.1. System Event Log .................................................................................... 160
6.4.2. View FRU Information ............................................................................... 161
6.4.3. BMC Network Configuration ...................................................................... 162
6.5. Security Menu ..................................................................................................... 163
6.6. Boot .................................................................................................................... 164
6.7. Save&Exit Menu .................................................................................................. 166
6.8. Utility ................................................................................................................... 168
6.8.1. BIOS Requirements .................................................................................. 168
6.8.2. ROM Flash ............................................................................................... 169
6.8.2.1. Update under DOS prompt: ............................................................ 169
6.8.2.2. Update under EFI Shell .................................................................. 169
6.8.2.3. Update ME FW with the whole image file under Linux environment .... 169
6.8.2.4. BIOS Recovery .............................................................................. 169
7. Rail Kit Assembly ........................................................................................................... 171
7.1. Unpacking the System ......................................................................................... 172
7.2. Installing the Rails ............................................................................................... 173
7.3. Installing the System Into the Rack ...................................................................... 174
8. Troubleshooting .............................................................................................................. 176
8.1. Server Boot Issue Topics ..................................................................................... 177
8.2. System does not Boot after Initial Installation ........................................................ 178
8.2.1. Power Cord Not Plugged In ...................................................................... 178
8.2.2. Processor Issues ...................................................................................... 178
8.2.3. Memory Issues ......................................................................................... 178
8.2.4. Monitor Issues .......................................................................................... 178
8.2.5. Power Supply, Chassis and Fan Issues ..................................................... 179
8.2.6. Cable Issues ............................................................................................ 179

Netberg Demos R420
M2 server. User manual.
vii
8.2.7. Electrical Short or Overload ....................................................................... 179
8.2.8. Defective Components .............................................................................. 179
8.3. System does not boot after Configuration Changes ............................................... 180
8.3.1. Hardware Changes ................................................................................... 180
8.3.2. Software Changes .................................................................................... 180
8.3.3. BIOS Changes ......................................................................................... 180
8.3.4. Installation Problems ................................................................................. 180
8.3.5. Troubleshooting External Connections ....................................................... 181
9. Installation and Assembly Safety Instructions ................................................................... 182
10. Server Safety Information ............................................................................................. 185
10.1. Safety Warnings and Cautions ........................................................................... 186
10.2. Intended Application Uses .................................................................................. 188
10.3. Site Selection .................................................................................................... 189
10.4. Equipment Handling Practices ............................................................................ 190
10.5. Power and Electrical Warnings ........................................................................... 191
10.6. Power Cord Warnings ........................................................................................ 192
10.7. System Access Warnings ................................................................................... 193
10.8. Rack Mount Warnings ........................................................................................ 194
10.9. Electrostatic Discharge (ESD) ............................................................................ 195
10.10. Other Hazards ................................................................................................. 196
10.11. Cooling and Airflow .......................................................................................... 197
10.12. Laser Peripherals or Devices ............................................................................ 198
11. Regulatory and Compliance Information ........................................................................ 199
11.1. Electromagnetic Compatibility Notices ................................................................. 200
11.1.1. FCC Verification Statement (USA) ........................................................... 200
11.1.2. Europe (CE Declaration of Conformity) ..................................................... 200
11.1.3. VCCI (Japan) .......................................................................................... 201
11.1.4. Regulated Specified Components ............................................................ 201
11.1.5. Restriction of Hazardous Substances (RoHS) Compliance ......................... 201
11.1.6. End of Life / Product Recycling ................................................................ 202

viii
List of Figures
2.1. 3.5" HDD System Front View ......................................................................................... 10
2.2. 2.5" HDD System Front View ......................................................................................... 10
2.3. 3.5" HDD System Overview ........................................................................................... 14
2.4. 2.5" HDD System Overview ........................................................................................... 15
2.5. 3.5" HDD System Front View ......................................................................................... 16
2.6. 3.5" HDD System Front View ......................................................................................... 16
2.7. Back View with Two Nodes (with OCP 1G/10G Base-T NIC) ........................................... 17
2.8. Back View with Two Nodes (with OCP SFP+ NIC) .......................................................... 18
2.9. 3.5" Front Panel Buttons and LEDs ................................................................................ 19
2.10. 2.5" Front Panel Buttons and LEDs .............................................................................. 19
2.11. Rear Panel Power LEDs .............................................................................................. 19
3.1. Removing Top Cover .................................................................................................... 23
3.2. Sliding the Chassis Cover to the Front ........................................................................... 24
3.3. Installing Screws ........................................................................................................... 24
3.4. Power Supply Locations ................................................................................................ 25
3.5. Removing the Power Supply .......................................................................................... 26
3.6. Installing a Power Supply Unit ....................................................................................... 26
3.7. 3.5” SATA / SAS HDD Locations ................................................................................... 27
3.8. Sliding out the HDD Assembly ....................................................................................... 27
3.9. Removing the HDD ....................................................................................................... 28
3.10. Placing the HDD to the HDD Tray ................................................................................ 28
3.11. Fastening the Screws .................................................................................................. 29
3.12. Installing the HDD Assembly ........................................................................................ 29
3.13. 2.5” SATA / SAS HDD Locations .................................................................................. 30
3.14. Sliding out the HDD Assembly ..................................................................................... 30
3.15. Removing the HDD ..................................................................................................... 31
3.16. Placing the HDD to the HDD Tray ................................................................................ 31
3.17. Fastening the Screws .................................................................................................. 31
3.18. Installing the HDD Assembly ........................................................................................ 32
3.19. Node Locations ........................................................................................................... 33
3.20. Removing a Mainboard Module .................................................................................... 33
3.21. Installing a Mainboard Module ...................................................................................... 34
3.22. Removing the Heat Sink .............................................................................................. 35
3.23. Processor Location ...................................................................................................... 36
3.24. Opening the Load Plate ............................................................................................... 36
3.25. Lifting the Processor out of the Socket ......................................................................... 37
3.26. Closing the Load Plate ................................................................................................ 37
3.27. Placing the Processor .................................................................................................. 38
3.28. Location of System Memory ......................................................................................... 39
3.29. DIMM Socket Location ................................................................................................. 39
3.30. Lifting the DIMM out of the Socket ............................................................................... 41
3.31. Pressing the Retaining Clips Outward ........................................................................... 41
3.32. Inserting the DIMM into the Socket .............................................................................. 42
3.33. Interposer Board Location ............................................................................................ 43
3.34. Removing the interposer Board 1 ................................................................................. 44
3.35. Removing the Bracket ................................................................................................. 44
3.36. Removing the interposer Board 2 ................................................................................. 45
3.37. Expander Board Location ............................................................................................. 46
3.38. Removing the Expander Board Assembly ..................................................................... 46

Netberg Demos R420
M2 server. User manual.
ix
3.39. Removing the Expander Board .................................................................................... 47
3.40. Removing the Rear HDD Assembly .............................................................................. 48
3.41. Removing the Rear HDD ............................................................................................. 48
3.42. Installing the Rear HDD ............................................................................................... 49
3.43. Installing the Rear HDD Assembly ............................................................................... 49
3.44. Removing the Rear HDD Backplane Bracket ................................................................ 50
3.45. Removing the Rear HDD Backplane ............................................................................. 50
3.46. Removing the Expansion Card Assembly ..................................................................... 51
3.47. Removing the Expansion Card ..................................................................................... 52
3.48. Removing the Riser Card ............................................................................................ 53
3.49. Fan Duct Location ....................................................................................................... 54
3.50. Removing the Fan Ducts ............................................................................................. 54
3.51. Removing the Motherboard .......................................................................................... 55
3.52. Strong Plate Location .................................................................................................. 56
3.53. Removing the Strong Plate .......................................................................................... 56
3.54. Power Distribution Board Locations .............................................................................. 58
3.55. Removing the Upper Power Distribution Board .............................................................. 59
3.56. Removing the Bridge Card ........................................................................................... 59
3.57. Removing the Lower Power Distribution Board .............................................................. 60
3.58. System Fan Location ................................................................................................... 61
3.59. Removing a System Fan ............................................................................................. 61
3.60. Removing the Fan Control Board ................................................................................. 62
3.61. Upper Middle Plane Location ....................................................................................... 63
3.62. Lower NIC Middle Plane Location ................................................................................ 63
3.63. Lower NTB Middle Plane Location ............................................................................... 64
3.64. Removing the Upper Middle Plane ............................................................................... 64
3.65. Removing the Middle Plane Bracket ............................................................................. 65
3.66. Removing the Lower Middle Plane ............................................................................... 65
3.67. 3.5” HDD Backplane Location ...................................................................................... 66
3.68. Removing the Screws .................................................................................................. 67
3.69. Removing the HDD Cage ............................................................................................ 67
3.70. Removing the backplane .............................................................................................. 68
3.71. 24 x 2.5”HDD Backplane Location ................................................................................ 69
3.72. Removing the Screws .................................................................................................. 70
3.73. Removing the HDD Cage ............................................................................................ 70
3.74. Removing the Bridge Board ......................................................................................... 71
3.75. Removing the Bridge Board Bracket ............................................................................. 71
3.76. Removing the Backplane ............................................................................................. 72
3.77. HBA Card Location ...................................................................................................... 73
3.78. Removing the HBA Card ............................................................................................. 73
3.79. Installing the HBA Card ............................................................................................... 74
3.80. OCP Card Location ..................................................................................................... 75
3.81. Removing the OCP Card ............................................................................................. 76
3.82. Installing the OCP Card ............................................................................................... 76
3.83. Front Panel Location ................................................................................................... 77
3.84. Removing the Front Panel Assembly ............................................................................ 77
3.85. Removing the Front Panel ........................................................................................... 78
3.86. 12x3.5” HDD Server Sensor Board Location ................................................................. 79
3.87. 24x2.5” HDD Server Sensor Board Location ................................................................. 79
3.88. Removing the Sensor Board ........................................................................................ 80
3.89. Removing the Sensor Board ........................................................................................ 81

Netberg Demos R420
M2 server. User manual.
x
4.1. Mainboard Overview ...................................................................................................... 84
4.2. 12x3.5“ HDD Backplane ................................................................................................ 86
4.3. 24x2.5“ HDD Backplane ................................................................................................ 87
4.4. Bridge Board ................................................................................................................. 89
4.5. Upper Middle Plane ....................................................................................................... 90
4.6. NIC Middle Plane .......................................................................................................... 90
4.7. NTB Middle Plane ......................................................................................................... 91
4.8. Power Distribution Board ............................................................................................... 92
4.9. Rear HDD Backplane .................................................................................................... 93
4.10. Expander Board .......................................................................................................... 94
4.11. Fan Control Board ....................................................................................................... 95
4.12. Interposer Board .......................................................................................................... 96
4.13. Sensor Board .............................................................................................................. 97
6.1. Main Screen ................................................................................................................ 106
6.2. Advanced Screen ........................................................................................................ 107
6.3. Processor Configuration ............................................................................................... 108
6.4. Advanced Power Management Configuration ................................................................ 110
7.1. Installing the Rails ....................................................................................................... 173
7.2. Sliding the System into the Rack .................................................................................. 174
7.3. Tightening the Thumbscrews ....................................................................................... 175

xi
List of Tables
2.1. Major Features .............................................................................................................. 10
2.2. Specifications ................................................................................................................ 11
2.3. Component Overview .................................................................................................... 14
2.4. Component Overview .................................................................................................... 15
2.5. 3.5" HDD System Front View ......................................................................................... 16
2.6. 2.5" HDD System Front View ......................................................................................... 17
2.7. System Rear View ......................................................................................................... 17
2.8. System Rear View ......................................................................................................... 18
2.9. Front Panel Buttons and LEDs ....................................................................................... 19
2.10. Rear Panel Power LEDs .............................................................................................. 19
2.11. HDD LED Definition ..................................................................................................... 20
2.12. Front Panel LED Definition .......................................................................................... 20
6.1. BIOS Setup Page Layout ............................................................................................. 102
6.2. BIOS Setup: Keyboard Command ................................................................................ 103
6.3. Main Screen Fields ...................................................................................................... 106
6.4. BIOS Requirements Description ................................................................................... 168
11.1. Product Safety Requirements ..................................................................................... 199

1
Chapter 1. Safety Information

Safety Information
2
1.1. Conventions
Several different typographic conventions are used throughout this manual. Refer to the following
examples for common usage.
Bold type face denotes menu items, buttons and application names.
Italic type face denotes references to other sections, and the names of the folders, menus, pro-
grams, and files.
<Enter> type face denotes keyboard keys.
Warning information appears before the text it references and should not be ignored
as the content may prevent damage to the device.
CAUTIONS APPEAR BEFORE THE TEXT IT REFERENCES, SIMILAR TO NOTES
AND WARNINGS. CAUTIONS, HOWEVER, APPEAR IN CAPITAL LETTERS AND
CONTAIN VITAL HEALTH AND SAFETY INFORMATION.
Indicates information that is important to know for the proper completion of a proce-
dure, choice of an option, or completing a task.
Highlights general or useful information and tips.

Safety Information
3
1.2. Acronyms
Word Definition
A/D Analog to Digital
ACPI Advanced Configuration and Power Interface
ASF Alerting Standard Forum
Asserted Active-high (positive true) signals are asserted when in the high electrical
state (near power potential). Active-low (negative true) signals are asserted
when in the low electrical state (near ground potential).
BIOS Basic Input/Output System
BIST Built-In Self Test
BMC At the heart of the IPMI architecture is a microcontroller called the Baseboard
management controller (BMC)
Bridge Circuitry connecting one computer bus to another, allowing an agent on one
to access the other
BSP Bootstrap processor
Byte 8-bit quantity
CLI Command Line Interface
CMOS In terms of this specification, this describes the PC-AT compatible region of
battery-backed 128 bytes of memory, which normally resides on the base-
board
CPU Central Processing Unit
Deasserted A signal is deasserted when in the inactive state. Active-low signal names
have "_L" appended to the end of the signal mnemonic. Active-high signal
names have no "_L" suffix. To reduce confusion when referring to active-high
and active-low signals, the terms one/zero, high/low, and true/false are not
used when describing signal states.
DTC Data Transfer Controller
EEPROM Electrically Erasable Programmable Read-Only Memory
EMP Emergency Management Port
FRU Field Replaceable Unit
GB 1024 MB.
GPIO General Purpose Input/Out
HSC Hot-Swap Controller
Hz Hertz (1 cycle/second)
I2C Inter-Integrated Circuit bus
IANA Internet Assigned Numbers Authority
IBF Input buffer
ICH I/O Controller Hub

Safety Information
4
Word Definition
ICMB Intelligent Chassis Management Bus
IERR Internal Error
IP Internet Protocol
IPMB Intelligent Platform Management Bus
IPMI Intelligent Platform Management Interface
ITP In-Target Probe
KB 1024 bytes.
KCS Keyboard Controller Style
KVM Keyboard, Video, Mouse
LAN Local Area Network
LCD Liquid Crystal Display
LCT Lower Critical Threshold
LED Light Emitting Diode
LNCT Lower Non-Critical Threshold
LNRT Lower Non-Recoverable Threshold
LPC Low Pin Count
LSI Large Scale Integration
LUN Logical Unit Number
MAC Media Access Control
MB 1024 KB
MD2 Message Digest 2 - Hashing Algorithm
MD5 Message Digest 5 - Hashing Algorithm - Higher Security
Ms Milliseconds
Mux Multiplexer
NIC Network Interface Card
NMI Nonmaskable Interrupt
NM Node Management
OBF Output buffer
OEM Original Equipment Manufacturer
Ohm Unit of electrical resistance
PDB Power Distribution Board
PEF Platform Event Filtering
PEP Platform Event Paging
PERR Parity Error
POH Power-On Hours

Safety Information
5
Word Definition
POST Power-On Self Test
PWM Pulse Width Modulation
RAC Remote Access Card
RAM Random Access Memory
RMCP Remote Management Control Protocol
ROM Read Only Memory
RTC Real-Time Clock. Component of the chipset on the baseboard.
RTOS Real Time Operation System
SCI Serial Communication Interface
SDC SCSI Daughter Card
SDR Sensor Data Record
SEEPROM Serial Electrically Erasable Programmable Read-Only Memory
SEL System Event Log
SERR System Error
SMBus A two-wire interface based on the I2C protocol. The SMBus is a low-speed
bus that provides positive addressing for devices, as well as bus arbitration
SMI Server Management Interrupt. SMI is the highest priority nonmaskable inter-
rupt
SMM Server Management Mode
SMS Server Management Software
SNMP Simple Network Management Protocol
SOL Serial Over LAN
UART Universal Asynchronous Receiver/Transmitter
UCT Upper Critical Threshold
UDP User Datagram Protocol
UNCT Upper Non-Critical Threshold
UNRT Upper Non-Recoverable Threshold
WDT Watchdog Timer
Word 16-bit quantity

Safety Information
6
1.3. Safety Information
1.3.1. Important Safety Instructions
Read all caution and safety statements in this document before performing any of the instructions.
Warnings
Heed safety instructions: Before working with the server, whether using this manual or any other
resource as a reference, pay close attention to the safety instructions. Adhere to the assembly in-
structions in this manual to ensure and maintain compliance with existing product certifications and
approvals. Use only the described, regulated components specified in this manual. Use of other
products / components will void the UL listing and other regulatory approvals of the product and
will most likely result in non-compliance with product regulations in the region(s) in which the prod-
uct is sold.
System power on/off: The power button DOES NOT turn off the system AC power. To remove
power from system, you must unplug the AC power cord from the wall outlet. Make sure the AC
power cord is unplugged before opening the chassis, adding, or removing any components.
Hazardous conditions, devices and cables: Hazardous electrical conditions may be present on
power, telephone, and communication cables. Turn off the server and disconnect the power cord,
telecommunications systems, networks, and modems attached to the server before opening it.
Otherwise, personal injury or equipment damage can result.
Electrostatic discharge (ESD) and ESD protection: ESD can damage drives, boards, and other
parts. We recommend that you perform all procedures in this chapter only at an ESD workstation.
If one is not available, provide some ESD protection by wearing an antistatic wrist strap attached
to chassis ground any unpainted metal surface on the server when handling parts.
ESD and handling boards: Always handle boards carefully. They can be extremely sensitive to
electrostatic discharge (ESD). Hold boards only by their edges. After removing a board from its
protective wrapper or from the server, place the board component side up on a grounded, static
free surface. Use a conductive foam pad if available but not the board wrapper. Do not slide board
over any surface.
Installing or removing jumpers: A jumper is a small plastic encased conductor that slips over two
jumper pins. Some jumpers have a small tab on top that can be gripped with fingertips or with a
pair of fine needle nosed pliers. If the jumpers do not have such a tab, take care when using nee-
dle nosed pliers to remove or install a jumper; grip the narrow sides of the jumper with the pliers,
never the wide sides. Gripping the wide sides can damage the contacts inside the jumper, caus-
ing intermittent problems with the function controlled by that jumper. Take care to grip with, but not
squeeze, the pliers or other tool used to remove a jumper, or the pins on the board may bend or
break.

Safety Information
7
1.4. Disclaimer
The information in this document is subject to change without notice. The manufacturer makes no
representations or warranties with respect to the contents hereof and specifically disclaims any im-
plied warranties of merchantability or fitness for any particular purpose. Furthermore, the manufac-
turer reserves the right to revise this publication and to make changes from time to time in the con-
tent hereof without obligation of the manufacturer to notify any person of such revision or changes.
For the latest information and updates please refer to www.netbergtw.com
All the illustrations in this technical guide are for reference only and are subject to change without
prior notice.

8
Chapter 2. About the Server

About the Server
9
2.1. Introduction
This document is for the person who installs, administers, and troubleshoots servers and storage
systems. Netberg assumes you are qualified in the servicing of computer equipment and trained in
recognizing hazards in products with hazardous energy levels.
Table of contents
Other Netberg Server manuals
Popular Server manuals by other brands
Jung
Jung Smart Visu Server Series Product documentation
Supermicro
Supermicro SuperServer 420GP-TNAR user manual
Oracle
Oracle EXADATA X6-2 Installation and configuration guide
Asus
Asus RS920A-E6/RS8 user guide
Supermicro
Supermicro SuperServer 5029P-WTR user manual
Yawarra
Yawarra nuxV 1600 quick start guide
