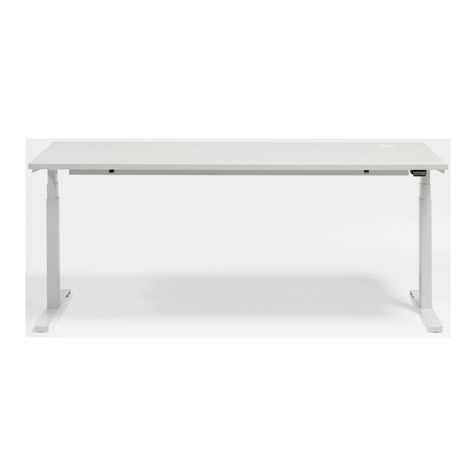
Neudoerfler Flux M Table User manual

2020/10
Flux M Montageanleitung | Flux M Assembly Instructions
Neudoerfler Oce Systems GmbH | Kom.-Rat Karl Markon-Str. 530 | A-7201 Neudörfl | neudoerfler.com
Flux M | Montageanleitung
Flux M | Assembly Instructions
Technische Daten
Serie: Flux M
Verstellbereich: 680mm - 1180mm
Gewichtsausgleich, zur Abstimmung
auf variable Tischlasten: 0 - 40kg
Festgestellt maximal belastbar bis: 85kg
Transportsicherung, Handauslösehebel rechts
1x
Tischgestell
table frame
1x
Tischplatte
table top
8x
Plattenclips
table top clips
1x
Zusatzzarge
auxiliary frame
1x
Kabelkanal
cable tray
2x
Kabelkanalhalterung
cable tray brackets
2x
Klemmhebel
clamping levers
Tischmodell mit Zusatzzarge
Table model with auxiliary frame
3x
Spanplattenschrauben
chipboard screws
16x
Euroschrauben
Euro screws
01 02
!
Warnhinweise
!
Siehe Bedienungsanleitung
!
Max. 85kg
Versuchen Sie nicht, Komponenten dieses Produktes zu entfernen oder in irgendeiner Form zu manipulieren.
Die Zentralträger-Abdeckung darf nur von sachkundigen Personen entfernt werden.
Jegliche Reparaturen an der Mechanik, der Gewichtseinstellung, der Transportsicherung oder dem Handauslösehebel
dürfen ausschließlich von geschultem Fachpersonal durchgeführt werden.
Beim Transport und bei der (De-)Montage muss die Transportsicherung aktiviert sein (siehe Montageanleitung).
Tisch nie seitlich aufstellen oder lagern (90 Grad). Beim Tragen / Drehen nur am Gestell festhalten.
Bei Missachtung kann persönlicher Schaden entstehen und es besteht Verletzungsgefahr!
Technical Specifications
Series: Flux M
Height adjustment range: 680mm - 1180mm
Adjustable counterweight for balancing
various table loads: 0 - 40kg
Maximum load in locked position: 85kg
Transport protection, manual release lever on the right
!
Warnings
!
See User Guide
!
Max. 85kg
Don‘t try to remove components of this product or to manipulate it in any way.
The coverage of the central beam may only be removed by knowledgeable persons.
Any type of repairs at the mechanics, the weight setting, the transport protection or the manual release lever may only be
performed by trained specialists.
When transporting and (dis)assembling the table the transport protection must be activated (see assembly
instructions). Make sure the table is stored or set down only in a standing position –never on its side. Always hold it by the
frame, never by the table top.
The case of disregard can cause personal damage and injuries!

2020/10
Flux M Montageanleitung | Flux M Assembly Instructions
Neudoerfler Oce Systems GmbH | Kom.-Rat Karl Markon-Str. 530 | A-7201 Neudörfl | neudoerfler.com
1. Plattenclips (8 Stück) mit je 2 Stück Euroschrauben (gesamt 16 Stück) in die vorgekörnten Bohrungen auf die
Unterseite der Tischplatte schrauben.
Screw the table top clips (8x) into the pre-punched pilot holes on the underside of the table top with 2 Euro
screws (16x) each.
2. Kabelkanalhalterungen (2 Stück) in den Kabelkanal clippen.
Clip the cable tray brackets (2x) into the cable tray.
3. Zusatzzarge mittels Klemmhebel (2 Stück) am Tischgestell befestigen.
Attach the auxiliary frame to the table frame by means of the clamping levers (2x).
4. Vormontierten Kabelkanal auf die Zusatzzarge clippen und Halterung schließen.
Clip the pre-mounted cable tray to the auxiliary frame and close the brackets.
5. Tischgestell um 180° drehen und auf die Tischplatte legen. Der Handschalter muss sich auf der Seite mit den
zwei vorgekörnten Bohrlöchern befinden (siehe Abb.).
With the table frame upside down, place it on the underside of the table top. The manual switch must be on the
side with the two pre-punched pilot holes (see ill.)
6. Plattenclips schließen.
Close the table top clips.
03 04

2020/10
Flux M Montageanleitung | Flux M Assembly Instructions
Neudoerfler Oce Systems GmbH | Kom.-Rat Karl Markon-Str. 530 | A-7201 Neudörfl | neudoerfler.com
7. Handauslöser mittels Spanplattenschrauben (2 Stück) an die Tischplatte schrauben.
Screw the manual release lever to the underside of the table top with chipboard screws (2x).
8. Mittelsteg mittels Spanplattenschraube (1 Stück) an die Tischplatte schrauben.
Screw the central beam to the underside of the table top with a chipboard screw (1x).
9. Tisch um 180° drehen und auf die Beine stellen.
Turn the table right side up and set it on its legs.
10. Transportsicherung des Tischgestells entsichern (= Schraube bis zum Anschlag hinein drehen).
Release the transport protection device on the table frame (= turn the screw all the way in).
11. Der Tisch ist bereit zur Benutzung (siehe Bedienungsanleitung).
The table is ready to use (see user guide).
05 06

2020/10
Flux M Montageanleitung | Flux M Assembly Instructions
Neudoerfler Oce Systems GmbH | Kom.-Rat Karl Markon-Str. 530 | A-7201 Neudörfl | neudoerfler.com
Tischmodell ohne Zusatzzarge
Table model without auxiliary frame
1. Plattenclips (8 Stück) in die vorgekörnten Bohrungen auf die Unterseite der Tischplatte schrauben.
Screw the table top clips (8x) into the pre-punched pilot holes on the underside of the table top.
1x
Tischgestell
table frame
1x
Tischplatte
table top
1x
Kabelkanal
cable tray
8x
Plattenclips
table top clips
2x
Kabelkanalhalterung
cable tray brackets
7x
Spanplattenschrauben
chipboard screws
16x
Euroschrauben
Euro screws
2. Kabelkanalhalterungen (2 Stück) mit Euroschrauben (je 2 Stück) an die Tischplatte schrauben.
Screw the cable tray brackets (2x) onto the underside of the table top with Euro screws (2 screws each).
3. Kabelkanal an den beiden Kabelkanalhalterungen befestigen.
Attach the cable tray to the two cable tray brackets.
4. Tischgestell um 180° drehen und auf die Tischplatte legen. Der Handschalter muss sich auf der Seite mit den
zwei vorgekörnten Bohrlöchern befinden (siehe Abb.).
With the table frame upside down, place it on the underside of the table top. The manual switch must be on the
side with the two pre-punched pilot holes (see ill.).
07 08

2020/10
Flux M Montageanleitung | Flux M Assembly Instructions
Neudoerfler Oce Systems GmbH | Kom.-Rat Karl Markon-Str. 530 | A-7201 Neudörfl | neudoerfler.com
5. Plattenclips schließen.
Close the table top clips.
6. Handauslöser mittels Spanplattenschrauben (2 Stück) an die Tischplatte schrauben.
Screw the manual release lever to the underside of the table top with chipboard screws (2x).
7. Mittelsteg mittels Spanplattenschraube (1 Stück) an die Tischplatte schrauben.
Screw the central beam to the underside of the table top with a chipboard screw (1x).
8. Tisch um 180° drehen und auf die Beine stellen.
Turn the table right side up and set it on its legs.
9. Transportsicherung des Tischgestells entsichern (= Schraube bis zum Anschlag hinein drehen).
Release the transport protection device on the table frame (= turn the screw all the way in).
10. Der Tisch ist bereit zur Benutzung (siehe Bedienungsanleitung).
The table is ready to use (see user guide).
09 10

2020/10
Flux M Montageanleitung | Flux M Assembly Instructions
Neudoerfler Oce Systems GmbH | Kom.-Rat Karl Markon-Str. 530 | A-7201 Neudörfl | neudoerfler.com
CPU-Halterung
CPU Holder
1x
Klemmhebel
clamping lever
1x
CPU-Halterung
CPU holder
1. CPU-Halterung von außen auf den Seitenbügel des Tisches aufschieben.
Die CPU-Halterung kann nach Belieben an der linken oder rechten Seite des Tisches montiert werden.
Slide the CPU holder onto the lateral frame of the table from the outside. The CPU holder can be
mounted on either the left or the right side of the table.
2. Klemmhebel in die vorgesehene Öffnung
einschieben.
Insert the clamping lever into the opening provided.
3. Klemmhebel durch 90-Grad-Drehung
fixieren, sodass er am Gestell anliegt.
Secure the clamping lever by turning it
90 degrees so that it lies up against the frame.
1. Tisch in die niedrigste Position bringen.
Put the table in its lowest position.
2. Transportsicherung des Tischgestells aktivieren (= Schraube bis zum Anschlag hinaus drehen).
Tisch ausschließlich im gesicherten Zustand demontieren und transportieren!
Wenn Sie den Tisch transportieren, tragen Sie ihn nur am Gestell und niemals an der Tischplatte. Stellen Sie
sicher, dass der Tisch nur stehend – niemals auf der Seite liegend – gelagert oder abgestellt wird.
Warnhinweise siehe Bedienungsanleitung.
Activate the transport protection device on the table frame (= turn the screw all the way out).
Disassemble and transport the table only when the transport protection device is activated!
When transporting the table, always hold it by the frame, never by the table top. Make sure the table is stored or
set down only in a standing position – never on its side.
See warnings in the user guide.
Flux M | De-Montageanleitung
Flux M | Disassembly Instructions
12
11

2020/10
Flux M Montageanleitung | Flux M Assembly Instructions
Neudoerfler Oce Systems GmbH | Kom.-Rat Karl Markon-Str. 530 | A-7201 Neudörfl | neudoerfler.com
3. CPU-Halterung demontieren (falls vorhanden): Klemmhebel lösen und Halterung vom Gestell nehmen.
Disassemble the CPU holder (if there is one): Release the clamping lever and remove the holder from the frame.
4. Tisch um 180° drehen und auf die Tischplatte legen.
Turn the table upside down so that it is lying on the table top.
5. Schrauben des Handauslösers (2 Stück) heraus schrauben und zur Seite legen.
Unscrew the manual release lever screws (2x) and set them aside.
6. Schraube des Mittelstegs (1 Stück) heraus schrauben und zur Seite legen.
Unscrew the central beam screw (1x) and set it aside.
7. Kabelkanal und Kabelkanalhalterungen (2 Stück) herunter schrauben / abclippen.
Unscrew/unclip the cable tray and cable tray brackets (2x).
8. Zusatzzarge (falls vorhanden) durch Öffnen der Klemmhebel (2 Stück) vom Tischgestell demontieren.
Remove the auxiliary frame (if there is one) from the table frame by opening the clamping levers (2x).
13 14

2020/10
Flux M Montageanleitung | Flux M Assembly Instructions
Neudoerfler Oce Systems GmbH | Kom.-Rat Karl Markon-Str. 530 | A-7201 Neudörfl | neudoerfler.com
9. Plattenclips öffnen.
Open the table top clips.
10. Tischgestell von der Tischplatte herunternehmen.
Remove the table frame from the table top.
11. Schrauben der Plattenclips (8 Stück) heraus schrauben und zur Seite legen.
Unscrew the screws from the table top clips (8x) and set them aside.
12. Tisch und alle Bestandteile in geeigneter Verpackung transportieren.
Transport the table and all components in suitable packaging.
Kontakt
Contact
Bei Fragen oder Problemen sind wir gerne für Sie da:
Please feel free to contact us if you have any questions or problems:
Neudoerfler Oce Systems GmbH
Kom.-Rat Karl Markon-Str. 530
A-7201 Neudörfl
T +43 2622 77444 | bueromoebel@neudoerfler.com | neudoerfler.com
16 17
Other Neudoerfler Indoor Furnishing manuals
Popular Indoor Furnishing manuals by other brands

Herman Miller
Herman Miller Keyn Disassembly for Recycling Instructions
home star
home star Mainstays ES108997A Assembly instructions
HAG
HAG Capisco user guide

Simpli Home
Simpli Home Amherst AXCAMH53-HIC manual
Omnimount
Omnimount RSVS5U instruction manual
Home Styles
Home Styles Montego Bay 88 5661 25L quick start guide
HAMPTON BAY
HAMPTON BAY 3022-CM4-FP Use and care guide
System Build
System Build 6646015COM manual

Happy Beds
Happy Beds XIAMEN Wooden Bed - 3ft Single Assembly instructions
Westwood Design
Westwood Design TRIBECA Assembly instruction
Child Craft
Child Craft Redmond F02838 manual
Happy Beds
Happy Beds RACING CAR BEDSIDE instructions
