Neumann.Berlin KH 80 DSP User manual

· . · ·
()/- · - · @. · ..
. /
KH 80 DSP
I M
B
N ‘
I ‘
I
M
G
I
B
B
K
Οδηγίες λείτΟυργίας

KH 80 DSP | 2
The KH 80 DSP studio monitor ..............................................3
Delivery includes ..........................................................3
About this manual..........................................................3
Product overview ..........................................................4
Installing and connecting the KH 80 DSP .....................................5
Preparing the loudspeakers ............................................5
Preparing the room....................................................5
Positioning the loudspeakers ...........................................6
Connecting audio signals...............................................7
Connecting network cables . . . . . . . . . . . . . . . . . . . . . . . . . . . . . . . . . . . . . . . . . . . . .8
Connecting/disconnecting the KH 80 DSP to/from
the mains power supply................................................8
Configuring and using the KH 80 DSP ........................................9
Switching the KH 80 DSP on/o .........................................9
Functionality of the Neumann logo .....................................10
SETTINGS switch.....................................................11
Resetting the KH 80 DSP ..............................................11
Firmware update.....................................................11
Adjusting the frequency response using the backpanel controls ............12
Adjusting the acoustic level ...........................................12
Cleaning and maintaining the KH 80 DSP ....................................13
Troubleshooting ..........................................................13
Specifications ............................................................13
Acoustical measurements and block diagram.................................14
Accessories ..............................................................14
Installation angles ........................................................15
Contents
EN

KH 80 DSP | 3
The KH 80 DSP studio monitor
Thank you for purchasing a Neumann studio monitor. The KH 80 DSP features a Mathemati-
cally Modeled Dispersion™ Waveguide (MMD™), DSP acoustical controls, control via standard
IP networks and an extensive range of mounting hardware. This allows the loudspeaker to
be used in diverse acoustical conditions, with any source equipment and in a wide variety of
physical locations. The KH 80 DSP represents the latest in acoustic and electronic simulation
and measurement technologies to ensure the most accurate sound reproduction possible.
Depending on the size, Neumann’s two-way loudspeaker systems are designed for use as near
field monitors or as rear loudspeakers in larger multi-channel systems. They can be used in
project, music, broadcast, and post production studios for tracking, mixing, and mastering.
Delivery includes
1 KH 80 DSP
4 Self-adhesive feet
1 Safety Guide
1 Supplement “Getting Started Quickly”
Delivery also includes European, UK or US mains cables
About this manual
This operating manual describes the physical setup and autonomous operation of the
KH 80 DSP. For information about using the KH 80 DSP in a network with the Neumann.Control
software please refer to the software help.
Some of the advantages of exploring Neumann.Control are:
• More extensive acoustical controls for more accurate audio reproduction
• System-wide control such as volume control, soloing and muting
• Rapid system re-purposing
When released, to download the app for Android or iOS tablets go to the Google Play Store or
Apple App Store and search for “Neumann.Control”.
When released, to download the software for PC or Mac go to www.neumann.com and find the
download section in the KH 80 DSP product page.
Note that imperial dimensions are approximate.
EN

KH 80 DSP | 4
Product overview
1
2
2
1 Neumann logo
• for information on the functionality
of the Neumann logo refer to chapter
“Functionality of the Neumann logo”
2 Bass reflex ports
3
4
5
7
6
3 Threaded inserts (M6) for Neumann
mounting hardware
4 On/o switch
5 RJ-45 socket for network control
6 Cooling vents
7 Control switches
8
9
8 Mains socket
9 XLR/Jack analog input socket
Front panel
Back panel
Bottom
EN

KH 80 DSP | 5
Installing and connecting the KH 80 DSP
CAUTION
Danger of injury and material damage due to tipping/dropping of the product!
If improperly mounted, the product and/or the mounting hardware (e.g. rack) can tip over
or drop down.
XAlways have the product mounted by a qualified specialist according to local, national
and international regulations and standards.
XUse the mounting systems recommended by Neumann and always provide sucient
additional protection against tipping or dropping.
CAUTION
Damage to the product due to overheating!
If air cannot circulate properly around the cooling vents on the rear of the product, the
amplifier(s) may overheat leading to premature activation of the thermal protection system
which limits the maximum output level of the loudspeaker. In rare cases, damage to the
product may also occur.
XNever cover the cooling vents.
XWhen installing the product into tight spaces such as wall recesses, maintain an air gap
of at least 5 cm (2") around the top, rear and side panels of the product and provide suf-
ficient air circulation. If necessary, use forced-air cooling (e.g. in OB vans).
For information on installation, please refer to the supplied “Getting Started Quickly”
supplement. This will help you set up the loudspeakers in a way that will give you the
best acoustic performance from the system.
For further information on setting up loudspeakers, please refer to the “Questions &
Answers” section on the product page at www.neumann.com.
For more information on building systems using Neumann loudspeaker products, please
refer to the Product Selection Guide at www.neumann.com
Preparing the loudspeakers
CAUTION
Risk of staining surfaces!
Some surfaces treated with varnish, polish or synthetics may suer from stains when they
come into contact with other synthetics. Despite a thorough testing of the synthetics used
by us, we cannot rule out the possibility of staining.
XDo not place the loudspeaker on delicate surfaces.
To place the loudspeaker on a flat surface:
XAttach the supplied self-adhesive feet to the bottom of the cabinet.
This reduces the risk of scratching the surface and acoustically isolates the loudspeaker
from the surface.
Preparing the room
XArrange all acoustically relevant surfaces and objects symmetrically on either side of the
listening axis of the room (left/right).
XMinimize the sound that is reflected back to the listening position by using angled surfaces
and/or acoustical treatment.
This product has been optimized for use in recording studios. In order not to aect the
quality of reproduction, make sure that the product is used in an EMC (electromagneti-
cally compatible) environment.
EN

KH 80 DSP | 6
Positioning the loudspeakers
XCarry out the following steps very accurately, since the more accurate the physical arrange-
ment of the loudspeakers in the room, the more accurate the reproduction will be at the
listening position.
XObserve the recommended distances between the loudspeakers and your listening position
(imperial dimensions are approximate):
• Minimum: 0.50 m (2')
• Recommended: 0.8–1.75 m (2'6"–6')
• Maximum: 3.0 m (9')
XAvoid positioning the loudspeaker at a distance “dwall” of 0.8 to 1.75 m (2'6"–6') from
the wall behind the loudspeaker. When positioning bass managed loudspeakers, avoid a
distance “dwall” of 0.8 to 1 m (2'6"–3') from a solid wall behind the loudspeaker. Similarly,
avoid these distances from solid side walls or a solid ceiling. Respecting these positio-
ning limitations reduces the chances of dips in the low frequency response (comb filte-
ring) caused by strong reflections.
XPrint out the diagram “Installation angles” that can be found at the end of this operating
manual.
XPlace the diagram at the listening position or center of the listening area.
XUsing a tape measure, place the loudspeakers at the same distance from the center of the
diagram “Installation angles”. To ensure good imaging, do this at an accuracy of at least
1 cm (1
/
2").
XIf the loudspeakers cannot be placed at the same distance from the listening position, com-
pensate for distance dierences > 1 cm (1
/
2") by delaying closer loudspeakers by 30 µs/
cm (76 µs/inch). Delay can be set directly in the loudspeaker using the Neumann.Control
software.
XCheck the location of the loudspeaker cabinet. This depends on the application:
• 2.0 systems (stereo): ±30°, plus optional subwoofer(s)
• 5.1 systems:
ITU-R BS.775-1: 0°, ±30°, ±110° (±10°), plus optional subwoofer(s)
(center, front left/right, surround left/right)
ANSI/SMPTE 202M: 0°, ±22.5°, arrays to the surround left and to the surround right,
plus optional subwoofer(s)
• 7.1 systems: 0°, ±30°, ±90°, ±150°, plus optional subwoofer(s)
(center, front left/right, side left/right, back left/right)
• 3D systems See the recommendations from Dolby, DTS, Auro3D and
ITU-R BS.2051-0 for loudspeaker positioning.
The acoustical axis of the KH 80 DSP is located at the midpoint of the bass and tweeter drivers.
XAlways point the acoustical axis, in the horizontal and vertical planes, towards the listening
position.
The acoustical axis is a line perpendicular to the loudspeaker’s front panel along which
the microphone was placed when tuning the loudspeaker’s crossover during design.
Pointing the acoustical axis, in the horizontal and vertical planes, towards the listening
position or center of the monitoring area will give the best measured and perceived
sound quality.
XPosition the loudspeaker so that there is a direct line of sight from the listening position to
the bass and tweeter drivers.
Distances
d
wall
Arranging the
loudspeakers
at an angle
x = 7.7 cm
y = 12.9 cm
EN

KH 80 DSP | 7
Connecting audio signals
XAlways use good quality cables to achieve the maximum cable lengths shown below:
Signal (connector) Cable length Connection
Analog (XLR) up to 100 m
(300’)
directly to the ANALOG INPUT socket (XLR/Jack)
(see below)
Analog (Jack) up to 100 m
(300’)
directly to the ANALOG INPUT socket (XLR/Jack)
(see below)
Analog (RCA) up to 10 m
(30')
via an adapter (RCA-XLR or Jack-XLR) to the
ANALOG INPUT socket (XLR/Jack) (see below)
If possible, use a balanced connection (XLR, stereo Jack) in order to avoid interference in
the cable.
Connecting analog signals to the KH 80 DSP
XOnly connect analog signals to the KH 80 DSP.
XConnect the left and right output of your analog audio source to the XLR input sockets of
the respective loudspeaker.
XLR or Jack XLR or Jack
Left signal
Right signal
Analog Source
XUse an XLR or Jack adapter (not supplied) to connect unbalanced cables (e.g. RCA cables).
XUse this adapter directly at the source and connect the adapter via a properly wired balanced
XLR cable to the loudspeaker. The connection of pin 3 to ground should be as close as pos-
sible to the source to maximize hum rejection on the cable.
XUse the following wiring if you want to make your own RCA to XLR cable:
Wiring Pin Signal
Source (RCA)
Unbalanced RCA to balanced XLR connections
Loudspeaker (XLR-M)
1Audio ground
2Signal +
3Signal -
Connecting
XLR, Jack or
RCA cables
EN

KH 80 DSP | 8
Connecting network cables
To use the extended functionality oered by the Neumann.Control software, the loudspeaker
must be connected to a standard network switch using a user supplied standard Ethernet cable
(Cat 5 or better). The maximum length of the cable is 100 m.
Refer to the Neumann.Control software help for information about how to use loudspeakers in
a network.
RJ45 RJ45 RJ45RJ45
Network Switch
Connecting/disconnecting the KH 80 DSP to/from
the mains power supply
To connect the KH 80 DSP to the mains power supply:
XMake sure that the on/o switch is set to “OFF”.
XConnect the figure-8 connector of the supplied mains cable to the mains socket.
Power Source
XConnect the mains plug of the mains cable to a suitable wall socket.
To disconnect the KH 80 DSP from the mains power supply:
XSet the on/o switch to “OFF”.
XPull the mains plug out of the wall socket.
EN

KH 80 DSP | 9
Configuring and using the KH 80 DSP
Switching the KH 80 DSP on/off
On/Off
XSet the on/o switch to:
• “ON” to switch on the loudspeaker. The Neumann logo lights up solid red while the
DSP system boots up. After approximately 5 seconds it turns white indicating the loud-
speaker is ready to be used. If the logo brightness has been set to less than 100% in the
Neumann.Control software, it will be dimmed or o after the bootup phase is complete.
• “OFF” to switch o the loudspeaker. The Neumann logo switches to red for a short moment
and then goes o.
There is a five second delay before sound can be heard from the loudspeaker in order
to avoid noises (pops) from preceding equipment switched on at the same time. Con-
versely, switching o the loudspeaker immediately mutes the audio.
EN

KH 80 DSP | 10
Functionality of the Neumann logo
Action Logo indication
Firmware activities
Loudspeaker is booting up Solid red
Loudspeaker boot up error Fast red flashing
Loudspeaker firmware is being updated Solid rosé
Loudspeaker resetting to factory default settings Rosé flutter flash
Everyday operation
Operating normally (dimmable via Neumann.
Control)
Solid white
Loudspeaker in active system is solo’ed in
Neumann.Control
Solid white
Loudspeaker system output level is dimmed or
muted (GUI button on Operate page)
Solid rosé
Neumann.Control is saving changes to the
loudspeaker’s memory (not Operate page
commands)
Solid rosé
Protection and Standby
Protection system is activated (takes priority over
other indications)
Red
Neumann.Control Alignment
Setup: Identify the loudspeaker Rosé pulses (2 Hz) + audible ID
tone
Guided Alignment: Loudspeaker is selected Rosé pulses (0.5 Hz)
Manual Alignment: Loudspeaker is selected Solid rosé
Precision Alignment: During countdown 10 rosé pulses (1 Hz)
Precision Alignment: Measuring the loudspeaker Red to White crossfade + test
signal
Precision Alignment: Loudspeaker not being
measured
White
EN

KH 80 DSP | 11
SETTINGS switch
The SETTINGS switch has two functions which can be turned on or o independently.
STANDBY
If the SETTINGS switch has been set to one of the two AUTO STANDBY = ON positions, the
KH 80 DSP will switch to standby after 90 minutes.
Standby means that the network interface, signal processing circuitry and power amplifiers
are all powered down. Standby mode is automatically deactivated when a suciently large
audio signal is detected at the analog input. The time taken to resume normal operation and
hear sound is 5 seconds. It is possible to change the time before standby mode is activated
using the Neumann.Control software.
Standby can be disabled by moving the SETTINGS switch to one of the two AUTO STANDBY =
OFF positions.
CONTROL
If the SETTINGS switch has been set to one of the two LOCAL CONTROL positions, the KH 80 DSP
will not react to network commands. Control of the loudspeaker will be from the backplate
only.
If the SETTINGS switch has been set to one of the two NETWORK CONTROL positions, the
KH 80 DSP will react to network commands from the Neumann.Control software. The other
backplate controls will be ignored.
If the SETTINGS switch is set to NETWORK CONTROL but there is no network connection and
active Neumann.Control software, the last used network configuration will be used.
If you have configured any settings via the Neumann.Control software and you remove the
network cable, the current settings will stay active.
By switching from network control to local control you can easily switch between a configu-
ration measured in the Neumann.Control software and settings made directly on the loud-
speaker.
This can make sense if you want to temporarily use the loudspeaker in a dierent location than
your measured studio environment.
The loudspeaker does not lose its settings even when disconnecting it from the network or the
mains supply.
Resetting the KH 80 DSP
To reset the KH 80 DSP internal controls to their factory default values:
XSwitch on the KH 80 DSP.
XWhile the Logo is flashing during the boot up phase, move the SETTINGS switch up and
down repeatedly.
The Logo will then light up with a rosé flutter flash before reverting to white.
Firmware update
Firmware updates are done via the Neumann.Contol software. When it is opened it surveys
the network for loudspeakers and checks if the firmware is up to date. If a firmware update is
needed, you will be prompted to follow the on-screen instructions. It takes approximately 10
seconds per loudspeaker to do the update.
EN

KH 80 DSP | 12
Adjusting the frequency response using the backpanel
controls
When the LOW MID control is set to FREE STANDING or, via the Neumann.Control software,
the acoustical controls have been set to 0 dB, the KH 80 DSP loudspeaker is designed to have
a flat frequency response in anechoic conditions. When the loudspeaker is installed in your
monitoring environment, the response changes. The same loudspeaker installed in dierent
positions in the same room may require dierent acoustical control settings. In a symmetrical
installation, left/right pairs (front or back) will probably have the same acoustical settings.
XBefore using your loudspeaker system for the first time, align the frequency response of the
loudspeakers in the room in order to obtain the desired response.
XRepeat the above step if you change the physical conditions in your studio.
XAt your listening position, determine the frequency response of each loudspeaker.
XUse the ACOUSTICAL CONTOL switch to compensate for the acoustical loading in the low-
mid frequency range due to nearby large solid objects (e.g. mixing consoles, desks or com-
puter screens).
ACOUSTICAL CONTROL switch Possible settings
Low-Mid Free Standing (0 dB),
Small Desk (-1.5 dB),
Medium Desk (-3 dB),
Large Desk (-4.5 dB)
Adjusting the acoustic level
XOn your KH 80 DSP loudspeakers, set the OUTPUT LEVEL switch to 94 dB SPL and the INPUT
GAIN control to -15 dB.
XPlay a broadband pink noise test signal that is set to -18 dBFS (Europe) or -20 dBFS (USA)
on the mixing console’s output level meters.
XMeasure the sound pressure level at the listening position using a sound level meter with
the following settings:
• “C”-weighted
• slow integration time
XSet the OUTPUT LEVEL switch and INPUT GAIN control of your loudspeakers so that the
desired acoustic level is obtained.
Recommended sound pressure levels:
Application Sound pressure level
Film 85 dB(C)
Broadcast 79 to 83 dB(C)
Music No defined reference levels
If the Neumann logo flashes red, the loudspeaker’s protection system has been activated. To
avoid this and achieve the desired output level, use larger loudspeakers or add a bass man-
aged subwoofer to the system.
Examples of sound pressure levels as a function of the input and output level of the KH 80 DSP:
Input signal
dBu
0
(0.775 V)
0
(0.775 V)
+4
(1.23 V)
-20
(77.5 mV)
INPUT GAIN control
dB 0-15 -4-15
OUTPUT LEVEL switch
dB SPL 100 100 94 114
Sound pressure level
dB SPL at 1 m
100 85 94 79
EN

KH 80 DSP | 13
Cleaning and maintaining the KH 80 DSP
CAUTION
Damage to the product caused by liquids!
Liquids entering the product can cause a short-circuit in the electronics and damage or even destroy the product.
XKeep all liquids away from the product!
XBefore cleaning, disconnect the product from the mains power supply.
XUse a soft, dry, and lint-free cloth to clean the product.
Troubleshooting
Problem Cause Solution
The Neumann logo is o, no sound
is heard from the KH 80 DSP
The KH 80 DSP main fuse
has blown.
Have the product checked by an
authorized Neumann service partner.
The Neumann logo is o or not
clearly visible, but sound is heard
from the KH 80 DSP
The Neumann logo is
switched o or dimmed.
Switch on the Neumann logo
and switch o the dimming (see
page 9) .
The KH 80 DSP is humming Incorrect wiring in the
audio cable and/or poor
quality grounding in the
audio cable.
Check the cabling, especially if
unbalanced cabling has been used - see
the cable wiring digram on page 7.
Use gold plated connectors.
Set the output level of the KH 80 DSP as
low as possible and set the output level
of the audio source as high as possible,
without causing it to clip.
The loudspeaker sounds very “thin”
in the bass. The low frequency
response is very low.
Incorrect wiring in the
audio cable or adapter.
Check the cabling, especially if
unbalanced cabling has been used - see
the cable wiring digram on page 7.
For further information, please refer to the “Questions & Answers” section on the product page at www.neumann.com.
Specifications
For a complete list of the product spefications please refer to the product page of the KH 80 DSP at www.neumann.com.
Product properties
Power supply 100 to 240 V~, 50/60 Hz
Power consumption (230 V / 100 V) Standby
Idle
Full output
<330 mW / <50 mW
9 W / 8 W
180 W
Dimensions (H x W x D) 233 x 154 x 194 mm (9 1/8" x 6" x 7 5/8")
Weight 3.4 kg (7 lbs 8 oz)
Temperature
Operation and storage, unpacked +10 °C to +40 °C (+50 °F to +104 °F)
Transport and storage, packed in original packaging –25 °C to +60 °C (–13 °F to +140 °F)
Relative humidity
Operation and storage, unpacked max. 75 % (non-condensing)
Transport and storage, packed in original packaging max. 90 % (non-condensing)
EN

KH 80 DSP | 14
In compliance with
Europe EMC EN 55032, EN 55103-2,
Electromagnetic Environment: Class E3
Safety EN 60065, EN 62368-1
RoHS EN 50581
USA 47 CFR 15 subpart B
Canada CAN ICES-3 (B)/NMB-3(B)
Acoustical measurements and block diagram
Additional technical data such as acoustical measurements and a block diagram can be found on the product page of
the KH 80 DSP at www.neumann.com.
Accessories
Product Description
LH 28 Tripod stand adapter
LH 29 TV spigot (lighting stand adapter)
LH 32 Wall L-bracket
LH 37 Subwoofer adapter
LH 43 Surface mounting plate
LH 45 Wall bracket
LH 46 Adjustable ceiling drop adapter
LH 47 Mounting adapter plate
LH 48 Tripod adapter plate
LH 61 Adjustable L-bracket
LH 64 Omnimount/VESA adapter
LH 65 Table stand
PAK 1 Precision alignment kit
EN

KH 80 DSP | 15
Installation angles
00°°
111100°°
118800°°
9900°°
115500°°
3300°°22.5°22.5°
6600°°
112200°°
110000°°
111100°°
9900°°
115500°°
3300°°
6600°°
112200°°
110000°°
EN

KH 80 DSP | 16
Der KH 80 DSP-Studiomonitor . . . . . . . . . . . . . . . . . . . . . . . . . . . . . . . . . . . . . . . . . . . . . . 17
Lieferumfang .............................................................17
Über diese Bedienungsanleitung............................................ 17
Produktübersicht .........................................................18
KH 80 DSP aufstellen und anschließen.......................................19
Lautsprecher vorbereiten .............................................19
Raum vorbereiten ....................................................19
Lautsprecher aufstellen ...............................................20
Audiosignale anschließen .............................................21
Netzwerkkabel anschließen............................................22
KH 80 DSP mit dem Stromnetz verbinden/vom Stromnetz trennen ..........22
KH 80 DSP konfigurieren und verwenden ....................................23
KH 80 DSP ein-/ausschalten ...........................................23
Funktionalität des Neumann Logos .....................................24
Schalter SETTINGS ...................................................25
Einstellungen des KH 80 DSP zurücksetzen . . . . . . . . . . . . . . . . . . . . . . . . . . . . . . 25
Firmware-Update ....................................................25
Frequenzgang mithilfe der Schalter auf der Lautsprecherrückseite anpassen .26
Lautstärkepegel anpassen.............................................26
KH 80 DSP reinigen und pflegen ............................................27
Fehlerbehebung...........................................................27
Technische Daten .........................................................27
Akustische Messungen und Blockdiagramm ..................................28
Zubehör..................................................................28
Aufstellwinkel ............................................................29
Inhalt
DE

KH 80 DSP | 17
Der KH 80 DSP-Studiomonitor
Herzlichen Dank für den Kauf eines Neumann Studiomonitors. Der KH 80 DSP zeichnet sich
aus durch Mathematically Modeled Dispersion™ Waveguide (MMD™), DSP-Akustikregler, die
Steuerung über herkömmliche IP-Netzwerke und umfangreiches Montagezubehör. Dadurch
kann der Lautsprecher unter vielfältigen akustischen Bedingungen, mit einer Vielzahl von
Signalquellen und an nahezu allen Orten eingesetzt werden. Der KH 80 DSP wurde mithilfe
modernster Simulations- und Messtechnik entwickelt und überzeugt durch seine akustische
Authentizität.
Je nach Größe können Neumann 2-Wege-Systeme als Nahfeldmonitore oder als hintere Laut-
sprecher in größeren Mehrkanalsystemen verwendet werden. Sie können in Projekt-, Musik-,
Rundfunk- und Nachbearbeitungsstudios (Post-Production) für Aufnahmen, Abmischungen
und Mastering eingesetzt werden.
Lieferumfang
1 KH 80 DSP
4 selbstklebende Füße
1 Sicherheitsleitfaden
1 Beiblatt „Getting Started Quickly“
Netzkabel für Europa, Großbritannien oder die USA liegen dem Produkt bei.
Über diese Bedienungsanleitung
Diese Bedienungsanleitung beschreibt die physische Einrichtung und den eigenständigen
Betrieb des KH 80 DSP. Informationen darüber, wie Sie den KH 80 DSP mit der Software
Neumann.Control über ein Netzwerk steuern können, finden Sie in der Softwarehilfe.
Die Verwendung von Neumann.Control bietet unter anderem folgende Vorteile:
• Umfangreichere akustische Optionen für eine genauere Audiowiedergabe
• Systemweite Einstellungen, z.B. Lautstärkeregelung, Solo-Schalten, Stummschalten
• Schnelle Umkonfiguration des Systems
Die Neumann.Control-App für Android-Tablets und iPads finden Sie nach ihrer Veröentlichung
im Google Play Store bzw. im Apple App Store (Suchbegri „Neumann.Control“).
Die PC- und Mac-Version der Software finden Sie nach ihrer Veröentlichung im Download-
bereich der KH 80 DSP-Produktseite unter www.neumann.com.
DE

KH 80 DSP | 18
Produktübersicht
1
2
2
1 Neumann Logo
• Informationen zur Funktionalität des
Neumann Logos finden Sie im Kapitel
„Funktionalität des Neumann Logos“
2 Bassreflex-Önungen
3
4
5
7
6
3 Gewindebuchsen (M6) für Neumann
Montagezubehör
4 Ein-/Ausschalter
5 RJ-45-Buchse für die Netzwerksteuerung
6 Kühlönungen
7 Bedienelemente zur Einstellung
8
9
8 Netzbuchse
9 Analogeingang (XLR/Klinke)
Vorderseite
Rückseite
Unterseite
DE

KH 80 DSP | 19
KH 80 DSP aufstellen und anschließen
VORSICHT
Verletzungsgefahr und Sachschäden durch Umkippen/Herabfallen des Produkts!
Bei unsachgemäßer Montage kann das Produkt bzw. Montagezubehör (z.B. Ständer) umkip-
pen oder herabfallen.
XLassen Sie das Produkt stets von einer qualifizierten Fachkraft nach örtlichen, nationa-
len und internationalen Vorschriften und Standards montieren.
XVerwenden Sie die von Neumann empfohlenen Montagesysteme und sorgen Sie stets für
eine ausreichende zusätzliche Sicherung des Produkts gegen Umkippen oder Herabfallen.
VORSICHT
Beschädigung des Produkts durch Überhitzung!
Wenn die Kühlönungen auf der Rückseite des Produkts nicht ungehindert von Luft
umströmt werden, kann die Elektronik des Produkts überhitzen und das thermische Schutz-
system auslösen. Dadurch wird der maximale Ausgangspegel reduziert und es kann zu
Produktschäden kommen.
XBedecken Sie niemals die Kühlönungen!
XHalten Sie beim Einbau (z.B. in Wandaussparungen) einen Abstand von mindestens 5 cm
um die Ober- und Rückseite sowie die linke und rechte Seite des Produkts ein und stellen
Sie sicher, dass Luft die Kühlönungen ungehindert durchströmen kann. Verwenden Sie
ggf. zusätzlich einen aktiven Lüfter (z.B. in Übertragungswagen).
Informationen zum Aufstellen finden Sie auch im Beiblatt „Getting Started Quickly“.
Es unterstützt Sie dabei, die Lautsprecher unter akustischen Gesichtspunkten optimal
aufzustellen.
Weitere Informationen zum Aufstellen von Lautsprechern finden Sie im Bereich „Fragen&
Antworten“ auf der Produktseite unter www.neumann.com.
Informationen zur Erweiterung Ihres Systems um zusätzliche Neumann Lautsprecher-
Produkte finden Sie im „Product Selection Guide“ unter www.neumann.com.
Lautsprecher vorbereiten
VORSICHT
Gefahr der Verfärbung von Oberflächen!
Einige Oberflächen sind mit Lacken, Polituren oder Kunststoen behandelt, auf denen beim
Kontakt mit anderen Kunststoen Flecken entstehen können. Trotz sorgfältiger Prüfung der
von uns eingesetzten Kunststoe können wir derartige Verfärbungen nicht ausschließen.
XStellen Sie den Lautsprecher nicht auf empfindliche Oberflächen.
Um den Lautsprecher auf einer ebenen Fläche aufzustellen:
XBringen Sie die selbstklebenden Füße auf der Unterseite des Lautsprechers an.
Sie reduzieren damit die Gefahr eines Verkratzens der Aufstellfläche und isolieren den Laut-
sprecher akustisch von der Fläche.
Raum vorbereiten
XOrdnen Sie alle akustisch relevanten Flächen und Gegenstände im Raum symmetrisch um
die akustische Achse an.
XMinimieren Sie den zur Abhörposition reflektierten Schall durch abgewinkelte Oberflächen
und/oder durch eine akustische Behandlung.
Dieses Produkt ist für die Wiedergabe in Studios optimiert. Um die Qualität der Wieder-
gabe nicht zu beeinflussen, achten Sie auf eine geschützte EMV-Umgebung.
DE

KH 80 DSP | 20
Lautsprecher aufstellen
XFühren Sie die folgenden Schritte sehr präzise aus. Je genauer Sie das Aufstellen ausführen,
desto genauer wird die Klangwiedergabe an der Abhörposition sein.
XBeachten Sie die empfohlenen Abstände der Lautsprecher zu Ihrer Abhörposition:
• Minimum: 0,50m
• Empfohlen: 0,8 – 1,75m
• Maximum: 3,0m
XVermeiden Sie Abstände „dwall“ zwischen 0,8 und 1,75m zur Wand hinter dem Lautsprecher.
Wenn Sie den Lautsprecher in Verbindung mit dem Bassmanagement eines Subwoofers
betreiben, sollten Sie Abstände „dwall“ zwischen 0,8 m und 1 m zur Wand hinter dem Laut-
sprecher vermeiden. Diese Abstandsempfehlung gilt auch für seitliche Wände und den
Abstand zur Decke. Sie reduzieren damit das Auftreten von Auslöschungen im Tieftonbe-
reich, die durch starke Schallreflexionen verursacht werden (Kammfiltereekte).
XDrucken Sie die Abbildung „Aufstellwinkel“ aus, die Sie im Anhang dieses Dokuments finden.
XPlatzieren Sie die Abbildung an der Abhörposition bzw. am Mittelpunkt des Abhörbereichs.
XVerwenden Sie ein Maßband, um die Lautsprecher im gleichen Abstand um den Kreismittel-
punkt der Abbildung zu platzieren. Um eine optimale Audiowiedergabe zu erreichen, dürfen
die Abstände um nicht mehr als 1cm abweichen.
XKompensieren Sie Abweichungen des Abstands > 1 cm mithilfe eines Delays von 30 µs/cm
für die näher liegenden Lautsprecher. Delays können Sie direkt im Lautsprecher mit der
Software Neumann.Control einstellen.
XOrdnen Sie die Lautsprecher wie folgt an:
• 2.0 Systeme (Stereo): ±30°, ggf. erweitert um Subwoofer
• 5.1 Systeme:
ITU-R BS.775-1: 0°, ±30°, ±110° (±10°), ggf. erweitert um Subwoofer
(Center, Front links/rechts, Surround links/rechts)
ANSI/SMPTE 202M: 0°, ±22.5°, ein Surround-Array links und rechts,
ggf. erweitert um Subwoofer
• 7.1 Systeme: 0°, ±30°, ±90°, ±150°, ggf. erweitert um Subwoofer
(Center, Front links/rechts, Side links/rechts, Back links/rechts)
• 3D-Systeme Siehe die Empfehlungen von Dolby, DTS, Auro3D und
ITU-R BS.2051-0 zur Aufstellung der Lautsprecher.
In der Mitte zwischen Tiefton- und Hochtontreiber verläuft die akustische Achse des KH 80 DSP.
XRichten Sie die akustische Achse stets in vertikaler und horizontaler Ebene auf Ihre Abhör-
position aus.
Die akustische Achse ist eine Linie, die lotrecht zur Vorderseite eines Lautsprechers
verläuft. Während der Monitorentwicklung wird das Mikrofon zur Feinabstimmung
des Lautsprechers entlang dieser Achse aufgestellt. Indem Sie die akustische Achse
auf vertikaler und horizontaler Ebene auf die Abhörposition des Tontechnikers oder
in die Mitte des Abhörbereichs richten, erhalten Sie die beste gemessene und wahr-
genommene Wiedergabequalität.
XPositionieren Sie den Lautsprecher so, dass direkter Sichtkontakt von der Abhörposition
zum Hoch- und Tieftontreiber besteht.
Abstände
d
wall
Lautsprecher
winkelförmig
anordnen
x = 7.7 cm
y = 12.9 cm
DE
Other manuals for KH 80 DSP
2
Table of contents
Languages:
Other Neumann.Berlin Speakers manuals
Neumann.Berlin
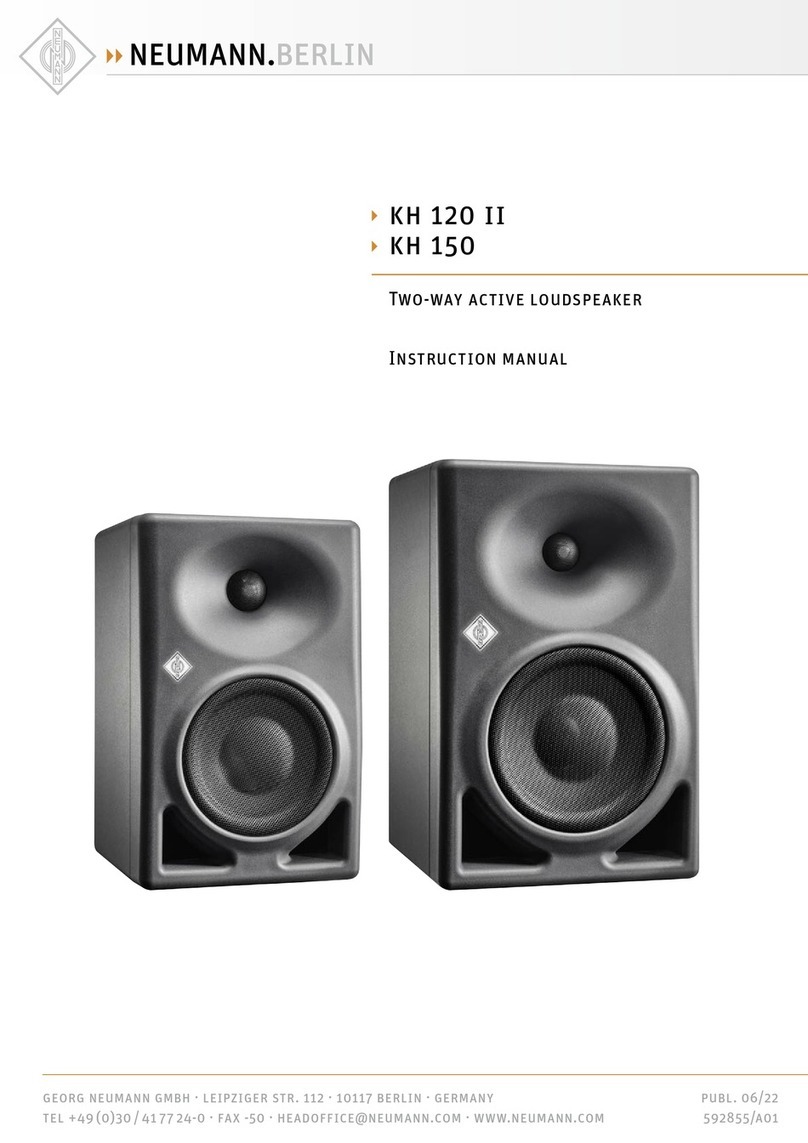
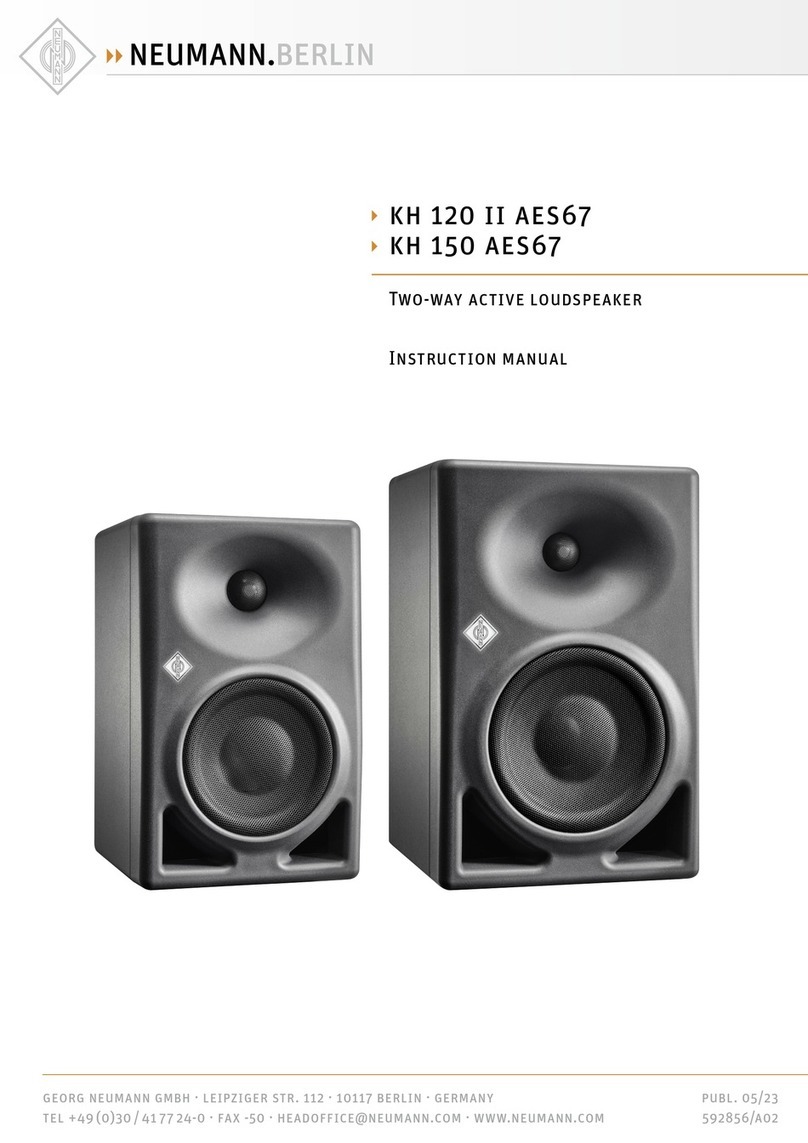
Neumann.Berlin KH 120 II User manual
Neumann.Berlin
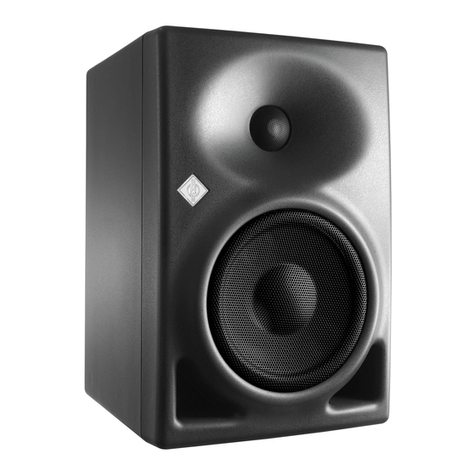
Neumann.Berlin KH 120 II AES67 User manual
Neumann.Berlin
Neumann.Berlin KH 120 D User manual

Neumann.Berlin
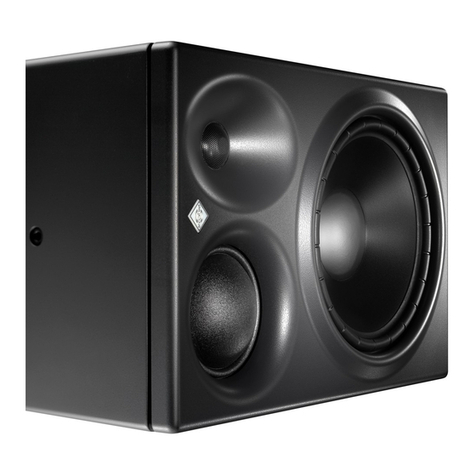
Neumann.Berlin KH 120 A User manual
Neumann.Berlin
Neumann.Berlin KH 310 A User manual

Neumann.Berlin
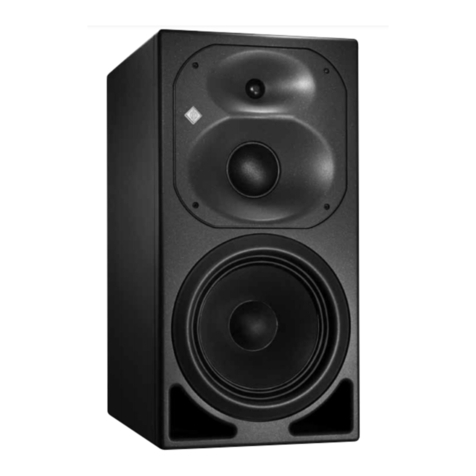
Neumann.Berlin KH 80 DSP User manual
Neumann.Berlin
Neumann.Berlin KH 420 User manual
Neumann.Berlin
Neumann.Berlin KH 150 AES67 User manual
Neumann.Berlin
Neumann.Berlin KH 120 A User manual
Neumann.Berlin
Neumann.Berlin KH 80 DSP User manual

