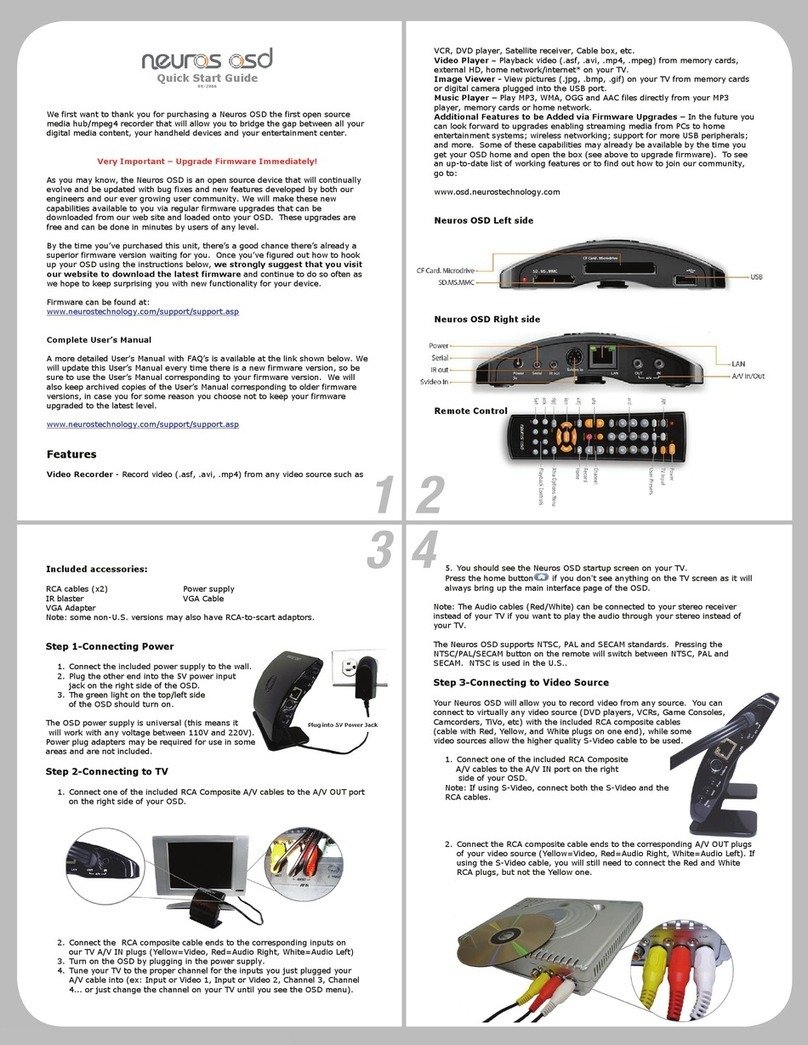
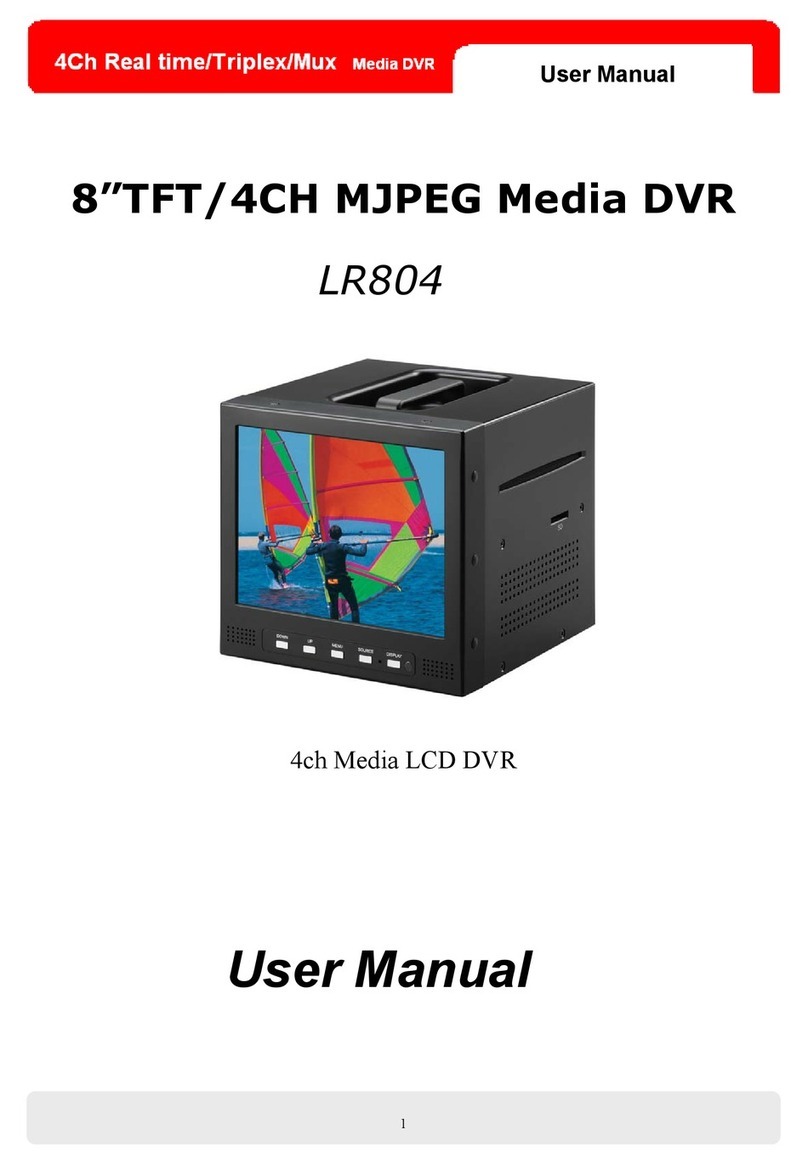
Neuros MPEG4 Recorder 1 User manual

iii

i
Preface
Information in this document has been carefully checked for accuracy;
however, no guarantee is given as to the correctness of the contents.
The information in this document is subject to change without notice.
This document contains proprietary information protected by
copyright. All rights are reserved. No part of this manual may be
reproduced by any mechanical, electronic or other means, in any form,
without prior written permission of the company.
Copyright
Copyright© 2005, All Rights Reserved.
Trademarks
All trademarks are the property of their respective owners.
Conventions
The following conventions are used throughout this manual.
NOTICE
Text set off in this manner indicates key information
that you should pay attention to.
CAUTION
Text set off in this manner indicates that failure
to follow these directions could result in damage to equipment
or loss of information.
WARNING
Text set off in this manner indicates that failure
to follow these directions could result in bodily harm or loss of
life.

Neuros MPEG-4 Recorder
ii
Preface
Safety Information
Please read the following safety instructions and keep the user manual
for later reference.
• Use only the power adapter supplied with the product.
• Do not place the product near any source of heat or expose it to
direct sunshine.
• Do not attempt to connect any computer accessory or electronic
product without instruction from qualified service personnel. It
may result in risk of electric shock.
• Do not expose the product to moisture. Never spill any liquid on
the product.
• Do not place the Neuros MPEG-4 Recorder where the temperature
is less than -10° C (14° F) or greater than 60° C (140° F).
Routine care
Wipe the Neuros MPEG-4 Recorder with a soft cloth. Do not use abra-
sive powders or solvents, such as benzene or thinners. When you leave
the Neuros MPEG-4 Recorder unused for a long time, unplug the AC
adapter from the outlet.

iii
Contents
1 Overview........................................................................................... 1
1.1 Features.......................................................................................... 1
1.2 System Requirements .................................................................... 2
1.3 Unpacking...................................................................................... 2
1.4 The Neuros MPEG-4 Recorder ..................................................... 3
1.4.1 Front View ................................................................................. 3
1.4.2 Rear View .................................................................................. 3
1.5 The Remote Control ...................................................................... 4
1.5.1 Top View ................................................................................... 4
1.5.2 Bottom View.............................................................................. 4
2 Getting Started ................................................................................ 5
2.1 Making Connections...................................................................... 5
2.1.1 Connecting the Power................................................................ 5
2.1.2 Connecting to a Television ........................................................ 6
2.1.3 Connecting to a Television for Recording................................. 7
2.1.4 Connecting to a DVD, VCR or Camcorder ............................... 8
2.1.5 Connecting to a Computer......................................................... 9
2.1.6 Inserting and Removing a Compact Flash (CF) Card.............. 10
2.1.7 Inserting and Removing a Secure Digital (SD) Card .............. 11
2.2 Viewing Media Files ................................................................... 12
2.2.1 Viewing still pictures............................................................... 12
2.2.2 Viewing Videos ....................................................................... 13
2.2.3 Listening to Audio Files .......................................................... 15
3 Using the Neuros MPEG-4 Recorder .......................................... 17
3.1 Accessing the On Screen Interface.............................................. 17
3.1.1 Selecting files........................................................................... 19
3.1.2 Changing the storage media..................................................... 19
3.2 Main Player Setup Menu ............................................................. 20
3.2.1 TV Out ..................................................................................... 20
3.2.2 Date and Time.......................................................................... 21
3.2.3 Disk Copy ................................................................................ 22
3.2.4 Upgrade.................................................................................... 22
3.2.5 Format...................................................................................... 23
3.3 Playing Videos............................................................................. 24

Neuros MPEG-4 Recorder
iv
Contents
3.3.1 Video Player Setup Menu ........................................................ 25
3.3.2 Repeat....................................................................................... 25
3.3.3 Lock and Unlock ...................................................................... 26
3.3.4 Delete ....................................................................................... 26
3.3.5 Copy File.................................................................................. 27
3.3.6 Using the Neuros MPEG-4 Recorder to Play MPEG-4 Video 27
3.4 Using the Neuros MPEG-4 Recorder to Display Images ............ 28
3.4.1 Special Effects.......................................................................... 29
3.4.2 Image Browser Setup Menu..................................................... 30
3.4.3 Slide ......................................................................................... 31
3.4.4 Lock and Unlock...................................................................... 31
3.4.5 Delete ....................................................................................... 32
3.4.6 Copy File.................................................................................. 32
3.5 Using the Neuros MPEG-4 Recorder to Play Audio ................... 34
3.5.1 Music Player Setup Menu ........................................................ 35
3.5.2 Repeat....................................................................................... 36
3.5.3 Lock and Unlock ...................................................................... 37
3.5.4 Delete ....................................................................................... 37
3.5.5 Copy File.................................................................................. 38
3.6 Using the Neuros MPEG-4 Recorder to Record Video ............... 39
3.6.1 Video Record Setup ................................................................. 40
3.6.2 Quality...................................................................................... 41
3.6.3 Auto Record ............................................................................. 42
3.6.4 Resolution ................................................................................ 43
3.7 Using the Neuros MPEG-4 Recorder to record TV programs..... 44
3.8 Using the Neuros MPEG-4 Recorder as a Card Reader .............. 46
Appendix ..................................................................................................... 47
Specifications............................................................................... 47
Upgrading the Firmware .............................................................. 49
FCC Certification......................................................................... 50
Troubleshooting ........................................................................... 51
Warranty ...................................................................................... 52

1
Chapter 1: Overview
The Neuros MPEG-4 Recorder
- Mini Video Recorder is an
MPEG-4 recorder and player
that enables anyone to make
home movies. Record your
favorite TV shows, personal
home video, or videos (VHS,
VCD, DVD, Hi8, or DV) onto
a flash memory card 1" MicroDrive or SD card. Play your prerecorded
full-motion, full-color videos on a PC, TV, or Pocket PC based PDA.
In addition, the Neuros MPEG-4 Recorder is a super high fidelity MP3
player. The Neuros MPEG-4 Recorder’s elegant design makes it look
great on your desk and easy to use.
1.1 Features
•Image Browser - View digital images on your television with the
built-in Image Browser.
•Video Recorder - Record video from your video camera, VCR or
DVD player. Videos are stored in the Advanced Systems Format
(ASF). ASF movie files can also be played with Windows Media
Player 7 or above. Windows Media Player is included free with
Microsoft Windows.
•Video Player - The video player is MPEG-4 compatible and will
also play AVI and ASF files.
•Music Player - The audio player is MP3 compatible.
•USB Card Reader - The Neuros MPEG-4 Recorder simulta-
neously supports Compact Flash (CF) and Secure Digital (SD)
cards. Each card appears as a separate removable disk in Windows
Explorer.
•Compact and Portable Design - The Neuros MPEG-4 Recorder
is small enough to fit in your pocket.
•Flexible - The Neuros MPEG-4 Recorder can be used with a PC,
Stereo System, Television, VCR, DVD player or Video Camera.

2
Overview
Neuros MPEG-4 Recorder
1.2 System Requirements
Ensure that the following requirements are met:
• USB 2.0 interface on your PC
• Microsoft Windows XP, 2000, ME, or 98 (drivers are required for
Windows ME and 98)
• Compact Flash (CF) or Secure Digital (SD) card (one or more)
• Audio video system with RCA compatible input and output
1.3 Unpacking
Contact your supplier if any of the following items are damaged or
missing.
• Neuros MPEG-4 Recorder
• Remote Control with Battery
• RCA to Mini-plug Cables (x2)
• USB Cable
• AC Power Adapter
• User Manual
•CD-ROM

3
Overview
Neuros MPEG-4 Recorder
1.4 The Neuros MPEG-4 Recorder
1.4.1 Front View
1.4.2 Rear View
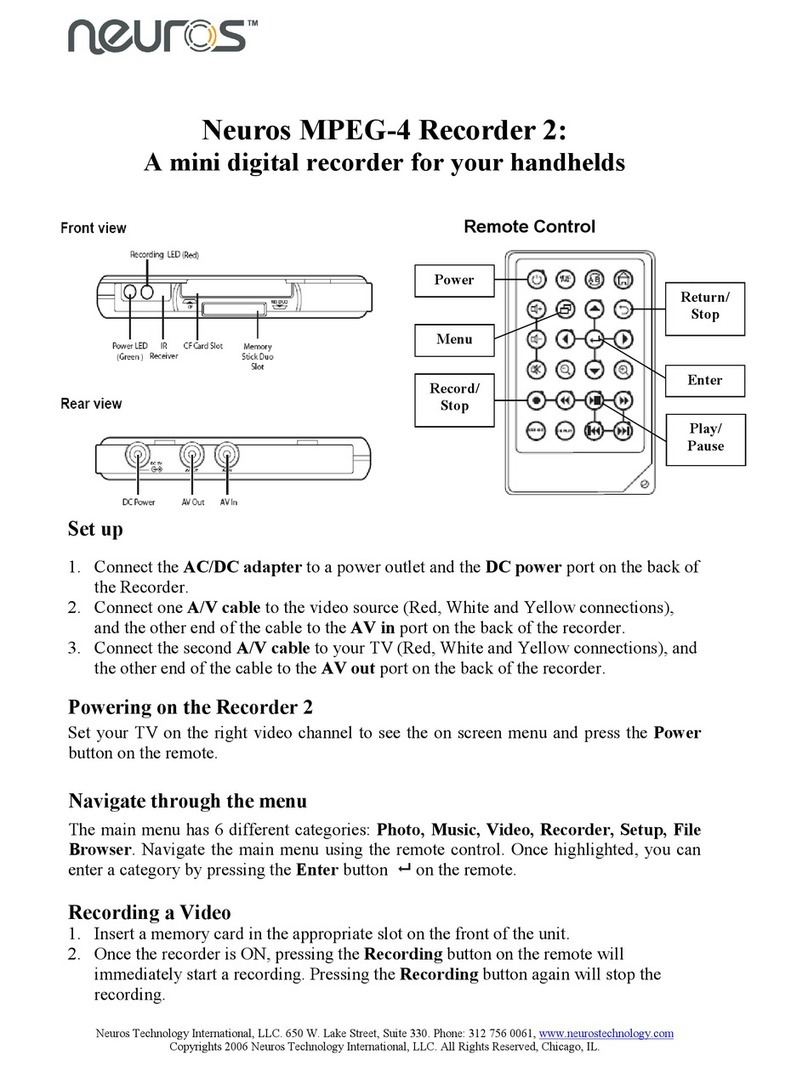
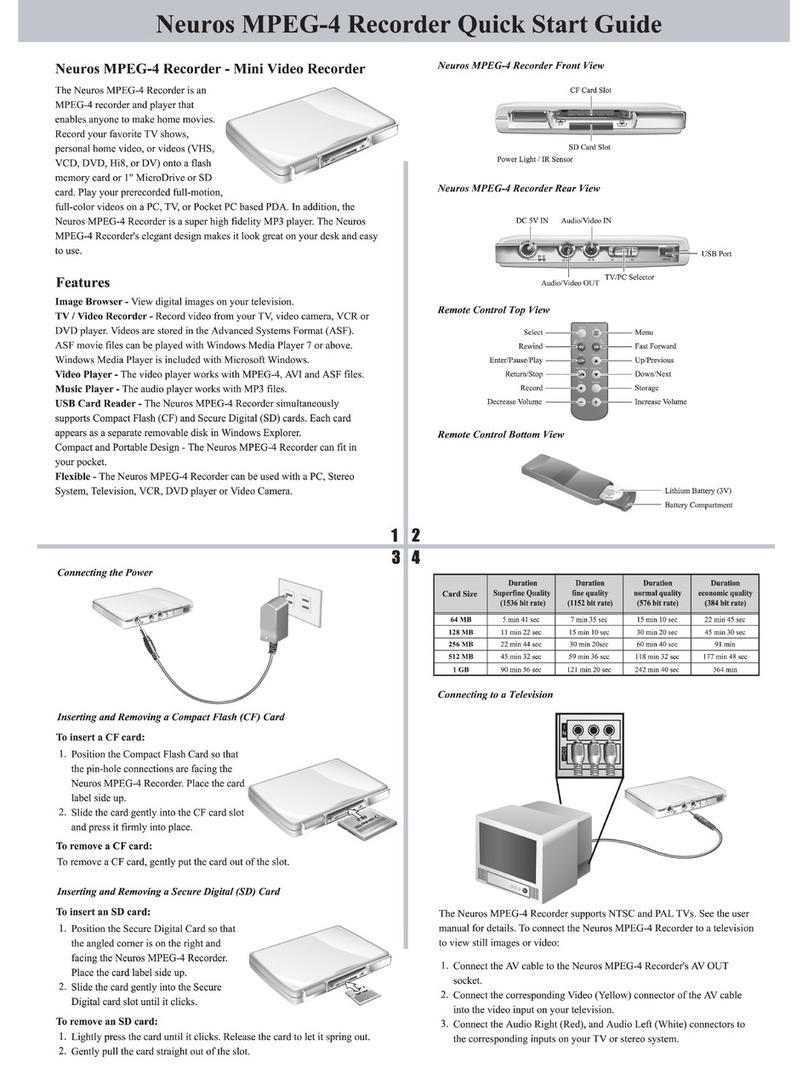
CF Card Slot
SD Card Slot
Power Light / IR Sensor
DC 5V
AV OUT AV IN USB 2.0
TV PC
USB Port
TV/PC Selector
Audio/Video INDC 5V IN
Audio/Video OUT

4
Overview
Neuros MPEG-4 Recorder
1.5 The Remote Control
1.5.1 Top View
1.5.2 Bottom View
Select Menu
FFFR
Enter Up/Prev.
Down/Next
Return/Stop
Rec
Vol
Storage
Select Menu
Rewind
Enter/Pause/Play
Return/Stop
Record
Decrease Volume
Fast Forward
Up/Previous
Down/Next
Storage
Increase Volume
Lithium Battery (3V)
Battery Compartment

5
Chapter 2: Getting Started
This chapter covers how to connect your Neuros MPEG-4 Recorder to
other equipment and view media files for the first time.
2.1 Making Connections
Read this chapter to learn how to:
• Connect the power to your Neuros MPEG-4 Recorder
• Connect your Neuros MPEG-4 Recorder to a television
• Connect your Neuros MPEG-4 Recorder to a DVD, VCR or cam-
corder
• Insert or remove a memory card
• Connect your Neuros MPEG-4 Recorder to a computer
2.1.1 Connecting the Power
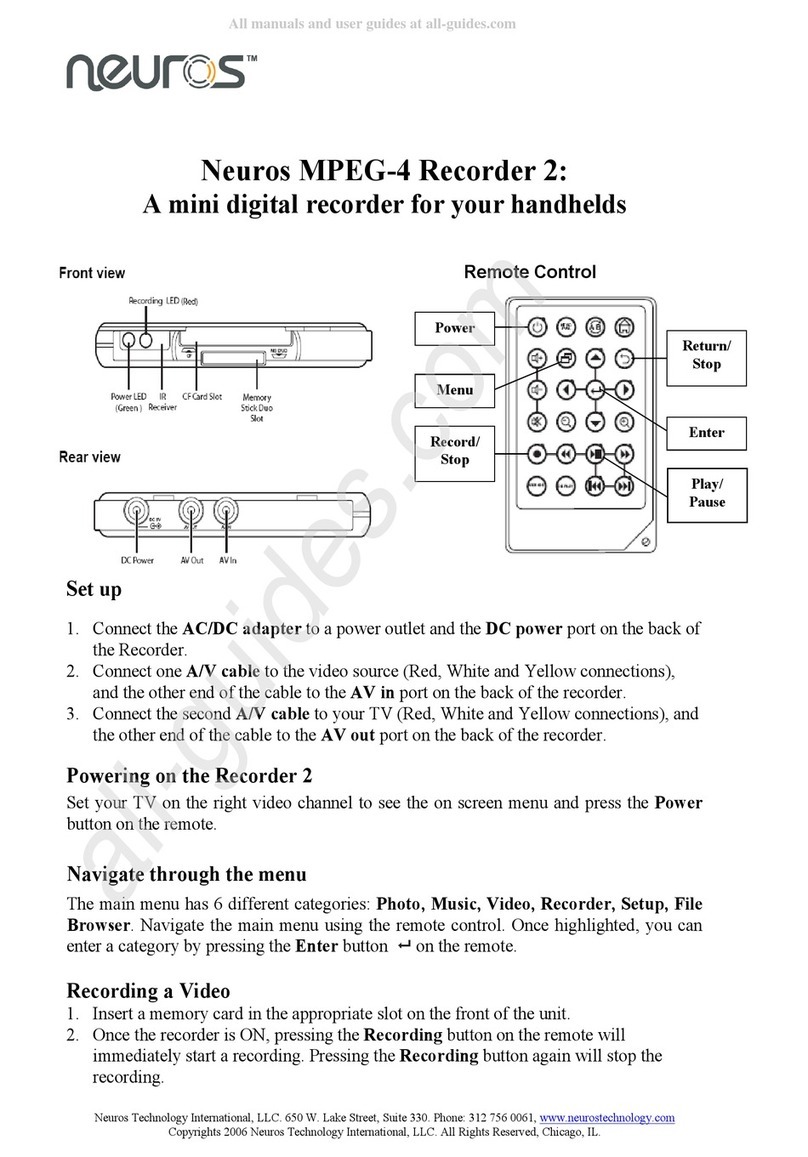
1. Insert the connector (A) of the supplied DC power adapter into the
DC 5V connector on the Neuros MPEG-4 Recorder.
2. Insert the power adapter (B) into a wall socket.
NOTICE
When connecting the Neuros MPEG-4 Recorder to a
personal computer or notebook computer, it is not necessary to
connect the power adapter.
AB

Neuros MPEG-4 Recorder
6
Getting Started
2.1.2 Connecting to a Television
The Neuros MPEG-4 Recorder supports NTSC and PAL standards.
See Section 3.2.1, “TV Out” on page 20 for a detailed explanation of
the PAL and NTSC standards.
To connect the Neuros MPEG-4 Recorder to a television to view still
images or video:
1. Connect the power adapter to the DC 5V socket on the
Neuros MPEG-4 Recorder.
2. Connect the AV cable to the AV O U T socket on the Neuros
MPEG-4 Recorder.
3. Connect the corresponding Video (Yellow) connector of the AV
cable into the video input on your television.
4. Connect the Audio Right (Red), and Audio Left (White)
connectors to the corresponding inputs on your stereo system.
5. Set the TV/PC switch to TV.
I
N
O
U
T

Neuros MPEG-4 Recorder
7
Getting Started
2.1.3 Connecting to a Television for Recording using TV itself
To connect the Neuros MPEG-4 Recorder to a television for recording:
1. Connect the Neuros MPEG-4 Recorder to a television as
described in Section 2.1.2, “Connecting to a Television” on
page 6
2. Connect a second AV cable from the AV IN socket on the
Neuros MPEG-4 Recorder.
3. Connect the corresponding Video (Yellow), Audio Right (Red)
and Audio Left (White) connectors, on the other end of the AV
cable, to the AV OUTs of your television.
NOTICE
This requires your television to have a set of AV
OUTs.
Please refer
Section 3.7 “Usingthe Neuros MPEG-4
Recorder to record TV programs using TV itself” on page
44
I
N
O
U
T

Neuros MPEG-4 Recorder
8
Getting Started
2.1.4 Connecting to a DVD, VCR or Camcorder
To connect the Neuros MPEG-4 Recorder to record video from a VCR,
DVD or camcorder:
1. Connect the power as described in Section 2.1.1, “Connecting
the Power” on page 5.
2. Insert the AV cable to the AV I N socket of the Neuros MPEG-4
Recorder.
3. Insert the corresponding Video (Yellow), Audio Right (Red), and
Audio Left (White) connectors at the other end of the AV cable, to
the video and audio outputs on your DVD, VCR or camcorder
equipment.
4. Set the TV/PC switch to TV.
Connecting to a camcorder:
Connecting to a camcorder allows you to record movies directly to
your Neuros MPEG-4 Recorder.
I
N
O
U
T
ANTENNA IN
S-VIDEO
CHANNEL
34
I
N
EJECT
REW PLAY
FF
STOP
VIDEO
RFUDCOUT
AUDIO
EDIT
PAUSE
AV IN
AV OUT

Neuros MPEG-4 Recorder
9
Getting Started
2.1.5 Connecting to a Computer
1. Insert a Compact Flash (CF) card or Secure Digital (SD) card into
the Neuros MPEG-4 Recorder.
2. Insert the small end of the USB cable into the Neuros MPEG-4
Recorder USB 2.0 port.
3. Insert the large end of the USB cable into the USB 2.0 port on
your computer.
4. Set the TV/PC switch to PC.
When the Neuros MPEG-4 Recorder is connected to a PC or notebook
PC, each memory card inserted into the device appears as a removable
disk in Windows Explorer. Files stored on the Neuros MPEG-4
Recorder can be accessed in the same way as files on any other avail-
able disk.
NOTICE
When connecting the Neuros MPEG-4 Recorder to a
computer or notebook computer, it is not necessary to connect
the power adapter.

Neuros MPEG-4 Recorder
10
Getting Started
2.1.6 Inserting and Removing a Compact Flash (CF) Card
To insert a CF card:
1. Position the Compact Flash Card so that the pin-hole connections
are facing the Neuros MPEG-4 Recorder. Place the card label side
up.
2. Slide the card gently into the CF card slot and press it firmly into
place.
To remove a CF card:
To remove a CF card, gently pull the card out of the slot.

Neuros MPEG-4 Recorder
11
Getting Started
2.1.7 Inserting and Removing a Secure Digital (SD) Card
To insert an SD card:
1. Position the Secure Digital Card so that the angled corner is on the
right and facing the Neuros MPEG-4 Recorder. Place the card
label side up.
2. Slide the card gently into the Secure Digital card slot until it
clicks.
To remove an SD card:
1. Lightly press on the card until it clicks.
2. Release the card and it will spring out.
3. Gently pull the card straight out of the slot.

Neuros MPEG-4 Recorder
12
Getting Started
2.2 Viewing Media Files
This section describes how to play videos, audio files and view still
pictures on a television.
2.2.1 Viewing still pictures
1. Make sure that your Neuros MPEG-4 Recorder is connected to a
television and/or audio system and is powered up as described in
Section 2.1, “Making Connections” on page 5.
2. Switch the Neuros MPEG-4 Recorder PC/TV switch to TV.
Splash Screen
A splash screen will be displayed for about 10 seconds. When the
splash screen has disappeared, the Player menu will appear.
Player Menu

Neuros MPEG-4 Recorder
13
Getting Started
3. Use the , , and buttons on the remote control to high-
light the Image Browser icon and use the button to confirm
your selection. The Image Browser will be displayed.
Image Browser
The Image Browser will display thumbnails of all the displayable
images and any subdirectories that exist.
4. Use the , , , and buttons on the remote control to
highlight an image or a subdirectory. Use the button to
confirm your selection. If an image is selected it will be displayed.
If a subdirectory is selected, its contents will be displayed.
5. To return to a parent directory, select the previous directory icon,
“..”, as shown above and press the button on the remote
control to confirm your selection.
2.2.2 Viewing Videos
1. Make sure that your Neuros MPEG-4 Recorder is connected to a
television and/or stereo system and is powered up as described in
Section 2.1, “Making Connections” on page 5.
2. Switch the Neuros MPEG-4 Recorder PC/TV switch to TV.
A splash screen will be displayed for about 10 seconds as shown in
Section 2.2.1, “Viewing still pictures” on page 12. When the splash
screen has disappeared, the Player menu will appear.

Neuros MPEG-4 Recorder
14
Getting Started
Player Menu
3. Use the , , and buttons on the remote control to high-
light the Video Player icon and use the button to confirm your
selection. The Video Player will be displayed.
Video Player
4. Use the , , , and buttons on the remote control to
highlight a video to play or a subdirectory. Use the button to
confirm your selection. If a video file is selected it will play. If a
subdirectory is selected, its contents will be displayed.

Neuros MPEG-4 Recorder
15
Getting Started
5. Use the , , , and buttons on the remote control to fast
forward, rewind, stop, play or pause the video.
6. To return to a parent directory, highlight the .. directory icon and
press the button on the remote control to confirm your
selection.
2.2.3 Listening to Audio Files
1. Make sure that your Neuros MPEG-4 Recorder is connected to a
television and/or stereo system and is powered up as described in
Section 2.1, “Making Connections” on page 5.
2. Switch the Neuros MPEG-4 Recorder PC/TV switch to TV.
A splash screen will be displayed for about 10 seconds as shown in
Section 2.2.1, “Viewing still pictures” on page 12. When the splash
screen has disappeared, the Player menu will appear.
Player Menu
3. Use the , , , and buttons on the remote control to
highlight the Music Player icon and use the button to confirm
your selection. The Music Player will be displayed.
Other manuals for MPEG4 Recorder 1
1
This manual suits for next models
1
Table of contents
Other Neuros DVR manuals
