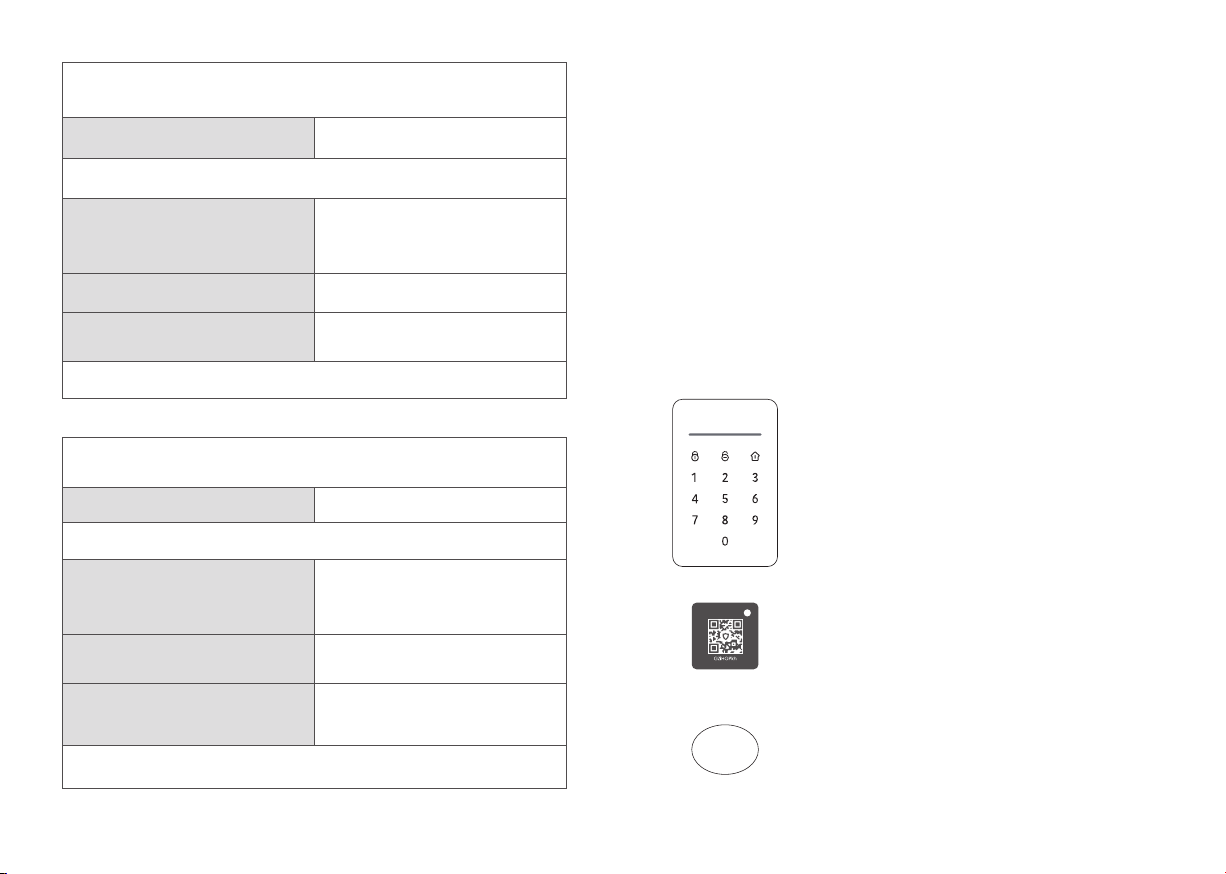
Appairage du clavier avec l’alarme
Scanner QR Code Mode Learning
(modèle Pro L9 )
1. Appuyez sur Reset jusqu’à ce que la barre de statut clignote de 3 couleurs différentes
Veuillez garder le clavier allumé durant tout l’appairage.
2. Lancez l’application, dans les réglages
accessoires, appuyez sur
[Ajouter Accessoire]
2. Lancez l’application et entrez dans le mode
Learning
3. Scannez le QR Code situé à l’arrière du clavier. 3. Appuyez sur 1234 + Armer pour envoyer un
signal au système.
4. Suivez les étapes de l’application et sauvegarder
les paramètres
4. Suivez les étapes de l’application et sauvegarder
les paramètres
Le clavier émettra un bip lorsque l’appairage sera terminé.
Appairage du RFID Tag avec l’alarme
Scanner QR Code Mode tutoriel
1. Veuillez vous assurer que le clavier a été appairé avec l’alarme avant cette étape.
2. Lancez l’application, dans les réglages
accessoires, appuyez sur
[Ajouter Accessoire]
2. Lancez l’application et entrez dans le mode
tutoriel.
3. Scannez le QR Code situé sur le badge RFID. 3. Passez le RFID tag près de la zone RFID jusqu’à
l’obtention d’un son.
4. Suivez les étapes de l’application et sauvegardez
les paramètres.
4. Suivez les étapes de l’application et sauvegardez
les paramètres.
Vous pouvez essayer de désarmer l’alarme en lisant le RFID tag via le clavier après l’appairage afin de voir
si le RFID a bien été appairé
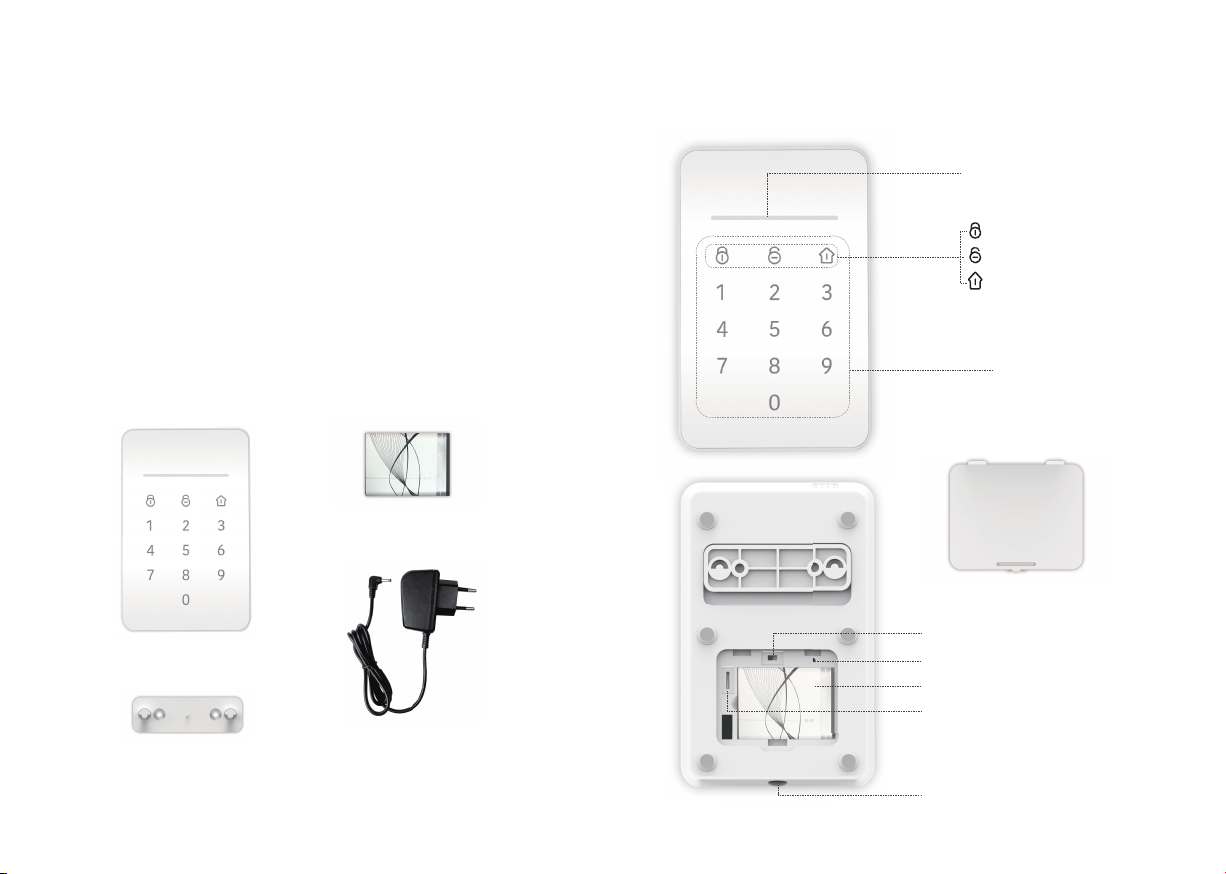
Utilisation
Activer le panneau
1. Lorsque le clavier est en veille, touchez n’importe quel bouton pour le réactiver.
2. Après avoir été activé, le clavier va se synchroniser avec le statut de l’alarme en temps réel, il sera
représenté par la barre de statut.
3. Le clavier se met en veille au bout de 10 secondes si aucune opération n’est effectuée.
4. Lorsque le clavier est en veille, il ne réagira pas aux signaux envoyés par l’alarme jusqu’à réactivation.
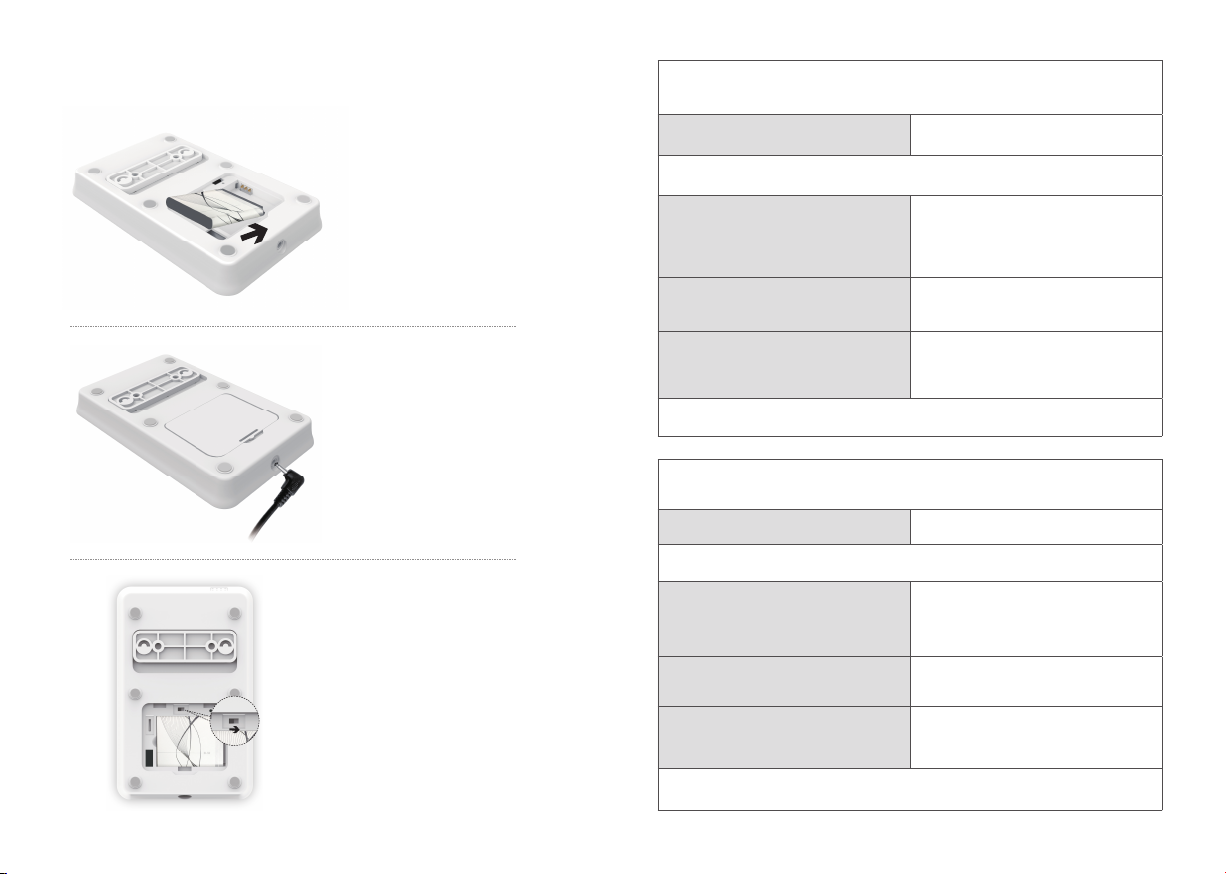
Pourquoi le mode veille?
Votre clavier est pourvu d’une batterie de sauvegarde. Le mode veille permet de conserver une utilisation
plus longue de celle-ci.
Lorsque l’adaptateur secteur est connecté, la batterie se recharge. Le clavier est protégé contre les
surtensions, il est donc recommandé de le laisser branché au secteur.
Armer/Désarmer/Mode maison
Entrez le code, et appuyez sur[Armer] [Désarmer] ou[Mode maison]du
clavier.La barre de statut émettra un flash et changera de couleur après
que la commande ait été effectuée correctement.
[Armer] : Rouge
[Désarmer] : Vert
[Mode maison] : Bleu
Note:Le code est enregistré dans le panneau principal, celui-ci peut être
modié sur l’application ou le logiciel PC. Pour le modèle GSM, le code
d'opération du clavier est identique au mot de passe administrateur (1234
par défaut).
Pour le modèle WIFI, le code d'opération du clavier est identique au mot
de passe du périphérique (1234 par défaut).
Passez le badge RFID sur le panneau du clavier, le système se désarmera
immédiatement si le RFID a été appairé.
Si le système et en mode SOS et que le clavier est activé, la barre de
statut va clignoter et le clavier va générer un bip pendant 1 minute.
SOS
05 06