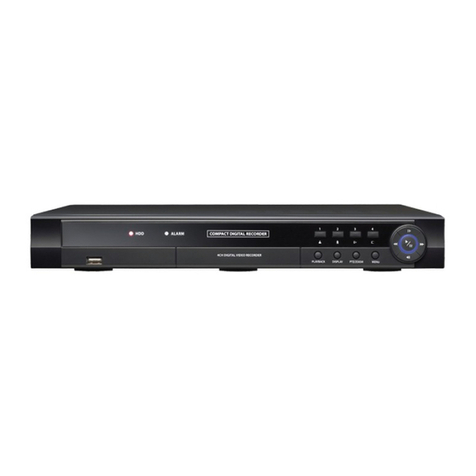
New Security Technologies H.264 Pentaplex User manual

H.264 Pentaplex DVR
1
User Manual
V1.0
[ 4 / 8 / 16 Channel DVR ]
Notice:
The information in this manual was current when published. The manufacturer reserves the right to revise and
improve its products. All specifications are therefore subject to change without notice.
512-756-1678
DVR4,8,16DVDP

H.264 Pentaplex DVR
2
Table of Contents
Safety Warning and Precautions ………………………………..………….………................……..….………………………………..…….……………........ 4
Package Contents ……………………………………………………..…………………………………………………………………………………………………………… 5
Chapter 1. Understanding Your DVR ..……………………….…………..………….….................……………………....………..………………………..….. 6
1.1. Basic Security System Configuration ……………………………………………………………………………………………………………………………. 6
1.2. Features of Your DVR …………..………………………….……………………..……………………………………………………..………………………….... 7
1.3. Front Panel View…………….……………………………….………………………………………………………..………………….……………..…………….... 8
1.4. Rear Panel View…………………………………………………………………………………………………………………………….………….………............. 9
1.5. Remote Control……………………….……….………………………………………..…………………………………………………………….………….…….. 10
Chapter 2. Installation …..………………………………..……………………………………………………..……………………………………………….………..... 11
2.1. HDD Installation ……………………………….………………………………………………………………………..………………………………………………. 11
2.2. Network Connection .…….…………………..……………………………………………………………………………….…………………………………..…. 12
2.2.1. Using a Static IP Address ………………..….……………………………………………………………………………..………………………..………… 12
2.2.2. Using a Dynamic IP Address ………….……..……………………………………………………………………………………………………………….. 12
2.2.3. Router Configuration ……………..............……………………………………………………………………………………….………..………………. 13
STARTING THE SYSTEM………………………………………………………………………………………………………………………………….………………………15
LIVE MENU DESCRIPTION……………………..……….………………………………………………………………………………………………….…………………..16
SYSTEM INFORMATION……..………………………………………………………………………………………………………………………………..………………..18
LIVE MENU NAVIGATING USING THE MOUSE………………………………………………………………………………………………………………………..19
LIVE MENU NAVIGATING USE THE REMOTE CONTROL…………..………………………………………………………………………………………………19
Chapter 3. Main Menu Setup …..……………..………..………………………………………….……………………………….……………………………….…... 20
3.1. Video/Audio Setup…………………………………………………………………………….……………………………………………………..……..…………. 21
3.1.1. Camera……..…………………………………………………………………….….……………………….………………………………………..……………… 21
3.1.2. Monitor/SPOT..……………..........................................……………………………….……………………………….….…………………………. 23
3.1.3. Sequence/Event Display…………………………….…………………………………………….………………………………………………..…………. 24
3.1.4. OSD/Display Position…………………………….…………………………………………………………………………………………….....….…………. 25
3.1.5. Screen Mode……………………………………………………………….…………………………………..…………………………………..…….…………. 26
3.2. Record Setup…………………………………………………………………………………………………………………………..…………………………………... 27
3.2.1. Record Policy …………………………………………………………………………………………………………………………………………………….….. 27
3.2.2. Record Quality ………………………………………………………………………………………………………………………….…………………………… 28
3.2.3. Schedule ………….………….…………………..………………………………………………………………………………………….……………………….. 28
3.2.4. Holiday …………………..…………….……….………………………………………………………………………………………….………………………….. 29
3.2.5. Motion………………………………..……….……………………………………………………………………………………………………………………..… 30
3.2.6. Event Record Duration………….………….……………………………………………………………………………………….…………………………… 32
3.2.7. Record Option…………………………………………………………………………………………………………………………………………………………32
3.3. Device Setup……………………………………………………………………………………………………….……………………………………………….……… 33
3.3.1. Storage…………………………………….…….....…………….…………………………………………………………………………………………………… 33
3.3.2. Sensor/Video Loss Detection…………………………………………………………………………….………………………………………………….. 34
3.3.3. Alarm Setup ………………………………………………………………………………………………………………….………………….……………….….. 35
3.3.4. PTZF Camera Control Setup …………………………………………………………………………………………….…………….…………………….. 36
3.3.5. System Controller………………………………………………………………………………………………………………………...............................36
3.3.6. POS…………………………………………………………………………………………………………………………………………………………………………37
3.3.7. Video Analysis……………………………………………………………………………………………………………………………………..…………………38
3.4. System Setup ……..………………………………………………………………………………..…………..………………………………………..…............. 39
3.4.1. Date/Time………......……………………………………………………………………………………………………………………….………….………….. 39
3.4.2. Signal/Language….……………………………………………………………………………..…………………………..………..…………………………… 40
3.4.3. Config…….……………………..………………………………………………………………………………………………….……………..…………………... 41
3.4.4. Log…………………..………….…………………………………………………..………………..…………………..…………………………………………….. 42
3.4.5. Authorization Management……………………………………………………………………………..………………..……………….……………….. 43
3.5. Network Setup .…………………………………………………………………………………………………………………….…………………………………..… 47
3.5.1. Connection…………………………………………………………………………………………………………………….…………..…………………………. 49
3.5.2. Port…..….…………………………………………………………………………………………………………………………………….…………….…………… 49
3.5.3 ID & Password…………..……………………………………………………………………………………………………………………………….………50
3.5.4. DDNS…………………..……………...…………..…...…………………………………………………………..………………………………………….……… 51
3.5.5. Live Transfer……….……….……..………………….………………………………………………………………………………………………..…………… 52
3.5.6. Mailing Service…………………………………………………………………………………………………………..……………………………………………53
3.5.6.1. SMTP…………………………………………………………………………………………………………………..…………………………………..……53
3.5.6.2. Event……………………………………………………………………………………………………………………….……………………………………54
3.5.6.3. Recipient…………………………………………………………………………………………………………………….…………………………………54
3.6. Backup Setup………………..………………………………………………………………………………………………………………………………………………55

H.264 Pentaplex DVR
3
Chapter 4. Search Menu Setup……………………………………………………………………………………………………………………………………………….56
4.1. Time………………………………………………………….....………………….………………………………………………………………………………………….…56
4.2. Event………….…….………………………………………………………………………………………………………………………………………………………….…58
4.3. Motion………..……………………………………………………………………………………………………………………………………………………………….…59
4.4. Protect….……………………………………………………………………………………………………………………………………………………………………..…59
4.5. Capture……………………………………………………………………….…………………………………………………………………………………………….……60
4.6. POS Device……….. ..…………….…………………………………………………………………………………………………………………………………………61
4.7. Video Analysis……………………………………………………………………………………………………….……………………………………………………….61
Chapter 5. General Operation…………………………………………………………………………………………………………………………………………………62
5.1. Mouse Menu…………………………………….…………………….....………………….……..………………………………………………………………….……62
5.1.1 Scene Mode…………………………………………………..……………………………………………………………………………………………………………63
4-Split……………………………….…………………………….…………………………………………………………………………………………………………63
PIP…………………………………………................................................…………………………………………………………………………….………63
Auto Sequence…………………………………………………………………………………………………………………………..………………………………63
5.1.2. Spot Out……..…..………………………………………………………………………...………………………………………………………………………………64
5.1.3. Audio Off………………............................................................................................................................………………..………....64
5.1.4. Zoom……………….…………………………………………………………………………………………………………………………………………………………65
5.1.5. Freeze…………………..…..……......…………………………………………………………………......……………………………………………………………65
5.1.6. Stop Alarm…...........…………………………………………………………….……………………………..………………………………………………………66
5.1.7. Record Stop……………………………………………………………………………………………………………………….………………………………………66
5.1.8. Play…………………………….…………………………………………………………………………………………………..…………………………………………66
5.1.9. Search (See Chapter 4)…………………………………………………………………………………………………….……………………………………67
5.1.10. Backup……………….………….…………………………………………………………………………………………………………………………………………67
5.1.11. Main Menus (See Chapter 3)………….....………………………………………………………………………………….…………………………………67
5.1.12. Hide Launcher………....………………………………………………………………………………………………………………………………………………68
5.1.13. Log Out…………………………………………………………………………………………….………………………………………………………………………69
5.2. Live Launcher…..…………………..…………………………………………………………………………………………………………………………………………69
5.2.1. Screen Display Option………………………………………………………………………..………………………………………………………………………70
5.2.2. Control Buttons…………………………………………………….……………………………………………………………………………………………………71
5.3. Playback Launcher………………………………………………………………………………………………………………………………………………….………72
5.3.1. Control Buttons……………..…….…….………………………………………………………………………………………………………………………………73
5.3.2. Playback & Trick Mode…….…………………………………………………………………………………………………………………………………………74
5.4. PTZ Control…………….…………………………………….…………………………………………………….…………………………………………………..……. 75
5.5. Recording……………………………………………..………………………………………………………………………………………………………………………..75
Chapter 6. Protect Video/Audio Files ….………………….…….…………………………………………………………..…………………………………….…… 79
6.1. Protect Registration ……………………………………………………………………………………………………………………….………………….…………. 79
6.2. Playback and Remove Protected File…………………….…………………………………………………………………..…………………………….…… 79
6.3. Protected File Backup ……………………………………………………….………………………………………………………………….………………………. 80
Chapter 7. Capture Video Still Image ………………..………………………………………….………………………………………………………………………. 81
7.1. Still Image capture…………..…………….…………….………………………………………………………………………………………………………………. 81
7.2. Retrieve and view Captured Images …………………….…….…………………………….……………………………………………………………..…… 81
7.3. Remove Captured Images …………….………….………………………………………………………..………………………………………………………... 82
7.4. Backup Captured Image………………………………………………………………………………………………..……………………………………….……… 83
Chapter 8. Web Viewer ……………………………..……..………………………………………….………………………………………………………………………. 85
8.1. Video/Audio……………..…………….………………..….………………………………………………………………………………………………………………. 85
8.2. Record …………………….………………………………………………….…………………………….……………………………………………………………..…… 86
8.3. Device ……………..…………………………...………….………………………………………………………..………………………………………………………... 89
8.4. System…………………………………………………………………………………………………………………………..……………………………………….……… 91
8.5. Network …………………….………………………………………………….…………………………….…………………………………………………………..…… 94
Appendix
POS Configuration……………………………………………………………..……..…………………………………………………………..………………………….98
ATM Configuration…………………………………………………………..……………….………………………………………………………..………………….101
Network Troubleshooting……..…………………………………..………………………………………………………………………..…………………………102
Terms/Icon Glossary………………………………………….…………………….…………………………………………………………..………………………..105
How to download Windows Media Player 10+ or VLC Media Player and play AVI backup file………………………………………108

H.264 Pentaplex DVR
4
Safety Warning and Precautions
TO REDUCE RISK OF FIRE OR ELECTRIC SHOCK, DO NOT EXPOSE THIS APPLIANCE TO RAIN OR MOISTURE.
DO NOT REMOVE COVER. NO USER SERVICEABLE PARTS INSIDE. REFER SERVICING TO QUALIFIED
SERVICE PERSONNEL.
All the safety and operating instructions should be read before the unit is operated.
•Refer all work related to the installation of this product to qualified service personnel or system installers.
•Do not block the ventilation opening or slots on the cover.
•Do not drop metallic parts through slots. This could permanently damage the appliance. Turn the power
off immediately and contact qualified personnel for service.
•Do not attempt to disassemble the appliance. To prevent electric shock, do not remove screws or covers.
There are no user-serviceable parts inside. Contact qualified service personnel for maintenance. Handle
the appliance with care. Do not strike or shake, as this may damage the appliance.
•Do not expose the appliance to water or moisture, nor try to operate it in wet areas. Do not take
immediate action if the appliance become wet. Turn the power off and refer servicing to qualified service
personnel. Moisture may damage the appliance and also cause electric shock.
•Do not use strong or abrasive detergents when cleaning the appliance body. Use a dry cloth to clean the
appliance when it is dirty. When the dirt is hard to remove, use a mild detergent and wipe gently.
•Do not overload outlets and extension cords as this may result in a risk of fire or electric shock.
•Do not use the appliance beyond its specified temperature, humidity or power source ratings. Do not use
the appliance in an extreme environment where high temperature or high humidity exists. Use the
appliance at temperature within indoor type DVR for 0°C ~ +40°C and humidity below 90%. The input
power source for this appliance is AC100 ~ 240V.
This equipment has been tested and found to comply with the limits for a Class A digital device. The
changes or modifications not expressly approved by the party responsible for compliance could void
the user’s authority to operate the equipment.
Notice:
The information in this manual was current when published. The manufacturer
reserves the right to revise and improve its products. All specifications are
therefore subject to change without notice.
Note

H.264 Pentaplex DVR
5
Please make sure the following parts are all included with the main DVR when you open the product package. If there
are any missing items, contact your distributor.
Part Name Quantity
H.264 Standalone DVR 1
IR Remote Control 1
DC Power Adapter 1
Power Cable 1
Install CD 1
AAA Battery 2
H.264 Pentaplex DVR
AAA BatteriesIR
Remote
Control
DC Power Adaptor Install CDPower Cable
Package Contents

H.264 Pentaplex DVR
6
LOCAL
NETWORK
OR
INTERNET
Audio
Input
Cameras
CCTV Monitor
VGA Monitor
PC
Web Browser
WebViewer
Client Program
NVR (NetViewer)
Speaker
DC Power Adapter
1.1. Basic Security System Configuration
Chapter 1. Understanding Your DVR
External
HDD
HDMI Monitor
AVE VSI
Pro Max
Hitron
System
Keyboard
Power
Switch
Alarm Out
• NO Devices
• DC 30V 1A max
• AC 125V 0.5A max
Sensor Inputs
• NC/NO Devices scalable
• TTL Level Input

H.264 Pentaplex DVR
7
1.2. Features of Your DVR
Notice:
The information in this manual was current when published. The manufacturer reserves the
right to revise and improve its products. All specifications are therefore subject to change
without notice.
Your DVR is the most competitive H.264 standalone 16-channel DVR developed for all industrial applications.In
addition to its sleek professional design, it is very reliable and cost effective.Most of all, its real time and crystal
clear picture quality with small recording file size and powerful remote control function will become the standard to
which other security systems are judged. Also, its VCA (video content analysis) function will offer you the advanced
security environment.
Major features include:
►Real time live, real time recording
►16 channels input for analog camera
►PENTAPLEX : simultaneous Live, Recording, Playback, Backup, Network
►Extremely small recording file size using H.264 compression technology
►Adjustable recording frame rate, resolution and picture quality
►Video / Audio data backup via USB 2.0 or CMS
►Support Authentic Video Image Player
►High speed network transmission
►Dynamic / Static IP address support, Own Client (IE based NetViewer) / Web Browser (WebViewer) support
►Remote recording, still image capturing and printing
►Multiple DVRs and multiple clients support for CMS application
►PTZF camera control by RS-485 and via network
►Independent color adjustment for each camera input and VGA output
►USB Mouse and IR remote control unit for user interface
►Self-diagnosis system and Hardware Watchdog : error checking and restoring functions
►Powerful event search function (Search by manual, schedule, motion, sensor, network or all)
►Pre-Alarm Recording for motions and sensors
►Protect Video/Audio files from HDD Overwrite
►Still image capturing and printing during live or playback
►System & Event Log files management
►Configuration data copy to other channels for easy setup
►Configuration file Export / Import for easy installation of multiple DVRs
►Control of minimum recording dates by channel
►Mobile (I-Phone, Android, Black Berry, Symbian and Windows mobile) phone support
►E-Map support
►POS support
►Video Analysis support

H.264 Pentaplex DVR
8
1.3. Front Panel View and Keypads
1. POWER LED: DVR power indicator.
2. REC LED: Recording indicator.
3. PLAYBACK LED: Playback mode indicator. A green light will be on when you play a recorded file back.
4. NET LED: Network connection indicator. A green light will be on when the DVR is connected to the network.
5. USB 2.0 Port: Connect USB mouse or USB memory device for file backup or firmware upgrade.
6. IR REMOTE CONTROL SENSOR: Receives all incoming signals from the remote control.
7. JOG/SHUTTLE: Let’s you fast forward or rewind by manual turning the joggle.
8. INFO: Display system information. Press the key to turn on/off (exit).
9. REC:: Start/Stop manual recording.
10. PROTECT: You can protect recorded data from HDD overwriting.
11. CAPTURE: You can capture video image either in Playback Mode or Live Mode
12. AUDIO: Turn audio on or off.
13. FREEZE: Will temporarily pause live feeds.
14. MODE: Press to change the display type from various split screen mode.
15. SEARCH: To search video/audio files.
16. MENU: Press to pop up main menu window.
17. KEYLOCK: Locks any keys from functioning.
18. PTZ: Control PTZ camera(s) connected to your DVR
19. TELE: Zooms in on a specific area when using the PTZ function.
20. WIDE: Zooms out of that specific area when using the PTZ function.
21. ALARM: Set up Alarm.
22. ZOOM: To enlarge desired area.
23. PIP: Will display a picture with the main picture.
24. BACKUP: Backups up desired data.
25. RETURN: Redirects to Search Menu.
26. CHANNELS/CAMERAS: Channels and Cameras
27. REWIND KEY: Rewind the video during playback.
28. PLAY KEY: Playback the recorded video and audio files.
29. PAUSE KEY: Pause the recorded video and audio files.
30. STOP KEY: Stop playback.
31. FAST FORWARD KEY: Fast forward the video during playback.
32. LEFT ARROW KEY: Move to the left when navigate through menus.
33. ENTER KEY: Select items shown on the display when navigating through menus.
34. UP BUTTON KEY: Go up when navigate through menus.
35. RIGHT ARROW KEY: Move to the right when navigate through menus.
36. DOWN ARROW KEY: Go down when navigate through menus.
37. CD/DVD Burner: To backup video/audio files in a blank CD or DVD. (Some models do not come with DVR burner)
9 37
23
108 14
24
28 29 30
11
12
2
1
3
4
6
15 32 3634
35
13
17
5 20
19
16
18
21
22
25 27
7
33
26 31

H.264 Pentaplex DVR
9
4CH
8CH
16CH
1.4. Rear Panel View
** Available Input/Output connectors and features are different from each model (part). Please contact distributors to check
the exact part number with your desired Input/Out connectors and features.
This manual describes all possible Input/Output connectors and features of this series.

H.264 Pentaplex DVR
10
1.5. IR Remote Control
1. REC (Record): Start/stop manual recording.
2. Remote Control Setting Indicator
3. Number Buttons:Select camera (channel) number.
4. ID: Displays current ID.
5. ID SEL: Allows you to select ID setting.
6.Audio: ON/ OFF function.
7. Return: Directs you back to the previous menu. In Live Mode, this
Button will log you out.
8. Navigate Buttons: ◀Left ▲Up ▶Right ▼Down :
9. Enter : To select and save the menu and parameter change.
10. Freeze: Freezes images. (Only in Live Mode).
11. Mode: Change the display mode to 1/4/8/16/32 split screen.
12. Alarm: Turns the Alarm off.
13. Zoom: Zoom in/out the video when the channel is in full display mode.
14. Menu: Enter or exit the menu.
VCR-like functions
15. Search :Go to recorded file search menu.
16. ■Stop: Stop playback.
17. REW: Rewind (select a speed from 1, 2, 3 and 4 for faster rewind).
18. FF: Fast forward (select a speed from FF1, 2, 3 and 4.)
19. ▶Play: Play a recorded file.
20. Pause: Pause a video during playback mode.
Backup functions
21. Backup: Will direct you to the file backup window.
22. PTZ Control: Will be able to control the camera with remote control.
23. : Allows you to Zoom Out in PTZ Mode.
24. : Allows you to Zoom In in PTZ Mode.
1. Remove the battery cover by
sliding in the direction of the
arrow.
3. Replace the battery cover by
sliding in the direction of the arrow.
2. Insert two AAA batteries
according to directions provided.
Installing batteries
*****
ID Setting Instruction:
1) Press down ID SEL button for 2 seconds to start the ID Setting Mode
2) LED will be flashing when it is in ID Setting Mode.
3) Input any 2 digits to set ID.
4) Once the 2 digits are selected, press enter.
* If no action is taken within the 2 second allowed time period, it will
automatically exit you from the ID Setting.

H.264 Pentaplex DVR
11
Step 1. Make sure the DVR power is switched OFF
Step 2. Open the top cover of DVR using a cross screw driver.
Step 3. Take out the HDD mounting plate from DVR.
Step 4. Place HDD(s) on the mounting plate and mount it with screws.
Step 5. Replace the mounting plate into the DVR and fix it with screws.
Step 6. Attach the data and power cable to HDD(s) correctly.
Step 7. Replace the top cover of DVR and fix it with screws.
After HDD installation
Step 8. Turn the DVR power ON.
Step 9. DVR will detect HDD(s) during the booting and will format HDD(s).
Step 10. After HDD formatting, DVR will be automatically rebooted and will be ready to work with
HDD(s).
2.1. HDD Installation
Before Installation
We recommend setting the current time on your DVR before HDD Installation.
Please make sure that the power of DVR is switched off before starting installation.
Chapter 2. Installation

H.264 Pentaplex DVR
12
2.2. Network Connection Setup
2.2.1 Using a Static IP Address
You can use the Static IP address, Subnet Mask and Gateway address provided by your ISP
(Internet Service Provider) for your DVR. The Gateway address is the IP address of your broadband modem.
2.2.2 Using a Dynamic IP Address
You can use a router with your Dynamic IP broadband modem. In this case, you should set the configuration
of a router properly for network connection between DVR and Net/Web Viewer. Please follow the
instructions in next section to configure your router correctly.
If your Broadband Modem does not support internal loop back (port forwarding) function and
you want to monitor DVR using a PC located in same Intranet, you should use Direct IP instead
of DDVRLS in the connection menu of NetViewer. If your PC is located outside of Intranet, you
can use both DDVRLS and Direct IP to connect to DVR even though your Broadband Modem has
limited features. You will know about DDVRLS and Direct IP in Chapter 7, NVR (NET VIEWER).
Home/Office Network Internet
Internet

H.264 Pentaplex DVR
13
2.2.3. Router Configuration
If your DVR is connected to the network through a router, you should configure router properly.
There are 3 steps as follows.
1. WAN Setting 2. DHCP Setting 3. Virtual Server Setting
2.2.3.1. WAN Setting
When you connect to your Router,
you can find menu for WAN setting.
Please confirm the WAN setting. If
you are using DSL service, you
should select PPPoE, and you will be
directed to a sub-menu to type in
DSL user name and password.
2.2.3.2. DHCP & IP Address Setting
To assign an unique private IP address
to DVR in your intranet environment
automatically, you can enable DHCP
option in the Network Setup menu of
your DVR and your Router. In this
case, you can skip the procedures
described on this page.
We recommend assigning IP address
to DVR manually to prevent
unexpected change of IP address.
If you have any problem with DHCP function or want to assign the private IP address, please disable
DHCP option in the Network Setup menu of your DVR and check the starting and ending IP used by DHCP
server of the Router. You can assign any private IP address to your DVR even if it is out of the DHCP
range, but the IP address should match with the one entered in the Network Setup menu of your DVR.
*A router from D-Link is quoted as an example in this manual. The images of setup menu above may not always match
another router’s setup menu.

H.264 Pentaplex DVR
14
2.2.3.3. Virtual Server Setting
You should register your DVR as a virtual server. Please enter the information into IP address field
of the router (e.g. 192.168.0.110).
Protocol Type should be TCP. Private/Public Port numbers should be the same with the Port
numbers assigned in DVR. You can change port numbers in Network Setup menu to avoid conflict
with other network servers.
Your DVR uses 3 port numbers and the default Port numbers are 9350~1 and 80. 9350~1 are for
controlling the video, audio and commands of Net Viewer, and 80 is for Web Viewer. You need to
register 3 port numbers into the router as network servers. Please make sure that your router does
not block those port numbers to/from the DVR with filter and firewall features.
9350
9350
80
80
.
.
.
.

H.264 Pentaplex DVR
15
STARTING THE SYSTEM
When power is turned on, you will see the
initializing screen and initializing may take up to
one minute to complete.
After initializing is complete, a live screen will appear. To log in, right click any area on the screen and a
live menu will appear. Click to any menu and it
will prompt you to login dialog.
Enter ID and Password by using the virtual keyboard and
click OK. By default, the ID is set at “Admin” and the
Password is set at “1234”
After the initialization, it will prompt you to a page
where you will need to select which monitor to use
for your mouse operation.

H.264 Pentaplex DVR
16
LIVE MENU DESCRIPTION
MENU DESCRIPTION
1 SCREEN MODE Can select how you would like to view screen
2 SPOT OUT Independent of the Live Mode which monitors a specific channel through the Spot Out Port
3 AUDIO ON/OFF Option to have the audio or off
4 FREEZE Can freeze Playback or Live scene
5 STOP ALARM Stops the alarm output and the event monitoring. Refer to "Event Monitoring"
6 RECORD STOP Starts/stops the standard recording
7 PLAY Plays the search result (data).
8 SEARCH Can search for recorded data
9 BACKUP Can backup data via USB drive
10 MAIN MENU Access the main menu. Refer to the Using the DVR section
11 INFORMATION This menu will display software version and MAC Address
12 HIDE LAUNCHER Hides the launcher.
13 LOGOUT You can log out.

H.264 Pentaplex DVR
17
SYSTEM INFORMATIOIN
This menu will display overall system information
When there’s a exclamation , this indicates that the DVR has
not been registered in our DDVRLS server
Password will only show half of the registered password. You can
enter up to 8 characters max. If four characters are used in the
password, it will show as 12**, six characters will show as 123***
and eight character, 1234****

H.264 Pentaplex DVR
18
Live Menu
By using the mouse, move the mouse to the far right in the middle of the screen and a blue arrow button will
appear on the screen (see picture above) to navigate to different channels. If you are viewing the channels in a
4 split mode and by clicking the blue arrow button, it will take you to the next four channels. For an 8 channel
DVR, the arrow button will only allow you to navigate to intervals of 4 channels.
For a 16 channel, you can use this mouse navigation when viewing in 4-split screen and 9 split screen
only. No other screen viewing will allow you to use this function.
Navigating to a different channels by using the mouse.
! This function only applies to Mars Plus 8 channel and 16 channel DVRs. Mars Plus 4
channel DVR will not have this function available.

H.264 Pentaplex DVR
19
Navigating to different channels by using the remote control.
When no channels are selected, you can use the remote control to navigate to another interval. In this example,
it is in a 4-split screen. By pressing the direction button on the remote control ▶, it will take you to the next
four channels. For an 8 channel DVR, it will navigate you to next four channels and back to the first four channels.
This function will also apply to the 16 channel DVRs.
If a channel is selected (has yellow border), you can use the remote control by using the arrow buttons to
navigate to individual channels. To select a channel using the remote control, press the enter button and
a yellow border will appear on that channel, (see above picture). After the channel has been selected and by
using the arrow buttons on the remote control, you can navigate to desired channels.
! This function only applies to Mars Plus 8 channel and 16 channel DVRs. Mars Plus 4
channel DVR will not have this function available.

H.264 Pentaplex DVR
20
•Go to Main Menu Window using:
Remote control – Press MENU, Mouse – Right click and click MENU icon.
•To go to desired sub menu:
Use direction keys and press ENTER (remote control) or click on the mouse
•To go to the higher level menu:
Remote control – Press MENU, Mouse – Right click
Chapter 3. Main Menu Setup
Main Menu Tree
VIDEO/AUDIO RECORD DEVICE
CAMERA POLICY STORAGE
MONITOR/SPOT RECORD QUALITY SENSOR/VIDEO LOSS DET.
SEQUENCE/EVENT DISPLAY SCHEDULE ALARM SCHEDULE
OSD/DISPLAY POSITION HOLIDAY PTZ
SCREEN MODE MOTION SYSTEM CONTROLLER
EVENT RECORD DURATION POS/ATM DEVICE
RECORD OPTION VIDEO ANALYSIS
SYSTEM NETWORK BACKUP
TIME CONNECTION BACKUP
SIGNAL/LANGUAGE PORT CD or DVD
CONFIG ID,PASSWORD USB MEMORY DEVICE
LOG DDNS
AUTHORIZATION MGMT LIVE TRANSFER
MAILING SERVICE
Table of contents
Other New Security Technologies DVR manuals
