manuals.online logo
Brands
  1. Home
  2. •
  3. Brands
  4. •
  5. New Works
  6. •
  7. Home Lighting
  8. •
  9. New Works Karl-Johan Pendant User manual

New Works Karl-Johan Pendant User manual

Assembly & Care Guide
Karl-Johan Pendant
[email protected] Frederiksgade 1, Ground Floor, 1265 København DK www.newworks.dk
e Karl-Johan Pendant is carefully crafted, making every piece unique.
e use of natural materials means that dierences in expression may occur, such as smaller marks and minor deviations.
SAFETY INSTRUCTIONS
Please read the instructions carefully and keep them for future reference. New Works Aps is not responsible for any
faults or damages caused by not following the instructions correctly.
Turn o electricity at the main circuit breaker panel before beginning the installation. Installation is to be carried out
only by a qualied electrician. It is important that all wires are connected - when unpacking the box, be careful not
to pull wires, as this may result in a bad connection.
is lamp must be permanently wired into the electric system. Dierent ceiling materials require dierent types of
ttings. Always choose screws and plugs that are suited to the ceiling material.
e lamp is only intended for indoor use. Consult a professionally qualied electrician if any doubt.
Follow the guidance 220-240V~ 50/60Hz - Small: Built in LED 7W / Large: Built in LED 7W.
e light source and lamp exterior may get hot after prolonged use.
Do not subject the lamp to any shock while lit as this may cause the lamp to break.
Keep the product out of children’s reach. Dispose of the packaging and do not allow children to play with it.
Do not modify the product in any way.
CLEANING
Turn o the electricity before cleaning the lamp. Wipe the lamp shade with a soft dry or damp cloth. Do not use
any abrasive cleaning tools, and never use strong cleaning agents such as household glass cleaner, white spirit or
turpentine.
MORE INFORMATION
For more information such as product overview, material description and disclaimers - please visit our website at
www.newworks.dk. If you have any questions or comments, please do not hesitate to contact us at info@new-
works.dk.
Assembly & Care Guide
Karl-Johan Pendant
[email protected] Frederiksgade 1, Ground Floor, 1265 København DK www.newworks.dk
N
L
Loosen the nut to remove the canopy.1.
Turn o electricity and the main circuit breaker panel before beginning the installation.
Hold two ngers on the silicone ring while mov-
ing the canopy downwards (wipe the cord with
a damp cloth to reduce friction from the silicone
ring). If needed disconnect the cord while in-
stalling the ceiling titng.
2.
Adjust the lengths of the wire and cord.
To secure the wire, the wire lock must
be tightened with both screws.
4.
Place the ceiling tting in the desired
position. Mark the holes and drill the
holes. Use plugs and screws appropriate
for the ceiling material.
3.
Move the canopy back up again by holding two
ngers on the silicone ring while pushing the
canopy upwards (wipe the cord with a damp
cloth to reduce friction from the silicone ring).
Tighten the nut to secure the canopy.
6.
N
L
N
L
N
L
Connect eletricity by installing both cables,
natural (N) and live (L) in the terminals.
Consult a professionally qualied electri-
cian if any doubt.
5.
Assembly & Care Guide
Karl-Johan Pendant
[email protected] Frederiksgade 1, Ground Floor, 1265 København DK www.newworks.dk
is step should be carried out by two people.
Lift up the aluminium cover ring while
placing the light source globe inside the
shade. Take the C disc and insert the cord
and wire.
1. Angle the disk in an upright position
and insert it inside the shade.
2. Place the disk on top of the light
source globe. Make sure it is placed
correctly before resting the shade on it.
3.
Place the aluminium cover on
top of the shade.
5.Adjust the shade by placing two ngers
on the wire and moving it until the
shade is hanging straight.
4.
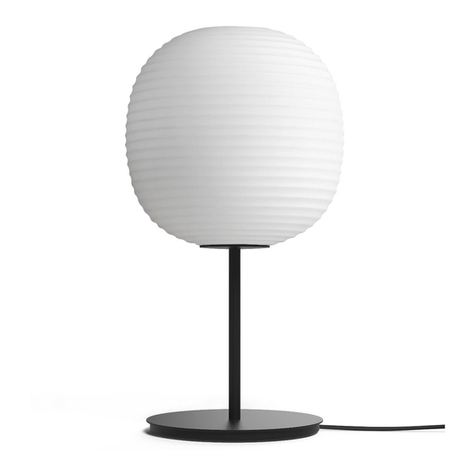
is glass shade is mouth blown and the unique nature of each piece means a
slightly uneven weight balance might occur.
Turn on the electricity again at
the main circuit breaker panel.
6.

Other New Works Home Lighting manuals

New Works Lantern Pendant Medium User manual

New Works

New Works Lantern Pendant Medium User manual

New Works LANTERN User manual

New Works

New Works LANTERN User manual

New Works Material Table Lamp User manual

New Works

New Works Material Table Lamp User manual

New Works BOWL User manual

New Works

New Works BOWL User manual

New Works 20612 User manual

New Works

New Works 20612 User manual

Popular Home Lighting manuals by other brands

Philips myLiving 37227/11/16 user manual

Philips

Philips myLiving 37227/11/16 user manual

Philips 406541716 user manual

Philips

Philips 406541716 user manual

FLOS GLO-BALL BASIC 2 quick start guide

FLOS

FLOS GLO-BALL BASIC 2 quick start guide

JONATHAN Y JYL3024A quick start guide

JONATHAN Y

JONATHAN Y JYL3024A quick start guide

JONATHAN Y JYL1126-SET2 quick start guide

JONATHAN Y

JONATHAN Y JYL1126-SET2 quick start guide

Philips Ecomoods 16908/93/16 user manual

Philips

Philips Ecomoods 16908/93/16 user manual

Time2 Ella Startup guide

Time2

Time2 Ella Startup guide

Philips ecomoods 33205/48/16 user manual

Philips

Philips ecomoods 33205/48/16 user manual

Kompernass KH 4164 operating instructions

Kompernass

Kompernass KH 4164 operating instructions

Occhio io verticale cc Mounting instructions

Occhio

Occhio io verticale cc Mounting instructions

OttLite T96G5R quick start guide

OttLite

OttLite T96G5R quick start guide

BROSA Capra Tripod Floor Lamp Assembly guide

BROSA

BROSA Capra Tripod Floor Lamp Assembly guide

Philips 563931713 Specifications

Philips

Philips 563931713 Specifications

Philips Ledino 422213126 brochure

Philips

Philips Ledino 422213126 brochure

Exo Terra LIGHT DOME PT2055 operating instructions

Exo Terra

Exo Terra LIGHT DOME PT2055 operating instructions

Inspire LINA instruction manual

Inspire

Inspire LINA instruction manual

FLOS WireRing Instruction for correct Installation and Use

FLOS

FLOS WireRing Instruction for correct Installation and Use

Inspire DAHLIA instruction manual

Inspire

Inspire DAHLIA instruction manual

manuals.online logo
manuals.online logoBrands
  • About & Mission
  • Contact us
  • Privacy Policy
  • Terms and Conditions

Copyright 2025 Manuals.Online. All Rights Reserved.