Newer Technology MXP802NRTR User manual

Wireless-N Broadband AP / Router
Quick Installation Guide
Version 1.3

1
Table of Contents
English
1. Before Installation .............................................................................................................................2
2. Hardware Installation ........................................................................................................................3
3. Configure your computer’s TCP/IP Settings......................................................................................4
4. Configure your AP.............................................................................................................................7

2
1. Before Installation
Thank you for purchasing the Wireless 11n AP Router. This guide will help you set-up and configure
your AP with easy-to-follow instructions. For more detailed or advanced settings, please refer to the
User Manual on the CD-ROM.
Package Contents
Please make sure you have the following in the box:
♦WRTR-501 Wireless-N Broadband AP Router
♦Multi-Language Quick Installation Guide
♦User Manual CD-ROM
♦Three dipole 2dBi RSMA detachable Antennas
♦AC/DC Power Adapter
♦RJ-45 Cat.5 UTP Cable
♦Warranty Card
Note: if anything is missing, please contact your vendor

3
2. Hardware Installation
1. Power off your network devices.
2. Locate an optimum location for the AP. The best place for the AP is usually at the center of your
wireless network, with line of sight to all of your wireless devices.
3. Adjust the antennas. Normally, higher location of your AP may get better performance.
4. Using a standard Ethernet network cable, connect to the AP’s Ethernet port to your local network.
5. Connect the AC power adapter to the AP's Power port. Then connect the other end to an electrical
outlet. Only use the power adapter supplied with the AP. Use of a different adapter may cause
product damage.
6. The Hardware installation is completed. Please refer to the following content or user guide for AP
configuration.
Verify Hardware LED status
Verify the following LED lights are on:
Power: The Power LED lights up and will keep while the AP is powered on.
Security (orange): WPS encryption is work or not.
Wireless: When wireless is available, this led lights. When transmit or receive the data, this led is
blinking.
Router: When Router is working as "Router", this LED light
DIAG(red): When FW updating or system is abnormal, it will light
Internet: The Internet LED flashes when there is a successful Internet connection.
LAN: The LAN LED lights up when Ethernet port of AP was connected to LAN. When the LED is
flashing it indicates the network activity over that port.
4
3. Configure your computer’s TCP/IP Settings
Windows 2000/XP
1. Click Start; click Settings and then click on the Control Panel.
2. Double-Click the Network Connection icon.
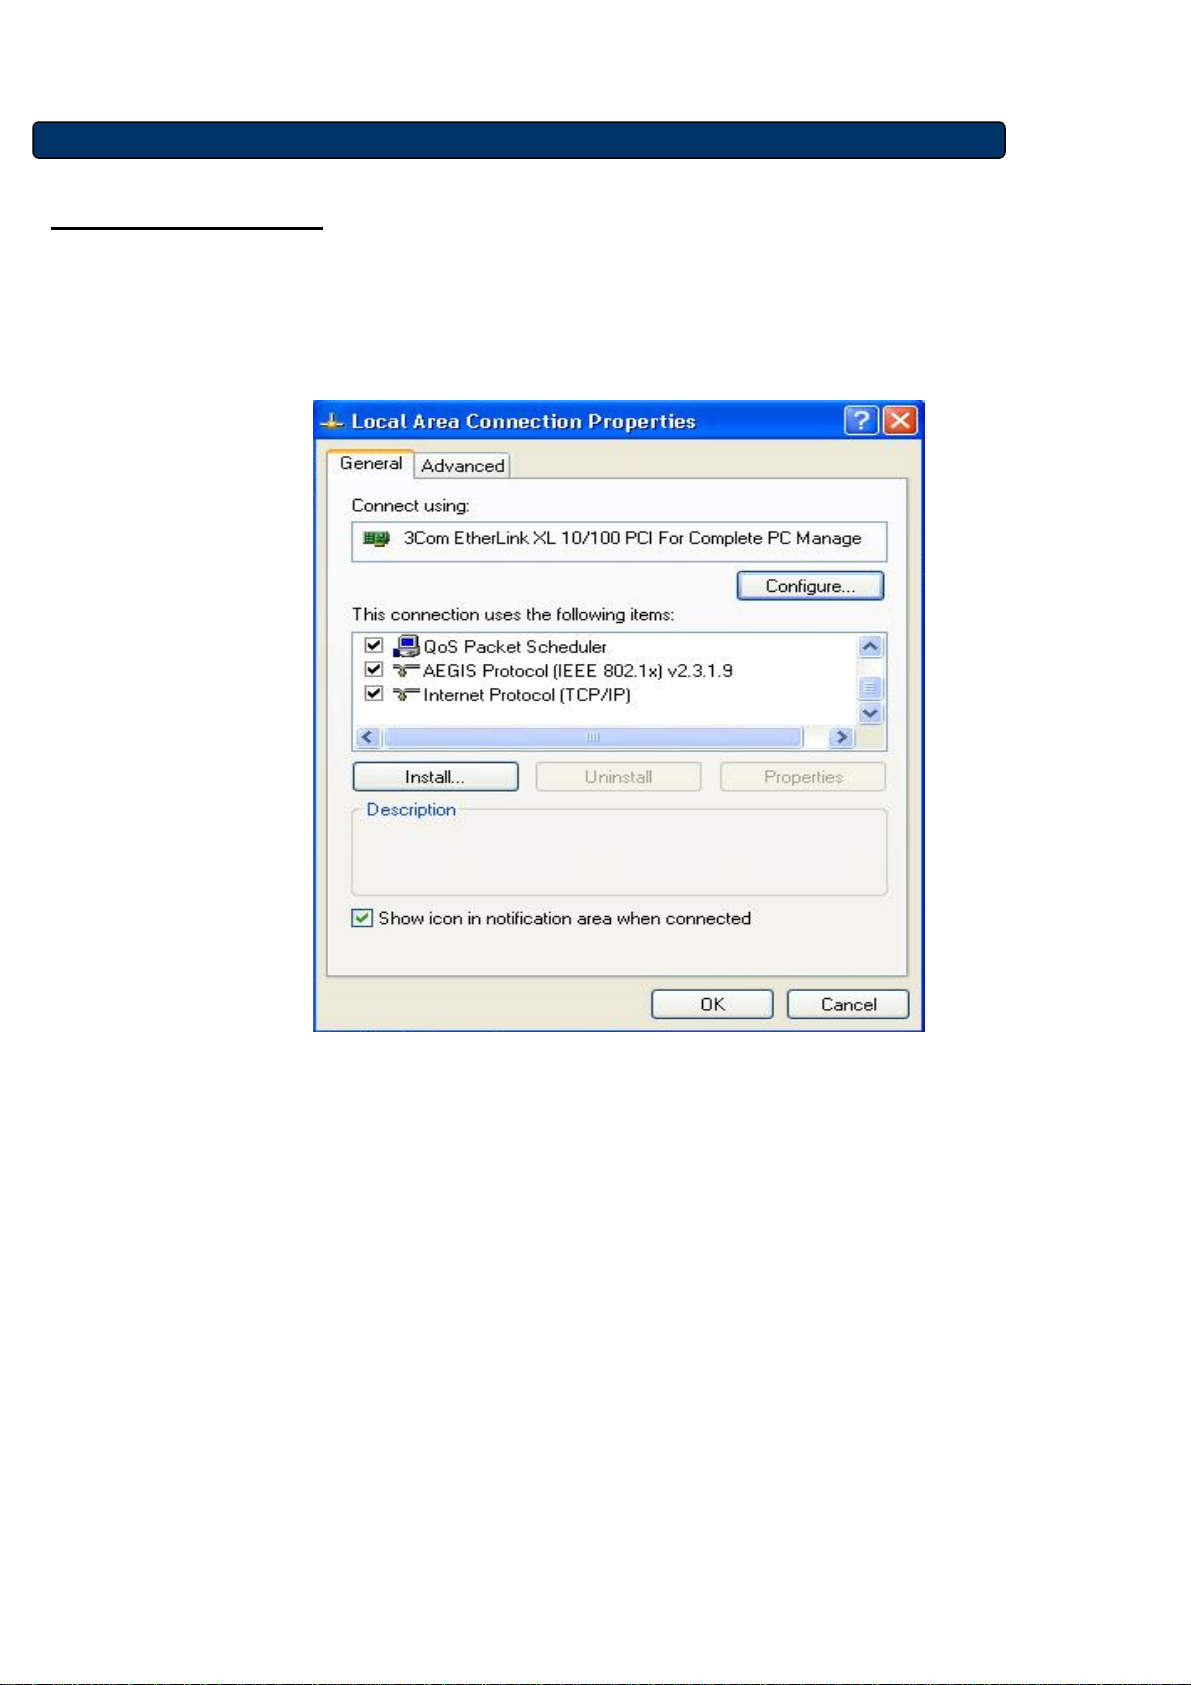
3. Right-Click on the Local Area Connection icon and then click on Properties. The Local Area
Connection Properties windows will appear.
4. Under the General Configuration Tab, locate and select TCP/IP with the corresponding network
card, then click Properties. The Internet Protocol (TCP/IP) Properties window will appear.
5. Click on Use the following IP Address and enter
IPAddress: 192.168.1.10
Subnet Mask: 255.255.255.0
Default gateway: 192.168.1.1

5
6. Now your computer is ready to access and configure the AP.
Windows VISTA
1. Click Start ÆControl Panel, then Network and Internet ÆManage network connections.
2. Right-Click on the Local Area Connection icon and then click on Properties. The Local Area
Connection Properties windows will appear.
3. Under the Networking Configuration Tab, locate and select Internet Protocol Version4
(TCP/IPv4) with the corresponding network card, then click Properties. The Internet Protocol
(TCP/IP) Properties window will appear.

6
4. Click on Use the following IP Address and enter
IPAddress: 192.168.1.10
Subnet Mask: 255.255.255.0
Default gateway: 192.168.1.1
5. Now your computer is ready to access and configure the AP.
NOTE : The default IP address setting for the AP is a class C IP address (192.168.1.1 /
255.255.255.0). Please make sure that the current workstation is following the class C IP
address range, from 192.168.1.2 to 192.168.1.254

7
4. Configure your AP
1. Open your web browser, type http://192.168.1.1 in the Address bar, and press Enter.
2. An authentication window will appear. Enter the username and password, and then click OK.
By default, please leave blank in username and type admin in password.
3. Turn to the Wireless Section; here you may select a different channel, SSID or enable Security
if it is necessary.
4. Click “Save Settings” button to finish the Setup if you have something change. The following
screen would appear to notify you the system is rebooting. All changes will be taken effect
while reboot procedure is completed.

8
5. When the AP reboot procedure is completed, you may change the TCP/IP properties of this
computer. Select the “Obtain an IP address automatically” instead of “Use the following IP
Address “ item if your local network has DHCP server service to assign IP address for your
wireless client. This step will set your computer as DHCP client and get IP from your DHCP
server via AP.
If there is no DHCP server in your network, then you should assign one proper IP address
manually to fit your network IP subnet.
6. For DHCP client, using following command to check if your computer already got IP address.
zWin2000, WinXP, WinVISTA: type the “ ipconfig “ on your windows Command Prompt.
Once you got the IP address, subnet mask and default gateway, that means your computer
already connected to local network.
For detail configuration of this AP, please refer to the CD-ROM.

9
Federal Communication Commission Interference Statement
This equipment has been tested and found to comply with the limits for a Class B digital device,
pursuant to Part 15 of the FCC Rules. These limits are designed to provide reasonable protection
against harmful interference in a residential installation. This equipment generates, uses and can
radiate radio frequency energy and, if not installed and used in accordance with the instructions, may
cause harmful interference to radio communications. However, there is no guarantee that interference
will not occur in a particular installation. If this equipment does cause harmful interference to radio or
television reception, which can be determined by turning the equipment off and on, the user is
encouraged to try to correct the interference by one of the following measures:
-Reorient or relocate the receiving antenna.
-Increase the separation between the equipment and receiver.
-Connect the equipment into an outlet on a circuit different from that to which the receiver is
connected.
-Consult the dealer or an experienced radio/TV technician for help.
This device complies with Part 15 of the FCC Rules. Operation is subject to the following two conditions:
(1) This device may not cause harmful interference, and (2) this device must accept any interference
received, including interference that may cause undesired operation.
FCC Caution: Any changes or modifications not expressly approved by the party responsible for
compliance could void the user's authority to operate this equipment.
IMPORTANT NOTE:
FCC Radiation Exposure Statement:
This equipment complies with FCC radiation exposure limits set forth for an uncontrolled environment.
This equipment should be installed and operated with minimum distance 20cm between the radiator &
your body.
This transmitter must not be co-located or operating in conjunction with any other antenna or
transmitter.
The MXP802NRTR ( FCC ID: UNH-MXP802NRTR ) is limited in CH1~CH11 for 2.4 GHz by
specified firmware controlled in U.S.A.
Table of contents
Popular Network Router manuals by other brands


Billion
Billion BiPAC 7300 G Configuration guide

H3C
H3C S3100-52P Operation manual

Alcatel-Lucent
Alcatel-Lucent 7210 SAS E OS Configuration guide

Allied Telesis
Allied Telesis AT-GS950/24 user guide

Alcatel-Lucent
Alcatel-Lucent 7210 SAS E OS Configuration guide

Motorola
Motorola WE800G - Wireless EN Bridge user guide