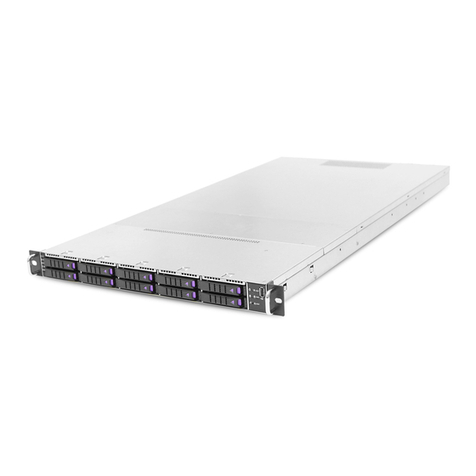
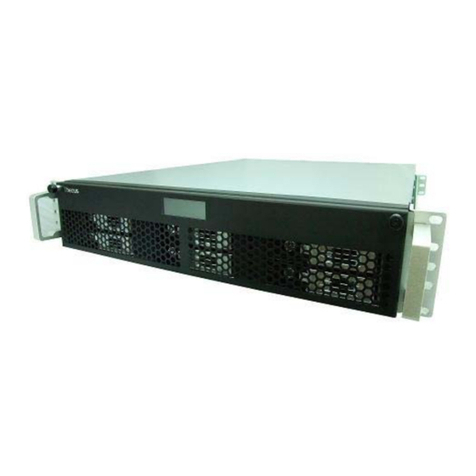
Newisys NA-1400 User manual

The NA-1400
Network Attached
Storage Device
User Guide
December 2005

2NA-1400
User Guide
December 2005
COPYRIGHT NOTICE
© 2001–2005 Newisys®, Inc. All rights reserved.
Newisys® Inc. has made every effort to ensure that the information contained in this document is accurate and
reliable, but assumes no responsibility for errors or omissions. Information in this document is subject to change
without notice. Companies, names, and data used in examples herein are fictitious, unless noted.
This document contains copyrighted and proprietary information, which is protected by United States copyright laws
and international treaty provisions.
No part of the document may be reproduced or transmitted, in any form or by any means, electronic or mechanical,
for any purpose, without express written permission from Newisys® Inc.
TRADEMARK ACKNOWLEDGMENTS
Newisys® and its logo are trademarks of Newisys®, Inc. Newisys® is a Sanmina-SCI company. All other trademarks
are the properties of their respective owners.
THIRD PARTY NOTICES
AMD and HyperTransport are trademarks of Advanced Micro Devices, Inc.
PowerPC, PPC and VisualAge are trademarks or registered trademarks of International Business Machines
Corporation.
Java Development Kit and JDK are trademarks or registered trademarks of Sun Microsystems, Inc.
StrongARM is a registered trademark of ARM, LTD.
MIPS is a registered trademark of MIP Technologies, Inc.
ViewML is a registered trademark of Century Software, Inc.
GoAhead Webserver is a trademark of GoAhead Software, Inc.
Linux is a registered trademark of Linus Torvalds.
Hard Hat is a trademark of MontaVista Software, Inc.
OPEN SOURCE COMPONENTS
Certain portions of the software included with the system are licensed under the terms of the most recent version of
the GNU General Public License (GPL) and GNU Lesser General Public License (LGPL), as published by the Free
Software Foundation. If you desire the source code for these components, you may access them on the support Web
site or request physical media (CD-ROM) through customer support. The media will be provided in exchange for a
handling fee in keeping with the terms of the GPL. The GPL is available at http://www.gnu.org/licenses/gpl.txt, and
the LGPL is available at http://www.gnu.org/licenses/lgpl.txt.
CONTACTING CUSTOMER SUPPORT
If you have questions, concerns, or need assistance, see the Technical Support contact information provided by your
system supplier.

NA-1400 3
Contents
Overview . . . . . . . . . . . . . . . . . . . . . . . . . . . . . . . . . . . . . . . . . . . . . . . . . . . . . . . . . . . . . .5
About this Guide . . . . . . . . . . . . . . . . . . . . . . . . . . . . . . . . . . . . . . . . . . . . . . . . . . . . .5
Audience . . . . . . . . . . . . . . . . . . . . . . . . . . . . . . . . . . . . . . . . . . . . . . . . . . . . . . . . . . .5
Warranty and Liability Limitations . . . . . . . . . . . . . . . . . . . . . . . . . . . . . . . . . . . . . . . .5
About the NA-1400 . . . . . . . . . . . . . . . . . . . . . . . . . . . . . . . . . . . . . . . . . . . . . . . . . . .5
Software . . . . . . . . . . . . . . . . . . . . . . . . . . . . . . . . . . . . . . . . . . . . . . . . . . . . . . . .5
Integrated Management . . . . . . . . . . . . . . . . . . . . . . . . . . . . . . . . . . . . . . . . . . . .5
Web Interface Management Software Compatibility . . . . . . . . . . . . . . . . . . . . . . .6
Features . . . . . . . . . . . . . . . . . . . . . . . . . . . . . . . . . . . . . . . . . . . . . . . . . . . . . . . .6
Minimum Requirements . . . . . . . . . . . . . . . . . . . . . . . . . . . . . . . . . . . . . . . . . . . .6
Installation and Setup . . . . . . . . . . . . . . . . . . . . . . . . . . . . . . . . . . . . . . . . . . . . . . . . . . . .7
Before you Begin . . . . . . . . . . . . . . . . . . . . . . . . . . . . . . . . . . . . . . . . . . . . . . . . . . . .7
Safety Precautions . . . . . . . . . . . . . . . . . . . . . . . . . . . . . . . . . . . . . . . . . . . . . . . .7
Components . . . . . . . . . . . . . . . . . . . . . . . . . . . . . . . . . . . . . . . . . . . . . . . . . . . . .7
Networking Options . . . . . . . . . . . . . . . . . . . . . . . . . . . . . . . . . . . . . . . . . . . . . . . . . . .8
Connect and Power up . . . . . . . . . . . . . . . . . . . . . . . . . . . . . . . . . . . . . . . . . . . . . . . .9
Points about Power on, Power off, and Reset . . . . . . . . . . . . . . . . . . . . . . . . . .10
Name and Address of the NA-1400 . . . . . . . . . . . . . . . . . . . . . . . . . . . . . . . . . .10
Find the NA-1400 on Your Network . . . . . . . . . . . . . . . . . . . . . . . . . . . . . . . . . . . . .10
Windows . . . . . . . . . . . . . . . . . . . . . . . . . . . . . . . . . . . . . . . . . . . . . . . . . . . . . . . . . .11
Use “Network Neighborhood” . . . . . . . . . . . . . . . . . . . . . . . . . . . . . . . . . . . . . . .11
Use “Find Computer” . . . . . . . . . . . . . . . . . . . . . . . . . . . . . . . . . . . . . . . . . . . . . .11
Saving Files . . . . . . . . . . . . . . . . . . . . . . . . . . . . . . . . . . . . . . . . . . . . . . . . . . . . .11
Assign a Drive Letter to the NA-1400 . . . . . . . . . . . . . . . . . . . . . . . . . . . . . . . . .11
Macintosh . . . . . . . . . . . . . . . . . . . . . . . . . . . . . . . . . . . . . . . . . . . . . . . . . . . . . . . . .12
Connecting through the Finder (Mac OS X) . . . . . . . . . . . . . . . . . . . . . . . . . . . .12
Saving Files to the NA-1400 (Macintosh) . . . . . . . . . . . . . . . . . . . . . . . . . . . . . .12
Linux . . . . . . . . . . . . . . . . . . . . . . . . . . . . . . . . . . . . . . . . . . . . . . . . . . . . . . . . . . . . .12
Mounting a Share on the NA-1400 . . . . . . . . . . . . . . . . . . . . . . . . . . . . . . . . . . .12
Create a Local Mount . . . . . . . . . . . . . . . . . . . . . . . . . . . . . . . . . . . . . . . . . . . . .13
View Available Shares . . . . . . . . . . . . . . . . . . . . . . . . . . . . . . . . . . . . . . . . . . . .13
Mount an Available Share . . . . . . . . . . . . . . . . . . . . . . . . . . . . . . . . . . . . . . . . . .13
Disconnect a Share . . . . . . . . . . . . . . . . . . . . . . . . . . . . . . . . . . . . . . . . . . . . . . .14
Log on and Configure . . . . . . . . . . . . . . . . . . . . . . . . . . . . . . . . . . . . . . . . . . . . . . . .14
Reset Network Settings . . . . . . . . . . . . . . . . . . . . . . . . . . . . . . . . . . . . . . . . . . . . . .15
Log off or Shut down . . . . . . . . . . . . . . . . . . . . . . . . . . . . . . . . . . . . . . . . . . . . . . . . .15
Remove and Reinstall an Hard Disk Drive Carrier . . . . . . . . . . . . . . . . . . . . . . . . . .15
Managing Settings . . . . . . . . . . . . . . . . . . . . . . . . . . . . . . . . . . . . . . . . . . . . . . . . . . . . .19
Managing Users and Groups on the NA-1400 . . . . . . . . . . . . . . . . . . . . . . . . . . . . .19
Reserved User and Group Names . . . . . . . . . . . . . . . . . . . . . . . . . . . . . . . . . . .19
Managing Users Locally . . . . . . . . . . . . . . . . . . . . . . . . . . . . . . . . . . . . . . . . . . .20
Managing Groups Locally . . . . . . . . . . . . . . . . . . . . . . . . . . . . . . . . . . . . . . . . . .21

User Guide
4NA-1400
Managing Access to Folders and Shares . . . . . . . . . . . . . . . . . . . . . . . . . . . . . . . . .22
Managing Shares and Folders . . . . . . . . . . . . . . . . . . . . . . . . . . . . . . . . . . . . . .23
Monitoring the NA-1400 . . . . . . . . . . . . . . . . . . . . . . . . . . . . . . . . . . . . . . . . . . . . . .26
Checking Status of the NA-1400 . . . . . . . . . . . . . . . . . . . . . . . . . . . . . . . . . . . . .27
Monitoring Hardware Status . . . . . . . . . . . . . . . . . . . . . . . . . . . . . . . . . . . . . . . .28
Change Administrative Password . . . . . . . . . . . . . . . . . . . . . . . . . . . . . . . . . . . .29
Change the Date and Time . . . . . . . . . . . . . . . . . . . . . . . . . . . . . . . . . . . . . . . . .30
Shutting Down the NA-1400 . . . . . . . . . . . . . . . . . . . . . . . . . . . . . . . . . . . . . . . . . . .30
Configuring Advanced Settings . . . . . . . . . . . . . . . . . . . . . . . . . . . . . . . . . . . . . . . . . . . .33
Changes to Advanced Settings . . . . . . . . . . . . . . . . . . . . . . . . . . . . . . . . . . . . . . . . .33
Name and DNS . . . . . . . . . . . . . . . . . . . . . . . . . . . . . . . . . . . . . . . . . . . . . . . . . .33
Other Networking Options . . . . . . . . . . . . . . . . . . . . . . . . . . . . . . . . . . . . . . . . . . . . .34
Obtaining an IP Address from a DHCP Server . . . . . . . . . . . . . . . . . . . . . . . . . .34
Authenticating Users and Groups . . . . . . . . . . . . . . . . . . . . . . . . . . . . . . . . . . . .36
Advanced Options . . . . . . . . . . . . . . . . . . . . . . . . . . . . . . . . . . . . . . . . . . . . . . . .39
Large Network Settings . . . . . . . . . . . . . . . . . . . . . . . . . . . . . . . . . . . . . . . . . . . . . . .40
Updating the NA-1400 via the Web . . . . . . . . . . . . . . . . . . . . . . . . . . . . . . . . . . . . .41
Troubleshooting . . . . . . . . . . . . . . . . . . . . . . . . . . . . . . . . . . . . . . . . . . . . . . . . . . . .42
Obtain a Configuration Snapshot . . . . . . . . . . . . . . . . . . . . . . . . . . . . . . . . . . . .42
Configuring Storage Settings . . . . . . . . . . . . . . . . . . . . . . . . . . . . . . . . . . . . . . . . . . . . .47
Managing Storage Settings . . . . . . . . . . . . . . . . . . . . . . . . . . . . . . . . . . . . . . . . . . . .47
Available RAID Levels in the NA-1400 . . . . . . . . . . . . . . . . . . . . . . . . . . . . . . . .47
General Information . . . . . . . . . . . . . . . . . . . . . . . . . . . . . . . . . . . . . . . . . . . . . .48
Managing Volumes . . . . . . . . . . . . . . . . . . . . . . . . . . . . . . . . . . . . . . . . . . . . . . .48
Managing RAID . . . . . . . . . . . . . . . . . . . . . . . . . . . . . . . . . . . . . . . . . . . . . . . . . .50
Managing Pools . . . . . . . . . . . . . . . . . . . . . . . . . . . . . . . . . . . . . . . . . . . . . . . . .51
Disk Properties . . . . . . . . . . . . . . . . . . . . . . . . . . . . . . . . . . . . . . . . . . . . . . . . . .52
Hard Disk Drive Replacement . . . . . . . . . . . . . . . . . . . . . . . . . . . . . . . . . . . . . . .53
Using the Online Help . . . . . . . . . . . . . . . . . . . . . . . . . . . . . . . . . . . . . . . . . . . . . . . . . . .55
On-line Help . . . . . . . . . . . . . . . . . . . . . . . . . . . . . . . . . . . . . . . . . . . . . . . . . . . . . . .55
Viewing On-line Help . . . . . . . . . . . . . . . . . . . . . . . . . . . . . . . . . . . . . . . . . . . . . .55
Printing On-line Help Screens . . . . . . . . . . . . . . . . . . . . . . . . . . . . . . . . . . . . . . .55
Glossary . . . . . . . . . . . . . . . . . . . . . . . . . . . . . . . . . . . . . . . . . . . . . . . . . . . . . . . . . . . . .57

NA-1400 5
Chapter 1
Overview
About this Guide
The NA-1400 User Guide contains the following information:
• "Installation and Setup" on page 7 includes diagrams of the NA-1400, with explanations of the
functions and proper use of its components and initial hardware installation.
• "Managing Settings" on page 19 includes instructions about how to manage groups and folders, how to
check status and user connections, and how to view settings.
• "Configuring Advanced Settings" on page 75 includes instructions about how to perform more
advanced administrative activities.
• "Configuring Storage Settings" on page 47 includes instructions about how to set up storage options.
• "Using the Online Help" on page 55 includes instructions about how to use the online help.
• "Glossary of Terms" on page 61 provides definitions for many of the terms that are used in this guide.
Audience
The NA-1400 System Agreement is intended for:
• Network users who are familiar with standard end-user functionality.
• Administrators who have some knowledge of basic computer networking.
Warranty and Liability Limitations
ATTENTION: USE OF THE SOFTWARE IS SUBJECT TO THE TERMS OF THE APPLIANCEWARE
SOFTWARE LICENSE. USE OF THE SOFTWARE INDICATES YOUR ACCEPTANCE OF THESE
LICENSE TERMS.
About the NA-1400
Software
The NA-1400 enables cross-platform file-sharing for Windows, Macintosh, and UNIX/Linux users. Server
software is the engine that drives this network-attached storage device. Setup, configuration, and
management are available via the Web-based interface.
Integrated Management
The NA-1400 produces simple management tools for locating and configuring devices. The Web-based
user interface unifies access to all NA-1400s on a network.

Overview
6NA-1400
Web Interface Management Software Compatibility
The management software does not require installation and is accessible from any system running
Microsoft Internet Explorer 5.0 or later or Mozilla Firefox 1.0 (or later) Web browsers.
Features
• XFS Journaling File System.
• The Linux 2.6.x-series kernel.
• Supports the following network protocols: SMB/CIFS (Windows) and FTP.
• Available in English, Japanese, French, German, Traditional and Simplified Chinese versions.
• Software RAID levels 0, 1 and 5 available, with RAID management tools.
• User and Group management in Local (with the NA-1400), Native (using Active.Directory Services),
or Mixed (using a Primary Domain Controller) security modes.
• Folders & Sharing management with Access Control Lists.
• WINS Server service available.
• Wizard based installer for easy server setup.
Minimum Requirements
The Web -based administration tool may be used on any system with either Microsoft Internet Explorer 5.0
or Mozilla Firefox 1.0 (or newer versions) installed. Although other JavaScript- and HTTPS-capable
browsers might work, they are not officially supported.

NA-1400 7
Chapter 2
Installation and Setup
Before you Begin
Read the document titled Safety and Regulatory Information, packaged with your NA-1400.
Safety Precautions
• Install the NA-1400 near the socket-outlet you intend to use.
• Ensure that cables do not extend across foot traffic areas or under heavy objects.
• Install the NA-1400 on a smooth, uncarpeted surface, so that the cooling vents are not blocked.
• Install the system away from heat sources, food, and liquids.
• USB ports are for use with mass storage devices, only. These are commonly known as “USB flash
drives,” “USB sticks,” or simply “memory sticks.”
• Do not use the USB ports with devices such as cameras. To store media from cameras and similar
devices, first download the media to your computer, then store the media in the NA-1400.
• Always power down the NA-1400 before you unplug it. (Press the power switch or click Shutdown.)
• After power-down, to disconnect, unplug the power cord from the wall, then unplug it from the NA-
1400. The power cord plug is the system's power disconnection device.
• The NA-1400 has a safety fuse. If the fuse trips, return it to your vendor for repair. Do not attempt to
replace the fuse. It is not a user-replaceable part.
• The maximum ambient operating temperature of the NA-1400 is 40oC.
Components
Remove the items from the NA-1400 package and check them against the list, below.
In addition to these items, you need an Ethernet cable and either of these Web browsers:
• Microsoft Internet Explorer 5.0 or later.
• Mozilla Firefox 1.0 or later.
Item Quantity
NA-1400 1
External power supply 1
Power cord 1
Hard disk drive carrier (inside the NA-1400) 4
Discovery CD 1

Installation and Setup
8NA-1400
Networking Options
See the diagrams below for network set-up options for the NA-1400.
Figure 2: Home Computer
NA-1400
LAN
WAN
Antenna
Router
Cable/DSL
Internet
Wireless
NA-1400
Figure 1: LAN, WAN, Wireless Network

Installation and Setup
NA-1400 9
Connect and Power up
1. Locate the parts that are identified on the bottom
and rear of the NA-1400, Figure 3:
a. Edge of front cover
b. Rubberized base piece
c. Bottom of NA-1400
d. Vents for fan
e. Power input
f. Ethernet port 0 (Eth0)
g. Ethernet port 1 (Eth1)
h. Back of NA-1400
2. Connect one end of your Ethernet cable to
Ethernet port 0 (F). Then connect the other end of the cable to a “live” Ethernet port.
3. Connect the permanently attached cord on the external power supply to the power input socket (E) on
the back of the NA-1400.
4. Connect the three-inlet end of the separate power cord to the socket on the end of the power supply.
Then plug the three-pronged end of the power cord into a power strip or other standard power outlet.
5. Locate the parts on the front of the NA-1400,
as illustrated in Figure 4:
i. Front cover, open
j. Front cover lock
k. USB port
l. Power indicator LED
m. Power switch
n. Hard disk drive carriers with activity
indicator LEDs
o. Hard disk drive carrier, partially removed
6. Press the power switch (m.) only once. The
power indicator is illuminated. After four or
five seconds you will hear the NA-1400 start
to power on and the power switch illuminates.
Note: If you store data, then remove one or more HDD carriers, always put them in the
same slots they occupied before you removed them. See "Points about Power on,
Power off, and Reset" on page 10
Figure 3: NA-1400, bottom and rear view
Figure 4: NA-1400, front view

Installation and Setup
10 NA-1400
Points about Power on, Power off, and Reset
• If the NA-1400 is off press the power switch only one time, quickly, to power on.
• If the NA-1400 is on:
Press the power switch twice, quickly, to restore settings.
Press and hold the power switch for four to five seconds or click the Shutdown option in the Web
interface to power off.
• Total time required to power up or power down after you press the power switch can be four minutes.
• LEDs on the hard disk drive carriers flicker during power up and illuminate during data read and write.
Name and Address of the NA-1400
At power-up the NA-1400 configures itself and assigns itself an IP address that you later use to access the
Web-based interface. If no DHCP server is available, a host configures an IPv4 Link-Local address on its
own, by selecting a random, unused IP address in the range from 169.254.0.1 to 169.254.254.254,
inclusive, according to RFC3927.
Note: It is recommended that you give the NA-1400 a static IP address or a non-expiring
DHCP lease time. If a network DHCP server is not available initially, add a route
to the 169.254.* network to configure the NA-1400 with a static IP address.
Find the NA-1400 on Your Network
Notes: Before you start the Discovery application on a non-DHCP network for the first
time, ensure that the NA-1400 and the client PC are physically plugged into the
same subnet.
Additional instructions for finding the NA-1400 on your computer are included,
below. See "Windows" on page 11, "Macintosh" on page 12, and "Linux" on
page 12.
When power-up is complete, your NA-1400 is configured and ready to use. To find it on your network and
to access the Web-based interface in order to use it, follow the instructions below.
1. Insert the Discovery CD into the appropriate drive.
2. Open the contents of your CD-ROM drive.
3. Find the Readme file that is included in the list of files and double-click on it to open it.
4. Follow the instructions for your operating system.
Notes: It can take 15 minutes or longer for the NA-1400 to display in the Workgroup.
Java Runtime Environment version 1.4 or later is required to run Discovery on
Mac OS X. Version 1.4.2 is highly recommended.

Installation and Setup
NA-1400 11
Windows
Use “Network Neighborhood”
To locate the NA-1400 in Network Neighborhood or My Network Places:
1. From your computer desktop, double-click on Network Neighborhood (or My Network Places in the
latest Windows versions).
2. Double-click on Entire Network.
3. Click the Search icon in the top tool bar.
4. Click Search for Computer, the hyperlink located in the left pane.
5. Type the IP address in the Computer Name field.
6. Press Enter. The NA-1400 displays in the right pane.
7. Double-click on the NA-1400 name to open the Logon window.
Use “Find Computer”
To locate the NA-1400 using Find Computer:
1. From the Windows Start menu, choose Find, and then click Computer. The Find Computer dialog
box opens.
2. Type the IP address of the NA-1400 in the entry field.
3. Click Find Now.
4. Locate the NA-1400 and double-click on it to connect.
Saving Files
• You can use the Save As command on the Windows File menu to save files on the NA-1400.
• You can also drag files to NA-1400 folders in Network Neighborhood or Windows Explorer.
Assign a Drive Letter to the NA-1400
You can assign, or "map" a drive letter to the NA-1400. If you assign a drive letter to the Public
share or a frequently accessed folder, you will have a convenient, direct path to your data.
To map to a shared folder:
1. Double-click on Network Neighborhood.
2. Browse to the NA-1400 or the appropriate folder and right-click on it.
3. From the menu, choose Map Network Drive. The Map Network Drive box opens with the path to
the folder you selected.
4. In the Drive field, select the drive letter you want to use for this folder.
5. Check Reconnect at Logon to automatically connect to this folder the next time you start Windows.
6. Click OK. Now you can locate the NA-1400 in My Computer under the drive letter you assigned.

Installation and Setup
12 NA-1400
Macintosh
Note: This version of the NA-1400 software supports Mac OS X 10.1.2, 10.1.5-based
computers (and later).
The NA-1400 is ready for use as soon as it is installed on your network. If necessary, the administrator can
limit access to files to particular users or groups. Otherwise, files on the NA-1400 are available to everyone
who has access to your network. Use the NA-1400 as you would any other drive or server on the network:
• Connect to the NA-1400 shares over Samba (CIFS) protocol using Finder (Mac OS X).
• Create and save shared files in folders and shares on the NA-1400.
• Back up files stored on the NA-1400.
• Make an alias for folders and shares that you use often.
Connecting through the Finder (Mac OS X)
To connect to the NA-1400:
1. From the Finder menu, select Go, then select Connect to server…
or
Press Apple + K.
2. Select the NA-1400 from the list.
3. Log on the NA-1400, either as a guest (without password) or with your user name and password.
4. Select the folder you want and click OK. The NA-1400 folder is now on the Macintosh desktop.
Saving Files to the NA-1400 (Macintosh)
You can save files on the NA-1400 by dragging the files onto NA-1400 folders on your desktop. NA-1400
folders remain mounted on the Macintosh desktop until you drag them to the trash.
Linux
The NA-1400 is ready for use from clients using CIFS/Samba as soon as it is installed on your network.
Use the NA-1400 as you would any other drive or server on the network:
• Connect to the NA-1400 by IP address and directory path to a local mount point.
• Create and save shared files in folders and shares on the NA-1400.
• Backup files stored on the NA-1400.
• Create KDE/GNOME desktop icons and symbolic links for convenience and faster access.
• To handle Samba (Windows) connections, you also can use the LinNeighborhood utility with a GUI.
Mounting a Share on the NA-1400
You must know the NA-1400 IP address and public mount point in order to connect to the NA-1400. Once
the IP address and target mount point are established, the NA-1400 is accessed using a mount command
with the target IP address, target mount point, and local mount point, in the form of:
smbmount //ip-address/target-directory-path local-mount-point

Installation and Setup
NA-1400 13
The target directory path depends on how the NA-1400 disks are configured. If the NA-1400 has been
configured with a static IP address, ask the administrator for this address to connect to the server. If the
NA-1400 is set to obtain a DHCP IP address automatically, either get the IP address from the Web interface
application, or ask the system administrator.
KDE or Gnome users also can use Konqueror or Nautilus (respectively) in order to browse the local
network using SMB/CIFS. Please refer to their manuals for details.
Create a Local Mount
To create a local mount:
1. Type:
mkdir [directory name] <Enter>
For example, if you want to create a directory named testdir under user's home directory, you would
type:
mkdir ~/testdir
2. Press Enter.
3. Type:
ls [directory name]
4. Press Enter. The contents of the directory display. It is empty.
View Available Shares
To view the shares available for CIFS/SMB mounting:
1. Type:
smbclient -L [//NA-1400 name or IP address]
2. Press Enter.
For example, if the NA-1400’s IP address is 192.168.0.230, you would type:
smbclient –L //192.168.0.230
3. Press Enter.
If your NA-1400 is joined into domain, you might be prompted for a domain password. Otherwise, just
press the Enter key at password prompt.
Mount an Available Share
1. Decide which share path you want to mount from the list that is displayed on the screen. To mount an
available share on the NA-1400 to a local mount point, from a Linux console type:
smbmount //[NA-1400 IP address]/[path on NA-1400] [local mount point]
For example, if the NA-1400 IP address is 192.168.0.230, the share name is public, and the local
mount point is ~/testdir, you would type:
smbmount //192.168.0.230/public ~/testdir
2. Press Enter.
3. Type:
ls [directory name]

Installation and Setup
14 NA-1400
4. Press Enter. The contents of the directory, now containing files on the NA-1400, display. You can use
this directory as if it were a local directory on the client.
Disconnect a Share
To disconnect a share mounted on the Linux client:
1. Type:
smbumount [directory name]
For example, if path on the local Linux client is ~/testdir, you would type:
smbumount ~/testdir
2. Press Enter.
3. Type:
ls [directory name]
4. Press Enter. The contents of the directory display. It is empty.
Log on and Configure
1. Open a Web browser window and click in the Address field at the top of the window.
2. Type https://IP address, where IP address is the address you found in the steps above. In this example
we use 169.254.0.1.
Figure 5: IP Address, Sample
3. Press Enter or click Go. The Logon window displays.
Figure 6: Logon Window
4. Click in the (case-sensitive) Password field and type the default password admin.
5. Click OK to open the Setup Wizard.
6. Accept the defaults or specify an IP address, subnet mask, and default gateway, and click Next.
7. Accept the defaults or enter a unique system name of 15 English characters or fewer. Click Next.
8. Verify date, time and time zone for the NA-1400. Use the GMT subtractor, if necessary. Click Next.
9. Accept the default password that populates the field or create a new password (use English characters).
You will use this password to have access to view or change configuration settings.
10. Click Finish.

Installation and Setup
NA-1400 15
Note: If you changed the system name, the NA-1400 will reboot. Otherwise, only its
management engine is restarted. In both cases, you must log on via the system
management Web interface when power on completes.
11. To log on again, type the NA-1400’s IP address in the Web browser address field and press Enter. The
Logon window opens.
12. In the Logon window, type your password and click OK. The Web-based system management tool
opens.
Note: In case of a server hang at logon time, the management engine will restart
automatically and be available for logon again in about five minutes.
Reset Network Settings
You can reset incorrect network parameters on the NA-1400. This is necessary after you have moved the
system between different networks, for example.
To reset the network settings:
1. Press the power switch one time to power up the NA-1400.
2. When the power up is complete (about four minutes), quickly press and release the power switch two
times.
The IP restore process begins and completes in a few second.
3. Quickly press and release the power button one time to power down the NA-1400.
4. When the power down is complete (about four minutes), press the power switch one time to power up
with the correct network settings.
Log off or Shut down
1. Click Logoff in the Web interface.
2. To shut down, click Shutdown in the Web interface or press the power switch one time.
Remove and Reinstall an Hard Disk Drive Carrier
This section contains instructions for the removal and insertion of an HDD carrier. If you want to replace
the HDD inside the carrier, see the detailed instructions in "Replace the Hard Disk Drive in the Carrier" on
page 16.
Caution: Ensure that you label each HDD with an appropriate sequential number.
This is necessary in order to ensure that you reinsert it into its original
slot. If you remove the HDD from one slot and insert it into a different
slot, you can lose all the data that was saved to the HDD.

Installation and Setup
16 NA-1400
Figure 7: SCSI Hard Disk Drive Carrier and Latch Release
Remove the HDD Carrier
1. Unplug the power supply cable from the back of the unit.
2. Unplug all Ethernet, USB, and other cables from the unit.
3. Open the front door of the unit.
4. Remove the HDD Carrier.
a. Open the front door of the unit.
b. Squeeze the release latch and carefully swing the arm to the left, as far as possible, to pull the
HDD carrier away from the connector.
c. With both hands, grasp the carrier bezel and carefully pull the HDD carrier out of the drive bay. Do
not use the arm as a handle for the removal of the HDD carrier.
Replace the Hard Disk Drive in the Carrier
If it is necessary to replace the hard disk drive, continue with the instructions below. If not, go to “Reinstall
the HDD Carrier.”
1. Place the SCSI hard disk drive and carrier on a flat, non-slippery surface.
2. Remove the four 6-32 phillips screws that hold the hard disk drive in the carrier. Set them aside for
later use.
3. Remove the hard disk drive from the carrier.
4. Place the new hard disk drive into the carrier. Ensure that the connectors are on the open end of the
carrier and that the screw holes are aligned.
5. Install the four 6-32 phillips screws to secure the hard disk drive. Do not overtighten the screws.
Reinstall the HDD Carrier
Caution: Be certain to installthe HDD carrier in the appropriate slot—the same slot
from which you previously removed it.
1. To reinstall the HDD carrier in the unit.
a. Unlatch and open the arm of the HDD carrier as far as possible to the left.

Installation and Setup
NA-1400 17
b. Grasp the body of the HDD carrier with both hands and carefully guide the connector end of the
carrier into the drive bay, until the arm engages and partially closes.
c. Push the arm forward and latch it to lock the HDD carrier in place.
2. Close the front door of the unit. The system is now ready to boot.
3. Reconnect the USB, Ethernet and power supply cables to the back of the unit.

Installation and Setup
18 NA-1400

NA-1400 19
Chapter 3
Managing Settings
Managing Users and Groups on the NA-1400
As soon as you install and configure the NA-1400, as instructed in the previous chapter, it is available to
everyone on your network, by default.
You can change the user authentication from local (on the NA-1400) to either of these network user
authentication means:
• Primary Domain Controller
• Active Directory Services
Notes: The choice of security mode should be made early. Later changes can cause some
users to lose access to files stored on the NA-1400.
If you use either of these authentication means, you must add, modify and delete
user and group information on the Primary Domain Controller or Active Directory
Services, rather than through the Web interface window.
Reserved User and Group Names
Some user and group names are reserved for system use. Table 1 contains the user names that are reserved
and Table 2 contains the group names that are reserved.
Table 1: User Names Reserved for System Use
adm halt news postgres ssh
apache iputils nobody root sshd
bin klogd novsftpd rpc sympa
daemon ldap nscd rpcuser sync
exim lp ntpd rsyncd syslogd
ftp mail operator secret uucp
games mailman popa3d shutdown vsftpd
gdm mysql postfix squid xfs
gopher
Table 2: Group Names Reserved for System Use
adm dip loop popa3d shadow
apache disk lp postdrop slocate
audio exim mail postfix squid
auth firewall mailman postgres sympa
bin floppy man postman sys
cdrom ftp mem proc tty

Managing Settings
20 NA-1400
Managing Users Locally
If users are authenticated locally on the NA-1400, add, delete, or edit user information through Security on
the Main Menu, under the Users tab.
Figure 1: Authenticating Users Locally
Adding a New User
To add a new user:
1. Click Security on the main menu.
2. Click Users tab. The User Management window opens.
3. Click Add User.
4. Enter the user’s Name, Description, and Password. Use the same name and password the user has for
logging into the network.
5. Click Accept.
The new user has been added to the list of users who can access the NA-1400.
cdwriter ftpadmin mysql radio utmp
chkpwd games named root uucp
console gdm netwatch rpc wheel
cvs gopher news rpcuser wnn
cvsadmin kmem nobody rpm x10
daemon ldap nscd rpminst xfs
Table 2: Group Names Reserved for System Use (Continued)
Table of contents
Popular Network Storage Server manuals by other brands
Acer
Acer Aspire EASYSTORE H341 Service guide
LaCie
LaCie 12big Rack Fibre 8 datasheet

A1 Security Cameras
A1 Security Cameras Blackjack NAS DW-BJNAS4T quick start guide
Seagate
Seagate Mirra user guide
QNAP
QNAP Turbo NAS TS-EC2480U-E3-4GE-R2 Hardware user manual

American Megatrends
American Megatrends StorTrends 1300 user guide
