Installing Cinema Pro in Vehicle
This device is specifically designed to be mounted behind the driver and/or
passenger seat(s).
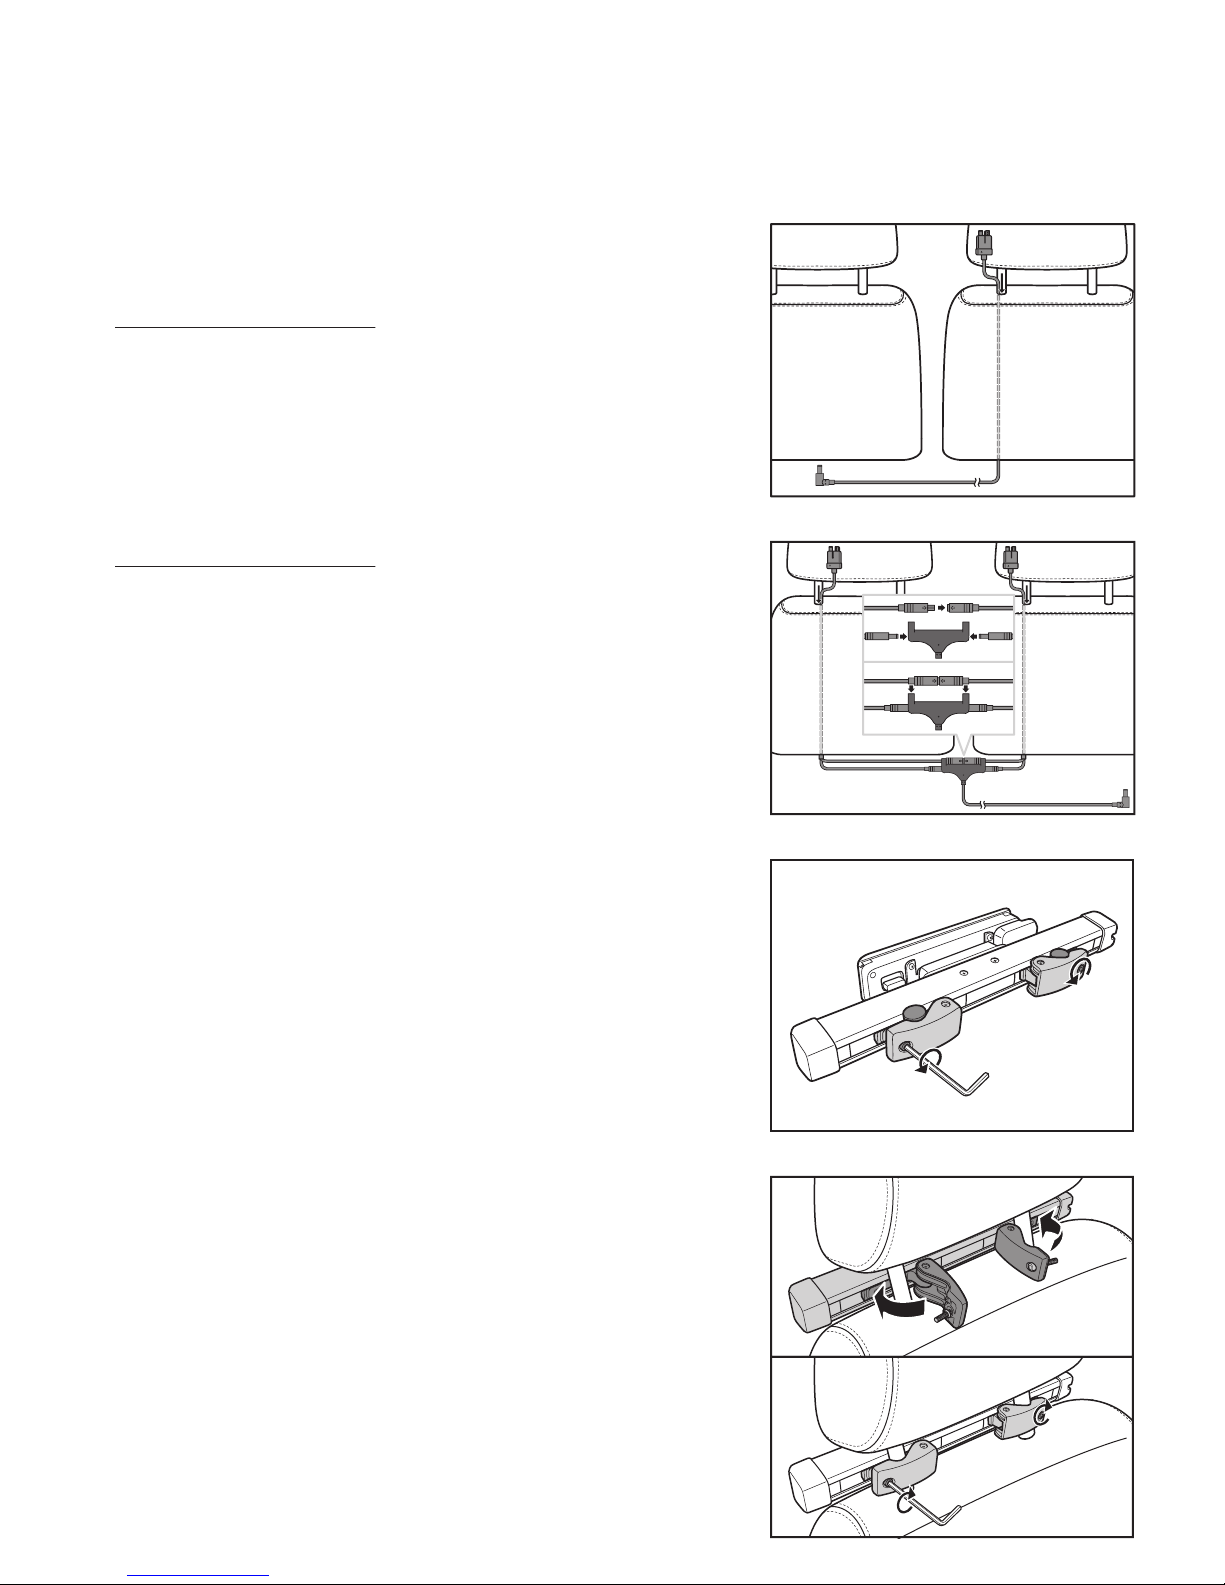
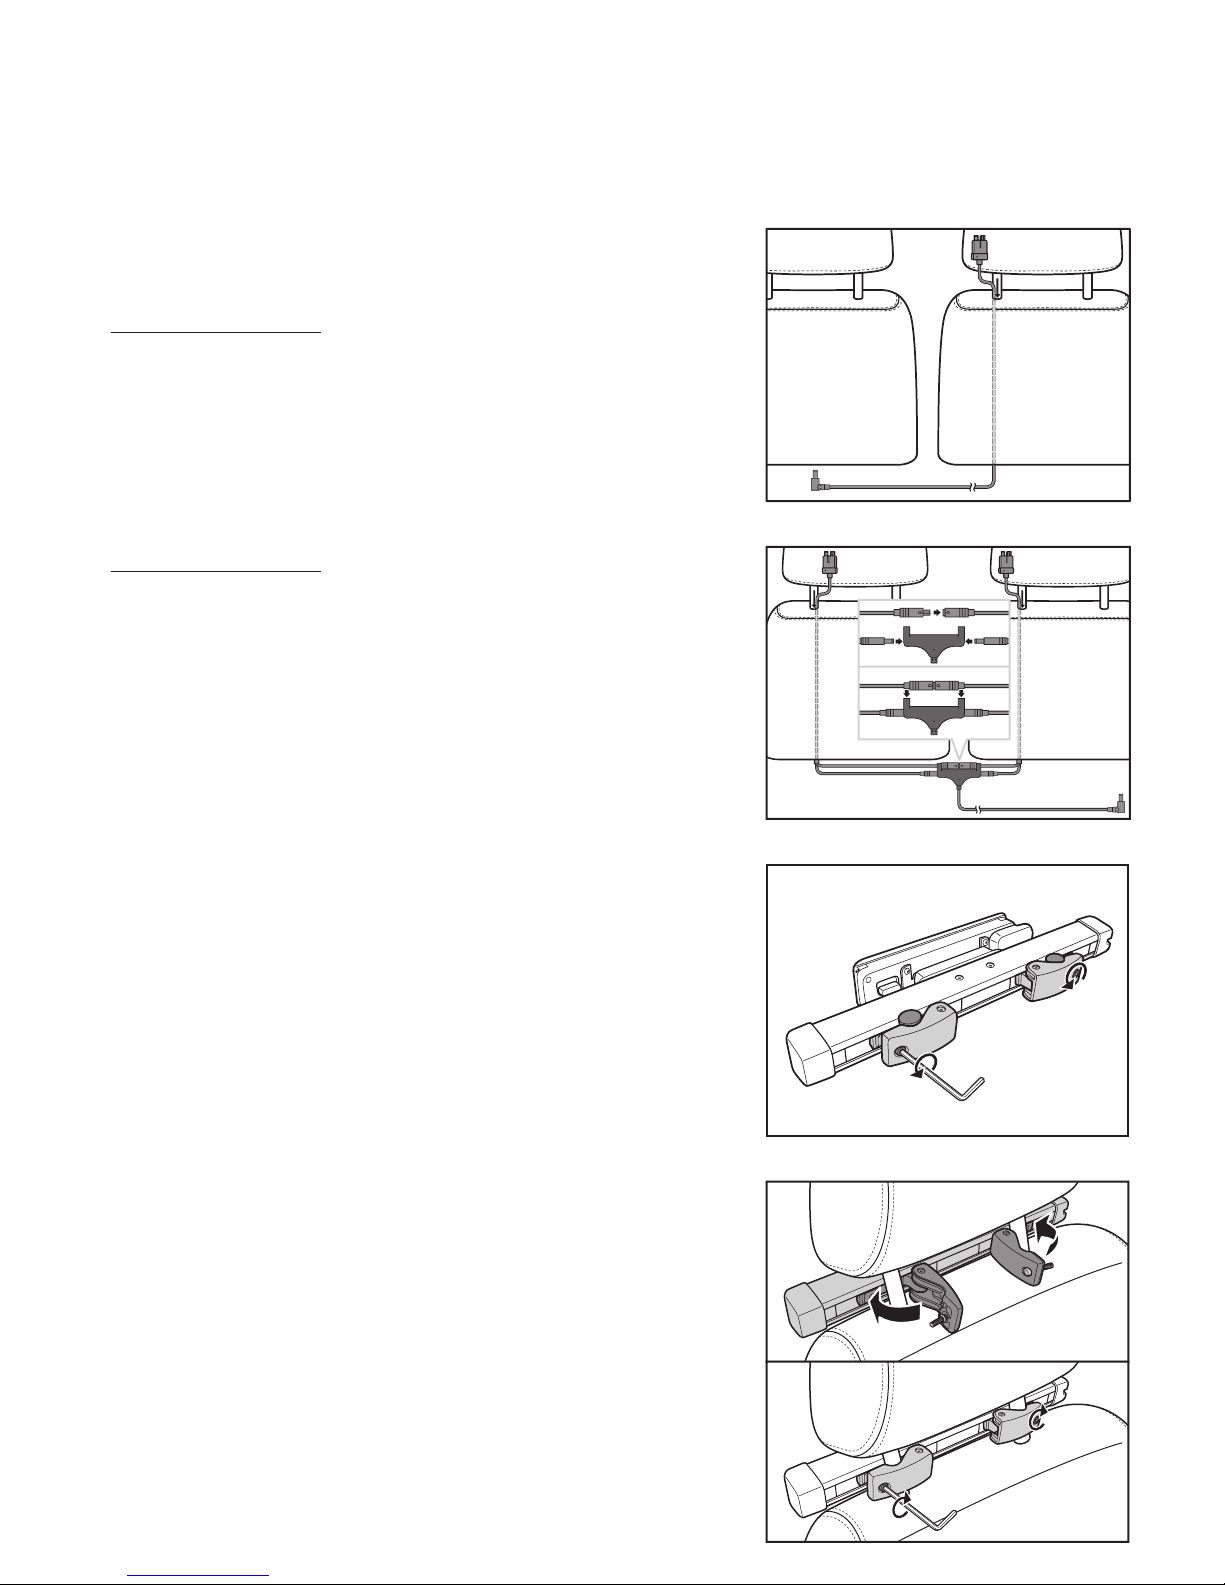
1 Remove the headrest(s) and carefully route the
cable(s).
For Uno Cinema Pro
Route the T-cable into the hole of the pole on
the seat.
For Duo Cinema Pro
Route the T-cable 2 and T-cable 3 into the holes
of the poles on each side of the seat. Then from
the bottom of the seat, connect both ends of
the T-cable 2 and T-cable 3 to the T-cable 1
connectors.
2 Replace the headrest(s) into place.
3 Remove the screws to release both locking
latches on the stanchion mount.
4 Position the bracket on the bars of the headrest.
Fasten the screws on both locking latches to fix
the bracket firmly on the bars.
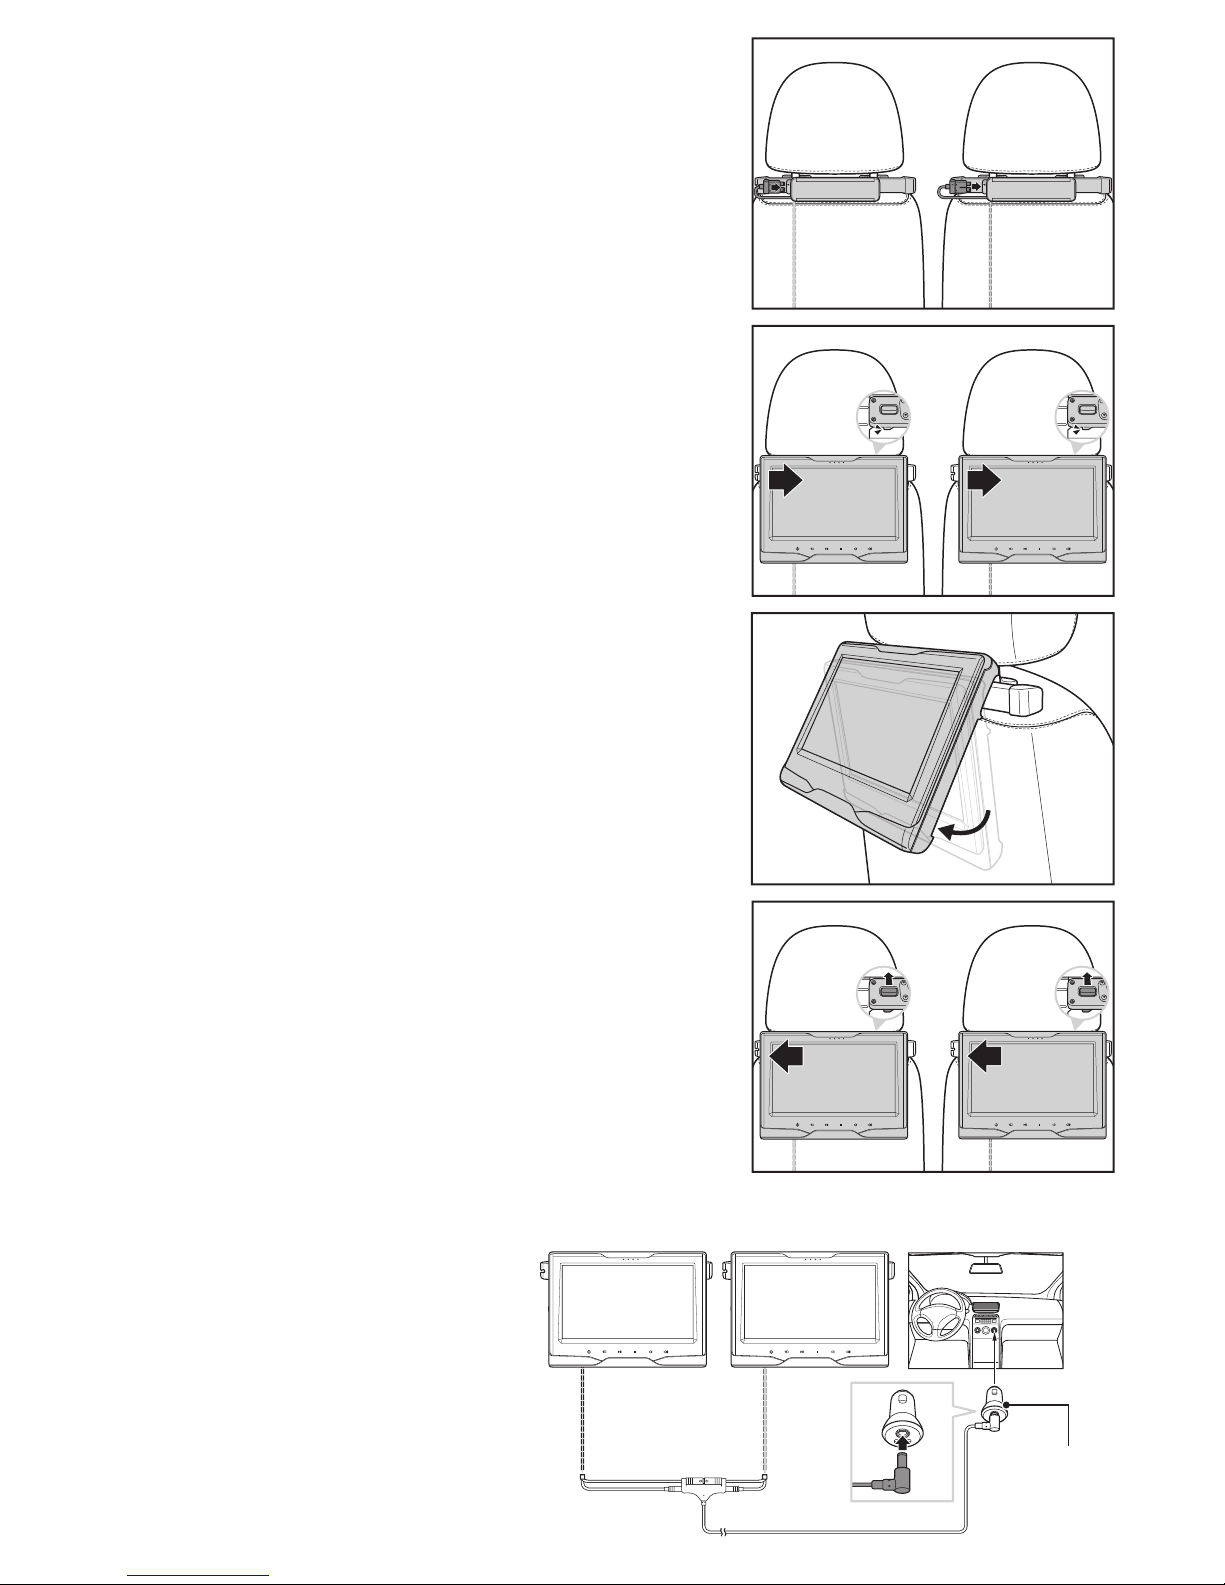
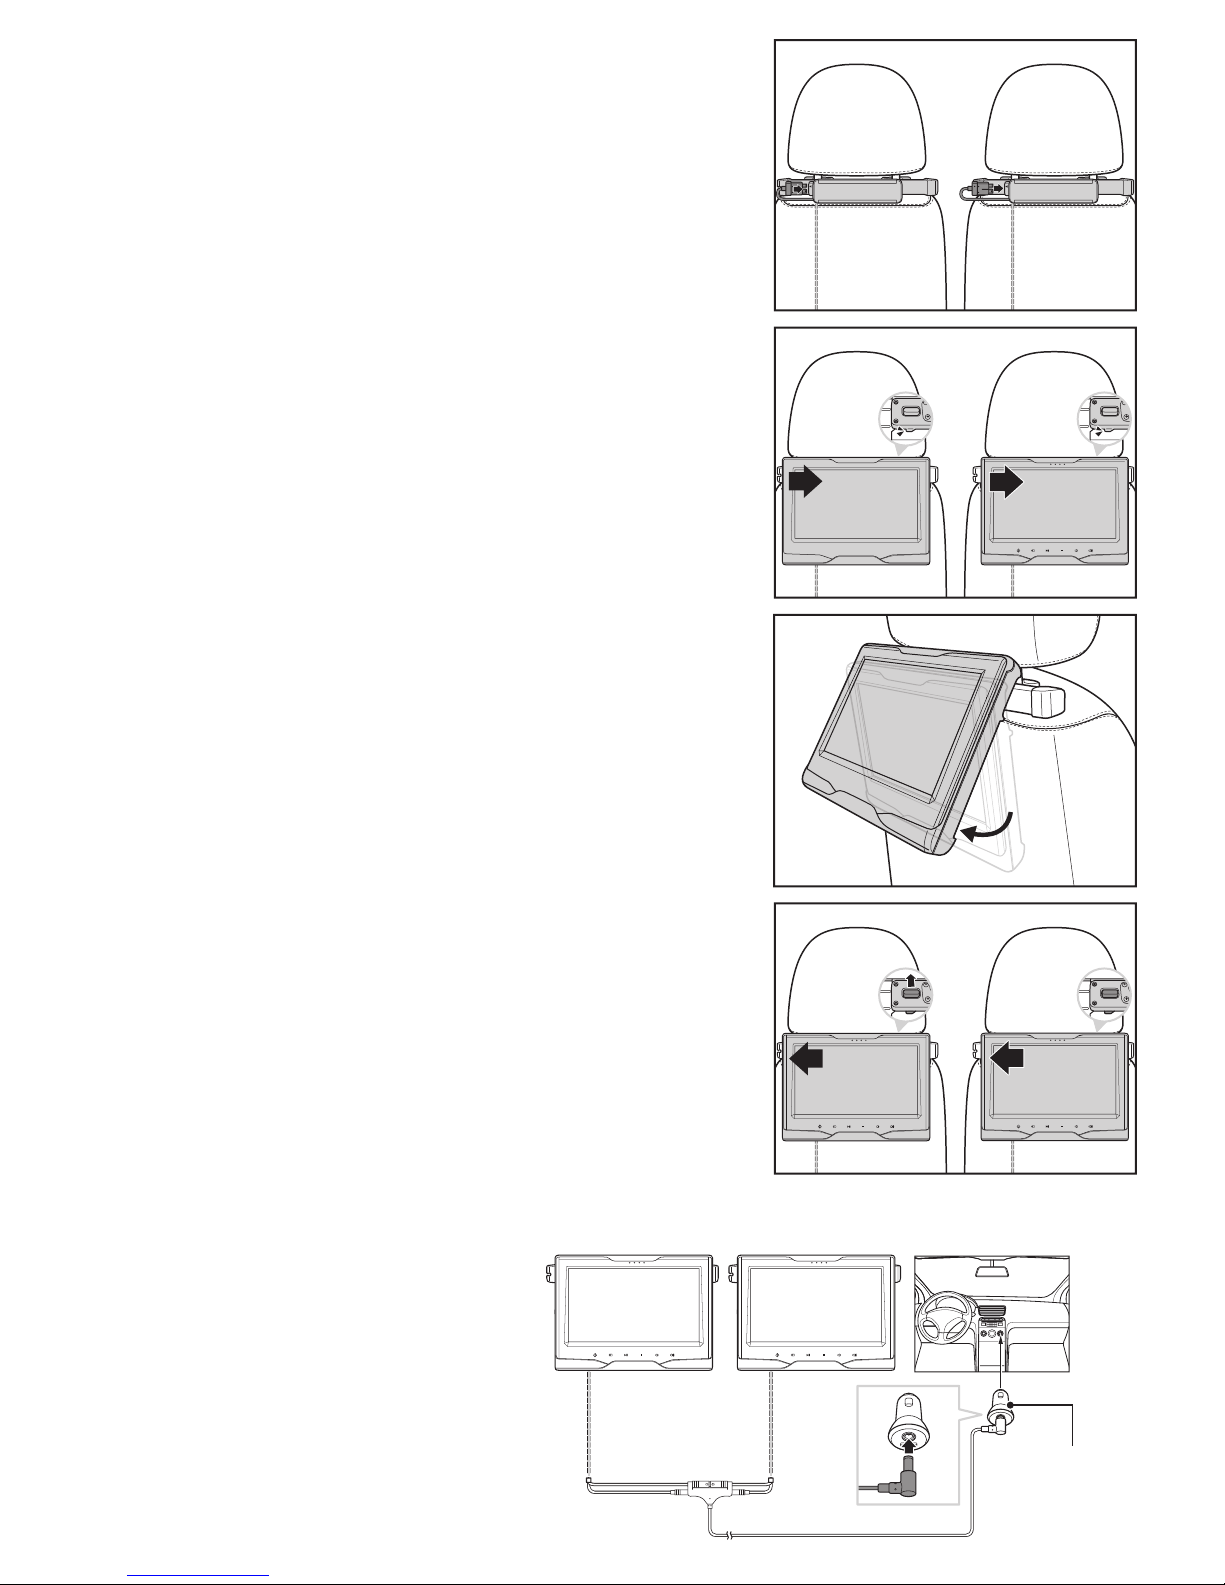
Note
To remove the player from the stanchion mount, pull and hold the
release latch upwards and then slide the player oto disengage
the connection.
Basic Connection
For proper connection method,
refer to the illustration.
5 Connect the player with the AV/Power cable
(one end of the car power cable) as shown in
the following illustration.
6 Slide the mount slot of the player into the
backplate of the stanchion mount fully until it
clicks into place.
Cigarette Charger
7 Adjust the player to the desired viewing angle.