Nexxt Solutions Smart Wi-Fi LED User manual
Smart Wi-Fi LED
color bulb
WARRANTY
nexxtsolutions.com/warranty
YEAR
2

User guide
Thank you for purchasing the Smart Wi-Fi LED color bulb
from Nexxt Solutions. We are excited to be part of making
your life easier, safer and bringing peace of mind into your
homes.
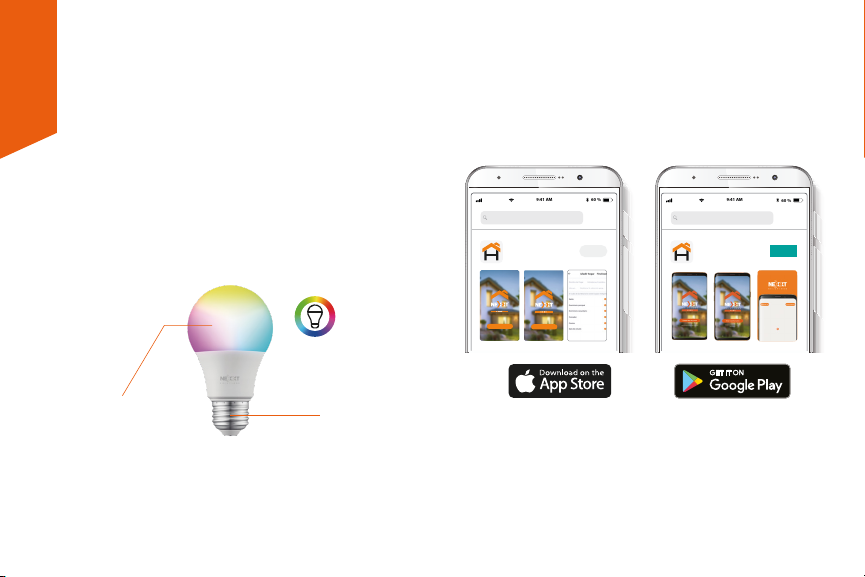
Product overview
1. LED: Displays various lighting colors according to your
preferred settings through the application
2. Screw base
Package content
• Smart LED color bulb
• Quick start guide
English
1
2
Installing Nexxt Solutions
Home App
Download Nexxt Home app from Google Play Store or
Apple App Store.
60 %
9:41 AM
Nexxt Home
Nexxt Solutions Home App
Cancel
GET
Accvent LLC
Login with existing account
Create New Account
SOLUTIONS
Iniciarsesión con cuenta existente
Crear Cuenta Nueva
SOLUTIONS
60 %
9:41 AM
Nexxt Home
Nexxt Solutions Home App
Cancel
INSTALL
Accvent LLC
Color &
White bulb
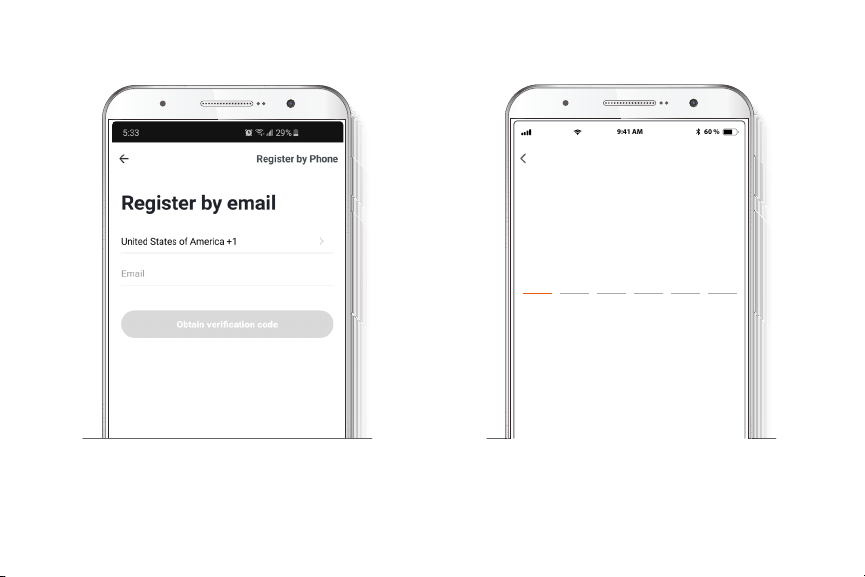
Step 2
Enter the verication code you received.
Step 1
Register by email. If you want to register by phone (US
only), select Register by phone on the upper right-hand
corner of the screen.
60 %
9:41 AM
Enter verication code
Verication code has been sent to your

Step 3
Create a new password and then select Completed.
Step 4
The Nexxt Solutions Home App account has been
successfully set up.
60 %
9:41 AM
Set Password
Completed
6-20 characters, including letters and numbers

Bulb installation
Screw in the Smart Wi-Fi LED color bulb to a E26/E27
socket.
Step 5
Assign a Home Name and Family Location.
Select Add another room and name each room as needed.
Select Save to store your settings.
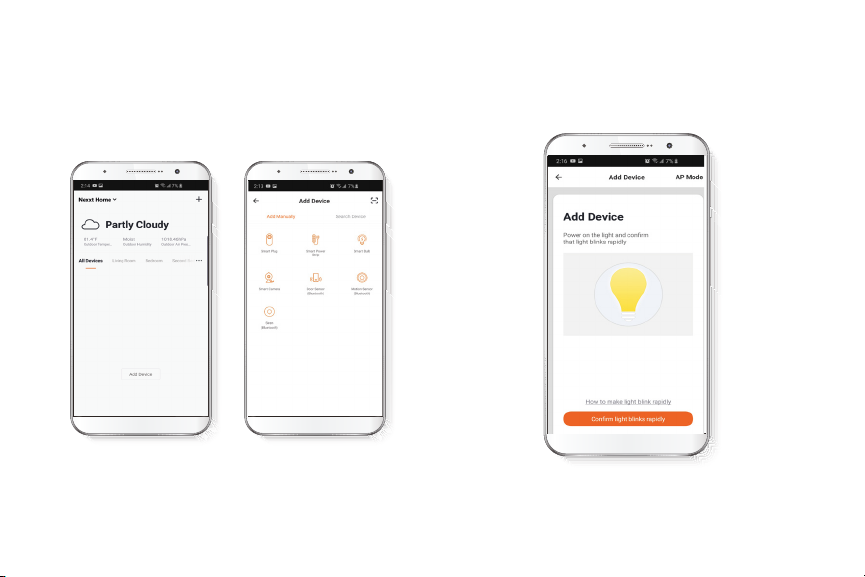
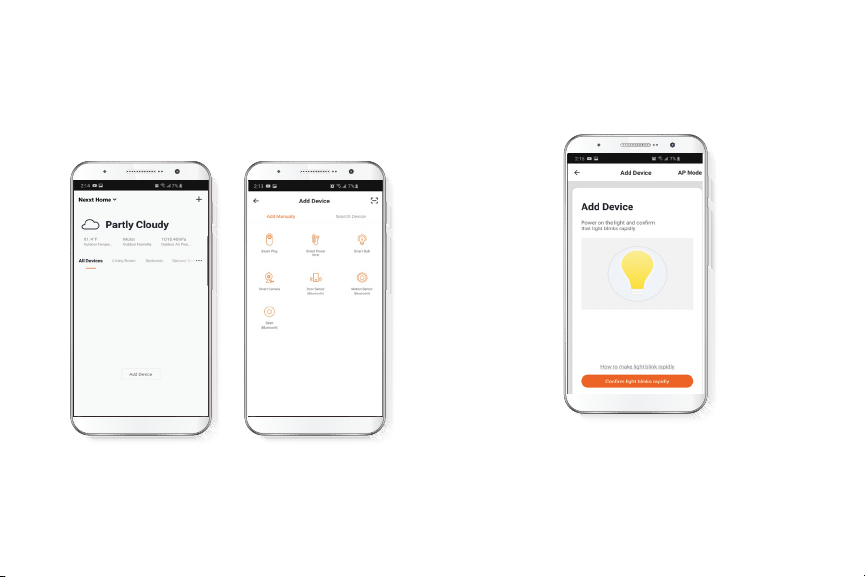
Add device
Step 1
Select Add device, followed by the smart bulb.
Step 2
Power on the smart bulb. Make sure the bulb is blinking. If
it fails to blink, reset the bulb. Turn it o from the switch,
wait 5 seconds before turning it back on again.

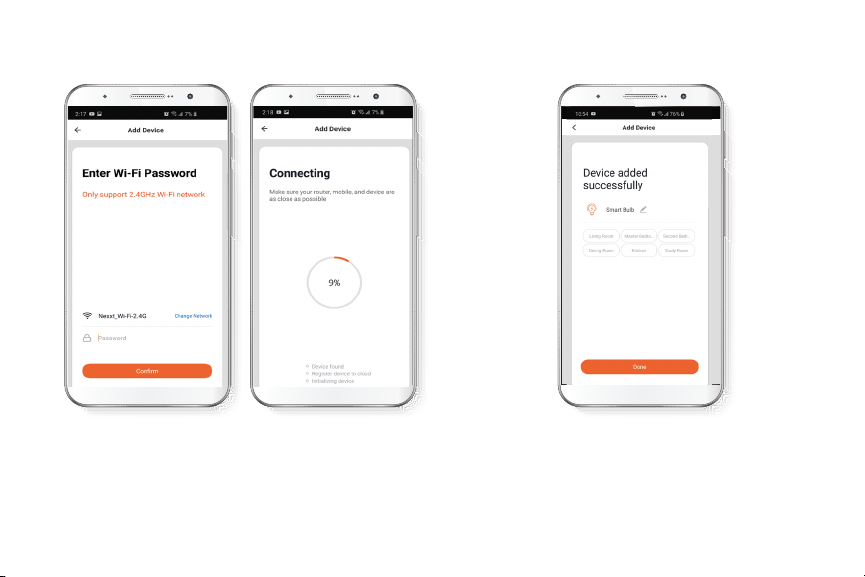
Step 3
You must connect to a 2.4GHz Wi-Fi network. Enter your
network password. Make sure you enter the correct
password, otherwise the device will not connect.
Step 4
Device added successfully will be displayed. Click on
Done.
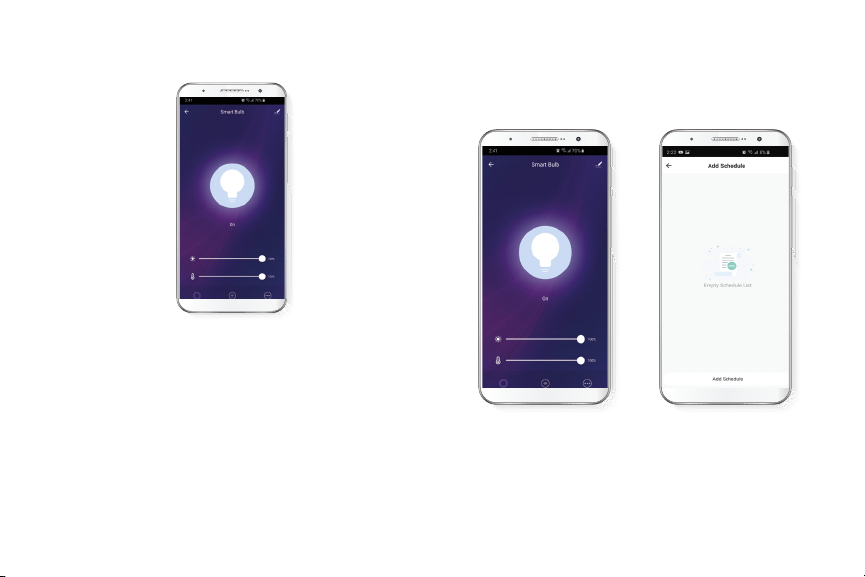
Functions
Bulb: Turns the bulb on and o.
White: Changes the brightness and white color
temperature.
Color: Changes the color, brightness, and saturation of the
bulb.
Scene: Gives you several preselected scenes and four
scenes you can congure.
Schedule: Allows you to add time and day schedule for the
device to turn on or o.
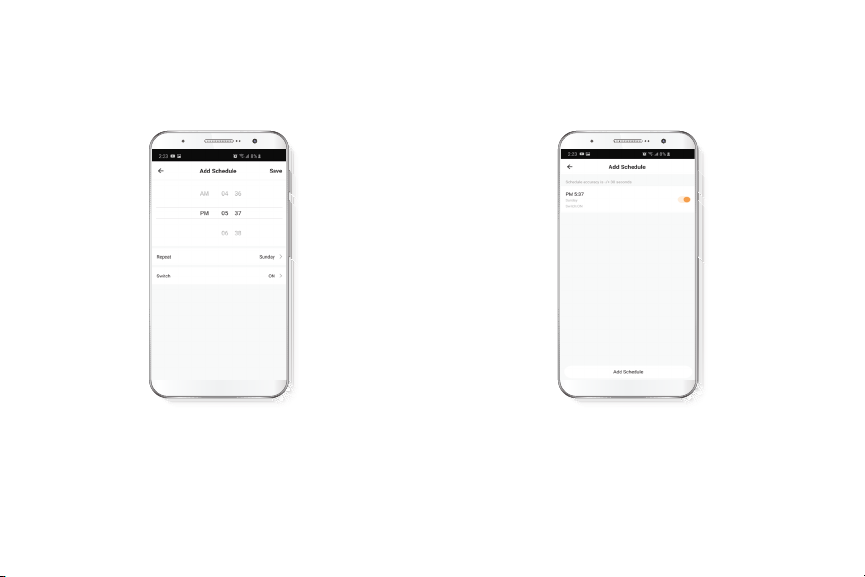
Schedule setup
Step 1
Click on the schedule icon to access the Add schedule
screen.

Step 2
Set the time you wish to schedule. Select Repeat to set
settings. Select Switch to schedule on/o status.
Click on Save on the upper right-hand corner to save a
schedule.
Delete setup
To remove a schedule on iOS, slide item to the left, and for
Android, press and hold Schedule, followed by Delete.
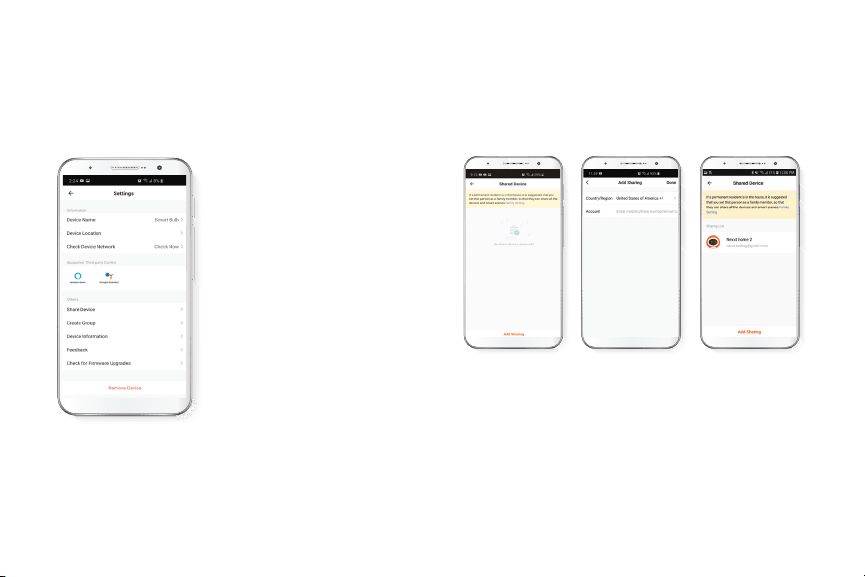
Settings
Click on the pencil icon on the upper right-hand corner.
Device name: changes the
name of the bulb.
Device location: allows you to
set location of the bulb.
Check network: test your
network to make sure you have a
good signal.
Share devices: allows to share
the bulb with family and friends.
Device information: will show
the information related to the
bulb.
Feedback: let us know if you
have any issues setting up the
bulb.
Firmware information: we will
sometimes add new features or
or provide updates with a new
rrmware upgrade.
Share device
Click on Share devices then tap Add sharing. Enter the
mobile number/e-mail address of family and friends
(phone, US only). Tap on Done. The newly congured users
will now have access to your smart bulb.
Note: family or friends will need their own Nexxt Solutions
Home Account to access the device.

Delete user
To remove a user, on Android press and hold the name you
want to eliminate. On iOs slide to the left the user you want
to remove. Click on Delete. A notication conrming you
don’t want to share the device with this user will be
displayed. Click on Conrm.
Nexxt Solutions® is a registered trademark. All rights reserved.
Amazon, Alexa and all related logos are trademarks of Amazon.com,
Inc. or its aliates. Google, Android y Google Play are trademarks of
Google Inc. All other brand names and trademarks are the property of
their respective owners. Made in China.
FCC ID: X4YHABUC110 (110V only)
Instalación de la aplicación
Nexxt Solutions Home
Descargue la aplicación Nexxt Solutions Home de Google
Play Store o de Apple App Store.
Guía del usuario
Gracias por adquirir la Bombilla inteligente Wi-Fi con
LED multicolor de Nexxt Solutions. Nos complace ser
parte de la solución destinada no sólo a simplicar su
vida, sino que además poder brindar más seguridad y
tranquilidad al interior de su hogar.
Descripción del producto
1. LED: Exhibe los diversos colores de iluminación
conforme a los parámetros seleccionados a través de
la aplicación.
2. Base de rosca
Contenido del empaque
• Bombilla inteligente con LED multicolor
• Guía de conguración rápida
Español
60 %
9:41 AM
Nexxt Home
Nexxt Solutions Home App
Cancel
GET
Accvent LLC
Login with existing account
Create New Account
SOLUTIONS
Iniciarsesión con cuenta existente
Crear Cuenta Nueva
SOLUTIONS
60 %
9:41 AM
Nexxt Home
Nexxt Solutions Home App
Cancel
INSTALL
Accvent LLC
1
2
Luz blanca
y multicolor

Paso 2
Ingrese el código de vericación que recibió.
Paso 1
Registro por email. Si desea registrarse por teléfono
(EE. UU. solamente), seleccione Registro por teléfono en el
borde superior derecho de la pantalla.
60 %
9:41 AM
Enter verication code
Verication code has been sent to your

Paso 3
Cree una contraseña nueva y seleccione Completo.
Paso 4
La cuenta Nexxt Solutions Home ha sido congurada
satisfactoriamente.
60 %
9:41 AM
Set Password
Completed
6-20 characters, including letters and numbers

Instalación de la bombilla
Atornille la bombilla LED multicolor en un zócalo E26/E27
hasta que quede asegurada en su lugar.
Paso 5
Asigne un Nombre a la casa y la Ubicación de la familia.
Seleccione Agregar otra habitación e identique los
puntos de instalación respectivos. Seleccione Guardar para
almacenar su conguración.
Agregar dispositivo
Paso 1
Seleccione Agregar dispositivo y a continuación, la
bombilla inteligente.
Paso 2
Encienda la bombilla inteligente. Asegúrese de que el LED
del dispositivo parpadea rápidamente. Si la luz no aparece
intermitente, reinicie la bombilla. Apague la luz con el
interruptor, espere 5 segundos antes de volver a encenderla.
Paso 3
Debe conectarse a una red Wi-Fi de 2.4MHz. Ingrese la
contraseña de la red. Asegúrese de utilizar la contraseña
correcta, de lo contrario, no se conectará el dispositivo.
Paso 4
Cuando la noticación Dispositivo incorporado
exitosamente aparezca en la pantalla, seleccione Terminar.

Funciones
Bombilla: Enciende y apaga el dispositivo.
Blanco: Cambia la intensidad del brillo y temperatura del
color blanco.
Color: Cambia el color, el brillo y la saturación de la
bombilla.
Escena: Incluye varias escenas preprogramadas, más cuatro
congurables por el usuario.
Horario: Le permite programar la hora y el día cuando
desea conectar o desconectar el dispositivo.
Configuración del horario
Paso 1
Haga clic en el ícono del horario para abrir la pantalla
Agregar horario.
Paso 2
Dena el horario que desea programar. Seleccione Repetir
para congurarlo. Seleccione Cambiar para alternar el
estatus del horario entre activo e inactivo. Haga clic en
Guardar en la sección superior derecha de la pantalla para
almacenar un horario.
Borrar configuración
Con el n de eliminar un horario, deslice el ítem a la
izquierda en iOS, pero mantenga presionado el Horario
respectivo de utilizar Android, seguido de Borrar al nal.

Configuración
Pulse el ícono del lápiz ubicados en el borde superior
derecho de la pantalla.
Denominación del dispositivo:
cambia el nombre de la bombilla.
Ubicación del dispositivo:
permite denir el punto de
instalación de la bombilla.
Vericar red: ejecuta una prueba
de la red para comprobar que la
recepción de la señal es buena.
Compartir dispositivos: permite
compartir el acceso a la bomiblla
con familiares y amigos.
Información del dispositivo:
muestra la información
relacionada con la bombilla.
Comentarios: comuníquese con
nosotros si ha tenido alguna
dicultad al instalar el producto.
Información del rmware: cada
cierto tiempo se integran nuevas
funciones o actualizaciones
mediante versiones mejoradas
del rmware.
Compartir dispositivo
Seleccione Compartir dispositivos seguido de Agregar
acceso compartido. Ingrese el número de teléfono o
dirección de correo electrónico de familiares y amigos
(servicio telefónico solo dentro de EE. UU.) Seleccione
Terminar. El o los usuarios que acaba de congurar desde
ahora van a tener acceso a la bombilla inteligente.
Nota: familiares o amigos necesitan establecer su propia
cuenta de Nexxt Solutions Home para tener acceso al
dispositivo.
Other manuals for Smart Wi-Fi LED
1
This manual suits for next models
3
Table of contents
Languages:


