manuals.online logo
Brands
  1. Home
  2. •
  3. Brands
  4. •
  5. Nikon
  6. •
  7. Camera Flash
  8. •
  9. Nikon Nikonos Speedlight SB-103 User manual

Nikon Nikonos Speedlight SB-103 User manual

Nikon
hrrKcnuos Speedlight
INSTRUCTIONMANUAL EI
lb,
IMPORIANT
SAFETY
NOTICE
FOR
NIKONOS
SPEEDLIGHTS
.BECAUSE
YOUR
NIKONOS
SPEEDLIGHT
USES
BATTERIES
FORPOWER,
CERTAIN
IMPORTANT
PRECAUTIONS
ARE
NECESSARY
IN
ORDER
TOENSURE
THEBEST
PERFORMANCE
AND
TO
AVOID
POTENTIAL
DAMAGE
OR
INJURY
DUE
TO
BATTERY.GAS
D
ISCHARGE.
OBATTERY.GAS
DISCHARGE
ryPICALLY
OCCURS
ASA BATTERY
ISUSED.
Because
thespeedlight
isairtight,
thegas
discharge
willbe
trapped
within.
On
therare
occasion
that
thedischarge
is
great,
it ispossible
for
the
speedlight
to
burst
under
thepressure
which
iscreated
within.
To
minimize
the
possibility
ofthis
condition,
please
followthese
simple
procedure.
oIFMOISTURE
ISDETECTED
INSIDE
THEFLASH
UNIT
OR
BATTERY
CHAMBER,
IMMEDIATELY
STOP
USING
THEUNIT.
Remove
the
batteries
and
keepthe
battery
chamber
open
(cap
removed.)
Donotusethe unit
until
it hasbeen
inspected
and
serviced
bya qualified
technician. ,,,,
oALWAYS
USE
THESAME
TYPEOF BATTERIES.
DonotMiXbTANdS
Of
bAttETiES
OT
different
versions
of thesame
brand
together.
Also,
avoid
mixing
new
andold
batteries.
Alwaysuseidentical
model
and
brand
batteries,
and
ensure
that
the
batteries
youuse
arefromthesame
manufacturing
batch
(same
year
andmonth
ofmanufacture.)
Battery
companies
usually
imprint
themanufacturing
code
and
timeof manufacture
ontheir
batteries.
Please
read
the
section
entitled
"Optimum
Battery
Performance"
on Page
24.
.DO NOT
MIXNICD
BATTERIES.
Donot
mixbrands
of NiCdbatteries
and
confirm
that
thebatteries
you
areusing
were
made
inthesame
manufacturing
batch.
Donotuse
NiCd
batteries
which
havebeen
charged
fordifferent
lengths
oftime.
lf theworking
time
of a NiCd
battery
seems
markedly
reduced,
even
after
it has
been
correctly
charged,
donot
use
it.
oWHEN
REPLACING
OLDBATTERIES,
LEAVE
THE
BATTERY
CHAMBER
CAP
OFF
FOR
AT
LEAST
1OMINUTES,
TO
VENT
THE
AIRWITHIN
THECHAMBER,
BEFORE
INSTALLING
NEW
BATTERIES.
oWHEN
NOT
USING
THESPEEDLIGHT
FOR
A PROLONGED
PERIOD,
REMOVE
THE
BATTERIES
AND
LEAVE
THE
BATTERY
CHAMBER
CAPOFF.
ThiS
W|II
EIiMiNAtE
anypotential
damage
due
to corrosion
frombattery
leakage.
lf corrosion
becomes
evident,
do
notuse
the
speedlight,
until
itis
properly
repaired
bya
qualified
technician.
. Do NOT
ATTEMPT
TODISASSEMBLE
THESPEEDLIGHT.
ItS
high
VOIIAgE
C CUitry
may
causesevere
electrical
shock.
oNIKON
RECOMMENDS
THAT
YOU
HAVE
YOURSPEEDLIGHT
SERVICED
ATAN
AUTHORIZED
NIKON
DEALER
OR
SERVICE
CENTER,
AT
LEASTONCE
EVERY
TWO
YEARS.
Although
the
unit
may
appear
tobe
in
good
condition,
internal
conditions
due
tocorrosion
mayexist
and
could
cause
malfunction.
There
willbea charge
forservice
performed.
-*
'*
{
t
-{
"3
i
d
{
r4
:L
H
www.orphancameras.com
NOMENCLATURE
@ Synchrosocket
index
@ Firingtube
61 Wide-Flash
Adapter
- sw-103
O loint collar Flash
headpositioning
index @
Joint
plate @
Arm positioning
screw @
Jointknob
@
Arm positioning
index @
Arm
knob
@
@ Exposure
calculationchart
@ Speedlight
plug
andlockingring
@ Camera
plug
and lockingring
@ Cordfasteninghanger O-rings
andlubricant
@
Firing
tube
parallel
indexes @
Exposure
calculation
chart
@ nsnltso film
speedscale Distancescalefor underwater photography @
CONTENTS f'
NOMENCTATURE... ...... 2
FOREWORD ....... 4
PREPARAIION ..4-6
ExominingondlubricotingtheO-rings......
5
TheO-ringsondiheirseoling
method....... 6
BASICOPERAT|ONS.. ....... 7-13
coNTROtSfNDETAtt .......14-23
Brocket. ...... 14
Arm.. ........ 14
Joint. ....14-15
SvnchroSocket ...... 15
SynchronizolionSpeed. .....16
ShoofingMode
Selector/PowerSwitch.16-17
ExposureColculotionChort. ....... 17
TTLAutomoticFloshConfrol ....lT-18
MonuolFloshConlrol...... ........19
ExposureCompensotion... ......'.;.20
Reody-Light .... 20-21
CordFostening
Honger .....22
Wide-FloshAdopterSW-403
........22
MultipleFloshPhotogrophy. ...22-23
DoylightFill-lnFloshPhotogrophy
..........23
TIPSONSPEEDTIGHI
PHOTOGRAPHY....
.......24
OPTIMUM
BATTERVPERFORMANCE....
........ 24
CAUTIONS. .....: 25
ACCESSOR|ES...... .....26
ExtensionArm.. .....26
DoubleFloshBrocket...... .........26
DoubleSyncCord ..........26
O-ringsondLubriconi.... .........26
SPEC|F|CATIONS.... .....27
,:+:i t4OfTAS.ffiqq
I
i#t?i*d.di, iG"*, ...!|*l;:.:i:.,.* .;*a;i*dE8iilltii{';ffi*.*;'i,r, i,.::.:.ti&Sddiii&h
www.orphancameras.com
FOREWORD
TheNikonosSpeedlight
SB-103,
an amphibious
high'
oerformance
electronic
llashunitwith a silicon'con'
trolled
rectifierandseries
circuitry,
isdesigned
foruse
withtheNikonos-V,
Nikonos
lV-A,and
Nikonos
lll.The
SB-103
can be submerged
to a depthof 50 meters
(160
feet)and withstand
pressure
of up to 6kg/cm2
(85
lb/in'),enabling
it
to
beused
inenvironments
where
regularspeedlights
could
notbetaken.
In
combination
withthe
Nikonos-V,theSB-103
features
automaticthrough-the-lens
(TTL)
flashexposurecontrol.
Thismeansthesilicon
photodiode
(SPD)
in
the
Nikonos'
V'sshutterbox
readsthe
light
passing
throughthe
lens
andthen
automatically
signals
the speedlight
to turn
itself
off whenthe exposure
is correct.
Because
TTL
flashoffersa wide rangeof useable
aperturesand
shooting
distances,
depth
of
fieldiseasytocontrol
and
shooting
as close
as 0.3m(t tt) ispossible.
Daylight
fill-inflash
photography
becomes
easier
whenusingthe
Nikonos-V.
Toenable
ittobeused
withtheNikonos
lV-Aand
Nikonos
lll,theSB-103
features
manualcontrol
withthree
power
settings:
"MFULL,"
"M1|4,"
and
"M1/16."
Thisspeedlight
has the same area of coverage
as
a 28mm lens.WhentheWide-Flash
AdapterSW-103
(provided)
isused,theareaof coverage
increasegto
that
ofa15mmlens.
Formultiple
flash
photography,
a double
flashbracket
anda doublesynccordare available
as options.
In
addition,
avarietyofother
optional
accessoriesisavail-
abletoincrease
theversatility
oftheSB-103.
Even
though
thisspeedlight
isextremely
easytooperate,
you
shouldstill
familiarize
yourself
with
the
preparatory
steps
andbasicoperations
explained
in the first
two
sections
ofthis
manual.For
moredetailedinformation,
TEfETtO..CONTROLS
IN
DETAIL''ANd
"TIPSON
SPEED.
LIGHT
PHOTOGRAPHY."
Alewminutes
wiselyinvested
now
will
pay
off
later
in
years
ofrewarding
photographic
experiences.
STOP!
READTHIS
NOTICE
BEFOREUSING
YOURSB.1O3.
THEO.RINGSEALS
MUST
BE
EXAMINED
AND
LUBRICATEDBEFOREUSE
TO
AVOIDDAMAGING
THESPEEDLIGHT.
This
NikonosSpeedlightSB-103
uses
O-ringsto seal
and waterproofthe junctions
between
parts.
Your
NikonosSpeedlight
SB-103should
notbe considered
waterproof
until
youhaveexamined
theO-rings
(one
each
forthebattery
chambercap
(0,
thesynccord's@
camera
andspeedlight
plugs,
andthesynchro
socket
cover
@
).
Theymustbein
perf
ect,undamaged
condition
and properly
lubricated
prior
to each use.
Read
the
following
instructionsthoroughlytofamiliarize
yourself
withthe
maintenanceoftheO-rings.
Becausetheoutersurfaceofyour
NikonosSpeedlight
SB-103
has
beenspecially
treatedtomake
it
waterproof
,
it
mustbe
protected
from
impact.
lfitbecomesdamaged,
senditto a qualified
technician
forservicebeforethe
nextuse.
YourNikonosSpeedlight
SB-103
is
watertightonly
when
in perfectly
servicedcondition,
whenallO-ringseals
are
in
perfect
condition,andwhenallcomponentsare
properly
assembledandclosed.
Pay
specialattention
to the instructionsfor installing
the
O-rings
becausethey
arewhatmakethe Nikonos
Speedlight
SB-103watertight.
For
theO-rings
to
perform
properly,
they
mustbein
perfect
condition
(with
no
cuts,
tears,or otherimperfections)and
properly
lubricated.
lftheyare
not,
they
willnot
performproperly
and
may
allow
waterto enter
yourflash
unit.
Toprevent
the
4
accidentaluseof a defective
O-ring,alwaysdiscard
oldO-rings.
ThechannelsintowhichtheO-rings
fitmust
be
free
ol
anyforeign
matter
and
in
theiroriginal,
smoothlyfinished
condition.
lf
theyare
not,
theO-rings
willnotseat
prop-
erlyand
mayallowwatertoenter
your
flashunit.
lf
any
channelin yourNikonosSpeedlightSB-103
becomes
damaged,
sendthe unitto a qualified
technician
for
servicebeforethe
next
use.
Allof the O-rings
in yourNikonosSpeedlightSB-103
mustbeexaminedattheendof eachdivedayand,if
oossible.after
each
dive.
j
j1
..i{:
I
'Ed
-i..:,.'*ira}*r-
PREPARATION
- continued
Examining
and
lubricating
theO-rings:
1.To
remove
theO-rings,
excepttheone
in
thesynchro
socketcover,
grasp
the
ring
between
your
thumb
anc
forefinger.Pinch
your
fingers
togetheras
you
slide
them
in
thedirectionofthearrowtocreateslackin
the
O-ring.
Then
grasp
theslack
portion
with
your
other
hand
and
pull
the
ring
off
(see
Fig.1).
Toremove
theO-ring
inthe synchrosocketcover,
usetheedgeof a creditcardor divecard
or some
thin,blunt.
instrument.
Never
usea knife
orother
sharp-edgedobject.
Push
upon thecenterof the
coverwitha fingertip
(orpointed
object),insertthe
cardunderthe
ring,
and
pull
ituptolift
theO-ringout
(see
Fig.2).Donot
scratchtheO-ring
in
the
process.
2.
Visually
examine
eachO-ring
for imperfections.lf
anyO-ring
is
damaged
(by
tears,cuts,orother
imper-
fections),discarditimmediately.lfanyO-ringhasdirt.
sand,
hair,
or
foreignmatter
on
it,rinsethe
O-ring
in
freshwater
to
removeit.
3.Whenlubricating
the
various
parts
of
your
flash
unit,
use only the specialnon-water-soluble
silicone
lubricantsuppliedwith thespeedlight.
Neveruse
other
lubricants
(such
asVaseline)which
are
water-
soluble.
4.Tolubricate
theO-rings,smearasmallamountofthe
specialsiliconelubricant
on
your
fingertipsand
then
gently
run
eachO-ringbetween
your
fingertips.Never
usea brush
orsimilarobject
toapply
the
lubricant;
small
hairsmayfall
intothechannelandallow
water
toentertheflashunit.Whilelubricatingeach
O-ring,
examineitwith
your
fingertipsfor imperfections.lf
an
O-ring
is
properly
lubricateditwill
glisten
andwill
Fig.1
not have"gobs" of lubricant
on it.Toensurethe
longest
possible
flash
unitlife,applylubricantwhen-
ever
necessary.Lubrication
protects
the
O-rings
from
excessivewear;italsomakesiteasierto attach
or
remove
otheroarts.
5.
Visually
examinethechannelsinto
which
the
O-rings
fit
todeterminethateach
is
cleanandsmooth.
lf
any
channel
is
dirty,
clean
itwithanon-lint-bearing
mate-
rial.
Coateach
channel
witha thin
film
of lubricant
whilebeingcareful
nottoapplytoo
much.
6.
Reseat
alloftheO-rings
with
your
fingertips
byin-
serting
onesideof the ringintothe channeland
holdingitin
position
whilerolling
theothersideof
{he
ringinto
place
(see
Fig.
3).
Toinsert
theO-ring
into
thechannelofthesynchrosocketcover,
push
upon
thecenter
ofthecoverwitha fingertip
(or
pointed
object),
place
the
ring
overthechannel,then
press
itdown
into
place.
Checkthatthe
O-ring
isnottwisted
andthateachof itsedgesis properly
seated
(see
Fis.a).
7.
CheckthesurfaceswhichareoppositetheO-rings
todeterminethat
each
isclean,
smooth,
andfree
of
foreign
matter.Cleanandlubricatethesurfacesin
the
same
manneras
thechannels.
8.Whenreattaching
the
parts
with
O-rings,
be
surethat
eachO-ringseats
properly
andsecurely.
All
ofthe
O-ringsmustbe
properly
alignedand
not
"pinched."
trin Q
I
rv.e
W
%d
Fig.4
www.orphancameras.com
PREPARATION
- continued
The
preceding
instructions
mustbe
performed
on
each
O-ring
prior
to each
divedayand,
if possible,prior
to
each
dive.
Byfollowing
these
procedures
andallother
procedures
inthis
instruction
manual,
you
willbe
able
toenjoy
using
your
NikonosSpeedlight
SB-103
formany
years.
Reminder:
Anextraset
ofO-rings
anda tubeof lubri-
cantaresupplied
withthe
flashunit.
AdditionalO-rings
and lubricantare available
from authorized
Nikon
dealers
andservice
centers.
The
O-rings
and
theirsealing
method
Themethodused
bytheO-rings
toseal
andwaterproof
the
flash
unit
isshown
inthe
followingillustrations.
Whena lowlevelof pressure
exists
(for
instance,
just
underthe
water's
surface),
eachO-ring
seals
itschannel
byitsownelastic
force
(see
Chart
A).Whenthe
pressure
increases
(at greater
depths),
the O-ring's
shape
is
altered
and
its
sealing
ability
isincreasedtowithstand
thegreater
pressure.
The
pressure
changes
the ring
fromitsoriginal
"O" shape
(when
lookingat a cross-
sectional
view)to
a"D" shape
(see
Chart
B).
30tr
Pressure
BASIC
OPERATIONS
I Remove
fhe bottery
" chomber
cop tio.
Turnthe
batterychamber
capcoun-
terclockwise
and oull it off the
speedlight
case.
Note: Thesmall numbers in circles identify
parts of the speedlight as listed in the
NOMENCLATURE
section.
t Remove
theAA-type
-' botlery
cqrtridgeu
from
the
botfery
chq
mber.
Turnthespeedlight
upsidedown
so
thebattery
cartridgeslides
outof
thebattery
chamber.
o
lf the batterycartridgedoes not slideout
when the speedlight
is upsldedown,shake
thespeedlight
until
itdoes.
? Insfoll
fhebotteries.
v' Installfour
1.5VAA-typealka-
line-maganeseor four 1.2V re-
chargeable
NiCdbatteries,
making
sure,the positiveand negative
(+
and
-) terminals
areinstalledas
shown
inthediagrams
onthecar-
tridge.
.Do not: lnsert
batteries
impropeily;leave
ftashunitturnedonwhennot
inuse.Anyof
these
maydamage
the flashunit.Also,do
nolleavebatteries
installed
whentheflash
unit is not being used;it may cause the
batteries
toexplode.
t Donotdropordamage
thebatterycartridge.
o
Useonly
onebrandortypeofbattery
atany
given time. When replacing batteriesre-
place
allsix
atthesame
time.
oWarning:
Batteries
may be hot whenyou
removethem;
handlecarefully.
. Useof manganese
batteries
is notrecom-
mended.
.Check proper battery installation
before
shooting.
Turnflash
unitonandmake
sure
the SB-703's
ready-lightlightsup within30
seconds.
.P/ease see "OPTIMUMBATTERYPER-
FORMANCE,"
page
24
[- Reploce
fhebottery
" corfridge
in
fhe
bottery
chomber.
Be sure the speedlight
shooting
modeselector/power
switch
is at
the
"OFF"
position,
thenalignthe
positioninggroove
@onthebattery
cartridge
with the notchon the
insideofthe
batterychamber
and
slidethe
batterycartridge
intothe
chamber.
5 Replqce
thebotlery
-' chomber
cop.
Push the center of the battery
chamber
cap into
the speedlight
case,then
turnthecap
clockwise
asfaras
itwill
go.
www.orphancameras.com
BASIC
OPERATIONS-
continued
Toloosenthe
joint
knob,
turn
itcoun-
terclockwise
whileholdingthe
joint
plate
@.
', Properly
position
fhe
" ;oint
plofe.
Turn
the
joint
knobso
the
flat
sides
of thejoint
plate
are parallel
with
theflatedges
ofthe
joint.
R Inserl
fhe
joint
plote
-' inlo
the
joinl
collor
o.
Whileholdingthe
baseofthe
joint
knobagainst
the
joint,
slide
the
joint
plate
into
the
joint
collaruntil
it is
fullyseated.
cWheninsertingthejoint plate into the ioint
collar,be suretheflatedgesof the
iointplate
remain
parallelto the flatedgesof theioint.
Loosen
thejoint
'knob @.
O Lock
the
joint.
-' Alignthe
flashhead
positioning
index
@
withthe
"normal"
position
mark
onthe
flashhead
positioning
scale,
thenturnthe
joint
knobclock-
wiseuntilthe
joint
islocked
in
posi-
tion.
.See page 15for information about removing
the joint.
.lO_
Loosen
the
joint
ItYr levgr @.
Turnthe joint levercounterclock-
wiseas
far
as
itwill
go
toloosen
it.
lll Inseil
theorm,;-s,
inlo
' " lhe
joint.
Insertthearm
positioning
screw
Q9
intotheslot
inthe
joint.
Thearmcan
beinserted
fromeitherside
ofthe
joint.
Thenormal
position
isshown
inthe
photo.
G, Posilion
lheorm.
l-'Align rne arm posrtioning
screw with the arm popitioning
index
@
onthe
joint
byturningthe
arm90o
tA^ Lock
lheorm.
tv'After aligningthearmposi-
tioning
screw
withthe arm posi-
tioningindex,
turnthe joint
lever
clockwiseas
far
asitwill
go
tolock
thearm
into
oosition.
14Loosenlhe
orm
'knob
@.
Iurn the arm knobcounterclock-
wise
as
far
asitwill
go
to loosen
it
(the
twobracket
positioning
pins
on
the bottom
of the grip @ will be
visible).
.lE Attochthebrockef
rvr u fothe
orm.
Slidetheopenendof the bracket
betweenthearmknob
andthe
grip,
seat the two bracket
positioning
pins
inthe
twoindentations
onthe
bracket,
and turn the arm knob
clockwiseasfarasit
will
go
tolock
thebracketinto
position.
oThe
correct
arm/bracket
oosition
iswith
the
three washers on the underside of the
bracket
andthe rubber
sideof thebracket
facing
up.
16'fllfli'{l'l!'n??J.'
@tothebrockef.
As
shown
inthe
photo,
slide
thecord
fasteninghanger
onto
thebracket.
www.orphancameras.com
17.
Remove
fhe
comelo'sflosh
sync
sockelcover.
Turn the camera'ssync socket
cover
counterclockwise
withacoin
to
remove
it.
.lR Attoch
lhecomero
'-' bodytothebrocket.
With
the
camera
against
the
rubber
side
of
the
bracket
andthe
camera's
triood socket over the bracket
screw,
screw
the
bracket
screw
into
the
camera's
tripod
socket
until
the
camera
and bracket
are securely
attached.
.lO Connecf
thesync
' lr ' cold €, lo fhe
comero.
Remove
thedust-proof
Plastic
cap
fromthe
sync
cord's
camera
Plug
(silver
lockingring). Insertthe
camera
plug
inthe
camera's
flash
socket
after
aligning
the
white
index
onthe
flashsynchro
socket
withthe
reddot
on
thecamera
Plug.
When
thecamera
plug
is inserted,
turn
its
locking
ring
clockwise
asfar
as
itwill
go
tosecure
the
Plug.
cDo not applyexcessive
force to the sync
cord'scameraplug
and,as
much
aspossib/e,
avoid
twisting
the
cord
Nikonos-V
or NikonoslV'A
:,tB,i;t
::til
;13jf
l;ii
:i:
3,
iliri
.,:i,:l
20Remove
thesynchro
'sockel cover@.
Turnthe
synchro
socKet
cover
coun-
terclockwise,
then
Pull
ituP.
tll Connect
thesync
- rr cord
tolheSB''103.
Remove
the
dust-proof
Plastic
cap
fromthe
sync
cord's
speedlight
plug
(black lockingring). Insert the
speedlight
plug intothe sYnchro
socket
after
aligning
the sYnchro
socket
index
@withtheredindex
on thespeedlight
Plug.
When
the
speedlight
plug
isinserted,
turn
its
locking
ring
clockwise
as far as it
will
go
to
secure
the
Plug.
.To keep
thesynccordoutof the waywhile
shooting,
attach
it to the hookof the cord
fastening
hanger.
i,. "6..
9p:;
. :3t;.
; ; dsaa
: ..: :li.t
I : "'d l
aF," 6"rie.j!b4arn,-
ii.r !jsti,rs.!i:6!b
j!'rii.:rr!q
r!!a,.lrrL.jii
!.,t.lajiria
:'.r.t!r.i$a
,4.i,.'o,!iir
.jairrii.ri;
r.,!!!!...1
..il!ilrir.lrl
riiri'tEi!
10
tt Confirm
fhe
position t" Set
fhe
shutler
speed
aat ofthe flosh
heod. aet on the cqmero.
Confirm
that'the arm positioning
screw
isalignbdwiththearm
posi-
tioningindex,the
flashhead
posi-
tioning
index
is aligned
with the
"normal"
position
markonthe
flash
head
positioning
scale,
andthe
flash
headis
facingin
thesame
direction
as the camera's
lens.
lf the arm
positioning
screw is not properly
aligned,
loosenthe joint leverto
reoosition
it.lfthe
flashhead
oosi-
tioning
indexis
not
properly
aligned,
loosen
the
joint
knobto
repositionit.
. See
page 15forinformation
about
positioning
the flashhead for close-upshootingwithin
approximately
tmG.Stil.
Whenusingthe
Nikonos-V,setthe
shuttersoeed/mode
selector
dial
to"A" oranyshutterspeed
setting
from 1/1000
to 1/125sec.;
when
usingthe Nikonos
lV-A,
set the
shutterspeed
dialto "A"; when
using
the
Nikonoslll,
set
theshutter
speeddialto
1/60sec.
Whenusingeither
the Nikonos-V
or NikonoslV-A,the proper
syn-
chronizationsoeed
(1/9Osec.)
will
be automaticallyset when the
SB-103'sshooting
mode
selector/
oower
switch
is
turned
on.
zfi.Selectonf/slop
from
rne
exposure
cqlculotion
chorf@.
Selectanaperture
from
therange
ofaoerturesthatcanbeusedatthe
existing
flash-to-subject
distance.
TTL flash operation with the
Nikonos'V: For example,
when
shooting
a subject
underwater
at
1.2m
(4.3tt)
withoutthe
wide-flash
adapter
whileusing
ASA/lSO
100
film,
the
useableaperture
rangeis
IromIl2.Bto
f/8.
Manual
flashoperation
with the
Nikonos-V,
lV:A,
or lll: For
exam-
ple,
when
shooting
asubject
on
land
aI 1.2m
(4.3ft)
withoutthe
wide-
flashadapter
whileusing
ASA/lSO
100
film,
the
appropriate
f/stopat
"MFULL"
isf/'16,at
"M114"
isf/8,
andat
"M1/16"
isf/4.
.The exoosurecalculation
chart
isadhesive-
backed,
enabling
it to be attached
to the
speedlightcase.
11
www.orphancameras.com
BASICOPERATIONS-
continued
25Set
fhef
/sfop
on
'lhe lens.
ForTTL
flashoperation,select
the
bestaperture
from the exposure
calculation
chart by considering
the
desired
amountof
depthof
field
and recyclingtime. For manual
flash operation,
select the best
aperture
fromamong
thosecorre'
sponding
to
the
"MFULL,"
"M114,"
and "M1/16"
settings
by consid-
ering
thedesired
amount
of depth
of
field.
In
the
photograph,
f/4isset.
powerswilch
@.
For TTL flashoperation,
set the
shooting mode selector/power
switch
to "TTL."
Formanualflash
operation,
set it to "MFULL,"
"M114,"
or
"M
1116."
Becausethis switch doubles
as
a
power
switch,
the
SB-103
isturned
on wheneverthe switch
is set to
other
than
"OFF."
tTTL automaticflashoperation
ls posslb/e
only
with
theNikonos-V.
oAssoonas you turn on the SB-103
when
using
the Nikonos-V,
theshutter
speed
LED
indicator inside the viewfinderwill blink if
theshutterspeed/mode
selector
dtal
lsset
at "A" or at any
shutterspeed
from 1/1000
to 1/30sec.
lf the selectordial is sel at
"M90" or "8," no shutterspeed
indicator
willblinkor light.
Assoonasyouturnon the
58-703when usingthe Nikonos
lV-4,the
redviewfinder
LEDturns
off
.
. Forinformationaboutthe variousshooting
modes,seepages
1
6to17.
6'f:XL?.''i,::15'7
.-
IF
t
)l
-]J
J
,7 Woil
for
fhereody-
r" light
@folight.
As soon as the flash ready-light
lights,
the
SB-103
is readyto fire.
Except
forNikonos
lll,ifthe
camera
you are usinghas a viewfinder
ready-light,
it will light
whenthe
SB-103
is completely
recycled.
Note
thatwiththe Nikonos-V
and
Nikonos
lV-A,
theexposure
meter
mustbeturned
on to activatethe
viewf
inder
ready-l
ight.
.With a set
of fully
rechargedNiCd
batteries,
the readylight will light in approximately
6 seconds;with a fresh set of alkaline-
manganese
batteries,
it willlight
tnapprox'
imately9seconds.
o
Ifeither
theSB-703
sorthecamera's
ready-
lightdoes
notlightor blink,checkthat:the
batteriesarepropeily
installed,
thecamera
and flashunitaresecurely
connected;
and
theshutterspeed/shooting
modeand ASA/
ISOfilm speed
setting
on the cameraare
correctly
set.
. See
page
21
forinformation
about
ready-light
exposu
rewar
ning
information.
28.1'?t3,1*'
3,,31H
T3;
a
s
ed,
the speedlight
fires.
After a few
seconds,
the
ready-lights
insidethe
camera's
viewfinder
and on the
speedlight
will
light
again
toindicate
the
flash
unit
is
fully
recycled
and
readv
forthe
nextshot.
12
.lf theflashunitfiresat itsmaximumoutput
during TTL flash operation, its readylight
willblink for approximately
2 secondsafter
theshutteris releasedto warnthat the shot
mayhavebeenunderexposed.
ln thiscase,
recheck the shooting distance/aperture
combination
selectedor movecloserto the
subject, if necessary.This warning is a/so
indicatedby theviewfinderreadyJightof the
Nikonos-V.
O Turnofftheflosh
unil.
t t To conservebattery
power
betweenshootingsessions,
turnthe
shooting;'mode selector/power
switchonthespeedlightto "OFF."
cTurningthe shootingmode selector/power
switch off between sesslonswill alsohelp
p
reventbatteryleakage.
13
www.orphancameras.com
CONTROLS
INDETAIL
Brocket@
As
indicatedinthediagram,therearetwo
positions
for
thebracketscrew@:one
for
theNikonos-VandNikonos
lV-A
andanother
for
theNikonoslll.Toreposition.the
bracketscrew,unscrew
it,
thenscrew
itbackintothe
holeorthethreadedendofthebracketslot
O. Once
screwed
intothebracketslot,thebracketscrewcanbe
moved
toany
position.
Thelargerholeinthecenterallowsthesynccord
to
be
connectedthroughthebrackettothe
Nikonoslll.
The
small
hole
ontheundersideof thebracket
isthe
tripodsocket
@.
The
small
hole
that
goes
completely
throughthe
bracketisnotusedwith
the
Nikonos
SB-103.
Arm@
To
attach
thearmto the
joint
@,insertthearmposi-
tioningscrew
@
intotheslot
in
the
joint
f
rom
eitherside.
Align
the
arm
positioning
screw
withthearm
positioning
index
@
on
the
joint
byturningthe
arm90o.
After
align-
ing
the
arm
positioning
screw
withthearmpositioning
index,turnthe
joint
lever
@
clockwise
asfarasitwill
go
tolockthe
arminto
position.
Whenthearmisattached
in
this
manner,thespeedlight's
axis
willalwaysintersect
withthe lens's
optical
axis,even
if theflashhead
is
movedupor down
onthearm.
(Normally,
the
joint
is
lockedatthetopofthe
arm,)Beforediving,
be
sure
the
joint
knob
@
and
joint
leverarelockedtightly.
Toattachthearmtothebracket,
turnthe
armknob
@
counterclockwiseas
far
as
itwill
go
to
loosenit
(the
two
bracket
positioningpins
onthebottomof
the
grip
@
will
be
visible).
Slide
theopenendofthebracketbetween
Nikonoslll
Nikonos-V
or NikonoslV.A
thearmknob
andthe
grip,
seatthetwobracket
posi-
tioning
pins
in
thetwoindentations
on
the
bracket,
and
turnthearmknob
clockwise
as
far
asitwill
goto lock
the bracket
into position.
The correct arm/bracket
position
is
withthe
threewashers
ontheunderside
of
the
bracketand
the
rubber
sideofthebracketfacing
up.
Joinf
@
The
joint
connectsthearmtothe
speedlight
and
allows
theflashheadto bepositioned
asrequiredforvarious
shootingsituations.
The
armcanbe insertedfrom
either
sideof the
joint,
buttouseitin
thenormal
position,
insertitas
shownin
thephoto.
Whenusing
twoSB-103Speedlights
(or
an
SB-103andanSB-102)
andtheoptional
DoubleFlash
Bracket,
insert
thearmthat
is
nexttothecamera'sfilm
advanceleverinto
the
joint
from
thedirectionopposite
thatshownin
the
photo.
(Ftash
head
positioning
scales
are
provided
on
both
sidesofthe
joint.)
The
joint
lever
allowstheflashheadtobe
turnedonthe
arm's
axisandmovedup
ordownthearmasrequired.
The
joint
knobisusedto adjusttheangle
of the
flash
head
(the
angle
of
intersection
betweenthe
speedlight's
axis
andthelens's
optical
axis).The
normalangleofthe
flashheadiswith
theflashhead
positioning
index
@
at
14
ITodetach
the "normal"
positioning
mark
@ on theflash
head
positioning
scale.The "normal"
position
is used
for
shootingbetween1m(3.3ft)
andinfinity.For
close-up
shootingwithinapproximately
1m (3.3ft),
loosen
the
joint
knob,
point
the
flash
head
towardthesubject,then
tightenthe
joint
knob.Inaddition
tothe
"normal"
posi-
tionmark
ontheflashhead
positioning
scale,
"0.6m
(2ft)"
@and
"0.3m
(1
ft)"
@
position
marks
are
provided
for usewhen shooting
subjectsat thesedistances.
However,when
the
flash
headisnotin
the"normal"
position,
the
joint
mustbeattached
tothetopofthearm
orthe
flash
headwillnot
be
pointed
atthe
subject.
To
detachthe
joint
from
thespeedlight,turnthe
joint
knob
counterclockwise
andslidethe
joint
plate
outof
the
joint
collarwhile
pulling
the
joint
knob.
Synchro
Socket@
To
connect
the
synccord
@tothespeedlight,remove
the
synchro
socket
cover
@
by
turning
it
counterclock-
wiseandpulling
it up.Remove
thedust-proof
plastic
cap from the sync cord's
speedlight
plug@ (black
lockingring).
Insert
the
speedlight
plug
into
the
synchro
socketafter
aligning
thesynchro
socket
index
@with
the
red
index
on
thespeedlight
plug.
When
thespeed-
light
plug
isinserted,
turnitslockingring
clockwise
as
far
asit
will
go
tosecurethe
plug.
Never
submerge
the speedlightin water with the
synchro
socketcoverremoved
or get the sync cord
plugs
wet.Always
make
surethe
synccord
plugs
are
securelyattached
before
enteringthewater.
After
shootingunderwater,
wipe
off
anywater
droplets
with
a soft
cloth
before
removing
theplug
to prevent
waterfrom
entering
thesocket.Whennot
using
thesync
cordorwhenwashing
thespeedlightwiththe
speedlight
plug removedfrom the synchrosocket,attach
the
synchrosocketcoverto protect
thesocket.Toattach
thesocketcover,
press
itagainst
the
sockettoseatthe
O-ring,thenturnitslockingring
clockwise
as faras
itwill
go.
.Tosimplify
identification,
boththetipof the synccord'sspeedlight
plug
andtheinside
ofthesynchrosocketarecolor-coded
yellow.
(
t
15
www.orphancameras.com
CONTROLS
lNDETA|L-continued
Synchronizofion
Speed
Theshutterspeed
at whichthe SB-103
synchronizes
witha camera
dependsuponthecamerabeing
used.
The tableshows
the flashsync speeds
of various
cameras.
Both
the Nikonos-Vand Nikonos
lV-Acamerasauto-
maticallyswitch
to the proper
synchronization
speed
when the SB-103'sshooting
mode selector/power
switch
issetto "TTL,"
"MFULL,"
"M114,"
or"M1116";
when
itis
set
to"OFF,"
the
automaticswitchover
func-
tion
iscanceled.
cAperture-priority
exposure
mode ("A") operation
on the Nikonos'V
and Nikonos
lV-AiscanceledwhentheSB-103
isturnedon.Todeter-
minethecorrectaperture,use
fhe58-7033 exposurecalculation
chart
kee page1il.
"When batteries
in the Nikonos-Vor NikonoslV-A
areexhausted,resetthe Nikonos-V'sshutterspeed/modeselector
dialto M90
(1
/90 sec.)or B
(Bulb),
or the Nikonos
lV-A's
shutter
speeddialtoM (1/90
sec.)or B(Bulb).
TTL
automatic
flashcontrolis not
posslble
when
the Nikonos-V
is
in the M90or B modes.
.*This indicates
the
correctshutterspeedasdeterminedby thesubjeclSbrlghlnessandthe
aperturesetting.Althoughthisisnota speedlight
function,it is helpfulwhenusingdaylight
fill-inflash
shooting.
1/90
sec.orslower Correctshuttersoeedblinks**
1/1000to1/125sec
1/60to1/30sec.
TTLinoperable
Nikonos
lV-A* 1/90
sec orslower M
(1/90
sec.)or
B
Nikonoslll 1/60
sec.
orslower
Shoofing
ModeSelecfor/Power
Switch
@
Theshooting
modeselector/power
switch
hasfiveclick-
stop
settings.
Theshooting
modesthatcanbeused
with
specificcameras
arelisted
above.
('OFF"
position
Thespeedlight
isturnedoffwhentheswitchissetat
thisoosition.
"TTL" position-TTL (through-the-lens)
Automatic
FlashMode
Thismode,
whichcanbeusedonly
inconjunction
with
the
Nikonos-Vcamera,
automaticallycontrolsthe
flash
exposure
Through-The-Lens
(TTL).
Inthis
mode,
the
Nikonos-V's
SPD
(silicon
photodiode)
reads
the light
passing
throughthe
lensandautomaticallysignals
the
SB-103toturn
itselfoff
when
the
exposureiscorrect.
16
Therange
ofuseableapertures
islarger
(from
t12.8
to
tl22when
using
ASA/ISO100film)with
TTLflash,
and
you
can
easilycontrolthe
depthof
field.In
addition,the
TTL mode makesdaylight
fill-inflash and close-up
photography
easierthanever.
.The useable
film speedrange for TTLoperation
is from ASA/ISO25
to400.Forinformation
about
theapertures
thatcanbe usedat various
filmspeeds,see
page18.
oTTL
operationis not posslb/e
with the NrkonoslV-Aor lll or whenthe
Nrkonos-V'sshutterspeed/modeselectordralissetat M90(ttgOsec.)
or
g(gutd.
. Evenif the Nikonos-V'sshutterspeed/mode
selector
dral
issetat "
A"
or from 1/30to 1/1000sec.,
TTLoperation
is not possib/ewhen: the
synccord is not securelyconnected,the ASA/ISO
film is setbeyond
ASA//SO400,or thebatteriesarecompletely
exhausted.
oln TTLautomaticflashoperation,the SB-103emits
amountsof light
sufficient for subjects
havingaveragereflectivity.Therefore,correct
exposuremay
notbeobtainable
if the subiect's
reflectivity
isextremely
loworhigh.
"MFULL,""M1l4,"
and
"M1/16"-Manual Flash
Modes
These
modescanbeusedwith
theNikonos-V,Nikonos
lV-A,andNikonoslll.Manualcontrol
is
veryconvenient
when
thecorrect
exposurecannotbeobtained
through
TTL
automatic
ooeration,TheSB-103has
threemanual
controlmodesfor selectionaccording
to theflash-to-
subject
distanceand
theshooting
situation.The
guide
numbers
areGN20
(10)
atthe
"MFULL"
position,
GN
10
(5)at
"M
114,"and
GN5
(Z.S)at
"M1/16"
whenusing
ASA/lSO100film.
(The
guide
numbers
in
parentheses
areforunderwater
photography).
To
determine
the
cor-
rectaperture,
usetheexposurecalculation
chart
or
perform
thecalculations
by
yourself
(see
page
19).
Inflash
photography,
which
apertures
canbe usedis
closelyrelated
to theflash-to-subject
distance.To
de-
terminetheuseable
apertures,
usethe
exposurecalcu-
lation
chart.
TTLAutomqlic
Flosh
Control
InTTLautomaticflash
photography,
theuseable
aper-
turesarefromtl2.B
tof
122
(when
usingASA/lSO100
film),
althoughtheactualrangefor
a specificshooting
situationdepends
uponthe flash-to-subject
distance,
the
ASA/lSO
film
speed,thetypeof photography
(on-
land
orunderwater),
and
whether
ornotthe
wide-flash
adapterisbeing
used.
Theactualrangesfor
specificsituationscan
beeasily
determinedwiththeexoosure
calculationchart.
Example
1:
When
shooting
on land
at Il4 without
the wide-flash
adapterwhile
usingASA/ISO
100
film,
you
cantake
pictures
of subjectslocated
between
0.9m(3ft)
and
sm
(to.+tt).
ln
thesame
manner,
when
shooting
underwater
aIf
111
with
thewide-flash
adapter
while
usingASA/lSO
400
film,
you
can
shootsubjects
located
between
O.Sm
(tft)
and1.zm
(+.gtt).
Before
you
selectan
aperture,
always
take
theflash-to-
subject
distanceintoconsideration.
To increase
the
flashto-subject
coupling
distance
as
much
as
possible,
select
a larger
f/stop
(a
numerically
smallerf-number).
lnthe
opposite
case,
close-up
shooting,
selectasmaller
f/stop
(a
numerically
larger
f-number).
17
www.orphancameras.com
CONTROLS
lNDETA|L-conlinued
Example
2:
Whenshooting
underwater
at25m (B.2ft)
without
the
wide-flash
adapter
while
using
ASA/lSO
50 film,
you
mustuse
Il2.B.
When
several
f/stops
areuseable
ataspecific
flash-to-
subject
distance,
make
yourselection
by taking
the
desired
depthof
field
andspeedlight
recyclingtime
into
consideration.
Example
3:
When
shooting
on
landaI1.2m
(+.Sft)without
the
wide-
flash
adapter
whileusing
ASA/ISO
100filmand you
wantthelargestdepth
of field
possible,
select
f/16.lf
you
want
to
minimize
recyclingtime
as
much
as
possible,
select
Il2.B.
Even
though
the
exposure
calculation
chart
may
appear
to indicate
otherwise,
the minimum
flash-to-subject
coupling
distance
forunderwater
photographyis0.3m
(r
tt).
When
using
anASA/lSO
filmspeed
notshown
inthe
exposure
c-alculation
chart
(for
example,
ASA/lSO
64),
calculate
the
difference
between
the
filmspeed
inuse
andthe
closest
filmspeed
inthechartto determine
the appropriate
intermediate
aperture
setting
to use.
For
example,
whenshooting
und6rwater
atO.3m
(1ft)
withthe
wide{lash
adapter
whileusing
ASA/lSO
64
film,
determine
theclosest
filmspeed
(ASA/lSO
50)and
its
useable
aperture
range
$12.8
tof/1'1).Since
64is
ap-
proximately
one-third
largerthan
50,
thecorrect
inter-
mediate
aperture
settings
willbeone-third
largerthan
thoseshown
inthechart
forASA/ISO50film.
Forin-
stance,
ifthe
correct
aperture
whenusing
ASA/lSO
50
TTLAuto Shooting
Range
filmis
tl2.B,
the
correct
aperture
whenusing
ASA/lSO
64
filmis
Il2.B
olus
one-third
(one
third
closer
Io Il4).
Likewise,
iftheaperture
shown
inthe
chart
isf/11,the
correctaperture
is
f/11
plus
onethird
(one
thirdcloser
to
f/l6).
Inthe
TTL
automatic
mode,theSB-103's
useable
ASA/
ISO
film
speed
rangeisfrom
ASA/ISO
25 lo 400,its
useable
aperture
rangeis fromIl2.B
Io t122,
andiIs
flash-to-subject
coupling
distance
rangeisfrom
0.3m
(r
tt)to
14m
(46fr).
Unit:
m(tt)
*
Ihese figures
should
only
beused
asaguidebecause
flash-to-subject
coupting
distance
ranges
areaffected
bytheexisting
conditions
(water
quality,
surroundings,
subl'ecfs,
and
soon).
400 200 100 50 25
28 2.51o
14
(8.2
to
a6) 1.8
to
10
(5
9
to33) '1
3
to
7
(4.3
to
23) 09to5(31o164)
428 18to10(59to33) 1.3to
7
(4
3to
23) 0.9
to5
(3
to 164) 06to35(2to115)
56 A2.8 13 to 7 (4.310
23) 0.9to
5
(3
to164) 06to35(21o115) 0.35
to
2.5
(1
1to8
2)
5.6 42.8 0.9
to5
(3
to
11.4) 06to35(21o11.5) 0
35to
2.5
(1.1
to8
2) 0.3to17(1
to56)
11 85.6 42.8 0.6
to35
(2
to
11.5) 0.35
to2.5
(1.1
to8.2) 0.3
to
1.7
(1
to
56) 0.3
to
1.2
(1
to
39)
to 11 856 A0.35to
2.5
(1
1to8
2) 03to17(1
to56) 0.3to
1.2
(1
to3.9) 03to08(1
to26)
22 to 11 856 03to
1.7
(1
to5.6) 03to12(1
to3.9) 03to0.8(1
to26) 03to06(1
to2)
22 to 11 803to1.2(1
to39) 0.3to0
8
(1
to
2.6) O3to06(11o2) 03
to035
(1
to.1.1)
22 IO 11 0.3
to0.8
(1
to
2.6) 03to0.6(1
to2) 03to035(1
to1.1)
18

Other manuals for Nikonos Speedlight SB-103

1

Other Nikon Camera Flash manuals

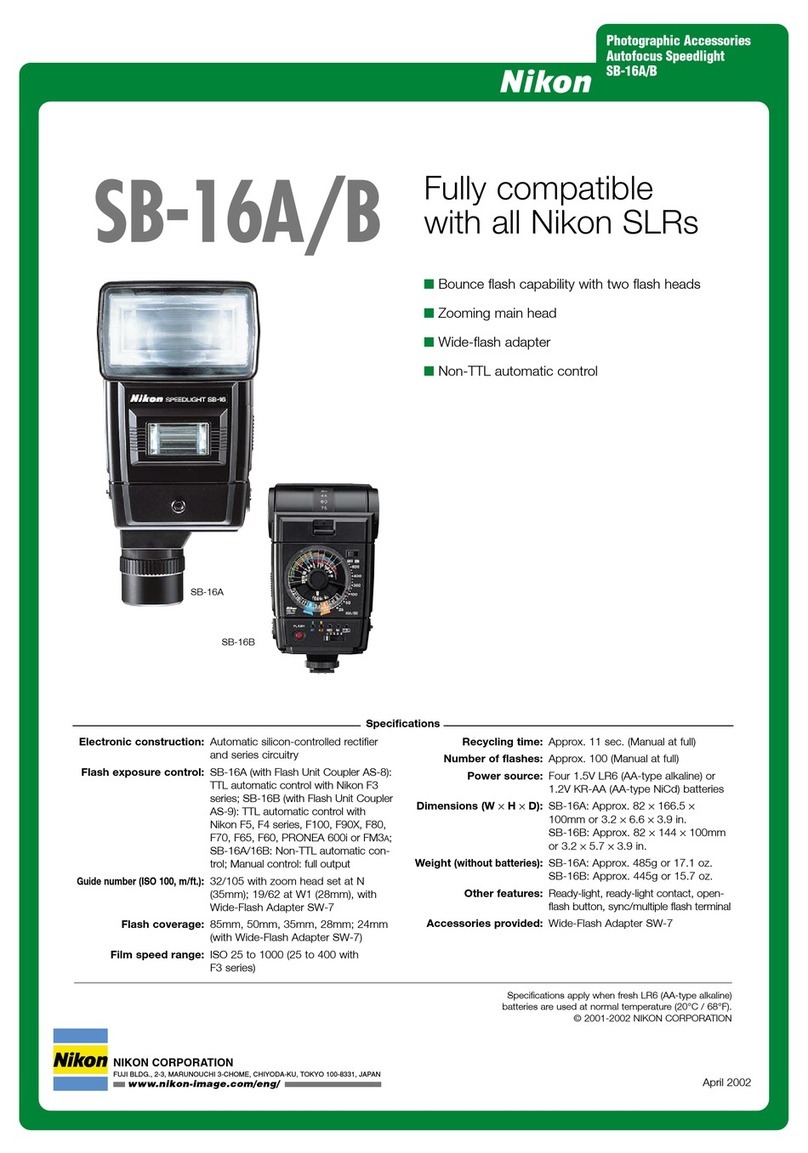
Nikon SB-16A/B User manual

Nikon

Nikon SB-16A/B User manual

Nikon Speedlight User manual

Nikon

Nikon Speedlight User manual

Nikon Speedlight SB-11 User manual

Nikon

Nikon Speedlight SB-11 User manual

Nikon SB-50DX User manual

Nikon

Nikon SB-50DX User manual

Nikon SB-800 User manual

Nikon

Nikon SB-800 User manual

Nikon Speedlight SB-16 User manual

Nikon

Nikon Speedlight SB-16 User manual

Nikon Autofocus Speedlight SB-27 User manual

Nikon

Nikon Autofocus Speedlight SB-27 User manual

Nikon Speedlight SB-16 User manual

Nikon

Nikon Speedlight SB-16 User manual

Nikon SB-400 User manual

Nikon

Nikon SB-400 User manual

Nikon SB-28 User manual

Nikon

Nikon SB-28 User manual

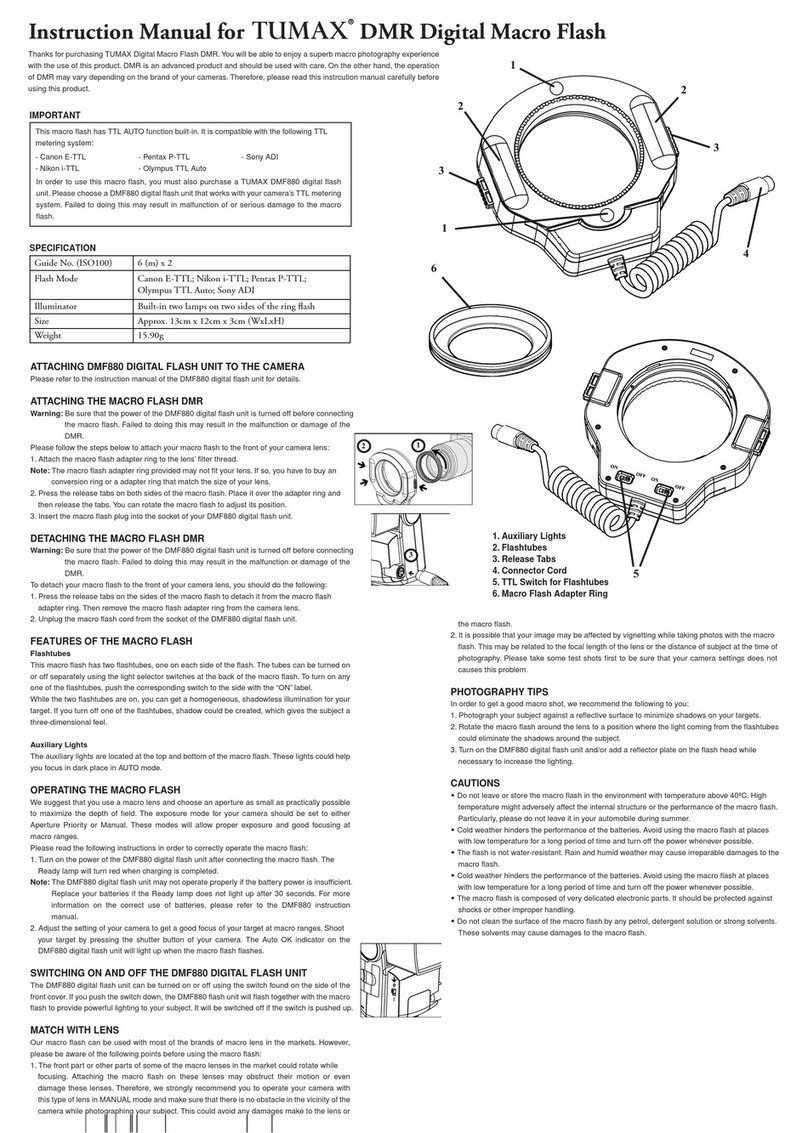
Nikon TUMAX DMF880 User manual

Nikon

Nikon TUMAX DMF880 User manual

Nikon Autofocus Speedlight SB-22 User manual

Nikon

Nikon Autofocus Speedlight SB-22 User manual

Nikon SB-30 User manual

Nikon

Nikon SB-30 User manual

Nikon SB-5000 User manual

Nikon

Nikon SB-5000 User manual

Nikon SB-10 User manual

Nikon

Nikon SB-10 User manual

Nikon SB-140 User manual

Nikon

Nikon SB-140 User manual

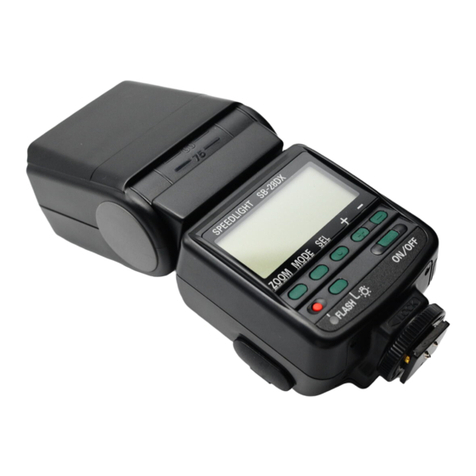
Nikon SB-28DX User manual

Nikon

Nikon SB-28DX User manual

Nikon Speedlight Unit SB-4 User manual

Nikon

Nikon Speedlight Unit SB-4 User manual

Nikon SU 800 - Wireless Speedlight Commander TTL Flash... User manual

Nikon

Nikon SU 800 - Wireless Speedlight Commander TTL Flash... User manual

Nikon SB-24 User manual

Nikon

Nikon SB-24 User manual

Nikon autofocus speedlight SB-900 User manual

Nikon

Nikon autofocus speedlight SB-900 User manual

Nikon Autofocus Speedlight SB-20 User manual

Nikon

Nikon Autofocus Speedlight SB-20 User manual

Nikon SB-800 Operating instructions

Nikon

Nikon SB-800 Operating instructions

Nikon SB-600 User manual

Nikon

Nikon SB-600 User manual

Popular Camera Flash manuals by other brands

Sony MACRO TWIN HVL-MT24AM Service manual

Sony

Sony MACRO TWIN HVL-MT24AM Service manual

Canon Speedlite 600EX-RT quick guide

Canon

Canon Speedlite 600EX-RT quick guide

Cactus KF36 instruction manual

Cactus

Cactus KF36 instruction manual

Nissin Mark II Di866 Pofessional instruction manual

Nissin

Nissin Mark II Di866 Pofessional instruction manual

Bolt VX-710C user manual

Bolt

Bolt VX-710C user manual

Godox V1F instruction manual

Godox

Godox V1F instruction manual

Canon 580EX - Speedlite II - Hot-shoe clip-on... instruction manual

Canon

Canon 580EX - Speedlite II - Hot-shoe clip-on... instruction manual

Dynalite Baja user manual

Dynalite

Dynalite Baja user manual

Altura Photo AP-UNV1 user manual

Altura Photo

Altura Photo AP-UNV1 user manual

Sigma EF-630 instructions

Sigma

Sigma EF-630 instructions

Minox DCC Flash instruction manual

Minox

Minox DCC Flash instruction manual

Sony HVL-F56AM operating instructions

Sony

Sony HVL-F56AM operating instructions

Pentax AF200T operating manual

Pentax

Pentax AF200T operating manual

Canon Speedlite 244 T instructions

Canon

Canon Speedlite 244 T instructions

Starblitz SHARK200 user guide

Starblitz

Starblitz SHARK200 user guide

Minolta MAXXUM DYNAX FLASH 3200I - PART 2 manual

Minolta

Minolta MAXXUM DYNAX FLASH 3200I - PART 2 manual

Metz AF-1 Operating	 instruction

Metz

Metz AF-1 Operating instruction

Fomei Digitalis Pro S600 DC user guide

Fomei

Fomei Digitalis Pro S600 DC user guide

manuals.online logo
manuals.online logoBrands
  • About & Mission
  • Contact us
  • Privacy Policy
  • Terms and Conditions

Copyright 2025 Manuals.Online. All Rights Reserved.