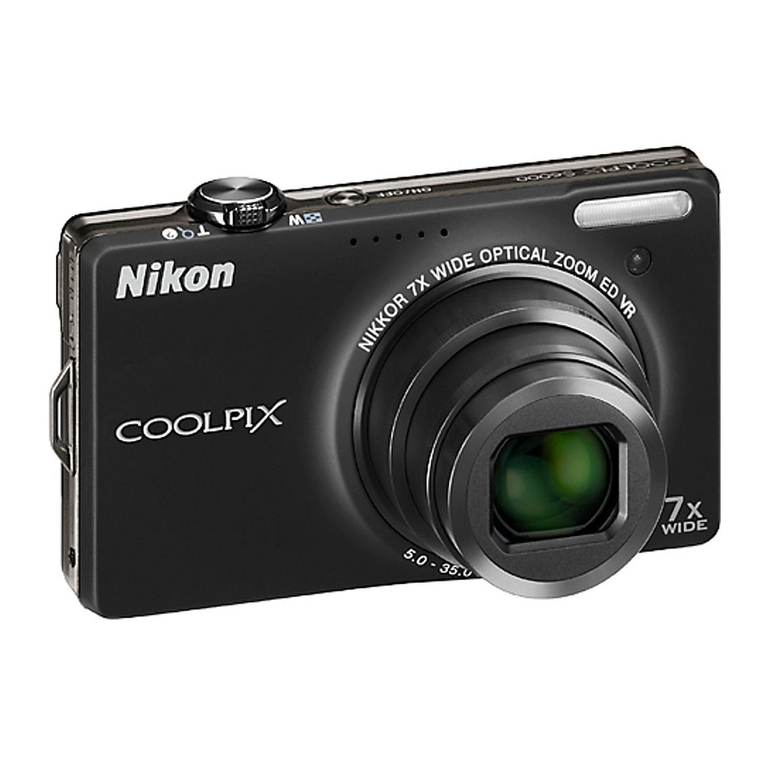
Nikon CoolPix S1100pj User manual

PC-PJ Transfer
Instruction Manual
En
Ck
Ch
Th
Id
Tr
Ar
En Projecting the Computer Display
Ck
Ch
Th
Id Memproyeksikan Tampilan Komputer
Tr Bilgisayar Ekranını Yansıtma
Ar


1
En
Projecting the Computer Display
Installing the Software Application
Before connecting the camera and the computer, install the software
application using the supplied PC-PJ Transfer CD.
System Requirements
•It may be possible to use a computer with a lower CPU performance or less
memory (RAM) than noted in the requirements above. However, the
transfer frame rate, transfer image quality (A4), and projection of movies
playing on the computer will be limited.
•Recommended display resolution: 1280 × 800 pixels or less
The PC-PJ Transfer software CD-ROM is supplied with the COOLPIX S1100pj.
The PC-PJ Transfer software allows you to use the camera’s built-in projector
to project the computer display via a USB connection.
This manual describes how to install and use the PC-PJ Transfer software.
Windows Mac OS
CPU Intel Core 2 Duo 3 GHz or above Intel Core 2 Duo
3 GHz or above
OS
Pre-installed versions of Windows 7 Home
Basic/Home Premium/Professional/
Enterprise/Ultimate, Windows Vista Home
Basic/Home Premium/Business/Enterprise/
Ultimate (Service Pack 2), or Windows XP
Home Edition/Professional (Service Pack 3)
All installed programs run as 32-bit
applications in 64-bit editions of Windows 7
and Windows Vista.
Mac OS X version
10.5.8 or 10.6.4
RAM
Windows 7, Windows Vista: 1 GB or more
(1.5 GB or more recommended)
Windows XP: 512 MB or more (1 GB or more
recommended)
512 MB or more
(1 GB or more
recommended)
Hard disk space 50 MB or more required when software is running
A: This icon indicates that more information is available elsewhere in this manual.

2
En
Before Installing
•Turn off any virus-checking software.
•Exit all other application software.
When Using PC-PJ Transfer (Including Installing and Uninstalling)
•Log on to an account with administrator privileges.
1Turn on the computer and insert the PC-PJ Transfer CD to the CD-
ROM drive.
•Windows: Follow on-screen instructions to complete the installation.
•Mac OS: Double-click the CD-ROM (PC-PJ Transfer) icon on the desk top and
click the PC-PJ Transfer Installer icon.
2Confirm the language to be installed and click Next.
If the desired language is not displayed, click Region Selection to choose a
different region and then choose the desired language.
Follow the on-screen instructions to install.
3Finish installing.
If prompted to restart the computer, follow the on-screen instructions.
Uninstalling the Software Application
•Windows: choose Start menu>All programs>PC-PJ Transfer>PC-PJ
Transfer Uninstall.
•Mac OS: open Applications and click Nikon Software>PC-PJ Transfer>
PC-PJ Transfer Uninstaller.

3
En
Projecting the Computer Display
1Before entering projector mode, display
the setup menu with the camera and set
USB in the Interface option to Projector.
To display the setup menu, tap the bottom tab on
the camera’s monitor to display the setting controls
and tap z.
See pages 143 and 155 of the User’s manual for
more information.
2Turn off the camera.
3Connect the camera to the computer using the supplied USB
cable.
Be sure that connectors are properly oriented. Do not attempt to insert connectors
at an angle, and do not use force when connecting or disconnecting the USB
cable.
4Turn on the camera.
The camera enters projector mode. The camera’s
monitor remains off.
Some computers may display a dialog prompting
you to restart the computer the first time you
connect the camera with the USB option set to Projector. Follow the on-screen
instructions to restart the computer.
USB
MTP/PTP Projector

4
En
5Start PC-PJ Transfer installed on the computer.
Windows: Choose Start menu > All Programs > PC-PJ Transfer > PC-PJ
Transfer.
Mac OS: Open the Applications folder, open the Nikon Software > PC-PJ
Transfer folders in that order, and then double-click the PC-PJ Transfer icon.
Clicking the PC-PJ Transfer icon on the Dock will also start PC-PJ Transfer.
Projection of the computer display begins and is displayed on the computer
display.
- Windows: is displayed on the right area of the taskbar. Right-click to
display the PC-PJ Transfer menu.
- Mac OS: is displayed on the right area of the menu bar. Click to display
the PC-PJ Transfer menu.
To pause projection, select Stop from the PC-PJ Transfer menu. To resume
projection, select Start.
6Exit the projection.
Choose Exit from the PC-PJ Transfer menu, turn off the camera, and disconnect
the USB cable.
When transferring images to the computer from the camera, set the camera’s USB
option back to MTP/PTP.
BNotes on Projecting the Computer Display
•When Stop or Exit is selected from the PC-PJ Transfer menu while the computer display is
being projected, image transfer stops and the projection freezes on the last projected
image. Select Exit and turn off the camera to end the projection.
•While the computer display is being projected, the computer switches to this software’s
dedicated drawing mode, and the color or appearance of file names on the desktop may
change (when using Windows). When Exit is selected from the PC-PJ Transfer menu, the
computer automatically returns to its original state.
CPC-PJ Transfer Settings
Choose Options from the PC-PJ Transfer menu to change the Transfer Frame Rate or
Transfer Quality setting.
•Transfer Frame Rate: The higher the transfer frame rate, the smoother the movement of
the projected image. When Auto is selected, the transfer frame rate is automatically set to a
value ranging from 5 to 24 fps.
•Transfer Quality: The image quality of the projected picture can be set to Auto, Low,
Middle, or High. When Auto is selected, the image quality is automatically set to either
Low, Middle, or High.
CAuto Off in Projector Mode
Auto off does not function while images on a computer are projected.
1
Ck
投影计算机的显示画面
安装软件应用程序
连接照相机和计算机以前,请通过附送的PC-PJ Transfer CD光盘安装
软件应用程序。
系统要求
•也许可以使用比以上要求中注明的CPU性能更低或内存 (RAM)更
少的计算机。不过,传送帧速、传送图像品质 (A4)和计算机上
动画播放的投影将受到限制。
•建议的显示分辨率:1280 ×800像素或更少
COOLPIX S1100pj附送PC-PJ Transfer软件CD-ROM光盘。通过
PC-PJ Transfer软件,可以建立USB连接使用照相机的内置投影仪投影
计算机的显示画面。
本说明书介绍如何安装和使用PC-PJ Transfer软件。
Windows Mac OS
CPU Intel Core 2 Duo 3 GHz或更快 Intel Core 2 Duo
3 GHz或更快
操作系统
预装版
Windows 7
家庭普通版
/
家庭高级
版
/
专业版
/
企业版
/
旗舰版、
Windows
Vista
家庭普通版
/
家庭高级版
/
商用版
/
企业版
/
旗舰版 (
Service Pack 2
)或
Windows XP
家用版
/
专业版 (
Service
Pack 3
)
在64位版本的Windows 7和Windows
Vista中,所有安装的程序均以32位应用
程序运行。
Mac OS X 10.5.8
或10.6.4版
内存
Windows 7、Windows Vista:1GB或
更多 (建议使用1.5 GB或更多)
Windows XP:512 MB或更多 (建议
使用1GB或更多)
512 MB或更多
(建议使用1 GB
或更多)
硬盘空间 运行软件时需要50 MB或更多空间
A:此图标表示本说明书中的其它地方还有更多信息。
中国用户:http://www.nikon.com.cn/
中国大陆地区用户可点击此处,登录尼康官方网站,点击 “支持及下载”栏目下的
“知识库和下载”
,获得常见问题回答 (FAQ)和在线的技术支持;点击 “如何购
买”栏目下的“代理商”或“经销商”,可获得本地尼康代理商或经销商的联络信息。
http://imaging.nikon.com/
http://www.nikon.com.cn/

2
Ck
安装之前
•关闭杀毒软件。
•退出所有其它应用程序软件。
当使用PC-PJ Transfer时 (包括安装和卸载)
•以具有管理员权限的帐户登录。
1开启计算机,然后将PC-PJ Transfer CD光盘插入光盘驱动器。
•Windows:按照屏幕指示完成安装。
•Mac OS:双击桌面上的CD-ROM (PC-PJ Transfer)图标并单击
PC-PJ Transfer Installer 图标。
2确认要安装的语言,然后单击下一步。
如果未显示所需语言,请单击国家/地区选择选择不同区域,然后选择所需
语言。
按照屏幕指示安装。
3完成安装。
如果提示您重新启动计算机,则请按照屏幕指示进行操作。
卸载软件应用程序
•Windows:选择开始菜单>所有程序>PC-PJ Transfer>
PC-PJ Transfer 卸载程序。
•Mac OS:打开应用程序,并单击Nikon Software>
PC-PJ Transfer>PC-PJ Transfer Uninstaller。

3
Ck
投影计算机的显示画面
1进入投影仪模式以前,请用照相机显示
设定菜单并将接口选项中的USB设定
为投影仪。
若要显示设定菜单,请轻触照相机显示屏底部
的标签显示设定控制按钮,然后轻触z。
有关更多信息,请参见
使用说明书
的第143和
155页。
2关闭照相机。
3使用附送的USB连接线将照相机连接至计算机。
确认接口方向正确。连接或断开USB连接线时,切勿尝试倾斜插入接口并切
勿过分用力。
4开启照相机。
照相机进入投影仪模式。照相机显示屏将保持
关闭。
如果在USB选项设定为投影仪时初次连接照相
机,某些计算机可能会显示对话框,提示您重新
启动计算机。按照屏幕指示重新启动计算机。
86%
073373
ᡩᕅҾ

4
Ck
5启动计算机上安装的PC-PJ Transfer。
Windows:选择开始菜单 > 所有程序 > PC-PJ Transfer >
PC-PJ Transfer。
Mac OS:打开应用程序文件夹,依次打开Nikon Software >
PC-PJ Transfer文件夹,然后双击PC-PJ Transfer图标。单击Dock中的
PC-PJ Transfer图标也将启动PC-PJ Transfer。
开始投影计算机的显示画面,计算机显示屏上将显示 。
–Windows:任务栏右侧区域中将显示 。右击 显示PC-PJ Transfer
菜单。
–Mac OS:菜单栏右侧区域中将显示 。单击 显示PC-PJ Transfer菜
单。
若要暂停投影,请从PC-PJ Transfer菜单选择
停止
。若要恢复投影,请选择
开始
。
6退出投影。
从PC-PJ Transfer菜单选择退出,关闭照相机,并断开USB连接线的连接。
将图像从照相机传送到计算机时,请将照相机的USB 选项重新设定为
MTP/PTP。
B关于投影计算机显示画面的注意事项
•投影计算机的显示画面时,如果从PC-PJ Transfer菜单选择停止或退出,图像传送将
停止,并且投影将定格在最后投影的图像上。请选择退出并关闭照相机结束投影。
•投影计算机的显示画面时,计算机将切换到本软件的特有绘画模式,并且桌面上文
件名的颜色或外观可能会改变 (使用Windows时)。从PC-PJ Transfer菜单选择
退出时,计算机将自动返回原状态。
CPC-PJ Transfer设定
从PC-PJ Transfer菜单选择选项可改变传送帧速或传送品质设定。
•传送帧速:传送帧速越快,投影图像的移动越流畅。选择自动时,传送帧速将自动
设定在5到24帧之间。
•传送品质:投影照片的图像品质可以设定为自动、低、中或高。选择自动时,图像
品质将自动设定为低、中或高。
C投影仪模式中的自动关闭
投影计算机上的图像时,自动关闭不起作用。

1
Ch
放映電腦畫面
安裝軟件應用程式
將相機連接到電腦前,使用隨機提供的 PC-PJ Transfer 光碟安裝軟件應用
程式。
系統要求
•
也可在電腦上使用比上述要求更低的
CPU
性能或較小的記憶體(
RAM
)。
但是,轉送每秒拍攝幅數,傳送影像品質
(
A
4
)
以及在電腦上播放的
短片放映將受限。
•建議顯示解像度:1280 × 800 像素或更低
PC-PJ Transfer 軟件 CD-ROM 隨COOLPIX S1100pj 提供。PC-PJ Transfer 軟件
允許您通過 USB 連接,使用相機內置放映機來放映電腦圖像。
本手冊介紹如何安裝和使用 PC-PJ Transfer 軟件。
Windows Mac OS
CPU Intel Core 2 Duo 3 GHz 或以上 Intel Core 2 Duo
3 GHz 或以上
OS
預先安裝版本 Windows 7 Home Basic/
Home Premium/Professional/Enterprise/
Ultimate、Windows Vista Home Basic/
Home Premium/Business/Enterprise/
Ultimate (Service Pack 2) 或Windows XP
Home Edition/Professional (Service Pack 3)
在64 位元版本 Windows 7 和Windows
Vista 中,所有安裝的程式以 32 位元應用
程式運行。
Mac OS X 版本
10.5.8 或10.6.4
記憶體
Windows 7, Windows Vista: 1 GB 或以上
(建議 1.5 GB 或以上)
Windows XP: 512 MB 或以上 (建議 1 GB
或以上)
512 MB 或以上
(建議 1 GB 或以
上)
硬碟空間 運行軟件時,需要 50 MB 或以上
A:該圖示表示本說明書其他地方中有詳細資訊。

2
Ch
安裝之前
•關閉任何病毒檢測軟件。
•退出所有其他應用程式軟件。
使用 PC-PJ Transfer 時 (包括安裝和解除安裝)
•以擁有管理員權限的帳戶登入。
1開啟電腦,然後將 PC-PJ Transfer 光碟插入光碟機。
•Windows︰按照畫面指示完成安裝。
•Mac OS︰按兩下桌面上的 CD-ROM (PC-PJ Transfer)圖示,按一下
PC-PJ Transfer Installer 圖示。
2確認要安裝的語言,然後按一下下一步。
如果沒有顯示需要的語言,按一下選擇地區以選擇不同的區域,然後選擇需
要的語言。
按照畫面指示安裝。
3結束安裝。
如果提示您重新啟動電腦,則請按照畫面指示進行操作。
解除安裝軟件應用程式
•Windows︰選擇開始選單>所有程式>PC-PJ Transfer>PC-PJ Transfer
解除安裝。
•Mac OS︰開啟應用程式並按一下 Nikon Software>PC-PJ Transfer>
PC-PJ Transfer Uninstaller。

3
Ch
放映電腦畫面
1進入放映機模式之前,顯示相機的設定
選單,在界面選項中將USB 設定為放映
機。
若要顯示設定選單,輕觸相機螢幕的底部標籤顯
示設定控制項,然後輕觸 z。
有關詳細資訊,請參閱
使用說明書
中的第 143 頁
和155 頁。
2關閉相機。
3使用隨機提供的 USB 線將相機連接至電腦。
請確保連接器的方向正確。請勿嘗試傾斜插入連接器,連接或斷開連接 USB
線時請勿過分用力。
4開啟相機。
相機進入放映機模式。相機螢幕保持關閉。
首次用 USB 選項設定將相機連接至放映機時,
某些電腦可能會顯示一個對話窗,提示您重新啟
動電腦。按照畫面指示重新啟動電腦。
USB
MTP/PTP
ᄍᆤᑨ

4
Ch
5啟動電腦上安裝的 PC-PJ Transfer。
Windows︰選擇開始選單>所有程式>PC-PJ Transfer>PC-PJ Transfer。
Mac OS︰按照該次序打開應用程式檔案夾,打開 Nikon Software>
PC-PJ Transfer 檔案夾,然後按兩下 PC-PJ Transfer 圖示。按一下插座上的
PC-PJ Transfer 圖示也可啟動 PC-PJ Transfer。
電腦畫面的放映開始,並且 顯示在電腦屏幕上。
-Windows︰顯示在工作列右側區域。右鍵按一下 顯示 PC-PJ Transfer 選
單。
-MacOS︰顯示在選單列右側區域。按一下 顯示 PC-PJ Transfer 選單。
要暫停放映,請從 PC-PJ Transfer 選單中選擇停止。要恢復放映,請選擇啟動。
6退出放映。
從PC-PJ Transfer 選單中選擇返回,關閉相機,然後斷開 USB 線。
當影像從相機傳輸到電腦時,將相機 USB 選項設定返回至 MTP/PTP。
B關於放映電腦畫面的注意事項
•在放映電腦畫面時從 PC-PJ Transfer 選單中選擇停止或返回后,影像傳輸停止,放映
定格在最後一張放映的影像上。選擇返回,然後關閉電腦,結束放映。
•放映電腦畫面時,電腦切換至此軟件專用的繪圖模式,桌面上的檔案名稱的顏色或
外觀可能會產生變化 (使用Windows 時)從 PC-PJ Transfer 選單中選擇返回時,電腦
自動返回至初始狀態。
CPC-PJ Transfer 設定
從PC-PJ Transfer 選單中選擇選項 以更改傳送每秒幅數或傳送品質 設定。
•傳送每秒幅數︰每秒傳輸幅數越高,放映影像的運動就越順利。 選擇自動時,每秒
傳輸幅數自動設定為範圍在 5 到24 fps 之間的值。
•傳送品質︰放映照片的影像品質可設定為自動、較低、適中或較高。選擇自動時,影
像品質自動設定為較低、適中或較高。
C放映機模式中的自動關閉
放映電腦上的影像時,自動關閉無效。

1
Th
การฉายภาพจากคอมพิวเตอร
ติดตั้งแอพพลิเคชั่นซอฟตแวร
กอนเชื่อมตอกลองเขากับคอมพิวเตอรใหติดตั้งแอพพลิเคชั่นซอฟตแวรจากแผนซีดี
PC-PJ Transfer ที่ใหมา
ขอกําหนดของระบบ
•ทั้งนี้อาจสามารถใชคอมพิวเตอรที่มี CPU ซึ่งมีประสิทธิภาพการทํางานต่ํากวาหรือมีหนวย
ความจํา (RAM) นอยกวาที่ระบุเอาไวในรายการความตองการของระบบขางตนได
อยางไรก็ตาม อัตราการถายโอนขอมูลการแสดงภาพ, คุณภาพของภาพที่ถายโอน (A4)
และการฉายภาพยนตรที่กําลังเลนอยูบนเครื่องคอมพิวเตอรอาจจะลดทอนลงไปบาง
•ความละเอียดของการแสดงผลที่แนะนํา: ไมเกิน 1280 × 800 พิกเซล
แผนซีดีรอมซอฟตแวรPC-PJ Transfer ใหมาพรอมกับกลอง COOLPIX S1100pj ซอฟตแวร
PC-PJ Transfer ชวยใหคุณสามารถใชงานเครื่องฉายภาพในตัวกลองเพื่อฉายภาพที่แสดงอยู
บนจอคอมพิวเตอรผานทางการเชื่อมตอ USB
คูมือการใชงานฉบับนี้จะอธิบายวิธีการติดตั้งและใชงานซอฟตแวรPC-PJ Transfer
Windows Mac OS
CPU Intel Core 2 Duo 3 GHz ขึ้นไป Intel Core 2 Duo 3 GHz
ขึ้นไป
OS
ระบบปฏิบัติการเวอรชันที่ติดตั้งมาพรอมกับเครื่อง
Windows 7 Home Basic/Home Premium/
Professional/Enterprise/Ultimate, Windows
Vista Home Basic/Home Premium/Business/
Enterprise/Ultimate (Service Pack 2) หรือ
Windows XP Home Edition/Professional
(Service Pack 3)
โปรแกรมทุกตัวจะทํางานแบบ 32 บิต ในWindows
7 และ Windows Vista เวอรชัน 64 บิต
Mac OS X เวอรชัน 10.5.8
หรือ 10.6.4
RAM
Windows 7, Windows Vista: 1 GB หรือมากกวา
(แนะนําใหใช1.5 GB หรือมากกวา)
Windows XP: 512 MB หรือมากกวา (แนะนําใหใช
1GBหรือมากกวา)
512 MB หรือมากกวา
(แนะนําใหใช1 GB
หรือมากกวา)
พื้นที่ฮารดดิสก50 MB ขึ้นไป ในขณะที่ซอฟตแวรทํางาน
A:เปนสัญลักษณแสดงวาสามารถหาขอมูลเพิ่มเติมไดจากสวนอื่นของคูมือการใชงานฉบับนี้

2
Th
กอนการติดตั้ง
•ปดการทํางานของซอฟตแวรปองกันไวรัสทุกตัว
•ปดแอพพลิเคชั่นซอฟตแวรอื่นๆ ทั้งหมด
เมื่อใชงาน PC-PJ Transfer (รวมถึงการติดตั้งและการถอดการติดตั้ง)
•ล็อกออนเขาสูแอคเคานตที่มีสิทธิพิเศษของผูดูแลระบบ
1เปดเครื่องคอมพิวเตอรแลวใสแผนซีดี PC-PJ Transfer ลงในไดรฟซีดีรอม
•Windows: ทําตามขั้นตอนคําแนะนําที่ปรากฏเพื่อการติดตั้งที่สมบูรณ
•Mac OS: ดับเบิลคลิกที่สัญลักษณCD-ROM (PC-PJ Transfer) บนเดสกท็อป
และคลิกที่สัญลักษณPC-PJ Transfer Installer
2ยืนยันภาษาที่จะใชติดตั้ง แลวคลิก Next (ถัดไป)
ถาภาษาที่ตองการไมแสดงขึ้นมา ใหคลิก Region Selection เพื่อเลือกภูมิภาคอื่น
จากนั้นเลือกภาษาที่ตองการ
ทําตามขั้นตอนคําแนะนําที่ปรากฏเพื่อติดตั้ง
3สิ้นสุดการติดตั้ง
หากมีขอความใหรีสตารทเครื่องคอมพิวเตอรทันทีใหทําตามขั้นตอนคําแนะนําที่ปรากฏบน
หนาจอ
การถอนการติดตั้งแอพพลิเคชั่นซอฟตแวร
•Windows: เลือกเมนูStart (เริ่ม)>All Programs (โปรแกรมทั้งหมด)>
PC-PJ Transfer>PC-PJ Transfer Uninstall
•Mac OS: เปด Applications (โปรแกรม)และคลิกที่ Nikon Software >
PC-PJ Transfer>PC-PJ Transfer Uninstaller

3
Th
การฉายภาพจากคอมพิวเตอร
1กอนเขาโหมดฉายภาพ ใหเปดเมนูตั้งคา ดวยกลอง
และตั้งคา USB ที่ตัวเลือก การเชื่อมตอ เปน
เครื่องฉายภาพ
หากตองการแสดงเมนูตั้งคา ใหแตะแถบดานลางบนจอภาพ
ของกลองเพื่อแสดงปุมตั้งคาตางๆ และแตะ z
โปรดดูขอมูลเพิ่มเติมไดที่หนา 143 และ 155 ของ
คูมือการใชงาน
2ปดการทํางานของกลอง
3เชื่อมตอกลองเขากับคอมพิวเตอรโดยใชสาย USB ที่ใหมา
โปรดตรวจสอบใหแนใจวาหันปลั๊กตอถูกดาน อยาพยายามเสียบหัวตอเขาทางมุม และอยาออก
แรงดันหรือดึงสาย USB มากเกินไปเมื่อเชื่อมตอหรือถอด
4เปดการทํางานของกลอง
กลองจะเขาสูโหมดฉายภาพ จอภาพของกลองจะยังดับอยู
เครื่องคอมพิวเตอรบางเครื่องอาจแสดงหนาตางขอความแจง
ใหคุณรีสตารตเครื่องคอมพิวเตอรในครั้งแรกที่คุณเชื่อมตอ
กลองหากตั้งคาตัวเลือก USB เปน เครื่องฉายภาพ
ปฏิบัติตามขั้นตอนคําแนะนําที่ปรากฏเพื่อรีสตารทเครื่องคอมพิวเตอร
USB
MTP/PTP
เครื่อง
ฉายภาพ

4
Th
5เปดโปรแกรม PC-PJ Transfer ที่ติดตั้งไวในคอมพิวเตอร
Windows: เลือกเมนูStart (เริ่ม)> All Programs (โปรแกรมทั้งหมด)> PC-PJ Transfer >
PC-PJ Transfer
Mac OS: เปดโฟลเดอรApplications (โปรแกรม)เปด Nikon Software> โฟลเดอร
PC-PJ Transfer ในลําดับนั้น และดับเบิลคลิก ไอคอน PC-PJ Transfer การคลิกที่ไอคอน
PC-PJ Transfer บน Dock จะเปนการเริ่มใชงาน PC-PJ Transfer ไดเชนกัน
การฉายภาพที่แสดงอยูบนเครื่องคอมพิวเตอรเริ่มตนและสัญลักษณจะปรากฏขึ้นบนหนาจอ
คอมพิวเตอร
-Windows: จะปรากฏที่บริเวณดานขวาของทาสกบารคลิกขวาที่ เพื่อแสดงเมนู
PC-PJ Transfer
-MacOS: จะปรากฏที่บริเวณดานขวาของเมนูบารคลิกที่ เพื่อแสดงเมนู
PC-PJ Transfer
หากตองการหยุดการฉายภาพชั่วคราว ใหเลือก Stop (หยุด)จากเมนูPC-PJ Transfer
หากตองการฉายภาพตอ ใหเลือก Start (เริ่ม)
6ออกจากการฉายภาพ
เลือก Exit (ออก)จากเมนูPC-PJ Transfer ปดกลองและถอดสาย USB
เมื่อตองการโอนยายภาพจากกลองไปยังคอมพิวเตอรใหเลือกการตั้งคาตัวเลือก USB เปน
MTP/PTP
Bหมายเหตุเกี่ยวกับการฉายภาพจากคอมพิวเตอร
•เมื่อเลือก Stop (หยุด)หรือ Exit (ออก)จากเมนูPC-PJ Transfer ในขณะที่กําลังฉายภาพจากเครื่อง
คอมพิวเตอรอยู การถายโอนภาพจะหยุดลงและการฉายภาพจะคางอยูที่ภาพสุดทายที่ฉาย เลือก
Exit (ออก)และปดกลองเพื่อสิ้นสุดการฉายภาพ
•ในระหวางที่กําลังฉายภาพจากเครื่องคอมพิวเตอรอยู เครื่องคอมพิวเตอรจะเปลี่ยนไปใชโหมดวาดภาพ
เฉพาะของซอฟตแวรนี้ ซึ่งอาจทําใหสีหรือตัวอักษรของชื่อไฟลตางๆ บนหนาจอเดสกท็อปเปลี่ยนแปลงไป
(เมื่อใชWindows) เมื่อเลือก Exit (ออก)จากเมนูPC-PJ Transfer เครื่องคอมพิวเตอรจะกลับไปยัง
สถานะเดิมโดยอัตโนมัติ
Cการตั้งคา PC-PJ Transfer
เลือก Options (ตัวเลือก)จากเมนูPC-PJ Transfer เพื่อเปลี่ยนการตั้งคา Transfer Frame Rate
(อัตราการถายโอนขอมูลการแสดงภาพ)หรือ Transfer Quality (คุณภาพในการถายโอนขอมูล)
•Transfer Frame Rate (อัตราการถายโอนขอมูลการแสดงภาพ): ยิ่งอัตราการถายโอนขอมูลการ
แสดงภาพสูง การเคลื่อนไหวของภาพที่ฉายก็จะยิ่งนุมนวลขึ้น เมื่อเลือก Auto (อัตโนมัติ)ไวอัตราการ
ถายโอนขอมูลการแสดงภาพจะไดรับการกําหนดคาไวในชวงตั้งแต5 ถึ 24 ภาพตอวินาทีโดยอัตโนมัติ
•Transfer Quality (คุณภาพในการถายโอนขอมูล): สามารถตั้งคุณภาพของภาพที่ฉายเปน Auto
(อัตโนมัติ), Low (ต่ํา), Middle (ปานกลาง)หรือ High (สูง)ไดเมื่อเลือก Auto (อัตโนมัติ)ไว
คุณภาพของภาพจะไดรับการกําหนดไวที่ Low (ต่ํา), Middle (ปานกลาง)หรือ High (สูง)โดยอัตโนมัติ
Cการปดกลองอัตโนมัติในโหมดฉายภาพ
ฟงกชั่นปดกลองอัตโนมัติจะไมทํางานในขณะที่ฉายภาพจากคอมพิวเตอร

1
Id
Memproyeksikan Tampilan Komputer
Menginstal Aplikasi Perangkat Lunak
Sebelum menyambung kamera dan komputer, instal aplikasi perangkat lunak
menggunakan CD PC-PJ Transfer yang disertakan bersama produk.
System Requirements
•Anda mungkin dapat menggunakan komputer dengan kinerja CPU atau
memori (RAM) yang lebih kecil daripada yang ditentukan dalam persyaratan di
atas. Namun, kecepatan bingkai transfer, kualitas gambar transfer (A4), dan
proyeksi film yang diputar di komputer akan terbatas.
•Resolusi tampilan yang disarankan: 1280 × 800 piksel atau kurang
CD-ROM perangkat lunak PC-PJ Transfer disertakan bersama COOLPIX S1100pj.
Dengan perangkat lunak PC-PJ Transfer, Anda dapat menggunakan proyektor
internal pada kamera untuk memproyeksikan layar komputer lewat koneksi USB.
Manual ini menjelaskan cara menginstal dan menggunakan perangkat lunak
PC-PJ Transfer.
Windows Mac OS
CPU Intel Core 2 Duo 3 GHz atau lebih Intel Core 2 Duo
3GHzataulebih
OS
Versi pra-instal Windows 7 Home Basic/Home
Premium/Professional/Enterprise/Ultimate,
Windows Vista Home Basic/Home Premium/
Business/Enterprise/Ultimate (Service Pack 2),
atau Windows XP Home Edition/Professional
versi (Service Pack 3)
Semua program yang terinstal berjalan sebagai
aplikasi 32-bit pada edisi 64-bit untuk Windows
7 dan Windows Vista.
Mac OS X versi 10.5.8
atau 10.6.4
RAM
Windows 7, Windows Vista: 1 GB atau lebih
(disarankan 1,5 GB atau lebih)
Windows XP: 512 MB atau lebih (disarankan
1 GB atau lebih)
512 MB atau lebih
(1 GB atau lebih
disarankan)
Ruang hard disk 50 MB atau lebih diperlukan ketika perangkat lunak berjalan
A: Ikon ini menunjukkan bahwa informasi yang lebih lengkap tersedia di tempat lain
dalam manual ini.

2
Id
Sebelum Menginstal
•Matikan perangkat lunak pemeriksa virus.
•Tutup semua perangkat lunak aplikasi yang lain.
Ketika Menggunakan PC-PJ Transfer (Mencakup Menginstal dan
Menghapus)
•Login ke akun dengan hak administrator.
1Nyalakan komputer dan masukkan CD PC-PJ Transfer ke drive CD-
ROM.
•Windows: ikuti petunjuk di layar untuk menyelesaikan penginstalan.
•Mac OS: klik dua kali ikon CD-ROM (PC-PJ Transfer) pada desktop dan klik ikon
PC-PJ Transfer Installer.
2Konfirmasi bahasa yang akan diinstal dan klik Next (Berikutnya).
Jika bahasa yang diinginkan tidak ditampilkan, klik Region Selection untuk memilih
kawasan yang berbeda kemudian pilih bahasa yang diinginkan.
Ikuti petunjuk di layar untuk menyelesaikan penginstalan .
3Penginstalan selesai.
JIka Anda diminta untuk menghidupkan ulang komputer, ikuti petunjuk pada layar.
Menghapus Aplikasi Perangkat Lunak
•Windows: pilih menu Start (Mulai)>All programs (Semua Program)>
PC-PJ Transfer>PC-PJ Transfer Uninstall.
•Mac OS: buka Applications (Aplikasi) dan klik Nikon Software>
PC-PJ Transfer>PC-PJ Transfer Uninstaller.
Other manuals for CoolPix S1100pj
4
Table of contents
Languages:
Other Nikon Digital Camera manuals

Nikon
Nikon 25472 User manual

Nikon
Nikon COOLPIX S02 User manual

Nikon
Nikon VAA35001 Coolpix S1 Operating instructions

Nikon
Nikon CoolPix S610 User manual

Nikon
Nikon Coolpix 5600 Operating instructions

Nikon
Nikon D3200 User manual

Nikon
Nikon COOLPIX 55300 User manual

Nikon
Nikon Coolpix S6100 User manual

Nikon
Nikon Coolpix S640 User manual

Nikon
Nikon 9421 User manual