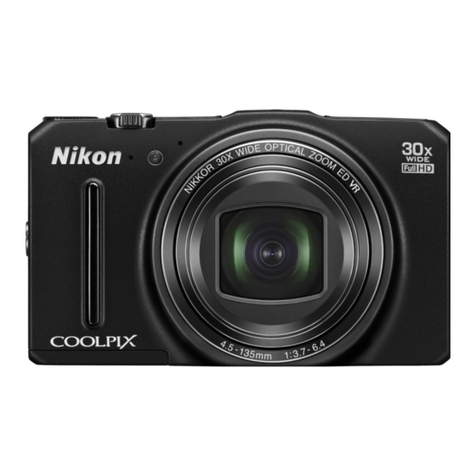
Nikon Coolpix S4100 User manual

Nikon
Quick Start Guide
Take
the
Camera
out
of
the
Box 3
4
9
12
First Steps
.~
Shooting and Playback
------------
Installing ViewNX 2
Using ViewNX 2
Other
Functions
14
20
( )
Nikon
COOLPIX
o
------.
COOLPIX
54100

I
Thank you for purchasing aNikon
COOLPIX
S41
00 digital camera. This
guide
introduces
the
procedures necessary for first
time
use
of
this camera.
For more detailed information, please refer
to
the
digital
User's
Manual,
which
is
located on
the
supplied
CO.
For information on viewing
the
camera's digital
User's
Manual,
see
"Viewing
the
Camera
User's
Manual
on
CD"
described below.
Should you need technical support,
we
offer a
number
of
options.
Internet
Please visit the Nikon
support
home
page, where you can:
•Search Nikon's
continuously
updated
Knowledge Database for
the
latest technical
support
information.
•
Use
"Ask Nikon aQuestion"
to
receive a
prompt
reply
from
aNikon professional advisor
to
your e-mail.
•
Download
the
latest versions
of
Nikon software or firmware updates for
your
product, or register
to
receive e-mail notification for software or firmware updates.
For customers in the United States: www.nikontechusa.com
For customers in Canada: help.nikon.ca (English), nikoncanada-fr.custhelp.com
(Franc;ais)
For customers in Mexico: nikon.com.mx/soporte
Telephone
Please
call for technical support and
other
product
assistance. Our professional advisers are standing by
to
help
with
your digital camera needs.
For customers in
the
United States: 1-800-NIKON-UX(1-800-645-6689)
For customers
in
Canada: 1-877-534-9910
For customers in Mexico: 001-888-565-5452
rn
Viewing the Camera User's
Manual
on CD
The
User's
Manual can be
viewed
using
Adobe
Reader
or
Adobe
Acrobat
Reader 5.0
or
later,
available for free
download
from
the
Adobe
website.
1Start the
computer
and insert the
User's
Manual
CD.
2Double-click
the
CD
COOLPIX
54100
icon in
Computer
(Windows 7 /
Windows
Vista) or
My
Computer
(Windows
XP),
or
on
the desktop (Macintosh).
3Double-click
the
INDEX.pdf icon
to
display alanguage selection screen.
Click alanguage and
follow
the
links
to
view
the
User's
Manual.
An
Important Notice about Accessories
Nikon COOLPIX
digital
camera
is
designed
to
the
highest
standards and includes
complex
electronic
circuitry.
Only
Nikon accessories, such
as
chargers, batteries,
Charging
AC
Adapters, and
AC
adapters are certified
by
Nikon specifically for
your
Nikon COOLPIX camera and are
engineered
and
tested
to
operate
within
the
requirements
of
the
electronic
circuitry
of
our
cameras.
THE
USE
OF
NON-NIKON
ACCESSORIES
MAY DAMAGE
YOUR
CAMERA AND WILL VOID
YOUR
NIKON WARRANTY.
Genuine
r\jikon accessories are available
through
your
Nikon-authorized
dealer.

Remove
the
camera and accessories
from
the
box
and
confirm
that
you have all
the
items listed below.
COOLPIX
S41
00
Digital Camera Camera Strap Rechargeable LHon Battery
EN-EL
19
(with battery
case)
Stylus
TP-1
Use(s
Manual CD
ViewNX 2
(CD-ROM)
Charging
AC
Adapter
USB
Cable UC-E6 Audio Video
Cable
EH-69P*
EG-CP
14
•Quick Start
Guide
(this guide) •Warranty
*A
plug
adapter
is
supplied
only
in countries
or
regions
where
required, and its shape varies
with
country
or region
of
purchase
(CD
6).
NOTE:
ASecure Digital
(SO)
memory
card, hereafter referred
to
as
aI/memory
cardlf,
is
not
provided.
See
page
173
of
the
User's
Manual for alist
of
approved
memory
cards.
Parts
of
the
Camera
I
~~;.:..;.:...,\
~4
C-e{
,~
5
~81~\
II
6
~i
III
7
DO
(shooting mode) button
DIE (playback)
button
EI
Battery-chamber/memory card slot cover
11.1
Monitor/touch panel
9---;';~--""
..
Power switch/power-on lamp
lUI
Shutter-release button
..
Zoom control
III
•
(~
movie-record) button
iii
Charge lamp/flash lamp
I
CD:
This icon indicates
that
more
information
is
available elsewhere in this guide.
Take
the
Camera
out
of
the
Box
~

Step 1Attach the Camera Strap
and
Stylus
@The stylus can be
attached
to
the
camera strap.
Step 2Insert theBattery
and
MemoryCard
Ifa
memory
card
is
inserted
in
the
camera, picture's data
is
recorded on the
memory
card. If no
memory
card
is
inserted in
the
camera,
the
data
is
recorded
to
the
camera's internal
memory
(approximately
20
MB).
2.1
Open
the
battery-chamber/memory
card slot cover.
II
Insert
the
supplied battery (EN-EL19). Battery chamber
Use
the edge
of
the battery
to
push the
orange battery latch
in
the direction
indicated by the arrow
(CD)
and fully
insert the battery
(@).
When
the
battery
is
fully
inserted,
the
battery latch will lock it
in
place.
Lt.
Inserting
the
Battery
Inserting
the
battery upside down or
backwards could
damage
the camera.
Be
sure
to
check the battery
is
in
the correct orientation.
2.2
I
(I)
First
Steps

2.3
Insert the
memory
card.
Slide the memory card
in
correctly until it
clicks into place.
~
Inserting Memory Cards
Inserting memory card upside down or
backwards could damage the camera
or
the
memorycard.
Be
sure
to
check the
memory card
is
in
the correct orientation.
Memory card slot
I\:)
~_.
2.4
Close the battery-chamber/memory card slot cover.
Removing
the
Battery and
Memory
Card
Turn the camera
off
and make
sure
that the power-on lamp and the monitor have turned
off
before opening the battery-chamber/memory card slot cover.
•Note that the camera, battery, and memory card may become
hot
during
use;
observe due
caution when removing the battery and
memory
card.
Removing
the
Battery
•Slide the orange battery latch
in
the direction indicated by the
arrow
(CD)
to
partially eject the battery, then carefully pull the
battery straight out to remove it (@).
Removing
the
Memory
Card
•
Press
the
card lightly into the
memory
card slot
(CD)
to
partially eject
it,
then carefully pull the card straight
out
to
remove it
(@)
.
..
Pages 16-17 and 24-25
of
the
User's
Manual
........
-.(tj
i:::::
~,tI
r
=II )
®.
I
First
Steps
~

Step 3Charge theBattery
Use
the
supplied Charging
AC
Adapter
EH-69P
and
USB
Cable
UC
-E6
to
charge
the
supplied Rechargeable Li-ion Battery
EN-EL
19
while it
is
in
the
camera.
3.1
Prepare
the
Charging
AC
Adapter
EH-69P.
Ifaplug adapter*
is
included, attach the plug adapter
to
the plug on
the Charging
AC
Adapter.
Push
the plug adapter firmly until it
is
securely held
in
place. Once the
two
are
connected, attempting
to
forcibly remove the plug adapter could damage the product.
*The shape
of
the plug adapter varies according
to
the country or
region
in
which the camera
was
purchased.
The Charging
AC
Adapter comes with the plug adapter attached
in
Argentina and
Korea.
3.2
With
the
camera
turned
off,
follow
steps
CD
to
@
to
connect
it
to
the
electrical
outlet.
Be
sure
that connectors
are
properlyoriented. Do
not
attempt
to
insert connectors at
an
angle, and
do
not
use
force when connecting or disconnecting the
USB
cable.
_._----------
-
~
,I,
•
~
-c::>~
~
'1'
--
0
F=
~
I-
r.
USB
cable
<------------'
~=:::::::::::=:=:::::::::::::::===;l
5
=1==============:::::----
The charge lamp slowly blinks green
to
indicate that
the battery
is
charging.
Charging
is
complete when the charge lamp turns off.
About
two
hours and ten minutes
are
required
to
charge afully exhausted battery.
3.3
Disconnect
the
Charging
AC
Adapter from
the
electrical
outlet
and
then
disconnect
the
USB
cable.
...... Pages 18-20
of
the
User's
Manual
I
•
First
Steps

Step 4Turn
On
the
Camera
Press
the
power
switch
to
turn
on
the
camera.
•The power-on lamp (green)
willlighC
and then
the
monitor
will turn on (the power-on lamp turns
off
when
the
monitor
turns on).
PI
Power Saving Function (Auto Off)
If
no
operations
are
performed for awhile,
the
monitor
will turn off,
the
camera will enter
standby mode, and
the
power-on lamp will blink. If no operations
are
performed for another
three minutes,
the
camera will turn off.
To
reactivate the monitorwhile the power-on lamp
is
blinking,
press
any
of
the following buttons:
-Power switch, shutter-release button, 0button,
[E
button, or •
(~
movie-record) button
Step 5Choose a
Language
and
Setthe
Camera
Clock
Alanguage-selection dialog
is
displayed
the
first
time
the
camera
is
turned on. Tap
the
monitor
to
choose alanguage and set
the
time
and date.
Operating
the
Touch Panel
The
COOLPIX
541
OO's
monitor
is
atouch panel display. Operate
the touch panel with yourfinger or the supplied
stylus.
Tapping
(CD)
Tap
the
touch panel.
Use
this operation
to
select acontrol or picture.
The shutter can also be released by
tapping
the
monitor.
Dragging
(@)
Drag yourfinger
across
the touch panel and remove it
from
the
touch panel.
Use
this operation
to
view
the
previous or next picture
during playback.
5.1
Language
X
I;;;]
(cstina
Dansk
!
Deutsch
~
I
Espanol
EAAflVIKCt
Fran~ais
IndoneSia
,
Tap
the
desired language. If
the
desired
language
is
not
displayed,
tap
0or 0
to
view
other
language options.
5.2
Tap
Yes.
I
First
Steps
~

Tap
CI
or
CI
to
select your
home
time
zone and tap
M3.
Daylight saving time setting
Ifdaylight saving time
is
in
effect, tap D
to
turn on the daylight saving
time
option. When the daylight saving time
option
is
enabled,
~~,
is
displayed at the
top
of
the monitor,
To
turn
off
the
daylight saving time
option, tap Dagain.
!
'.:J
Home
time
zone
&
..•..
,~
..
rror-'
'
New
York
Toronto
Lima,
~.
ro.,..
,.:.,;."
..
;l
.
-""·r
~.
l
[S-----18]
mJ)
5.3
5.4 5.5
Tap
M/DIY
to
choose the order in
which the month,
day,
and year
are
displayed.
Tap
each field (month,
day~ar,
hour,
and minute) and then tap gor ato
edit the date and time.
When finished
with
the
settings, tap
M3.
The settings
are
applied, the lens
extends, and the camera enters
shooting mode.
I
PZl!lmprinting Date on Pictures When Shooting
To
imprint date and time on pictures, display the Y(setup) menu and enable the Print date
option after the date and time have been
set.
Follow the procedure to display the Y(setup) menu and make settings.
•
Tap
the
bottom
tab displayed in the
monitor
in shooting or playback mode
to
display the
setting controls
(OJ
11),
tap Y(setup), and tap the desired icon
or
item.
...
Pages 146 and 153
of
the
User's
Manual
PZl!
Changing
the
Current Date, Time, or Language
As
with
"rdl!lmprinting Date on Pictures When Shooting" above, display the Y(setup) menu
and set the language or date and time
in
the Language
or
Time zone and date item.
...
Pages 149 and 160
of
the
User's
Manual
The next step explains basic shooting operations using
10
(auto) mode.
(I)
First
Steps

Step 7
Check
the BatteryLevel
Indicator
andNumber
of
Exposures
Remaining
I
Battery level indicator
I@
I#
Battery level Description
indicator
(c:J1
Battery level high.
(.:)1 Battery level low. Prepare
to
charge or replace
the
battery.
6Cannot take apicture. Charge
Battery exhausted. or replace
the
battery.
2.2
Frame the picture.
Point
the
camera at
the
subject.
When aface
is
framed by ayellow double border, the camera
has
detected that
face.
When
the
camera detects more than one
face,
a
double
borderwill bedisplayed around
the
face closest
to
the
camera,
and otherfaces will each be framed
with
asingle border.
The zoom operation
Rotate
the
zoom
control
•
To
enlarge the subject: rotate the zoom control to T
(telephoto).
•
To
capture awide
area:
rotate the zoom control to W(wide-
angle).
The
zoom
position
is
set at
the
maximum
wide-angle
position
when
the
camera
is
turned
on
.
..
Pages
28-29
of
the
User's
Manual
~
Number
of
exposures
remaining*
*Indicator
is
displayed
when
there are 50 or fewer exposures remaining. When
the
camera's
internal
memory
is
being
used,
lm
appears.
.....
Pages
26-27
of
the
User's
Manual
Step 2Hold the Camera andFrame aPicture
••
_~
__
...
_._._._~
••
_.~_
••
_
••
_
•••••
K_'
'_"
••
__
.••
_.
••
•••••
__
•
."
•
,.,
•
__
,,_
.....
._._
••
__
~.
••
._.
•••
n
._
•••
._.
__
• •
__
•••••
__
••
•••
_.
••
__
••••••
•
•••
__
2.1
Hold
the
camera steadily
in
both
hands.
Keep fingers, hair, and
other
objects away from
the
lens or
flash.
Shooting
and
Playback _

Step 3
Focus
andShoot -
-
~~
•
~pj]~
Flash
lamp
Focus area
When the camera detects ahuman face in
the
step
2,
the
camera focuses on the
area
framed by
the
yellow
double
border (focus
area).
Once focus
has
been
acquired, the
double
border turns green.
When
no
face
is
detected, the camera automatically
selects
the
focus
area
(up
to
nine
areas)
containing the
subject closest
to
the
camera. When the subject
is
in
focus, D(focus
area)
is
displayed in green.
Ifthe focus
area
blinks
red,
the
camera will be unable
to
focus. Change the composition and press
the
shutter-
release
button
halfway again.
3.1
Press
the
shutter-release
button
halfway,
stopping
when
you feel resistance.
Flash
lamp
The status
of
the flash can be checked by pressing
the
shutter-release
button
halfway.
On
Flash
will fire when picture
is
taken.
,I,
Blinks
Flash
charging.*
-c:>~
'1'
Off
Flash
off
or
not
required.
*
If
the
battery
is
low,
the
monitor
will turn off, and remain off, while the flash charges.
I
3.2
Press
the shutter-release
button
the
rest
of
the
way
down
to
take
the
picture.
The shutter
is
released and
the
picturewill be recorded
to
the
memory
card or internal memory.
Do
not
use force
when
pressing the shutter-release button,
as
this may
cause camera shake, resulting
in
blurred pictures.
~
Touch Shutter
The shutter
can
also be released by tapping
the
subject in the monitor.
.......
Pages 30-31
of
the
User's
Manual
•Shooting and
Playback

IE
co '
\UL':I~~=-n~
obutton
•
(.~
movie-record) button
Previous or next pictures can be displayed by dragging the
current picture right or left.
Drag
yourfinger
qUickly
across
half
ofthe
monitor
or more
to
skip
pastthe previous or nextfive pictures.Tap the
monitor
to
stop at
apicture
as
it slides past.
Press
the 0button, shutter-release button, or •
(."
movie-
record)
button
to
switch
to
shooting mode.
Step 4Playback
Pictures
Press
the [E] (playback) button. The camera
enters playback mode. The last picture taken
is
displayed in full-frame playback mode.
Deleting Pictures
1.
Display the picture to delete, and tap the tab at the
bottom
of
the monitor.
2.
Tap
W.
3.
Tap
Current image.
I
~
~/~~nJCn
~5:
M!l
<=I
iDlf'OO.
R
'--_------'[g)
U"
M
~»
•When the confirmation dialog
is
displayed, tap
Yes
and the
picture having been displayed will be deleted.
•
To
hide the setting controls such
as
Wafter applying the
setting, tap the tab again.
•After tapping
W,
tap
Erase
selected images to select multiple
pictures to delete.
Tap
All
images to delete
all
pictures.
•Deleted pictures cannot be recovered.
To
exit
without
deleting the picture, tap No in the confirmation dialog.
.......
Pages
32-33
of
the
User's
Manual
Press
the
power
switch
to
turn the camera off.
StepS
Turn
Offthe Camera
ShootinQ
and
Playback
(I)

Installing ViewNX2
Install the supplied software
to
display and edit photographs and movies that have
been copied
to
your computer. Before installing ViewNX
2,
confirm that your
computer meets the system requirements
(CD
19).
Your Imaging Toolbox
Step 1
Start
the Computer
and
Insert the InstallerCD
I
Windows
,Mac OS
Double-clickicon
on desktop
Welcome
Double-click
Welcome icon
~
Installing
ViewNX
2

Step 2Select aLanguage
Ifthe desired language
is
not
available, click Region Selection
to
choose adifferent
region and then choose the desired language.
CD
Select region (if required)
-.
Welcome to
\he
~
01
N.kon
dillc..1
~
P
.....
Mleet
your
I.....-c<il
from
ttl.
c:Ir-op-down
Iitt
Step 3
Start
the Installer
Click
Typical
Installation
(Recommended) and follow the on-screen instructions.
-.
VI
W
(r,
....
",.,
......
,_
..
}--
Click
Typical
Installation
e.-
(Recommended)
V...-x2
..-1o
......
_
MCl....,.
.........
_...-eo
-.-
.....
......",
ri
Installation Guide
Click Installation Guide
to
display help information about installing ViewNX
2.
Step 4Exit the Installer
Windows
(
'.
)
'"
Click
Yes.
The following software
is
installed:
•ViewNX 2
•Apple QuickTime (Windows only)
•Panorama Maker 5
Mac OS
NIIteft
The
installation Is complete..
1$
It OK
to
~
Ull
Install Cenler?
Click
OK.
I
Step 5Remove the Installer
CD
from the CD-ROM Drive
InstollinQ
ViewNX
2
(I)

Step 1CopyImages
to
the Computer
Use
the
Nikon Transfer 2feature
ofViewNX
2
to
copy images
to
the computer.
1.1
Turn
off
the camera.
I
1.2
Connect the camera and
computer
with
the
supplied
USB
cable.
Confirm that the connector
is
properly oriented and then gently insert the connector,
making sure
that
the connector
is
not
inserted at
an
angle. When disconnecting, make
sure that the connector
is
not
removed at
an
angle.
The camera automatically turns on and the power-on lamp lights. The camera
monitor
will remain off.
When the action selection dialog
is
displayed on the computer, select Nikon Transfer
2.
~
Using
ViewNX
2

When Using Windows 7
When the screen shown
below
is
displayed,
use
thefollowing procedure
to
select Nikon
Transfer
2.
-
'.
p
Select Nikon Transfer 2
as
the program specified for
Import
pictures and videos.
•Click Change program under
Import
pictures and videos, and then choose
Import
File using Nikon Transfer 2
in
the next screen and click
OK.
2Double-click
Import
File.
~
Starting Nikon Transfer 2
Ifthere
are
alarge
number
of
images on the memory
card,
it may take some time for Nikon
Transfer 2
to
start.
~
Powering
the
Camera During Image Transfer
•When connecting the camera
to
acomputer,
use
abattery
with
asufficient
amount
of
charge remaining
to
prevent the camera from turning
off
unexpectedly.
• . When the camera
is
connected
to
a
computer
via
the supplied
USB
cable
with
Auto
(default setting) selected for the Charge by computer
option
in
the setup menu, the
battery inserted into the camera
is
automatically charged. The charge lamp blinks slowly
while the battery
is
charging.
....
Pages 139 and 161
of
the User's
Manual
~
Transferring Images Using aCommercially-available Card Reader or aComputer's
Card Slot
The following methods
can
also be used
to
transfer images saved on a
memory
card
to
a
computer. I
•Connect acommercially-available card reader
to
the computer, and then insert the
•memory card.
•Insert
the
memory card directly into the computer's card slot.
Using ViewNX2
~

I
1.3
Confirm that the correct source
is
selected.
Confirm
that
the camera or removable disk appears
as
adevice
button
in
the "Source"
panel
of
the
Nikon Transfer 2"Options"
area.
Device
button
1.4
Click Start Transfer.
At default settings, all the images on the memory card will be copied
to
the
computer.
Click Start Transfer
1.5
Terminate the connection.
If
the
camera
is
connected to the computer, turn
the
camera
off
and disconnect
the
USB
cable. Ifyou
are
using acard reader or card slot, choose the appropriate option
in
the
computer operating system
to
eject the removable disk corresponding
to
the
memory
card and then remove the card from the card reader or card slot.
~
Using
ViewNX
2

Step 2View/mages
When image transfer
is
complete,
the
ViewNX 2screen
is
displayed and transferred
images
are
displayed.
PZlJ
Starting ViewNX 2Manually
•Windows: Double-click the ViewNX 2shortcut icon on the desktop.
•Mac
as:
Click
the
ViewNX 2icon in the Dock.
PZlJ
Starting Nikon Transfer 2Manually
Start ViewNX 2and click the Transfer icon in the toolbar
in
step
2.
I
UsinQ
ViewNX
2
~

Retouching Photographs
Click Edit in
the
ViewNX 2toolbar.
Images can be edited
by
using
tone
compensation, adjusting sharpness,
trimming
(cropping) images, etc.
Editing Movies
Click Movie Editor in
the
ViewNX 2toolbar.
[ ]
Focus
POint
it
-.
...
.
.-.
Movies recorded
with
this camera can be edited by deleting
unwanted
sections
of
movies, etc.
Printing Images
Click Print in
the
ViewNX 2toolbar.
Adialog
is
displayed and images can be printed using aprinter connected
to
the
computer.
~
For Details About Using ViewNX 2
Refer
to
the
ViewNX
2help information.
~
Using
ViewNX
2

ra
System Requirements
Windows Mac
OS
Using ViewNX)
(fI)

Tabs
Tap the tab to display the setting controls when
in
shooting or playback mode.
Shooting and playback settings can be made using the setting controls.
The available setting items vary depending on shooting mode, orthe type
of
picture
or playback mode.
1
Tap
the tab on the monitor.
2
Tap
the icon
of
the desired item
to
displaythe setting
screen
of
that
item.
Tap
V(setup)
to
perform the basic setting
of
the camera.
Tap
the tab again to hide the setting controls.
o
(g]
o
(g]
---_
.._
..
_--_
..
_-_.
__
._---_
..
_--_.
__
._----_
...
_._._-_.
__
._
.......
__
._._----
I
3
Tap
the desired setting icon
to
apply
that
setting.
Tap
lEI
to
return
to
the previous screen.
To
hide the setting controls after applying the setting, tap
the tab again.
...... Pages 14-15
of
the
User's
Manual
Image
mode
4320x3240
•••
0
••
Ii
11.
EJ
~
Other Functions
Other manuals for Coolpix S4100
4
Table of contents
Other Nikon Digital Camera manuals

Nikon
Nikon D100 User manual

Nikon
Nikon 1 AW1 User manual

Nikon
Nikon Coolpix P90 User manual

Nikon
Nikon D700 User guide

Nikon
Nikon COOLPIX S3500 User manual

Nikon
Nikon COOLPIX S3500 User manual

Nikon
Nikon 26196 User manual

Nikon
Nikon COOLPIX S4000 User manual

Nikon
Nikon D70 User manual

Nikon
Nikon Coolpix S50c User guide

Nikon
Nikon F 100 User manual

Nikon
Nikon 26190 User manual

Nikon
Nikon Coolpix P600 User manual

Nikon
Nikon Coolpix e1989 User manual

Nikon
Nikon COOLPIX S8000 User manual

Nikon
Nikon D5100 User manual

Nikon
Nikon Coolpix 880 User manual

Nikon
Nikon J1 User manual

Nikon
Nikon COOLPIX 4300 User manual

Nikon
Nikon Coolpix 990 User manual