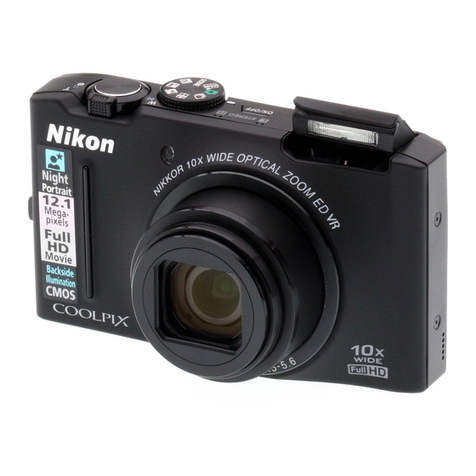
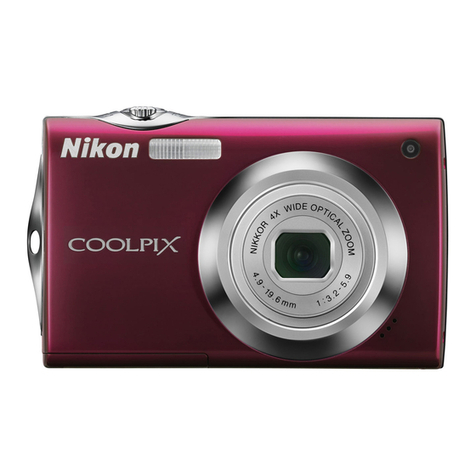
Nikon CoolPix S8200 User manual

Nikon
DIGITAL CAMERA
COOLPIX $8200
Reference Manual

For information about the following image editing features, see "Editing Still
Images" (_10):
- Quick retouch D-Lighting
- Skin softening Filter effects
- Small picture
Print Order (Creating a DPOF Print Order)
Press the[] button mode) -) MENUbutton ") [] tab -)/_, Print order
(playback
When printing images saved on the memory card using any of the following
methods, the Print order option in the playback menu is used to create digital
"print orders" for printing on DPOF-compatible devices.
• Inserting the memory card into a DPOF-compatible (_:)1-19)printer's card slot.
• Taking the memory card to a digital photo lab.
• Connecting the camera to a PictBridge-compatible (_:)719)printer (_23). A
print order can also be created for images saved in the internal memory if the
memory card is removed from the camera.
1Select Select images and press the
button.
te
_t Select images (up to 99) and the number of
copies (up to nine) of each.
• Rotatethe multi selector,or press• or • to sdect
images,and press• or • to specifythe number of
copiesto beprinted.
• Imagesselectedfor printingareindicatedby thecheck
markiconandthenumeralindicatingthenumberof
copiesto beprinted.Ifnocopieshavebeenspecifiedfor images,theselectioniscarlcded.
• Rotatethezoom control to T (C{)to switch to full-frame playback.Rotatethe zoom
control to W([]) to switchbackto 12-thumbnaildisplay.
• Pressthe _) button when setting iscomplete.
_43

The Playback Menu
3Select whether or not to print shooting date
and shooting information.
•Select Date and press the _) button to print the
shooting date on all images.
• Select Info and press the _) button to print shooting
information (shutter speed and aperture value) on all
images.
• Select Done and press the _) button to apply the settings.
Images selected for printing are indicated by the
icon during playbac:k
m
o_1_ Notes About Printing Shooting Date and Shooting Information
When the Date and Info settings are enabled in the print order option, shooting date and shooting
in_rmation are printed on images when a DPOF compatible (_19) printer that supports printing
of shooting date and shooting in_rmation is used.
• Shooting in_rmation cannot be printed when the camera is connected directly to a printer, via
the included USB cable, for DPOF printing (_29).
• Note that Date and Info settings are reset each time the Print order option is displayed.
• The date printed is that saved when the image was captured,
Changing the camera's date using the Date and time or Time
zone in the Time zone and date option in the setup menu after
an image has been captured has no effect on the date printed on
the image.
[] Canceling Existing Print Order
Select Delete print order in step 1 of"/_, Print Order (Creating a DPOF Print Order)" (_'_43) and
press the _) button to remove print marking from all images and cancel the print order,
_44

The Playback Menu
[] Print Date
When shooting date and time are imprinted on images using the Print date option (_66) in the
setup menu, images are saved with shooting date and time imprinted on the image when they are
captured. Images with the date imprinted on them can be printed from printers that do not support
printing of the date on images.
If the Print date option is used to imprint the shooting date on images, the Date selection option
of the Print order function has no effect.
te
t_
_45

8
m
o
The Playback Menu
Slide Show
Press the [] button mode) -) MENUbutton -) [] tab -) _ Slide show
(playback
Play back images, saved in the internal memory or on a memory card, one by one
in an automated "slide show/'
1 Use the multi selector to select Start and
press the _]_ button.
•To change the interval between images, select Frame
intvl, select the desired interval time, and press the _)
button before selecting Start.
•To repeat the slide show automatically, select Loop
and press the _) button before selecting Start. The
check mark (q_') will be added to the loop option when enabled.
2The slide show begins.
• While the slide show is in progress, press the multi
selector • to dispJay the next image or • to dispJay
the previous image. Hold down either button to fast
forward or rewind.
• To end or pause the slide show, press the _) button.
3End the slide show or restart it.
• The screen shown on the right is displayed when the
slide show has ended or is paused. Sdect I11 and
press the _) button to return to the screen dispByed in
step 1.Select Oto play the slide show again.
_,d Notes About Slide Show
•Only the first frame of movies included in a slide show isdisplayed.
• Forsequences (_'_7) whose sequence display options are set to Key picture only, only the key
picture isdisplayed.
• images captured using easy panorama (_ 49, _'_2) are displayed full frame when played in a
slide show. They do not scroll.
• The maximum playback time is up to 30 minutes even if Loop is enabled (_'572).
_46

The Playback Menu
O_ Protect
Press the [] button mode) -) MENUbutton ") [] tab -) 011 Protect
(playback
Protect selected images from accidental deletion.
Select images to protect or cancel protection for previously protected images
from tile image selection screen.
See "Tile Image Selection Screen" (_48) for more information.
Note that formatting tile camera's internal memory or tile memory card will
permanently delete protected images (_73).
Protected images are indicated by the @z icon during playback (_ 8).
te
t_
_47

The Playback Menu
The Image Selection Screen
When using one of the following features, a screen like
that shown on the right isdisplayed when selecting
images.
• Print order > Select images (_43)
• Protect (_47)
• Rotate image(_49)
• Copy > Selected images (_52)
• Choose key picture (_54)
• Welcome screen > Select an image (_60)
• Delete image > Erase selected images (_ 32)
Follow the procedures described below to select the images.
R
o
select the desired image.
• Rotatethezoom control ([_) 2) to T(% to switch to
full-frameplaybackor W(_;_) to switch backto 12-
thumbnail display.
• Onlyone imagecan beselectedfor Rotate image,
Choose key picture, and Welcome screen.Proceed
to step3.
2Press • or • to select or deselect (or to
specify the number of copies).
•Whenan imageisselected,acheckmark(%_)is
displayedwith the image.Repeatsteps1and 2to
selectadditional images.
3Press the _) button to apply image selection.
•WhenSelectedimages isselected,aconfirmation dialogisdisplayed.Followthe
instructionsdisplayed inthe monitor.
_48

The Playback Menu
Rotate Image
Press the[] button mode) -) IENUbutton -) [] tab -) _ Rotate
(playback image
Specify the orientation in which saved images are displayed during playback. Still
images can be rotated 90 degrees clockwise or 90 degrees counterclockwise.
Images that were saved in portrait ("tall") orientation can be rotated up to 180
degrees in either direction.
Select an image from the image selection screen (_'_48). When the Rotate image
screen is displayed, rotate the multi selector or press _ or i_ to rotate the image
90 degrees.
Rotate 90 degrees Rotate 90 degrees
counterclockwise clockwise
Pressthe _) button to finalize display orientation, and saveorientation
information with tile image. d_
t_
_1_ Notes About Image Rotation
•The camera cannot rotate images captured with another make or model of digital camera,
•While only the key picture of a sequence is displayed, images cannot be rotated. Apply the setting
after displaying individual images (_'_7, _54).
_-B49

The Playback Menu
Voice Memo
Pressthe[] button (playback mode) -) selectan image -) MENUbutton -) [] tab -)
Voice memo
Use the camera's microphone to record voice memos for images.
•For an image that has no voice memo, the voice memo recording screen is
displayed; for an image that has a voice memo (i.e.,an image indicated by _ in
full-frame playback mode), the voice memo playback screen is displayed.
Recording Voice Memos
• Pressand hold the _) button to record a voice
memo (up to 20 seconds).
• Do not touch the microphone during recording.
• During recording, _ and ]_ blink in the monitor.
• When recording ends, the voice memo playback
screen isdisplayed. See "Playing Voice Memos" for
more information.
•Pressthe multi selector _ before or after recording a
8voice memo to return to the playback menu. Press
__._ the MENUbutton to exit the playback menu.
o
Playing Voice Memos
• Presstile _) button to play tile voice memo.
• Pressthe _) button again to stop playback.
• Rotate the zoom control to T or W during playback
to adjust playback volume.
• Pressthe multi selector _ before or after playing a
voice memo to return to the playback menu. Press
the MENUbutton to exit the playback menu.

Deleting Voice Memos
Pressthe _ button while the screen described in
"Playing Voice Memos" is displayed.
When the confirmation dialog is displayed, select Yes
and press the _) button. Only the voice memo will be
deleted.
The Playback Menu
ro
r_
Notes About Voice Memos
•When an image with a voice memo attached is deleted, both the image and its voice memo are
deleted,
• You cannot delete voice memos attached to protected images (_47),
• Voice memos cannot be recorded for an image that already has a voice memo attached to it, The
current voice memo must be deleted before a new voice memo can be recorded.
• Voice memos cannot be attached to pictures recorded with easy panorama,
• This camera cannot record voice memos for images captured with another make or model of
digital camera.
[] More Information
See "File and Folder Names" (_84) for more information,

The Playback Menu
_-_ Copy (Copy Between Internal Memory and Memory Card)
Press the [] button mode) -_ MENUbutton -_ [] tab -_ _
(playback Copy
Copy images between the internal memory and a memory c:ard.
m
o
destination and press the _) button.
•I_l_l_): Copy images from internal memoryto
memory card.
•I_l mll'l_l: Copy images from memory card to internal
memory.
2Select a copy option and press the _) button.
•Selected images: Copy images selected from the
image selection screen (_'_48). Ifa sequence for which
only a key picture is displayed is selected (_7), all
images in the displayed sequence are copied.
•All images: Copy aHimages, if an image in a sequence
is selected, this option is not displayed.
•Current sequence: This option isavailable only if an image that is in a sequence
group was selected before the playback menu was displayed. All images in the
current sequence are copied.
_52

The Playback Menu
_1_ Notes About Copying Images
• JPEG, MOV, and WAV format files can be copied, Files saved in any other format cannot be
copied.
• Ifvoice memo (_50) are attached to images selected for copying, voice memos are copied with
the images.
• Operation isnot guaranteed with images captured with another make of camera or that have
been modified on a computer.
• When copying images for which Print order (_'B43) options are enabled, the print order settings
are not copied, However, when copying images for which Protect (_'B47) isenabled, the protect
setting iscopied,
• Ifyou copy images that are in a sequence, the copied images are not part of a sequence.
• If Sequence display options (_'B54) issetto Key picture only and an image in the sequence is
selected and the @ button ispressed to display individual images (_'_7), only I*1_1_1 (memory
card to internal memory) image copy isavailable.
[] If"Memory contains no images." Is Displayed
If there are no images saved on a memory card inserted in the camera when playback mode is
applied, the message Memory contains no images, will be displayed, Pressthe MEi/Ubutton to
display the copy options screen, and copy the images savedin the camera's internal memory to the
memory card,
[] More Information
See"File and Folder Names" (_84) for more h_formation, te
t_
_53

The Playback Menu
Sequence Display Options
Pressthe[] button (playback mode) -) MENUbutton -) [] tab -)
Sequence display options
Select the method used to display a series of images shot continuously (sequence;
_7) when viewing them in full-frame playback mode (_ 550)and in thumbnail
playback mode (_ 551).
Settings are applied to all sequences, and the setting is saved in the camera's
memory even if the camera isturned off.
Description
Setall imagesin allsequencesto bedisplayedindividually.
Setall sequences to be displayed using their key pictures only.
m
o
Choose Key Picture
Pressthe [] button (playbackmode) -) MEN[Ibutton -) [] tab -) _ Choosekeypicture
When Sequence display options is set to Key picture only, the key picture
ctisplayed in full-frame playback mocte (_ 30) ant1thumbnail playback mocte
(_ 31) can be set for each sequence of images.
•When changing this setting, before pressing MENU,first select the desired
sequence using full-frame playback mode or thumbnail playback mode.
• When the key picture selection screen isdisplayed, select an image. See"The
Image Selection Screen" (_48) for more information.
_54

Movie Options
Enter mode -_ MENUbutton -_ _1_tab -_ Movie
shooting options
Select the desired movie option to record.
In addition to normal speed movies, tile camera can also record high speed (HS)
movies (_57), which can be played back in slow motion or fast motion.
Larger image sizes and faster movie bitrates mean big her image quality and larger
movie file sizes.
Normal Speed Movies
_] HD 1080p'k
(1920x1080)
(default setting)
Description
Movies with an aspect ratio of 16:9 are recorded. This option is
suited to playback on a wide screen TV.
Movie bitrate: 18.8 Mbps
Frame rate: About 30 frames per second
Movies with an aspect ratio of 16:9 are recorded. This option is
1_] HD 1080p suited to playback on a wide screen TV.
(1920x1080) Movie bitrate: 12.6 Mbps
Frame rate: About 30 frames per second
Movies with an aspect ratio of 16:9 are recorded.
_] HD 720p Movie bitrate: 8.4 Mbps
(1280x720) Frame rate: About 30 frames per second
,_. iFrame 540
(960x540)
V_] VGA (640x480)
Movies with an aspect ratio of 16:9 are recorded. Aformat
supported by Apple Inc.
• Movie bitrate: 20.8 Mbps
• Frame rate: About 30 frames per second
When recording movies to the internal memory, recording may
stop unexpectedly in some shooting conditions. When recording
movies of important events, recording to a memory card (Speed
Class6 or higher) is recommended.
Movies with an aspect ratio of 4:3 are recorded.
Movie bitrate: 2.9 Mbps
Frame rate: About 30 frames per second
_55

The Movie Menu
HS Movie
Option
w__i_ HS 120 fps
(640x480)
_ HS 60 fps
(1280x720)
1_ HS 15 fps
(1920xl 080)
Description
1/4-speed slow motion movies with a 4:3 aspect ratio are recorded.
Max. recording time: 7 minutes and 15 seconds (playback time:
29 minutes)
Movie bitrate: 2.8 Mbps
Frame rate: About 120 frames per second
When the shooting mode is set to special effects ([_) 53), the
Soft effect is not applied to movies. Only the hue of the
Nostalgic sepia effect is applied.
1/2-speed slow motion movies with a 16:9 aspect ratio are
recorded.
Max. recording time: 14 minutes and 30 seconds (playback time:
29 minutes)
Movie bitrate: 8.3 Mbps
Frame rate: About 60 frames per second
2x speed fast motion movies with a 16:9 aspect ratio are recorded.
Max. recording time: 29 minutes (playback time: 14 minutes and
30 seconds)
Movie bitrate: 18.6 Mbps
Frame rate: About 15 frames per second
• The movie bitrate is the volume of movie data recorded per second. Variable
bitrate (VBR) encoding is used to automatic:ally adjust the bitrate depending on
PD the subject being recorded. When recording movies of subjects with large
amounts of motion, the file size increases.
n
o • See"MovieOptionsandMaximumMovie Length"(_ 90)for information
about recordingtime.
[] More Information
See"File and Folder Names" (6"B84) for more information,
6-B56

The Movie Menu
Recording Movies in Slow Motion and Fast Motion (HSMovie)
HS(high speed)moviescanbe recorded.Moviescanbe playedbackin slow
motion at 114or 112of normal playbackspeed,or playedbackin fastmotion ata
speedtwo timesfasterthan normalspeed.
• See"HSMovie" (_'_SS)for moreinformation.
IDisplay the movie menu (_55), use the
multi selector to select Movie options,and
then press the _]_ button.
2Confirm orchange HS movie settings, and
then press the _) button.
• See"MovieOptions"(_55) for more information.
• Pressthe MENUbutton afterchanging the settingsand
return to theshooting screen.
3Press the • (*_ movie-record) button to start HSmovieoptions
• Movierecording beginsafterthe monitor brieflyturns
off.
• Thecamerafocusesin the center ofthe frame.Focus
areasarenot displayedduring recording.
• The maximum movielength displayindicatesthe
maximum HSmovielength.
4Press the • (*_ movie-record) button to end recording.
4"
_57

2
rD
m
o
The Movie Menu
Notes About HS Movie
• Sound is not recorded.
• When recording HS movies, zoom position, focus, exposure, and white balance are locked when
the • ("_ movie record) button is pressed to start recording.
[] HS Movie
Recorded movies are played back at about 30 frames per second,
When Movie options (_55) is set to HS 120 fps (640x480) or HS 60 fps (1280x720), you can
record movies that ca n be played back in slow motion. When set to HS 15 fps (1920xl 080),
movies that can be played back in fast motion at a speed two times faster than normal speed can be
recorded,
When HS 120 fps (640x480) is selected:
Movies are captured for up to 7 minutes and 15 seconds at high speed, and are played back in slow
motion at a speed four times slower than normal speed.
Recording ! j 10s
Playback K 40s J
Slow motion playback
(no sound)
When HS 15 fps (1920x1080) is selected:
A movie of up to 29 minutes in length is recorded when shooting for the purpose of high speed
playback. Movies are played back two times faster than normal speed.
Recording [ 2 min
i ....
-4 ....
Playback [_ 1 rain
Fast motion playback
(no sound)
_58

The Movie Menu
Autofocus Mode
Enter mode -) MENUbutton -) _ tab -) Autofocus mode
shooting
Select the autofocus method used when recording normal speed movies.
Option _ Description
Focus is locked when the • (_1_movie-record) button is
AF-S Single AF _ressed to start recording.
(default setting) Select this option when the distance between the camera and
the subject will remain fairly consistent.
Camera focuses continuously.
Select this option when the distance between the camera and
AF-F Full-time AF subject will change significantly during recording. The sound of
the camera focusing may be heard in the recorded movie.
Use of Single AF is recommended to prevent the sound of the
camera focusing from interfering with recording.
_59

m
o
Welcome Screen
MENUbutton -_ V tab -_ Welcome screen
Select whether or not a welcome screen is displayed when the camera is turned
on.
Option Description
The camera enters shooting or playback mode without
None (default setting) displaying the welcome screen.
The camera displays a welcome screen and enters shooting or
COOLPIX playback mode.
Displays an image selected for the welcome screen. When the
image selection screen isdisplayed, select an image (_48) and
)ress the _) button.
• As the selected image is saved by the camera, it will be
displayed when the camera is turned on even if the original
Select an image image is deleted.
• Images captured at an Image mode (_ 71) setting of
4608x2592, images captured with easy panorama, and
copies created at a size of 320 x 240 or smaller using the small
picture (_18) or crop (_19) function cannot be selected.
_60

The Setup Menu
Time Zone and Date
MENUbutton -_ V tab -) Time and date
zone
Set the camera clock.
Option
Date and time
Date format
Time zone
' Description
Set camera dock to current date and
time.
Use the multi selector to set the date and
time in the date screen.
Select an item: Press• or • to change
between D, M, Y, hour, and minute.
Edit tile highlighted item: Rotate tile
multi selector or press • or V.
Apply the setting: Select the minute
setting and press the _) button.
The available date formats are Year/Month/Day, Month/Day/Year,
and Day/Month/Year.
Home time zone cars be specified and daylight saving time carl be
enabled or disabled. When the travel destination (_)') is selected, local
time (_'_63) isautomatically calculated and images are saved with the
shooting date and time of the selected region.This can be useful when
travdling.
Selecting the Travel Destination Time Zone
1Use the multi selector to select Time zone
and press the _) button.
•The Time zone screen is displayed.
ta
R
ta
t_
2Select _ Travel destination and press the
I_) button.
• The date and time displayed in the monitor changes
according to the region currently selected.
_61
Other manuals for CoolPix S8200
3
Table of contents
Other Nikon Digital Camera manuals

Nikon
Nikon FG-20 User manual

Nikon
Nikon 1 V1 User manual

Nikon
Nikon D60 User manual

Nikon
Nikon coolpix A300 User manual

Nikon
Nikon 26294 User manual

Nikon
Nikon Coolpix L15 User manual

Nikon
Nikon CoolPix S6200 User manual

Nikon
Nikon D70 User manual
Nikon
Nikon CoolPix S570 User manual

Nikon
Nikon Coolpix S510 User manual

Nikon
Nikon D700 User manual

Nikon
Nikon D4s Installation and maintenance instructions

Nikon
Nikon F4 User manual

Nikon
Nikon Coolpix P600 User manual

Nikon
Nikon COOLPIX S6150 User manual

Nikon
Nikon COOLPIX S2550 User manual

Nikon
Nikon 26269 User manual

Nikon
Nikon COOLPIX S5 User manual

Nikon
Nikon 1 J3 User manual

Nikon
Nikon D300 User manual