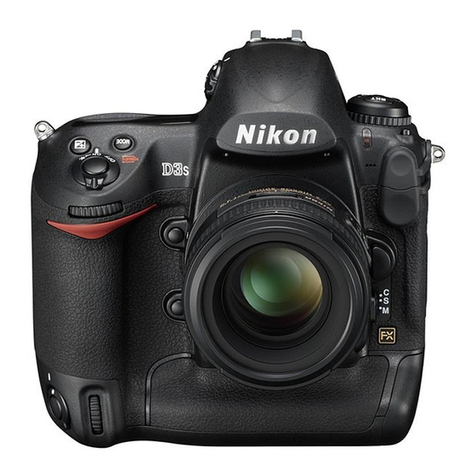
Nikon D300 User manual

Nikon
DIGITAL CAMERA
)(
User's Manual

Exposure
- Controlling How the Camera Sets Exposure
This section describes the options available to control exposure,
including metering, exposure mode, exposure lock, exposure
com pensation, and bracketing.
Metering ......................................................................... pg. 100
Exposure Mode .............................................................. pg. 102
P: Programmed Auto ...................................................................pg. 104
E_:Shutter-Priority Auto ..............................................................pg. 106
Ft:Aperture-Priority Auto ...........................................................pg. 107
11:Manual .........................................................................................pg. 109
Autoexposure (AE) Lock ............................................... pg. 112
Exposure Compensation .............................................. pg. 114
Bracketing ....................................................................... pg. 116
99

Metering determines how the camera sets exposure. The
following options are available:
Method Description
Recommended in most situations. Camera meters a wide area
of the frame and sets exposure according to distribution of
3D color
matrix II brightness, color, distance, and composition for natural
results.
Camera meters entire frame but assigns
greatest weight to area in center of
_3 frame (defaults to 8-ram circle in center
Center- ofviewfinder; if CPU lens is attached,
weighted area can be selected using Custom
Setting b5, [Center-weighted area],
pg. 277). Classic meter for portraits, i Center weight area 2
Camera meters circle 3 mm (0.12 in.) in
diameter (approximately 2% of frame).
Circle is centered on current focus
point, making it possible to meter off-
_3 center subjects (if non-CPU lens is used
Spot or if Auto-area AF is in effect (pg. 64),
camera will meter center focus point). Spot metering
Ensures that subject will be correctly area 2
exposed, even when background is
much brighter or darker, i
I For improved precision with non-CPU lenses, specify lens focal length and
maximum aperture in [Non-CPU lens data] menu (pg. 197).
2 Metered area is not actually displayed in viewfinder.
100

To choose a metering method,
rotate the metering selector until
the desired mode is displayed.
Metering selector
%
%
[] 3D Color Matrix II Metering
In matrix metering, exposure is set using a 1,005-segment RGB sensor.
Use a type G or D lens for results that include range information (3D color
matrix metering II;see page 352 for information on lens types). With other
CPU lenses, 3D range information is not included (color matrix metering
II). Color matrix metering is available when focal length and maximum
aperture of non-CPU lens are specified using [Non-CPU lens data] item in
setup menu (see page 197; center-weighted metering is used if focal
length or aperture is not specified).
[] See Also
For information on choosing the size of the area assigned the greatest
weight in center-weighted metering, see Custom Setting b5 ([Center-
weighted area], pg. 277). For information on making separate
adjustments to optimal exposure for each metering method, see Custom
Setting b6 ([Fine tune optimal exposure], pg. 277). 101

Exposure mode determines how the camera sets shutter speed
and aperture when adjusting exposure. Four modes are available:
programmed auto (P), shutter-priority auto (,S), aperture-priority
auto (sq),and manual (M).
Mode Description
Programmed
Pauto
(pg. 104)
Shutter-priority
.5 auto
(pg. 106)
Aperture-
priority auto
(pg. 107)
Manual
!I (pg. 109)
Camera sets shutter speed and aperture for
optimal exposure. Recommended for snapshots
and in other situations in which there is little time
to adjust camera settings.
User chooses shutter speed; camera selects
aperture for best results. Use to freeze or blur
motion.
User chooses aperture; camera selects shutter
speed for best results. Use to blur background for
portraits or bring both foreground and
background into focus for landscape shots.
User controls both shutter speed and aperture.
Set shutter speed to "bu I_b" for long time-
exposures.
[] LensTypes
When using a CPUlensequipped with an aperture ring (pg. 352), lock the
aperture ring at the minimum aperture (highest f-number). Type Glenses
are not equipped with an aperture ring.
Non-CPU lenses can only be used in exposure mode A (aperture-priority
auto) and !I (manual). In other modes, exposure mode A is automatically
selected when a non-CPU lens is attached. The exposure mode indicator
(P or .S)in the control panel will blink and A will be displayed in the
viewfinden
102

To choose the exposure mode, press the IVlODE
button and rotate the main command dial
until the desired mode is displayed in the
control panel or viewfinder.
MODEbutton
Main command
dial
[] Depth-of-Field Preview
To preview the effects of aperture, press and hold
the depth-of-field preview button. The lens will
be stopped down to the aperture value selected
by the camera (modes Pand .5) or the value
chosen by the user (modes .qand !I), allowing
depth of field to be previewed in the viewfinder.
Preview button
[] Custom Setting e4--Modeling Flash
This setting controls whether the built-in flash and the SB-900, SB-800,
SB-600, SB-R200, and other optional flash units that support the Creative
Lighting System (CLS; see page 357) will emit a modeling flash when the
depth-of-field preview button is pressed. See page 297 for more
information.
[] See Also
See page 96 for information on auto ISO sensitivity control. For
information on using the [Long exp. NR] option in the shooting menu for
reducing noise at slow shutter speeds, see page 262. For information on
choosing the size of the increments available for shutter speed and
aperture, see Custom Setting b2 ([EV steps for exposure cntrl.], pg. 275).
For information on changing the roles of the main and sub-command
dials, see Custom Setting f7 ([Customize command dials] > [Change main/
sub], pg. 307). 103

P: Programmed Auto
In this mode, the camera automatically adjusts shutter speed and
aperture according to a built-in program to ensure optimal
exposure in most situations. This mode is recommended for
snapshots and other situations in which you want to leave the
camera in charge of shutter speed and aperture. To take
photographs in programmed auto:
1MODEbutton
Select exposure mode P.
Press the MODEbutton and rotate the
main command dial until Pisdisplayed
in the viewfinder and control panel.
|Main command dial
2Frame a photograph, focus, and shoot.
Shutter speed: 1/320 S
Aperture: f/9
104

[] Flexible Program
In exposure mode P, different combinations of
shutter speed and aperture can be selected by
rotating the main command dial ("flexible
program"). Rotate the command dial to the right
for large apertures (small f-numbers) that blur
background details or fast shutter speeds that
"freeze" motion. Rotate the command dial to the Main command dial
left for small apertures (large f-numbers) that
increase depth of field or slow shutter speeds that
urmotioncom inationsoro ucetho me
exposure. While flexible program isin effect, an
asterisk ("*") appears in the control panel. To [_ [restore default shutter speed and aperture C • _A IS_{_]
settings, rotate the command dial until the
asterisk is no longer displayed, choose another mode, or turn the camera
off.
Shutter speed: 1/2,500 S Shutter speed: 1/60 S
Aperture: f/2.8 Aperture: f/22
[] See Also
See page 407 for information on the built-in exposure program.
105

.'3:Shutter-Priority Auto
In shutter-priority auto, you choose the shutter speed while the
camera automatically selects the aperture that will produce the
optimal exposure. To take photographs in shutter-priority auto:
1Select exposure mode MODEbutton
S.
Press the MODEbutton and
rotate the main command
dial until ,.qis displayed in
the viewfinder and
control panel. Main command dial
125 F5.6 }
2Choose a shutter speed.
Rotate the main command dial to
choose the desired shutter speed.
Shutter speed can be set to "x 2So" or
to values between 30 s (3o") and
1/8,000s (Booo). Use slow shutter speeds to suggest motion by
blurring moving objects, high shutter speeds to "freeze"
motion.
Slow shutter speed (I/6 S)Fast shutter speed (1/1,600 S)
3Frame a photograph, focus, and shoot.
[] See Also
See page 393 for information on what to do if flashing "_,u [b" indicator
appears in the shutter-speed displays.
106

Aperture-Priority Auto
In aperture-priority auto, you choose the aperture while the camera
automatically selects the shutter speed that will produce the
optimal exposure. To take photographs in aperture-priority auto:
1Select exposure MODEbutton
mode A.
Press the MODEbutton
and rotate the main
command dial until ,qis
displayed in the
viewfinder and control
panel.
/
Main command dial
F5.6 ]
2
Choose an aperture. __
Rotate the sub- __-_%7_
command dial to _ _ I_ '----" _"_I
choose the desired /' _°;_...... [_C. _ [5_] J
aperture from values _ _ I_J
between the minimum Sub-command dial
and maximum for the
lens. Small apertures (high f-numbers) increase depth of field
(see page 103), bringing both foreground and background
into focus. Large apertures (low f-numbers) soften
background details in portraits or other compositions that
emphasize the main subject.
Small aperture (f/36) Large aperture (f/2.8)
107

3Frame a photograph, focus, and shoot.
[] Non-CPU Lenses
If the maximum aperture of the lens has been ___
specified using the [Non-CPU lens data] item in i___1-- El
I c.D
setup menu (pg. 197) when a non-CPU lens is A [
attached, the current f-number will be displayed
in the viewfinder and control panel, rounded to
the nearest full stop. Otherwise the aperture
displays will show only the number of stops (_F,
with maximum aperture displayed as _FS) and the f-number must be read
from the lens aperture ring.
108

•"" Manual
•lie
In manual exposure mode, you control both shutter speed and
aperture. To take photographs in manual exposure mode:
1Select exposure MODEbutton
mode rl.
Press the MODEbutton
and rotate the main
command dial until rl
is displayed in the
viewfinder and
control panel.
25FJ F5o.5 1
Main command dial
109

2Choose aperture and shutter speed.
Rotate the main command dial to choose a shutter speed, and
the sub-command dial to set aperture. Shutter speed can be
set "x 25o" or to values between 30 s and 1/8,000s, or the
shutter can be held open indefinitely for a long time-exposure
(b_ ,L,L-_,pg. 111). Aperture can be set to values between the
minimum and maximum values for the lens. Check exposure
in the electronic analog exposure displays (see page 111), and
continue to adjust shutter speed and aperture until the
desired exposure isachieved.
Sub-command dial
Setting
aperture b,lC
Setting
shutter
speed ( ......."_,,,:::v-7I)
A'JI
Main command dial
3Frame a
photograph,
focus, and
shoot. Shutter speed: 1/250 S
Aperture: f/8
[] AF Micro Nikkor Lenses
Provided that an external exposure meter is used, the expos ure ratio need
only be taken into account when the lens aperture ring is used to set
aperture.
110

[] Electronic Analog Exposure Displays
The electronic analog exposure displays in the control panel and
viewfinder show whether the photograph would be under- or over-
exposed at current settings. Depending on the option chosen for Custom
Setting b2 ([EV steps for exposure cntrl.], pg. 275), the amount of under- or
over-exposure is shown in increments of 1/3 EV, 1/2EV, or 1EV. If the limits
of the exposure metering system are exceeded, the displays will flash.
CustomSettingb2setto [1/3step]
[] Long Time-Exposures
At a shutter speed of bu Lb, the shutter will
remain open while the shutter-release button
is held down. Use for long time-exposure
photographs of moving lights, the stars, night
scenery, or fireworks. Nikon recommends
using a fully-charged EN-EL3e battery or an
optional EH-Sa or EH-5 AC adapter to prevent
loss of power while the shutter is open. Note
that noise and color distortion may be present
in long exposures; before shooting, choose [On] for the [Long exp. NR]
option in the shooting menu (pg. 262).
[] See Also
See Custom Setting fl 0 ([Reverse indicators], pg. 310) for information on
reversing the electronic analog exposure display.
Shutter speed: 35 s
Aperture: f/25
111

Use autoexposure lock to recompose photographs after metering
exposure.
1Select center-weighted or
spot metering (pg. 100).
Matrix metering will not
produce the desired results
with autoexposure lock. If
using center-weighted
metering, select the center
focus point with the multi
selector (pg. 66).
Metering selector
2Lock exposure.
Position the subject in the selected
focus point and press the shutter-
release button halfway. With the
shutter-release button pressed halfway
and the subject positioned in the focus
point, press the AE-//AF-I.button to lock
exposure (and focus, except in manual
focus mode). Confirm that the in-focus
indicator (0) appears in the viewfinder.
While exposure lock is in effect, an AE-I.
indicator will appear in the viewfinder.
Shutter-release
button
AE-UAF-[button
112

3Recompose the
photograph.
Keeping the AE-L/AF-Lbutton
pressed, recompose the
photograph and shoot.
[] Metered Area
In spot metering, exposure will be locked at the value metered in a 3-mm
(0.12 in.) circle centered on the selected focus point. In center-weighted
metering, exposure will be locked at the value metered in the center of
the viewfinder (the default area for center-weighted metering is an 8-mm
circle in the center of the viewfinder).
[] Adjusting Shutter Speed and Aperture
While exposure lock is in effect, the following settings can be changed
without altering the metered value for exposure:
Exposuremode Settings
PShutter speed and aperture (flexible program; pg. 105)
S Shutter speed
RAperture
The new values can be confirmed in the viewfinder and control panel.
Note that the metering method can not be changed while exposure lock
is in effect [changes to metering take effect when the lock is released).
[] See Also
If [On] is selected for Custom Setting cl ([Shutter-release button AE-L],
pg. 279), exposure will lock when the shutter-release button is pressed
halfway. For information on changing the role of the AE-//AF-/button, see
Custom Setting f6 [[Assign AE-L/AF-L button], pg. 306). 113

Exposure compensation is used to alter exposure from the value
suggested by the camera, making pictures brighter or darker.
In exposure mode rl, only the exposure information shown in the
electronic analog exposure display is affected; shutter speed and
aperture do not change.
To choose a value for exposure
compensation, press the [] button and
rotate the main command dial until the
desired value is displayed in the control
panel or viewfinder.
[] button
Main command dial
+0 EV
([] button pressed)
-0.3 EV
+2.0 EV
114

Exposure compensation can be set to values between -5 EV
(underexposure) and +5 EV(overexposure) in increments of 1/3 EV.
In general, choose positive values to make the subject brighter,
negative values to make it darker.
-1 EV No exposure +1 EV
compensation
At values other than _+0,the 0 at the center of the electronic
analog exposure displays will flash and a [] icon will be displayed
in the control panel and viewfinder after you release the [] button.
The current value for exposure compensation can be confirmed in
the electronic analog exposure display by pressing the [] button.
Normal exposure can be restored by setting exposure
compensation to _+0.Exposure compensation is not reset when
the camera is turned off.
÷
[] See Also
For information on choosing the size of the increments available for
exposure compensation, see Custom Setting b3 ([Exp comp/fine tune],
pg. 275). For information on making adjustments to exposure
compensation without pressing the [] button, see Custom Setting b4
([Easy exposure compensation], pg. 276). 115

The D300 offers three types of bracketing: exposure bracketing,
flash bracketing, and white balance bracketing. In exposure
bracketing (pg. 117), the camera varies exposure compensation
with each shot, while in the case of flash bracketing (pg. 117), flash
level is varied with each shot (i-TTL and, in the case of the SB-900
and SB-800, auto aperture flash control modes only; see pages
357-360). Only one photograph is produced each time the shutter
is released, meaning that several shots are required to complete
the bracketing sequence. Exposure and flash bracketing are
recommended in situations in which it is difficult to set exposure
and there is not enough time to check results and adjust settings
with each shot.
In white balance bracketing (pg. 121), the camera creates multiple
images each time the shutter is released, each with a different
white balance adjustment. Only one shot is required to complete
the bracketing sequence. White balance bracketing is
recommended when shooting under mixed lighting or
experimenting with different white balance settings.
[] See Also
At default settings, the camera varies both exposure and flash level.
Custom Setting e5 ([Auto bracketing set], pg. 297) is used to choose the
type of bracketing performed.
Changes to bracketing settings can be made using the Fa button (the
default setting, see Custom Setting f4, [Assign FUNC. button], pg. 302), the
depth-of-field preview button (Custom setting fS, [Assign preview
button]), pg. 305), or the AE-L/AF-Lbutton (Custom Setting f6, [Assign AE-L/
AF-L button], pg. 306). Note that some "button press" options can not be
combined with options using "+dials." The explanation that follows
assumes that bracketing is assigned to the Fa button.
116

II Exposureand FlashBracketing
1 Select flash or exposure bracketing.
Choose the type of bracketing to be
performed using Custom Setting e5
([Auto bracketing set], pg. 297). Choose
[AE & flash] to vary both exposure and
flash level (the default setting), [AE only]
to vary only exposure, or [Flash only] to vary only flash level.
2 Choose the number of shots.
Pressing the Fnbutton, rotate the main command dial to
choose the number of shots in the bracketing sequence. The
number of shots is shown in the control panel.
Fnbutton
ii'\./_' Numberof shots
......)
pan I
Main command
dial Exposure and flash
bracketing indicator
At settings other than zero, a _ icon
and exposure and flash bracketing
indicator will be displayed in the
control panel, and a [] icon will blink in
the viewfinder.
\l/
117
Other manuals for D300
15
Table of contents
Other Nikon Digital Camera manuals

Nikon
Nikon COOLPIX L1 User manual

Nikon
Nikon Coolpix P900 User manual

Nikon
Nikon Coolpix 880 User manual

Nikon
Nikon F80 - F 80 SLR Camera User manual

Nikon
Nikon D3X User manual

Nikon
Nikon D3000 User manual

Nikon
Nikon 1 V1 User manual

Nikon
Nikon COOLPIX 57000 User manual

Nikon
Nikon CoolPix P7100 User manual

Nikon
Nikon D7000 User manual

Nikon
Nikon COOLPIX 5700 User manual

Nikon
Nikon COOLPIX 55300 User manual

Nikon
Nikon D7500 User manual

Nikon
Nikon COOLPIX S4000 User manual

Nikon
Nikon CoolPix P500 User manual

Nikon
Nikon Coolpix P350 User manual

Nikon
Nikon Coolpix User manual

Nikon
Nikon 26269 User manual

Nikon
Nikon Coolpix P600 User manual

Nikon
Nikon Coolpix L15 Operating instructions