manuals.online logo
Brands
  1. Home
  2. •
  3. Brands
  4. •
  5. Nikon
  6. •
  7. Digital Camera
  8. •
  9. Nikon D7100 User manual

Nikon D7100 User manual

Other manuals for D7100

4

Other Nikon Digital Camera manuals

Nikon Coolpix L5 User manual

Nikon

Nikon Coolpix L5 User manual

Nikon D700 User manual

Nikon

Nikon D700 User manual
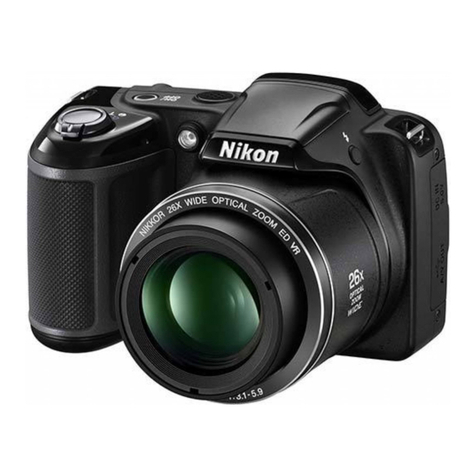
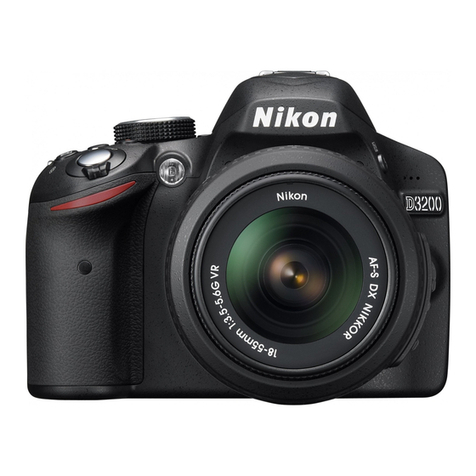
Nikon F90S User manual

Nikon

Nikon F90S User manual

Nikon COOLPIX 8700 User manual

Nikon

Nikon COOLPIX 8700 User manual

Nikon COOLPIX L1 User manual

Nikon

Nikon COOLPIX L1 User manual

Nikon Coolpix W150 User manual

Nikon

Nikon Coolpix W150 User manual

Nikon D3500 User manual

Nikon

Nikon D3500 User manual

Nikon Coolpix P5100 User guide

Nikon

Nikon Coolpix P5100 User guide

Nikon 1 v2 User manual

Nikon

Nikon 1 v2 User manual

Nikon Coolpix S33 User manual

Nikon

Nikon Coolpix S33 User manual

Nikon Coolpix 990 User manual

Nikon

Nikon Coolpix 990 User manual

Nikon FM3A User manual

Nikon

Nikon FM3A User manual

Nikon D70s User manual

Nikon

Nikon D70s User manual

Nikon KEYMISSION 170 User manual

Nikon

Nikon KEYMISSION 170 User manual

Nikon CoolPix S10 User manual

Nikon

Nikon CoolPix S10 User manual

Nikon Coolpix S3100 User manual

Nikon

Nikon Coolpix S3100 User manual

Nikon D5000 User manual

Nikon

Nikon D5000 User manual

Nikon 25480 User manual

Nikon

Nikon 25480 User manual
Nikon COOLPIX 3700 User manual

Nikon

Nikon COOLPIX 3700 User manual

Nikon CoolPix S202 User manual

Nikon

Nikon CoolPix S202 User manual

Nikon D4 User manual

Nikon

Nikon D4 User manual

Nikon N50 User manual

Nikon

Nikon N50 User manual

Nikon COOLPIX L820 User manual

Nikon

Nikon COOLPIX L820 User manual

Nikon Coolpix 5000 User manual

Nikon

Nikon Coolpix 5000 User manual

Popular Digital Camera manuals by other brands

Canon WP-DC35 user guide

Canon

Canon WP-DC35 user guide

Xiaomi 70mai Dash Cam Lite user manual

Xiaomi

Xiaomi 70mai Dash Cam Lite user manual

Samsung PL70 Quick start manual

Samsung

Samsung PL70 Quick start manual

GE E1680W user manual

GE

GE E1680W user manual

Canon EOS 1200D instruction manual

Canon

Canon EOS 1200D instruction manual

Tevion MD 86497 user guide

Tevion

Tevion MD 86497 user guide

Exakta VX Features

Exakta

Exakta VX Features

Kodak Digital Science DC120 user guide

Kodak

Kodak Digital Science DC120 user guide

Vectra Fitness H1 Quick reference guide

Vectra Fitness

Vectra Fitness H1 Quick reference guide

Olympus IR 500 - 4MP Digital Solutions Camera Manuel de Référence

Olympus

Olympus IR 500 - 4MP Digital Solutions Camera Manuel de Référence

Samsung EC-L100ZBBA brochure

Samsung

Samsung EC-L100ZBBA brochure

FujiFilm FINEPIX BL01124-201 owner's manual

FujiFilm

FujiFilm FINEPIX BL01124-201 owner's manual

Panasonic DMC-L10KPP Service manual

Panasonic

Panasonic DMC-L10KPP Service manual

Hyundai Electric HYU-CC-CHBF12001 Quick installation guide

Hyundai Electric

Hyundai Electric HYU-CC-CHBF12001 Quick installation guide

Sony DSC-WX80 specification

Sony

Sony DSC-WX80 specification

Olympus CAMEDIA C-3030ZOOM overview

Olympus

Olympus CAMEDIA C-3030ZOOM overview

Teledyne Piranha4 user manual

Teledyne

Teledyne Piranha4 user manual

Kodak EasyShare M532 Extended user guide

Kodak

Kodak EasyShare M532 Extended user guide

manuals.online logo
manuals.online logoBrands
  • About & Mission
  • Contact us
  • Privacy Policy
  • Terms and Conditions

Copyright 2025 Manuals.Online. All Rights Reserved.

1

GaryHewett&DavidSmall
17January2016
NikonD‐7100




TheNikonD‐7100isaverysophisticatedcameracapableoftakinghighqualitypicturesinawidevariety
ofsituations.Thoughthecameraappearsquitecomplicated,withjustalittletraining,youcanbetaking
greatpicturesveryshortly.

ThisdocumentisanaidetogoalongwithhandsontrainingontheNikonD‐7100.Thisisnotmeantto
beacompleteinstructionmanual.Manualsexist



CHECKLIST:

1. Ensurethatthecamerabatteryisfullychargedandthatanextrabatteryisbroughtalong.
2. MakesurethattwoSDcardsareintheirslotsandthatthetopofthecamerashowsthatatleast
500picturescanbetaken.
3. Verifyphotosizeandqualitypercustomerrequest.UsuallysettoJPEGFineunlessotherwise
directed.
4. SetISOto800andWhiteBalance(WB)to“A”.
5. Makesurethatfocusissettoautounlessyouspecificallywillmanuallyfocus.
6. ImageStabilization(OS)shouldbesetto“On”.
7. Makesurethatthelensfilteriscleananddoesn’thaveanydebrisorfingerprints
8. MounttheGPSonthehotshoeandplugthecableintothelowerrightsideofthecamera.
9. TakethecameraoutsidetoverifyGPSsignal.

















2

BasicCameraControls

Camerasettingscanbeviewedeitherthroughtheviewfinderbylightlypressingtheshutterbuttonorby
pressingthe“info”buttononthelowerleftofthebackofthecamera.

Turnthecameraonbyslidingleverto“on”



























WB(WhiteBalance),QUAL(ity)andISOcanbechangedbypressingandholdingbuttonsjusttothe
lowerleftofwritingonthecamera

“WB”etcthenusethethumb(back)wheeltochangevaluesandtheforefinger(front)wheelto
changeoverallsetting.WB=leaveon“A”forAuto–usethumbwheeltochange.Forefingerwheel
changescustomsettingsandshouldbeon“0”

QUAL=“L”&“FINE”–unlesssomethingelseisspecificallyrequested.
 Thethumbwheelchanges“Fine”,“Norm”&“Basic”
 Theforefingerwheelchanges“L”,“M”&“S”
 ThesmallestpossibleimagesizeiswiththeSize=“S”andJPEG=“Basic”~1.2Mb
 NormalpicturesizewithSize=“L”andJPEG=“Fine”~5.5Mb

ISO=Shouldbesetat800formostuses.Thethumbwheelchangesvalues,andtheforefingerwheel
changesbetween“ISO”and“ISO‐AUTO”.Leaveon“ISO”formostuses,whichlockstheISOto800.
3

TopviewofLCDwhile“WB”ispressed.













LensSwitches:

LensLock–needstobeoff(slideistowardfrontoflenswhenoff)

AF‐M–shouldbeonAF(auto‐focus).Focuscanbeconfirmedbythepresenceofsmall
blackrectangleinviewfinderwithshutterlightly.M(Manual)canbeusedforaerial
photography.Thefocusringcanbesettothe∞(infinity)sengwhenthe“M”modeis
usedtoensurethatobjectsmorethanabout100feetawayarealwaysinfocus.NEVER
twistthefocusringifthesettingison”AF”.AF‐Monthecamerabodyneedstomatch
thelenssetting.

“OS”–On‐Off–shouldbe“ON”–imagestabilization






















4


Leavedialon“S”forsingleshotformostpurposes.“CL”and“CH”arelowandhighburstmodes
andgenerallyshouldn’tbeused.


















Thereisadioptersettingsothatthecameraviewcanbesetforindividualeyesight.Changing
thediopterDOESNOTchangeanyofthecamerapicturessettings.Ifyouusethedioptertoget
aclearviewthroughtheviewfinder,pleasedoacourtesyandresetitforthenextuser.


Usethe“P”(Program)dialsettingwherethecameradeterminesthebestshutterspeedandF‐stop.
Othersettingssuchas“M”(manual),“A”(aperturepriority),“S”(shutterpriority)shouldonlybeusedif
oneisthoroughlyfamiliarwiththecamera.Don’tusethegreencameraiconwith“auto”overit
becauseitwilltryusingflashwhichisnotappropriateforaerialphotography.


















5

Topviewofcamera.Fromlefttoright;exposurecontrolknobandLCDScreenshowstypicalsettings.


























LCDPanelindicatorwhencameraisturnedon:

 Batterycharge–makesurefullychargedbeforegoingonmission

  Picturesize/Quality   SDCardused

WhiteBalanceISO‐AUTO(shouldbeoff)

RemainingPictures



ExposuremodeShutterSpeed


FocusmodeF‐Stop
(p75manual)



6

Viewwiththe“QUAL”buttonpressedwhereimagequalitycanbeadjusted.Notethatthenumber
“697”isthenumberofremainingpicturesthatcanbefitontheSDCardsinthecameraatsettingofL
(JPEGquality)andFINE(quality)selected.

















LCDscreenshowingISOsetting–“ISO”buttononbackofcamerabeingheld)



























7

SideviewofcamerashowingdoorforSDCards

















DooropenandSDcardshalfwayout–makesurethattheyarefullyinsertedandstayflushwiththe
camerabody.Thetopcardiswrittentofirst.
















Thecameraholds2SDcards(16Ginthiscase).Intypicalusethetopcardrecordspicturesfirstand
whenitisfullthebottomcardisused.Alternatesettingsareavailablewherecopiesarekeptonboth
cardsorwhereonecardisusedforhighestqualitypictureandtheotherforalowerquality.These
optionsareaccessedthroughthemenu.Pressthe“menu”buttononthebackofthecamerathenselect
thecameraicon“ShootingMenu”usingthejoystick.Nextpressthejoystickrightandtoggledownto
“RoleplayedbycardinSlot2”.Togglerightandthethreeoptionswillshow.Select“overflow”formost
usesandpress“ok”incenterofjoysticktoconfirmsetting.Lightlypresstheshuttertogetoutofthe
menu.




8

Thisscreenshowswhenthe“info”buttonispushed(seepage241inNikonmanual)
















A“MENU”Screen






























9

UsingtheGPS:

TheD‐7100kitincludestheNikonGP‐1aGPSmodulethatfitsintotheflashshoeontopofthe
camera.









 TheGPSmustbemountedonthecamerainordertorecordlocationinformation

1. SlidetheGPSintothehotshoeslotontheverytopofthecamera.
2. Plugthecableintothereceptacleattheverybottomleftsideofthecamera.Ensurethat
theplugisfirmlypushedin.



















3. Turnthecameraon.AredlightwillstartblinkingonthebackoftheGPSunit.OnceaGPS
signallockhasbeenachievedthelightwillturntosolidgreen(blinkinggreenmeansthatit
almosthasagoodlock).Youmayneedtotakethecameraoutsidewithaclearviewofthe
skyforabout5minutestogetagoodsignallock.







10

4. MakesurethatthecamerasettingsareappropriatefortheGPS.Pressthe“Menu”button
ontheupperleftofthecameraback.























5. Usingthe“toggle”wheelhighlightthe“notepad”onthelowerleftofthescreen.
6. Highlight“GPS”inthemenuthentoggleright.Notethatboth“Standbytimer”and“Usethe
GPStosetcameraclock”areturned“ON”



















