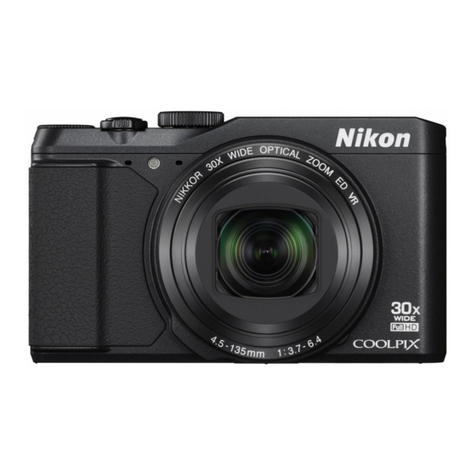
Nikon COOLPIX 8700 User manual

En
Quick Start Guide
DIGITAL CAMERA

Table of Contents
Step 1
Step 1 Install Nikon View ....................................pg. 17
Step 2
Step 2 Transfer pictures .......................................pg. 28
Windows...........................................pg. 18
Macintosh.........................................pg. 23
Install Nikon View and transfer pictures
pp. 16–33
Check the package contents
pg. 1
Take pictures
pp. 2–15
Step 1
Step 1 Charge the batteries...................................pg. 2
Step 2
Step 2 Attach the camera strap.............................pg. 3
Step 3
Step 3 Insert the battery........................................pg. 4
Step 4
Step 4 Insert a memory card..................................pg. 5
Step 5
Step 5 Turn the camera on.....................................pg. 6
Step 6
Step 6 Choose a language and set the clock........pg. 7
Step 7
Step 7 Format the memory card............................pg. 9
Step 8
Step 8 Take pictures .............................................pg. 11
Step 9
Step 9 View pictures ............................................pg. 15

Check the package contents 1
Check that you have all the items listed below.
COOLPIX 8700 digital camera
MH-53 battery charger
with power cable Camera strap
Warranty
Warranty
Nikon View CD-ROM
Nikon View
Reference Manual
Nikon View Reference Manual CD-ROM
EN-EL1 rechargeable battery
(with terminal cover)
Quick Start Guide
(this guide)
En
Quick Start Guide
DIGITAL CAMERA
Guide to Digital
Photography with the
COOLPIX 8700
The Nikon Guide to Digital Photography
with the
DIGITAL CAMERA
En
NOTE: Memory
cards are not
included with
the camera.
CHARGE
MH
–
53
LITHIUM IONBA
TTERYCHARGER
EG-E5000
Audio/video cable
UC-E1 USB interface cable
Lens cap with cord
Accessory shoe cover
(on camera)

2 Take pictures
Charge the batteries
Step 1
Charge the batteries
Connect the power cable to the MH-53 battery charger (
1
)
and insert the wall plug into a power outlet (
2
). The CHARGE
lamp will light (
3
).
CHARGE
MH
–
53
LITHIUM IONBA
TTERYCHARGER
CHARGE
MH
–
53
LITHIUM IONBA
TTERYCHARGER
Remove the terminal cover
from EN-EL1 and insert the
battery into the MH-53.
Slide the battery into the charger
terminals first.
The CHARGE lamp will start to
blink.
CHARGE
MH
–
53
LITHIUM IONBA
TTERYCHARGER
2
1
3
CHARGE

3
The Lens Cap
When replacing or removing
the lens cap, press the tabs on
either side of the cap to release
the latch (
1
). To avoid losing
the lens cap, use the cord
provided to attach it to the
camera as shown (
2
).
12
Charge the batteries/Attach the camera strap
CHARGE
MH
–
53
LITHIUM IONBA
TTERYCHARGER
Charging is complete when the
CHARGE lamp stops blinking.
An exhausted battery can be fully
recharged in about two hours.
Step 2
Attach the camera strap
Attach the camera strap securely to the two eyelets on the camera body as
shown below.

4
Insert the battery
Step 3
Insert the battery
2
1
Close the battery-chamber cover
Close the cover (
1
) and slide the
latch ( ) to the position (
2
).
Be sure that the battery-chamber
cover is properly latched.
Insert the battery
Insert the battery as shown in the
label inside the battery-chamber
cover, making sure the positive
(“+”) and negative (“–”) terminals
are in the correct orientation.
Inserting the battery upside
down or backwards could dam-
age the camera. Check to be
sure the battery is in the correct
orientation.
EN-EL1
2CR5
2
1
After confirming that the camera
is off, open the battery-chamber
cover
Slide the battery-chamber cover
latch ( ) to the position (
1
)
and flip the battery-chamber cover
open (
2
).

5Take pictures
Insert a memory card
Close the memory card slot
cover
Step 4
Insert a memory card
Open the memory card slot
cover (
1
)
A yellow notice describing mem-
ory card insertion is placed in the
memory card slot at shipment.
Remove the notice and read the
instructions (
2
).
2
CF CARD
Insert a memory card
Check that the eject button is all
the way down (
1
) and then insert
a memory card as shown in the
label inside the memory card slot
cover (
2
).
1
1
2
Insert memory cards terminals first.
Inserting the card upside down or
backwards could damage the cam-
era or the card. Check to be sure the
card is in the correct orientation.
Terminals
Direction of
Insertion
Front
Upside down
Sideways
Do not insert

6
Turn the camera on
Step 5
Turn the camera on
Remove the lens cap and
slide the mode selector to
(shooting mode)
Turn the camera on
Open the monitor
4
2
13
5
Auto Power Off
If no operations are performed for about 1 minute (the default setting),
the camera will enter standby mode and monitor will turn off automati-
cally to save power. To reactivate the camera, press the button or
press the shutter-release button halfway.

7Take pictures
Step 6
Choose a language and set the clock
The first time the camera is turned on, a language-selection dialog will be
displayed in the monitor. Follow the steps below to choose a language and
set the time and date.
Choose a language and set the clock
Move cursor up
Cancel and return
to previous menu,
or move cursor left
Display sub-menu,
move cursor right,
or make selection
Move cursor down
Press multi selector left, right, up, or down
Press button to
make selection
Select Yes.
London, Casablanca
HOME TIME ZONE
BK Set
MENU QUICK
Choose a language.
LANGUAGE
Cancel Set
Deutsch Nederlands
SvenskaEnglish
Español
Français
Italiano
MENU QUICK
Display DATE menu.
DATE
Set time and date?
No
Yes
Select home time zone.
London, Casablanca
HOME TIME ZONE
BK Set
MENU QUICK
TIME ZONE menu displayed.
TIME ZONE
01. 01. 2004 00
:
00
London, Casablanca
Time Zone
DaylightSaving
The multi selector and button are used to navigate the cam-
era menus.

8
Choose a language and set the clock
Choose order in which Day,
Month, and Year will be displayed.
.
DATE
01
10 :
15
02 2004.
MYD
Exit to shooting mode.
F5.6
F5.6
F5.6
1 /125
125
1/125 15
15
15
8M
8M
8M
Highlight D M Y.
.
DATE
01
10 :
15
02 2004.
MYD
Select Month. Repeat steps – to
edit Month, Year, hour, and minute.
.
DATE
01
00 :
00
01 2004
MYD
Edit Day (order of Day, Month, and
Year may differ in some areas).
DATE
01
00 :
00
01 2004.
MYD
Display DATE menu.
DATE
01
00 :
00
01 2004.
MYD
To turn daylight saving time on or off,
press multi selector down to highlight
DaylightSaving and press multi se-
lector right. When DaylightSaving
is checked, time will automatically be
TIME ZONE
01. 01. 2004 00
:
00
London, Casablanca
Time Zone
DaylightSaving
advanced one hour. Before proceeding to Step 7, press multi selector up
to highlight current time zone.

9Take pictures
Format the memory card
Step 7
Format the memory card
Memory cards must be formatted before first use. Follow the steps below to
format the card.
Press the button
Press the button to display the SHOOTING menu.
Note that formatting memory cards permanently deletes any data
they may contain. Be sure to copy any photographs and other data
you wish to keep to a computer before proceeding.
Confirm that (auto) mode is selected
If mode is not selected, press the button and rotate the com-
mand dial until the icon is displayed in the top left corner of the
monitor.
F5.6F5.6
1 /125125 1515
8M8M8M
F5.6
1/125 15
8M
Command
dial
button

10
Format the memory card
Exit to shooting mode.
F5.6
F5.6
F5.6
1 /125
125
1/125 15
15
15
8M
8M
8M
Format card. Do not proceed to
Step 8 until formatting is complete.
FORMATTING
Display options.
CF CARD FORMAT
No
Format
WARNING!
All images will be
deleted !
Highlight Format.
CF CARD FORMAT
No
Format
WARNING!
All images will be
deleted !
Highlight CF card format.
CF card format
Controls
Shot confirmation
info.txt
USB
Video mode
Reset all
SET-UP 2/3
Display SET-UP menu.
SET-UP 1/3
Language
Date
Folders
Monitor options
Seq. numbers
Shutter sound
Auto off

11Take pictures
Step 8
Take pictures
The steps below explain how to take pictures in auto mode, an automatic
“point and shoot” mode in which most settings are controlled by the cam-
era. Auto mode is selected by default the first time the camera is used. For
more information on shooting modes, see the Guide to Digital Photography
with the COOLPIX 8700.
Check indicators in the monitor.
The battery level is shown in the monitor as follows:
Display Description
NO ICON Battery fully charged.
Low battery. If flash fires, monitor turns off while Speed-
light recharges.
WARNING!!
BATTERY
EXHAUSTED
Battery exhausted. Recharge and reinsert battery, or use
spare battery.
Take pictures
F5.6F5.6
1 /125125 1515
8M8M8M
Battery level
indicator
Number of exposures
remaining
F5.6
1/125 15
8M
F5.6
1/125 1515
8M

12
Ready the camera
Hold the camera steadily in both hands.
Avoid pressing the but-
tons on the left side of
the camera body.
Be careful not to ob-
struct the red-eye re-
duction lamp.
Don’t Block the Shot
To prevent incorrectly exposed or partially obscured pictures, keep fingers
and other objects away from the lens and flash window.
If the subject is too dark, the built-in
Speedlight will pop up automatically.
Be careful not obstruct the Speedlight.
A warning will appear in the monitor or
viewfinder if the Speedlight is prevented
from popping up.
Take pictures

13Take pictures
Frame the subject
Position the subject in the center of the frame. Pictures can be
framed in the monitor or the viewfinder.
Take pictures
Viewfinder Focus
If the image in the electronic view-
finder seems blurred, rotate the
diopter adjustment control until
the image is in sharp focus. When
operating the diopter control with
your eye to the viewfinder, care
should be taken to avoid acciden-
tally putting your finger in your
eye.
Monitor button
Press the monitor button to
toggle between the moni-
tor and viewfinder.
Zoom buttons
Press Tto zoom in on the subject so
that it fills a larger area of the frame.
Press Wto zoom out, increasing the
area visible in the frame.

14
Take pictures
Take the picture
Press the shutter-release button the rest of the way
down to take the picture. To prevent blur, press the
shutter-release button down smoothly.
The camera has a two-stage shutter-release button. Press the shut-
ter-release button halfway to focus. Press it the rest of the way
down to release the shutter and record a picture.
Focus
Press the shutter-release button halfway to set focus and expo-
sure. Focus and exposure will lock while the shutter-release but-
ton is pressed halfway.
With the shutter-release button pressed halfway, check the focus
and flash indicators in the monitor or electronic viewfinder:
Flash
indicator
(red)
On Flash will fire when picture is taken.
Blinks Flash charging.
Off Flash off or not required.
Focus
indicator
(green)
On Subject in focus.
Blinks
Camera unable to focus on subject at center
of frame. Using focus lock, focus on anoth-
er subject at same distance, then recompose
picture and shoot.
Focus indicator
Flash indicator

15Take pictures
View pictures
Step 9
View pictures
Now that you’ve taken a few pictures, you can transfer (copy) them
to a computer, where they can be viewed, edited, and organized.
Turn the camera off
The lens will retract and the cam-
era displays will turn off.
Press the button
A picture will be displayed in the monitor.
(quick review) button
View additional pictures
Press the multi selector down or
right to view pictures in the order
recorded, up or left to view pic-
tures in reverse order.
To end image review, press the
shutter release button halfway.
Press the shutter-release but-
ton all the way down to take a
picture.
View previous picture
View next picture
Press once Press twice
Press the button once to display images in top left corner of
monitor, twice to view images full screen.

16
Install Nikon View
Step 1
Step 1 Install Nikon View
Step 2
Step 2 Transfer pictures pg. 28
Windows pg. 18
Supported Operating Systems
Windows XP Home Edition/Professional
Windows 2000 Professional
Windows Millennium Edition (Me)
Windows 98 Second Edition (SE)
• Preinstalled versions only
• Only computers with built-in USB ports supported
Macintosh pg. 23
See the back cover for detailed system requirements.
Install Nikon View and transfer pictures
Supported Operating Systems
Mac OS X (10.1.2 or later)
Mac OS 9.0–9.2
• Only computers with built-in USB ports supported

17
Install Nikon View
Step 1
Install Nikon View
Before Installing Nikon View
• Turn off any virus-checking software
• Exit all other applications that may be running
Uninstall Existing Versions of Nikon View and Nikon Capture Version 1.x
• Before installing Nikon View, you will need to uninstall Nikon Capture version
1.x (if installed) and any earlier versions of Nikon View.
Connecting the Camera to a Computer
Be sure to install Nikon View before connecting the camera to your
computer. If the “Add New Hardware” wizard is displayed when
the camera is connected, click Cancel to exit.
Important

18
Install Nikon View Windows
Installing Nikon View (Windows)
Turn the computer on and wait for Windows to start up.
Windows XP Home Edition, Windows XP Professional,
Windows 2000 Professional
When installing, using, or uninstalling Nikon View, log on as the
“Computer administrator” (Windows XP Home Edition, Windows
XP Professional) or “Administrator” (Windows 2000 Professional).
Important
Insert the Nikon View installer CD-ROM into the
CD-ROM drive. The Install Center program will
launch automatically and a language selection
dialog will be displayed. Select a language and
click Next.
If the Language Selection Dialog Is Not Displayed
Select My Computer from the Start menu (Windows XP Home Edition/
Windows XP Professional) or double-click the My Computer icon on
the desktop (other versions of Windows) and double-click the CD-ROM
(NKVIEW6) icon in the My Computer window.
Click Easy Install. The standard in-
stall includes:
• A PTP driver (Windows XP only)
• Coolpix Camera Drivers (Mass Stor-
age driver) (Windows 98 SE only)
• Panorama Maker
• QuickTime 5
• Nikon View
Other manuals for COOLPIX 8700
4
Table of contents
Other Nikon Digital Camera manuals

Nikon
Nikon Coolpix A10 User manual

Nikon
Nikon COOLPIX 5630 User manual

Nikon
Nikon 1 V1 User manual

Nikon
Nikon Coolpix S2900 User manual

Nikon
Nikon D3400 User manual

Nikon
Nikon COOLPIX L1 User manual

Nikon
Nikon FM10 User manual

Nikon
Nikon D300 User guide

Nikon
Nikon CoolPix S4300 User manual

Nikon
Nikon Coolpix P530 User manual

Nikon
Nikon Coolpix L31 User manual

Nikon
Nikon Coolpix L32 User manual

Nikon
Nikon 1 J3 User manual

Nikon
Nikon CoolPix S1100pj User manual

Nikon
Nikon COOLPIX P340 User manual

Nikon
Nikon N50 User manual

Nikon
Nikon N1530 User manual

Nikon
Nikon VQA090AA User manual

Nikon
Nikon COOLPIX L620 User manual
Nikon
Nikon COOLPIX L1OO User manual