Ningbo WFP-001 User manual

INSTRUCTION MANUAL
Food Processor
WFP-001/WFP-001A(no function of blender)
- FOR HOUSEHOLD USE ONLY -
Company:Ningbo Winlim Electric Appliance Co.,Ltd.
Address:No.88 Fengjiazha, Ditang Street, Yuyao Zhejiang,315409, China

IMPORTANT SAFEGUARDS
When using electrical appliances, basic safety precautions should always be followed
including the following:
1. ReadAll Instructions Before Using This Food Chopper
2. To protect against risk of electrical shock do not put cord, plug, or base in water or other
liquid.
3. Close supervision is necessary when any appliance is used by or near children.
4. Unplug from outlet when not in use, before putting on or taking off parts, and before
cleaning.
5.Avoid contacting moving parts.
6. Do not operate any appliance with a damaged cord or plug or after the appliance
malfunctions, or is dropped or damaged in any manner. Call our toll-free customer service
number for information on examination, electrical repair, mechanical repair, or adjustment.
7. The use of attachments not recommended or sold by Borine. may cause fire, electric
shock or injury.
8. Do not use outdoors.
9. Do not let cord hang over edge of table or counter or touch hot surface including stove.
10. Keep hands and utensils away from moving blades while processing food to reduce
the risk of severe injury to persons or damage to the food chopper A scraper may be
used but must be used only when the food chopper is not running.
11. Blades are sharp. Handle carefully.
12. This appliance is intended for processing small quantities of food for immediate
consumption. This appliance is not intended to prepare large quantities of food at one
time.
13. To reduce the risk of injury, never place cutting blade on base without first putting bowl
properly in place.
14. Be certain cover is securely locked in place before operating appliance.
15. Do not attempt to defeat the cover interlock mechanism.
SAVE THESE INSTRUCTIONS
SPECIAL INSTRUCTIONS:
A short power supply cord is provided to reduce the risk of becoming entangled in or
tripping over a longer cord. Extension cords are available and may be used if care is
exercised in their use:
The marked electrical rating must be at least as great as that of the product;
Arrange the longer cord so that it will not drape over a countertop or tabletop ,where it
can be
tripped over, snagged, or pulled on unintentionally (especially by children).
This appliance is not intended for use by persons (including children) with reduced
physical, sensory or mental capabilities, or lack of experience and knowledge, unless
they have been given supervision or instruction concerning use of the appliance by a

person responsible for their safety
Children should be supervised to ensure that they do not play with the appliance.
CONSUMER SAFETY INFORMATION
This appliance is intended for household use only.
Before first use
Remove any packaging material or promotional labels before first use. Wash
the chopper cover and jar in warm, soapy water. Dry thoroughly.
Care should be taken when cleaning the blades, blades are sharp.
Parts
Processor
1.Power unit
2.Drive shaft
3.Bowl
4.Lid
5.Feed tube
6.Pushers
7.Safety interlock
8.Speed control
Liquidiser
9.Blending cap
10.Lid
12.Jug
13.Sealing ring
14.Blade unit
Attachments
15.Knife blade
16.Dough tool
17.Thick slicing/coarse shredding disc
Choosing a speed for all functions
Tool/Attachment
Function
Speed
Maximum
capacities
Knife Blade
Grind meat
2
300g meat
Dough tool
Dough making
2
400g flour
+240gwater
Discs-slicing/
shredding/
chipping
Slicing/shredding/chipping food and
vegetables such as as carrots,cheese
1-2
Jug and cross blade
blender
2
1400ml

To use your food processor
1.Fit the detachable shaft onto the power unit ○
1
2. Then fit the bowl. Place the handle towards the back and turn anticlockwise until it
locks ○
2.
3. Fit an attachment over the drive shaft.
Always fit the bowl and attachment onto the machine before adding ingredients.
4. Fit the lid ○
3ensuring the top of the drive shaft locates into the centre of the lid.
Do not use the lid to operate the processor, always use the on/off control.
5. Switch on and select a speed.
The processor won't work if the bowl and lid are fitted incorrectly.
Use the pulse(p) for short bursts. The pulse will operate for as long as the control
is held in position.
6. Reverse the above procedure to remove the lid, attachments and bowl.
Always switch off before removing the lid.
Important
Your processor is not suitable for crushing or grinding coffee beans, or converting
granulated sugar to caster sugar.
when adding almond essence or flavouring to mixtures avoid contact with the
plastic as this may result in permanent marking.
To use your liquidiser
1.Fit the sealing ring 13 into the blade unit 14 ensuring the seal is located correctly.
Leaking will occur if the seal is damaged or not fitted correctly.
2.Screw the jug onto the blade unit.
3.Put your ingredients into the jug.(if make soybean milk need to put filter first).
4.Put the blending cap in the lid, then turn.
5.Turn the lid in a anticlockwise direction to lock onto the jug.
6. Place the liquidiser onto the power unit and turn to lock ○
4 .
7.Select a speed or use the pulse control.
Allow all llquids to cool to room temperature before placing them in the liquidiser.
Using the attachments
Knife blade15/doughtool
The knife blade is the most versatile of all the attachments.
The length of the processing time will determine the texture
achieved. For coarser textures use the pulse control.
Use the knife blade for cake and pastry making, chopping
raw and cooked meat, vegetables, nuts, pate, dips, pureeing
soups and to also make crumbs from biscuits and bread. It
can also be used for yeasted dough mixes if the dough tool
is not supplied.
Use the dough tool for yeasted mixes.

Hints
knife blade
Cut food such as meat, bread, vegetables into cubes approximately 2cm/3/4in.
before processing.
Biscuits should be broken into pieces and added down the feed tube whilst the
machine is running.
When making pastry use fat straight from the fridge cut into 2cm/3/4in.cubes.
Take care not to over-process.
Dough tool
1. Place the dry ingredients in the bowl and add the liquid down the feed tube whilst
the machine is running. Process until a smooth elastic ball of dough is formed this
will take 30 secs.
2. Re-knead by hand only. Re - kneading in the bowl is not recommended as it may
cause the processor to become unstable.
Slicing/shredding discs 17
reversible slicing/shredding discs.thick 17
1. Use the shredding side for cheese, carrots, potatoes
and foods of a similar texture.
2. Use the slicing side for cheese, carrots, potatoes, cabbage,
cucumber, courgette, beetroot and onions.
Use to cut: potatoes for julienne style French fries;
firm ingredients for salads, garnishes, casseroles and
stir fries(eg carrot, swede, courgette, cucumber).
Safety
Never remove the lld until the cutting disc has completely stopped.
Handle the cutting discs with care - they are extremely sharp.
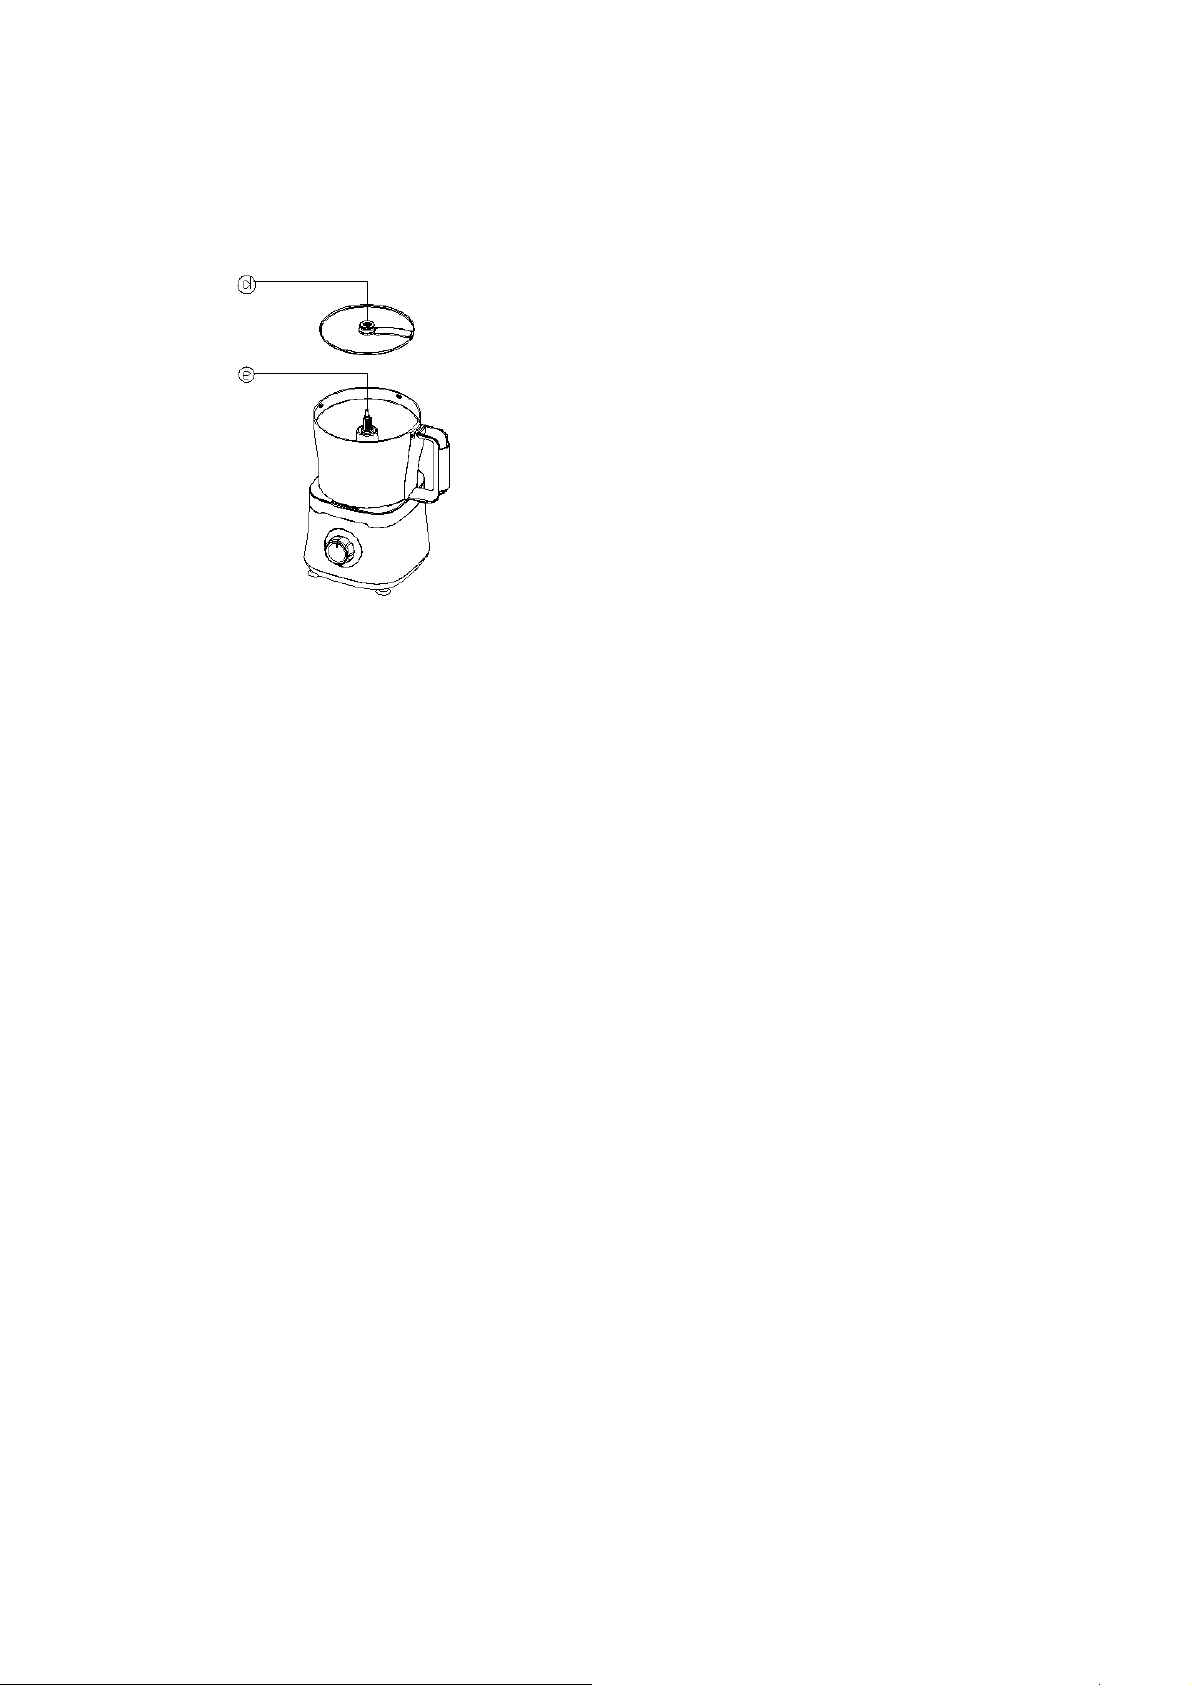
To use the cutting discs
1. Fit the drive shaft and bowl onto the power unit.
2. Holding by the centre grip ○
d, place the disc onto the
drive shaft with the appropriate side uppermost ○
e
3. Fit the lid.
4.Choose which size feed tubeyou want to use. The pusher contains a smaller feed tube for processing
individual items or thin ingredients.To usethe small feed tube - first put the large pusher inside the feed
tube.To use the large feed tube - use both pushers together.
5. Put the food in the feed tube.
6. Switch on and push down evenly with the pusher- never put your fingers in the feed Tube.
Hints
Use fresh ingredients.
Don't cut food too small. Fill the width of the large feed tube fairly full.This
prevents the food from slipping sideways during processing.
When using the chipper disc, place ingredients horizontally.alway use pusher
There will always be a small amount of waste on the plate or in the bowl
after processing.
Care & cleaning
1.Always switch off and unplug before cleaning.
2.Handle the blades and cutting discs with care - they are extremely sharp.
3.Some foods may discolour the plastic. This is perfectly normal and won't harm the
plastic or affect the flavour of your food. Rub with a cloth dipped in vegetable oil to
remove the discolouration.
Power unit
Wipe with a damp cloth, then dry. Ensure that the interlock area is clear of food
debris.
Liquidiser
1.Empty the jug/jar before unscrewing it from the blade unit.
2.Wash the jug/jar by hand.
3.Remove and wash the seals.
4.Don't touch the sharp blades, brush them clean using hot soapy water, then rinse
5.thoroughly under the tap. Don't immerse the blade unit in water.
Leave to dry upside down.
All other parts
Wash by hand,then dry.
Alternatively they can be washed on the top rack of your dishwasher. A short low
temperature programme is recommended.

Customer care
If the cord is damaged, it must be replaced by the manufacturer, its service agent or
similarly qualified persons in order to avoid a hazard.
Electrical Specifications
V
Volt
Hz
Hertz
W
Watt
Alternating current
Class II appliance
symbol
Tested safety
Communate Europpene
This marking indicates that this product should not be disposed with other household
wastes throughout the EU. To prevent possible harm to the environment or human
health from uncontrolled waste disposal, recycle it responsibly to promote the
sustainable reuse of material resources. To return your used device, please use the
return and collection systems or contact the retailer where the product was purchased.
They can take this product for environmental safe recycling.
Max Voltage
Frequency
Max Wattage
220-240V AC
50/60 Hz
600~800W
This manual suits for next models
1
Table of contents


