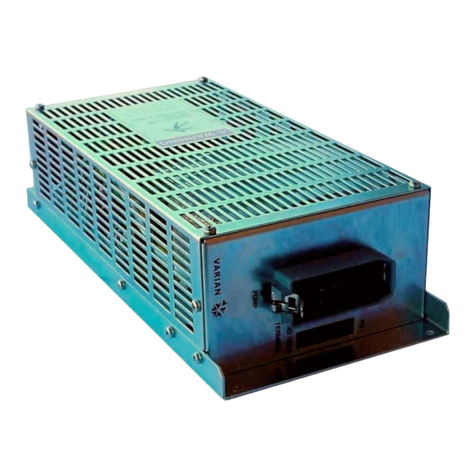
NJD Electronics NJ250 DP10000 User manual

NJ250
DP10000
4×10 A ANALOGUE DIMMING
PACK
• Individual 4-channel dimming
• 2.3 kW power handling per channel
• Terminal block input and output connectors
• 0−10 V control inputs
• Remote enable/disable
Page 1

IMPORTANT
Installer and Users please note:
These instructions should be read carefully and left with the user of
the product for future reference.
BEFORE USE
Inspect the product for any signs of damage. If the product is
damaged, DO NOT use it, and contact your supplier immediately.
PRODUCT SAFETY
•
Do not use the appliance in locations where paint, petrol or other
flammable liquids are used or stored.
•
Do no insert any object into the appliance through the grilles. This
may damage the appliance or result in overheating or electric shock.
•
Do not use this appliance in the immediate surroundings of a bath,
a shower or a swimming pool.
•
Do not use unless correctly installed.
•
Do not cover when in use.
•
For indoor use only.
GENERAL SAFETY REQUIREMENTS
Domestic wiring must be tested periodically by a qualified electrician
at least once every 10 years or at every change of occupancy.
For office and retail premises, and buildings such as village halls, the
wiring must be inspected at least once every 5 years.
It is recommended that all building be fitted with smoke alarms (it is
mandatory for new buildings).
INSTALLATION
The DP10000 must be installed by a competent electrician in
accordance with the current IEE Wiring Regulations.
Mains input
Remove the four cover fixing screws, and remove the
top cover. The grommets supplied may be replaced by 20 mm cable
glands if required. Ensure that the supply to which the DP10000 is
to be connected is capable of supplying sufficient current for the
load connected. If used to its full capacity, a 6 mm2cable wired to
its own 40 A circuit breaker will be required. The DP10000 must
not be wired to a 30 A ring main, or connected via a 13 A plug and
socket unless the output is de-rated accordingly.
Page 2

Connect the incoming mains supply (230 V) to the large terminal
block using 6 mm2cable:
• Connect the incoming LIVE supply to the large terminal block
labelled "LIVE".
• Connect the incoming NEUTRAL supply to the large terminal block
labelled "NEUTRAL"
• Connect the incoming EARTH to the brass terminal block labelled
with the EARTH symbol. The DP10000 must be earthed.
If connected to a supply of lower capacity than 40 A, the
outputs must be reduced as follows:
•
For a 13 A supply
, the maximum total load is 2990 W which can
be made up of: either: 745 W watts on each of the four channels
or: different loads on each channel so that the total does not exceed
2990 W (but not more than 2300 W on any one channel) or:
2300 W load may be connected to all four channels provided that
the unit is operated so that all four channels are not switched on
together at full power.
•
For a 16 A supply
, the maximum total load is 3680 W which can
be made up of: either: 920 W watts on each of the four channels
or: different loads on each channel so that the total does not exceed
3680 W (but not more than 2300 W on any one channel) or:
Page 3

2300 W load may be connected to all four channels provided that
the unit is operated so that all four channels are not switched on
together at full power.
•
For a 32 A supply
, the maximum total load is 7360 W which can
be made up of: either: 1840 W watts on each of the four channels
or: different loads on each channel so that the total does not exceed
7360 W (but not more than 2300 W on any one channel) or:
2300 W load may be connected to all four channels provided that
the unit is operated so that all four channels are not switched on
together at full power. For high-inrush loads (Halogen lamps,
motors, transformer operated devices) the outputs should be de-
rated to 1150 W per channel for the most severe inrush loads.
OUTPUTS
Connect the Lives from the loads to the terminal blocks
numbered 1, 2, 3 and 4 and labelled
L
.
Connect the Neutrals from the loads to the terminal blocks
numbered 1, 2, 3 and 4 and labelled
N
.
Connect the Earths from the loads to the brass terminal block
labelled with the earth symbol.
Page 4

If channels are to be used to their full capacity use 1mm2
wire.
FUSING
If connecting multiple loads to each output, reliability will be improved
if each load is fitted with its own fuse, of an appropriate rating. In
the case of a lamp failure, the lamp fuse will then blow, not the fuse
in the power pack. The other loads on the same channel will then
continue to operate. This greatly reduces the chance of a triac
failure.
The following loads may be connected to the DP10000
• 230 V filament lamps
• 230 V halogen lamps
• Low voltage halogen lighting via standard transformers
• Low voltage halogen lighting via "Electronic" Transformers. Low
voltage halogen lighting powered by so-called "Electronic
Transformers" may be connected to the DP10000 provided that the
transformers are suitable for Leading-edge-modulated dimmers.
Flickering or failing to dim is a sign that the transformer is not of a
suitable type. NJD recommends using standard laminated or
toroidal transformers for low voltage halogen lighting.
• LED lighting if suitable for use with a triac dimmer.
• Universal motors The DP10000 will act as a speed control.
The following are NOT suitable for connection to the DP10000
• Low energy fluorescent lighting (with built-in electronic ballast)
• Standard fluorescent lighting
• Synchronous motors
• Induction motors
• Lighting effects (such as NJD Chaos, Sword, Predator, Datamoon
etc.)
• Strobe lighting
•Discharge lighting
• LED lighting unless specifically designed for use with triac
dimmers.
The DP10000 is fully suppressed against interference to European
Standards, but problems may be encountered if running the output
Page 5

cables too close to sensitive audio circuits. Improved performance
can be achieved as follows:
• Each output channel should have its own separate neutral wire of
the same length and thickness as the live wire
• Each live output wire should be twisted together with its
corresponding Neutral.
• The neutrals from all four channels should be commoned only at
the terminal block inside the DP10000.
ANALOGUE INPUTS
Connect the outputs from any light controller with 0 to +10 V
analogue outputs to the 6-way terminal block labelled "4 3 2 1
ENABLE 10V 0V 15V"
The DP10000 can only be used with 0 to +10 V inputs.
The DP10000 cannot be used with controllers which produce 0 to
−10 V or 0 to +6 V outputs.
Connect the common to the 0 V terminal and the four signal wires
to the terminals labelled 1, 2, 3 and 4.
Page 6

"ENABLE" INPUT
The enable input allows the whole power pack to be enabled and
disabled remotely.
Note: If the enable input is not connected the
power pack will not work.
Permanently enabled
If you require the DP10000 to be
permanently enabled link the ENABLE input to the +10 V
terminal.
Remotely enabled and disabled
To use the ‘enable’ facility, connect
the 0−10 V switching output from the ‘enabling’ controller (probably
a switch/touch panel) to the enable input of the DP10000. Connect
the common/0 V output from the ‘enabling’ controller to the 0V
terminal.
A switch may be used if there is no controller available: take the +
10V output from the DP10000 through the switch and back to the
ENABLE input
+15 V Out
. A +15 V DC output is provided to supply lighting
controllers such as the Fade 4. A maximum of 100 mA may be
taken from this output.
Cable for analogue inputs.
For short cable runs (less than 5
metres, in areas away from mains power cables, use 6-core cable
of the type used in burglar alarms or telephone systems, or similar.
Page 7

For longer cable runs, use 5-core screened cable, connecting the
screen to the 0 V terminal. If interference still occurs (lamps
flickering when mains nearby is switched on or off) then it may be
helpful to connect the screen to mains earth. If the +15 V
connection is not being used, then 5-core cable, or 4-core screened
cable may be used. The analogue inputs may not be run in the same
trunking as the mains wiring.
A simple dimmer system.
Use the NJD Fade-4 (part code: NJ202)
connected to the analogue inputs of the DP10000. This can be the
basis of a simple, high powered 4-channel light dimmer.
Mimic:
The four red LEDs allow the user an instant visual indication
of the channel outputs.
REPLACING FUSES
The DP10000 is fitted with a 10 A fuse on each channel, to
protect the unit from overload. If the fuse fails, check that the
output is not being overloaded (no more than 2300 W is connected
to each output), before replacing the fuse.
In the case of lighting which takes a high surge current (halogen
lamps) it may be necessary to reduce the output loading.
To replace the fuse, disconnect the supply and remove the four
screws that hold the cover in place, and remove the cover. The fuse
is located adjacent to each output terminal. The correct fuse is
F10A 5×20 mm (part code: F128GD) Always use a high breaking
capacity fuse (which has a ceramic case) and ensure that it
complies with IEC127. Replace the cover and the cover fixing
screws.
If the channel remains permanently on after replacing the fuse, then
the triac has been damaged (This may happen in the case of an
extreme overload or short circuit on the output). If this happens the
product should be taken to a dealer for repair. Triacs are not
covered by the warranty, because they only fail if the product has
been misused or overloaded.
Page 8

FAULT FINDING
•
All outputs permanently off - power indicator off
Mains supply switched off
• All outputs permanently off - power indicator on
10 V enable connection missing
All low voltage inputs at 0 V
Lighting controller not powered
+15 V connection to lighting controller missing
• Output permanently off - led lights normally
Blown fuse - replace by correct type of fuse. Failed optoisolator
•
Output permanently on - led lights normally
Failed triac (most likely) Failed optoisolator (least likely)
•
Output permanently on - led permanently on
Analogue input 0 V connection missing
Low-voltage lighting controller output permanently on (measure input
voltage on terminal block)
• One Output permanently off - led permanently off
Break in wire of analogue input.
• All outputs permanently on, but turn off when all the
channels of the lighting controller are switched on
0V connection between controller and DP10000 broken or missing.
• Interference on sound system
Sensitive audio connections run too close to dimmer outputs. Live
and neutral to each channel run separately (live cable should be run
as close as possible to the neutral for the same channel).
Neutrals from various channels commoned. (Neutrals should be run
separately back to the dimmer pack)
•Flickering on low voltage lighting supplied by "electronic"
transformers
"Electronic" transformer not suitable for dimming.
• Motor speed remains constant, but stalls at low output
settings
Only certain types of motor may be speed controlled from a dimming
pack. Induction and synchronous motors cannot.
• Transformers fail in low-voltage lighting connected to the
dimming pack
Lamps are being flashed on and off too quickly. A "half-wave" failure
of a triac may damage transformers in low voltage lighting, if the low
voltage lighting is incorrectly fused.
Page 9

TECHNICAL SPECIFICATION
Size: 215 x 205 x 45 mm
Degree of protection: IP30
Weight: 2.1 kg
Supply Voltage: 230 V ˜ 50 Hz
Rated Insulation Voltage: 440 V AC
Conditional Short Circuit current: Icf = 1.5 kA
I2t (fuse rating) 300 A2s per channel
(Triac rating) 128 A2s per channel
Controlled supply: 230 V ˜ 50 Hz
Input Connections (mains): Terminals for 16 mm2copper cable
(control): 3.5 mm pitch terminal blocks
Earthing system: TT or TN-C-S
Analogue input impedance: 44 k
W
Control voltage: 0 V fully off, +10 V fully on
Maximum load per channel: 10 A or 2.3 kVA @ 230 V AC
(2.3kVA corresponds to a resistive load of 2300 Watts or an
inductive load of approximately 1750 Watts, depending on power
factor.)
Output Connections: Terminals for 3.5mm copper cable
Maximum total load: 9.2 kVA @ 230V AC
Fuses: F10A HBC to IEC127
Part code: F128GD
(HBC means ‘high breaking capacity’ - a HBC fuse has a ceramic
case.)
Triacs: 16 Amp 600 Volt isolated tab.
Type: BTA16 600BW
Part code: F950AJ
Page 10

DISPOSAL AND RECYCLING
You must not dispose of this appliance with domestic household
waste.
Most local authorities have specific collection system for appliances
and disposal is free of charge to the end-user.
When replacing an existing appliance with a similar new appliance
your retailer may take the old appliance for disposal.
STANDARDS
The DP10000 complies with:
EN60439 Part 1 (European Standard for Safety of Electrical
Switchgear)
EN55015 Compatibility) (European Standard for Electromagnetic
Page 11

SERVICE WARRANTY
Electrovision guarantees the product free from defects in materials
and workmanship for a period of twelve months.
Should this unit be operated under conditions other than those
recommended, at voltages other than the voltage indicated on the
unit, or any attempts made to service or modify the unit, then the
warranty will be rendered void.
The product you buy may sometimes differ slightly from illustrations.
This warranty is in addition to, and does not affect, your statutory
rights.
If you have any problems with this product, please call our Help Desk
on (0845) 459 4816.
Electrovision Ltd.,
Lancots Lane, Sutton,
St. Helens, Merseyside.
WA9 3EX
website:
www.electrovision.co.uk
The DP10000 is designed and built in Britain.
Page 12
Table of contents
