Noontec Giga Link N5 User manual
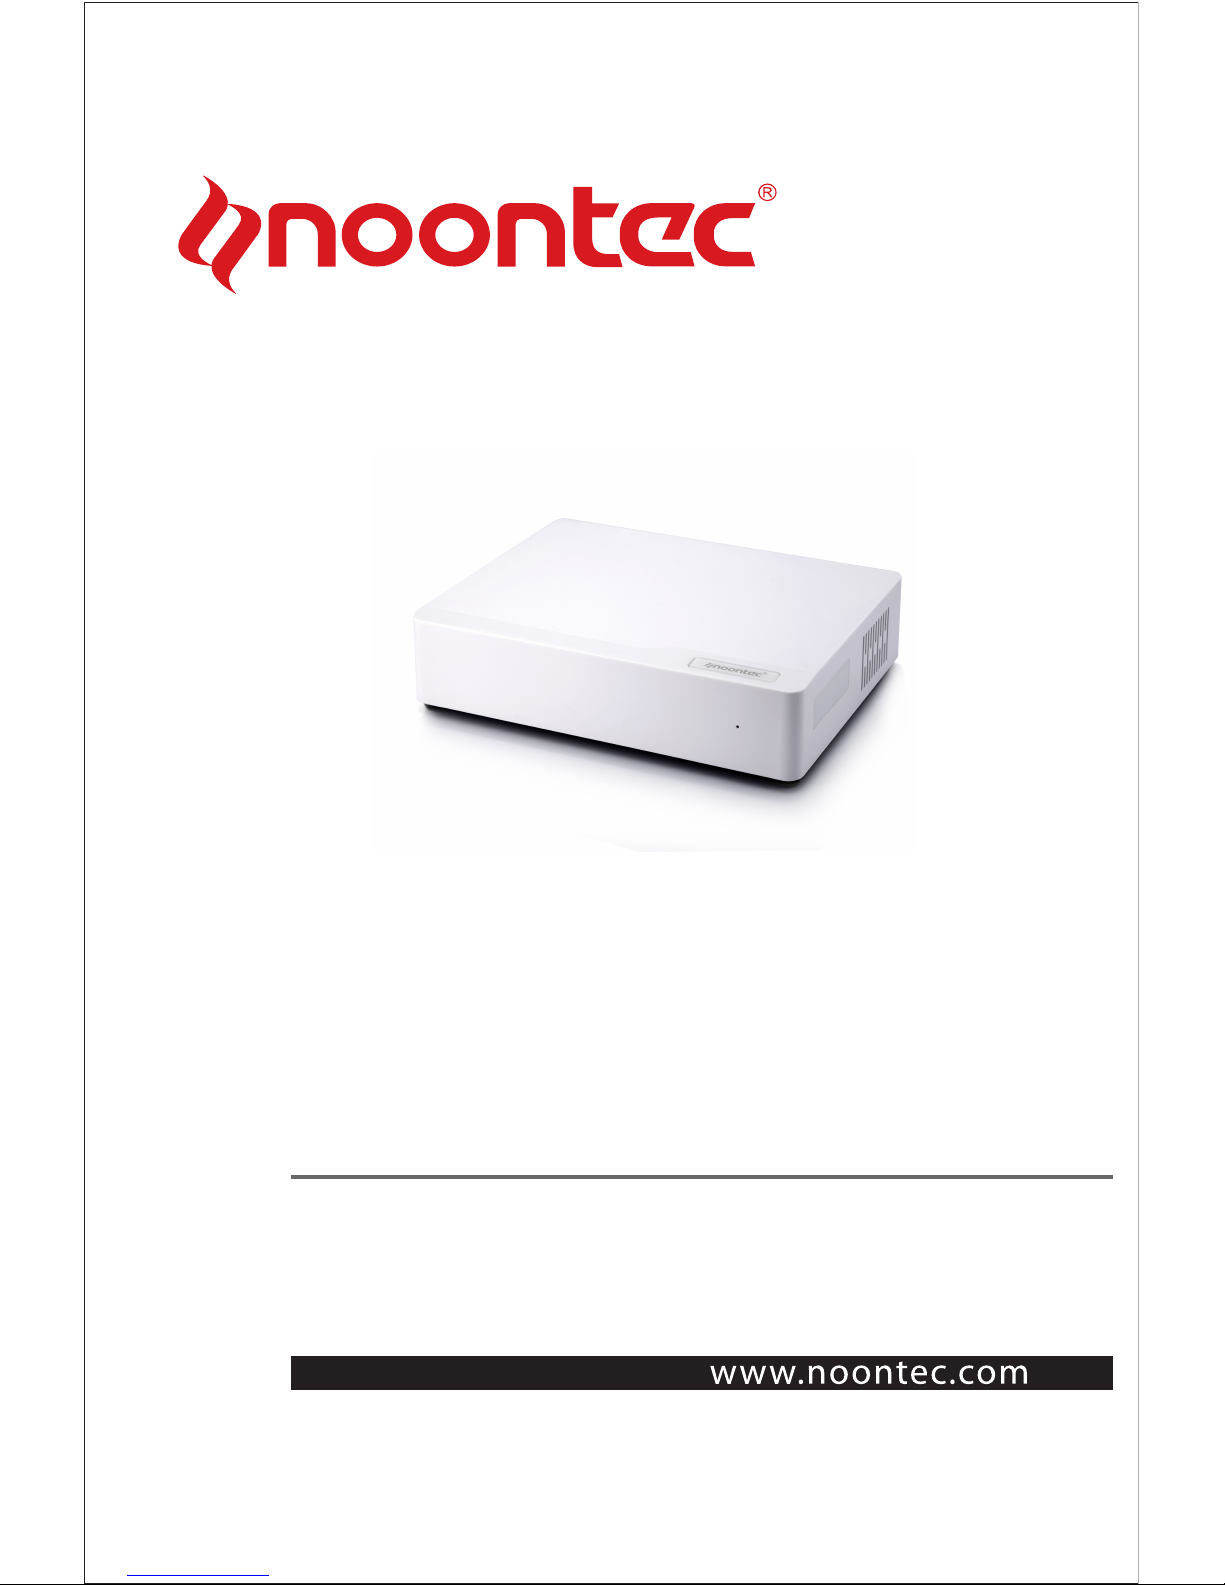
Giga Link N5
Manual

Statement
Dear customers, thank you for your choice to buy and use the product.
In order that you can better use all the features of this product, please
carefully read the manual before using the product, which contains
precautions and detailed functional instructions of the products during use.
The product components described in this manual have been
registered as state patents, infringement of any counterfeit are to bear the
legal liability involved. The product components are in line with national
safety standards for low-voltage electronic products.
The exclusive serial number labels on the product and sales package
are important certificates for warranty. When the product needs warranty,
users are required to present the product serial number bar code labels.
Not all environments are suitable for the use of this product; The
Company only provides after-sales services for the quality of the product
itself in accordance with the warranty terms committed by the Company,
and the Company is not liable for the data loss due to use of this product or
other related responsibilities.
For the changes in the design specifications of the product due to
technical or other external factors, the Company will no longer issue a
separate notice.
Obligation exemption terms
The Company shall not be liable for the losses caused by natural
disasters such as earthquake, lightning, or fire not caused by the Company,
third-party operations, theft, damage, accident, etc., or use in unusual
circumstances (such as abnormal operation, misuse or other problems).
This product is not used for commercial purposes, and the Company
shall not be commercially liable for the commercial use of the product.
The Company shall not be liable for any loss due to non-compliance
with this manual.
This product will be upgraded from time to time; the actual content and

function of the product will be subject to the real product.
The Company shall not be liable for any failure due to use in
combination of other facilities or software that has no connection with the
Company.
This product will be upgraded from time to time, the actual content and
function of the product will be subject to the real product.
For the firmware update, there may be some external risks, such as
power supply instability, power outage, file corruption and other accidents,
and the Company doesn't regard the firmware modification failures as
human damage, and they are not within the warranty responsibility. If the
firmware upgrade is necessary, the authorized distributor of the Company
deals with it.
Trademark
NOONTEC is the exclusive trademark of the Company. All other
trademarks or product names within this operation manual are the
trademarks or registered trademarks of the Company.
Safety Precautions
1. This product is designed and manufactured to fully consider the use
convenience and human safety, any improper use may lead to
unnecessary troubles and losses. Please read this user manual and all
precautions and safety instructions marked on the accessories, and
keep properly for future reference.
2. The components of this product are in line with national safety
standards for low-voltage electronic products, and first of all you can
use it.
3. The power used by the product must match the type indicated on the

nameplate. If you don't understand the indoor mains supply, contact
your dealer or the power company. For components using battery or
other power, please refer to the relevant operating instructions.
4. To make our products reliable and avoid risk of fire and electrical
shock, please keep the product away from heat and damp
environment, and maintain good ventilation.
5. Special frequency electromagnetic fields may affect the data read and
write operation and data transmission of the product.
6. Keep the product in a stable place, and do not place any device on the
product when in use.
7. Please do not stuff the product with additional items, and in general do
not remove the product so as to avoid accidents.
8. To prevent lightning and electrical surge from damaging the product,
please suspend the use of the product during a lightning storm or when
the mains supply is unstable
9. When a foreign material or liquid enters the inside of the product,
immediately disconnect the product with the power supply and
computer, so as to prevent short-circuit from damaging the human
body.
10. Do not physically remove or exit the product from your computer when
it is under normal read and write status. This will lead to the physical
disk damage and data loss.

1
TABLE OF CONTENTS
PRODUCT INTRODUCTION………………………………………1
PRODUCT SPECIFICATIONS AND MODE FEATURES…………………………………3
INSTRUCTION FOR PRODUCT BUTTON AND INTERFACE……………………………5
PRODUCT PACKING LIST AND INSTRUCTION FOR MAIN ACCESSORIES……………6
HARD DRIVE PREPARATION AND INSTALLATION…………………………7
NOONTEC NAS SOFTWARE………………………………………………………9
INSTRUCTION BEFORE USING THE PRODUCT………………………………………9
USAGE OF NOONTEC NAS SOFTWARE……………………………………………9
WEB MANAGEMENT AND INSTRUCTION………………………………13
ENTER PRODUCT’S HOMEPAGE……………………………………………………13
SYSTEM STATUS……………………………………………………………………15
NETWORK SETTINGS………………………………………………………………18
USER MANAGEMENT…………………………………………………………………22
SYSTEM TOOL………………………………………………………………………24
APPLICATION SERVICE………………………………………………………………26
EXIT…………………………………………………………………………………33
THROUGH USB DEVICE INTERFACE TO CONNECT WITH PC………………………33
MAINTENANCE ATTENTIONS……………………………………………………33
FAQ……………………………………………………………………………………34
ADDITIONAL EXPLANATION……………………………………………………37
1
Product Introduction
Welcome to use GIGALINK N5 new generation network storage device.
This device adopts the newest network subsidiary storing techniques,
which supports WEBDAV service to let you remote access through
network browser or WEBDAB application software installed in mobile
devices or upload your photos and other multimedia files to this network
device at anytime and anywhere. It supports DHCP, FTP & SMB service,
and has sharing management function. It supports BT download
function which makes it convenient to download material directly from
network, and based on WEB figure user interface, which make it easier
for management and convenient for system maintenance. It adopts one
3.5 inch SATA hard drive as data storage, which make data storage
faster and safer. It supports large capacity hard drive, and single hard
drive can reach 3TB. The product has USB Device interface, through
this interface you can connect it with PC for data transfer as fast speed
hard drive box. This product with complete function and easy to operate,
is the best choice for your network storage management.
GIGALINK N5 network storage has the following features:

2
1、10M/100M/1000M Auto-adjustment Ethernet high speed
transfer.
2、Easy to install, some settings steps make you easy to use this
system.
3、Completely supports large capacity SATA hard drive, single hard
drive can reach to 3TB.
4、Supports PPPoE and DDNS.
5、GIGALINK N5 supports as many as 16 users set up.
6、SAMBA, FTP and other servers support as many as 8 users
simultaneously online accessing.
7、WebDAV supports as many as 4 users simultaneously accessing.
8. Built-in BT client side is convenient for directly download material
from the network.
9、It supports UPnP network multimedia technique, which is for you to
enjoy sharing home video and audio multimedia.
10、Built-in media server, supports DLNA compatible digital multimedia
devices.
11、User management allows only read or read/write to access to the
folder.
12、Through Web browser to do the safe management access.
13、It supports all the Windows, MAC OS and Linux operating system.
14、Low power consumption design.
15、Plug and play, it supports various network protocol for be used in
different client side network situations.
16. It supports USB Device interface, by which to connect with PC for
data transfer as a high speed hard drive box.
17、It supports real time Email and short message notification. Such as
BT download finished notification, whenever and wherever to know NAS
newest status.

3
Product specifications and mode features
Model GIGALINK N5 Gigabit network storage
Interface
LAN Standard
Package
10/100/1000Mbps network
adaptively
Speed Read can up to 50MB/S, while
Write can up to 30MB/S
USB Device USB2.0 Immense amounts of read/write
storage interface( which can be
configured with USB 3.0)
Hard Drive SATA
interface
Support single SATA hard drive,
maximum capacity support 3TB
Software
Network Dynamic IP/Static IP/PPPoE/DDNS
Mobile Sharing
Server
1. Mostly set up 16 users, and support four users
online at the same time
2. Compatible with Win7/Vista/XP/MAC/Linux and
WebDAV software
FTP Server 1. Mostly set up 16 users, and support 8 users
online at the same time
2. Support UTF8 language coding
SMB Server 1. Mostly set up 16 users, and support 8 users
online at the same time
2. Compatible with Win7/XP/Vista/Linux
BT/PT Download 1. Built-in BT download client end, compatible with
BT and PT seed at the same time
2. Download status email notification function

4
Multimedia Server iTunes Server 1. Support iTune music
player
2. Support ID3 tag
v1/v2MP3/WAV/AAC
Support
UPnP/DLNA
digital multimedia
server
1. Compatible with XBOX
360/PS3/WMP12/DLNA
DMP
2. Support
image/music/video
System Tool Disk tool, network firmware updating, reboot
system, reset factory default settings, hard drive
format and hard drive hibernate function
Support
Operating System Support XP(SP3), Vista(SP2), Windows 7
Support advanced than MAC OS X(10.5.x),
advanced than Linux(samba 3.x)
File System SATA hard drive
format
exFAT (single file maximum
supports 127GB)
Maximum
Capacity
3TB
Power Consumption Working Consumption: lower than 11W
Standby Consumption: lower than 0.3W
Power AC input: 100V~240V, 50/60HZ
DC output: 12V/2A
Size Machine Size: 206 x 160 x 46mm
Package Size: 250 x 200 x 150mm
Weight Net weight: about 538g( without hard drive)
Gross weight: about 1024g (without hard drive)

5
Instruction for product button and interface
Single disk mobile storage box outline diagram:
Product front view:
LED light definition
Interface
definition Operating instructions
LED indicator
light
After shortly press power button, bicolor LED simultaneously
light blue that means normal power supply.
Long press the power button about 3 seconds, the blue LED
light glimmer 5 times then goes out
Product Back View:

6
Button and Interface Instruction
Interface Interface
definition Operating instructions
①LAN Network
interface
1000M network interface is compatible
with the network of 10M and 100 M
②USB
Device
USB interface Support to insert the product to PC for
management, it can be used as the
box of mobile HD.
③RESET Resetting
button
When starting up, long press this
button for about 5s to recover the
factory settings, and the material
stored in hard drive can’t be changed.
④POWER Power button Shortly press this button for starting,
long press it for 3s to power off.
⑤DC IN Interface of
power supply
Input interface of power supply
Attention: When using USB DEVICE interface, please connect the N5 with the
computer first before starting up, so that the product enter USB DEVICE status,
otherwise enter Network status.
Product packing list and instruction for main
accessories
Before using NOONTEC product, please make sure all the followings packaged
in the color box. If missing, please contact with your agent immediately to
guarantee your interests.

7
No Item Quantity
1 Host machine 1 pcs
2 Power Supply 1 pcs
3 USB Wire 1 pcs
4 Network Wire(option)1 pcs
5 Screws Some
Attention: As different models, specifications or other reasons, please notice
that there may not be all the above items in your package. If you have any
question, please contact the nearby agent.
Hard drive preparation and installation
Please select the proper hard drive according to your purchased product, and
follow the manual instructions to install the hard drive. This product is suit with
3.5 inch SATA hard drive. If you have any question during installation, please
contact with our after-sales service personnel or product manager immediately.
Warning! The product only supports the hard drive with exFAT(FAT64) form, if
you use the hard drive which has data with the other forms to install, the system
format the hard drive automatically and clear the data in the hard drive, then all
the functions of the product can be used. If you need these data in the future,
please backup firstly before installation.
Installation Progress:
1、Putthemachinetoinverseflatwise,back‐outfourscrewsinthebottomcap.

8
2、Takeoutthebottomcap,andmakethesideofthebottomcapwithharddrivecard
upwards.
3、Installedtheharddrivewithfrontsideupwardsintothebottomcap,putthesideof
harddrivewithoutinterfacetotheplacewithbaffle,screwupthethreescrewstofix
theharddrivefirmly.
4、Connectwelltheproduct’sharddrivepowerwireandSATAdatawirewiththehard
drive.
5.Coverthebottomcapwell(attention:makesurethepowersupplywireofhard
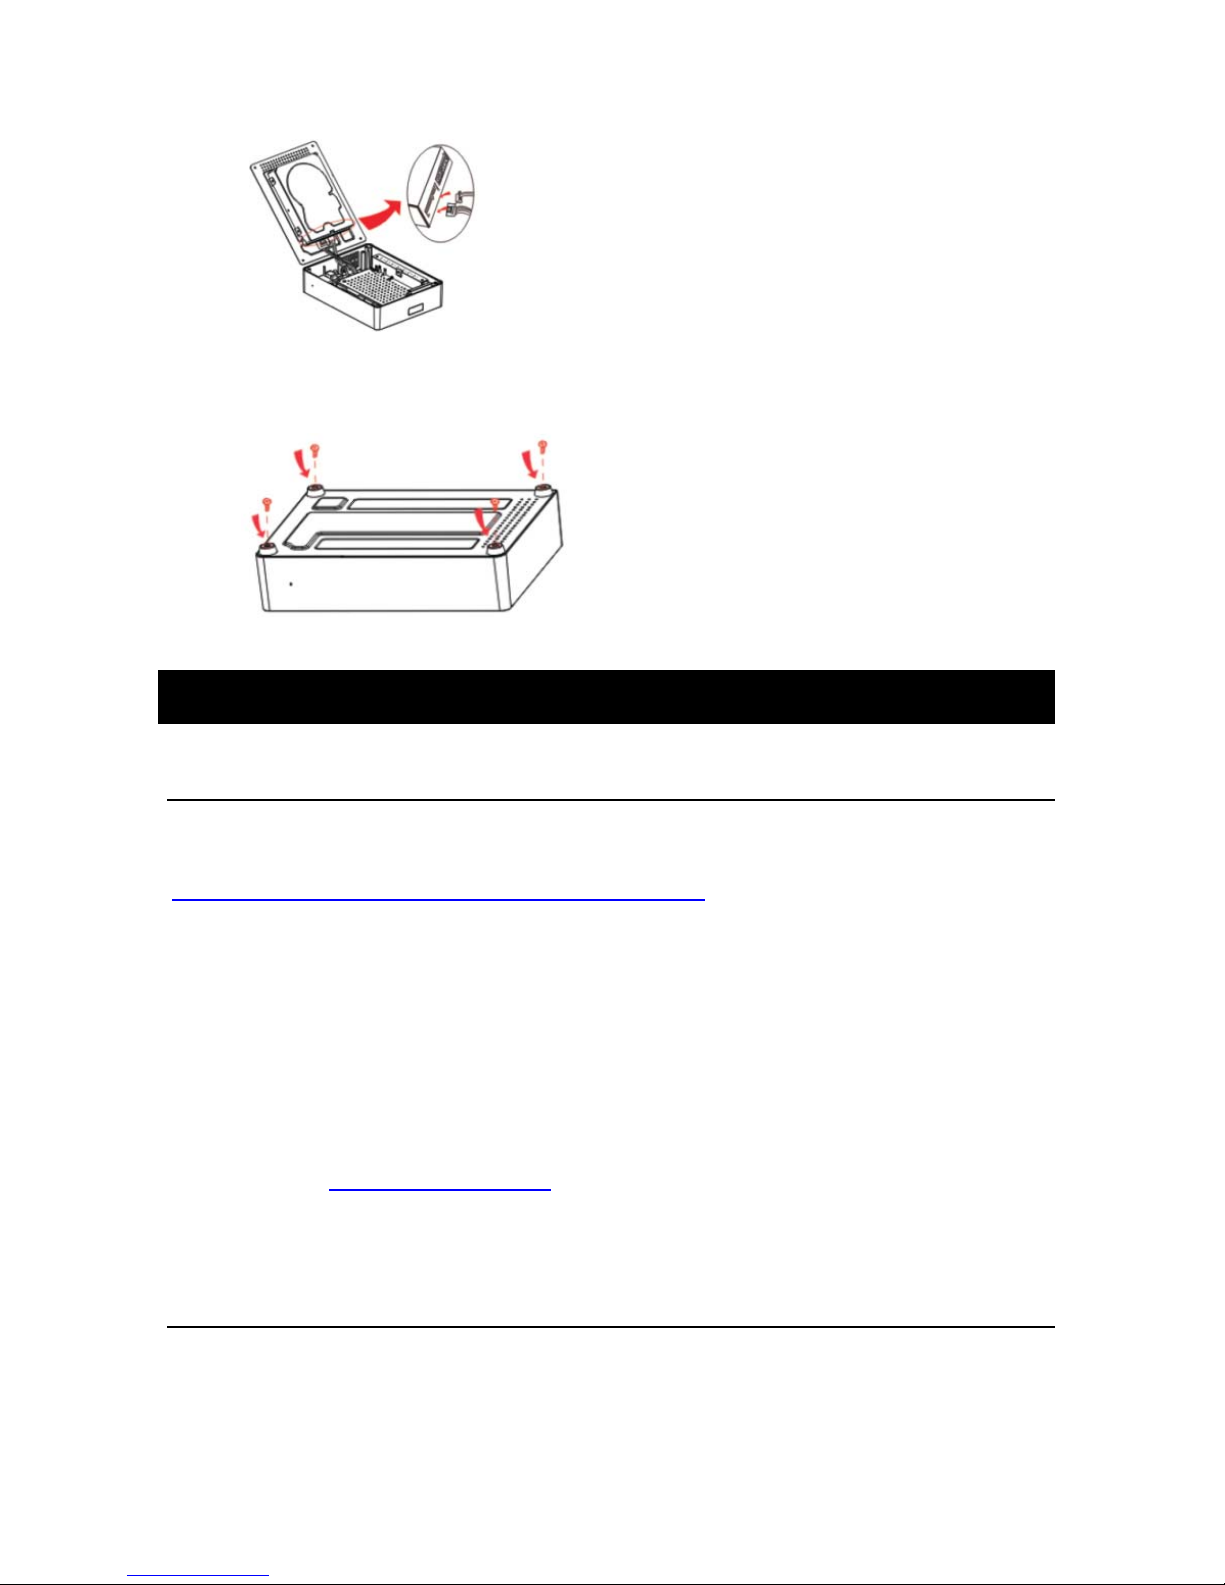
9
driveandSATAwiretobeconnectedfirmly).
6、Screwupfourscrewsofthebottomcapfirmly,sothattheinstallationofthe
productfinished.
Noontec NAS Software
Instruction before using the product
Before using the product please visit our official download website
http://www.noontec.com/Cn/services/downloads/ to download N5 Noontec NAS
software in the corresponding operating system. With Noontec NAS software to
search the IP address of storage in the LAN, and then enter the management
interface of network storage for operation.
If using the product under Linux and MAC OS operating system, please confirm
your computer supports JAVA environment, if not, please download JAVA
software from http://www.java.com.
Usage of Noontec NAS Software
When using this product, please install the hard drive well following the quick
installation guideline. Connect the product with concentrator/ router with network
wire45, after starting up, shortly press the power button to open the system, the
10
bicolor LED simultaneously light blue that means normal power supply. If during
this progress the red light go out after the hard drive be detected, that means the
product has finished starting. When there is data to read and writes, the red light
glimmer. The frequency of glimmer is corresponding to the speed of read and
write.
Attention:
Only N5 and the computer in the same LAN and same network segment,
Noontec and NAS software can be use normally.
When using the product in Windows operating system, please visit our official
website to download http://www.noontec.com/Cn/services/downloads/ Noontec
NAS software of N5 in Windows operating system. The software can search the
N5 machine automatically and show the corresponding IP address, meanwhile, it
will also show several common using function logging methods. It is easy and
convenient to operate.
1、Download Noontec NAS software compressed packet to your computer and
decompress it。
2、Meanwhile, it can also send the shortcut of “Noontec NAS. exe” software icon
in the folder to the computer desktop( convenient for management)
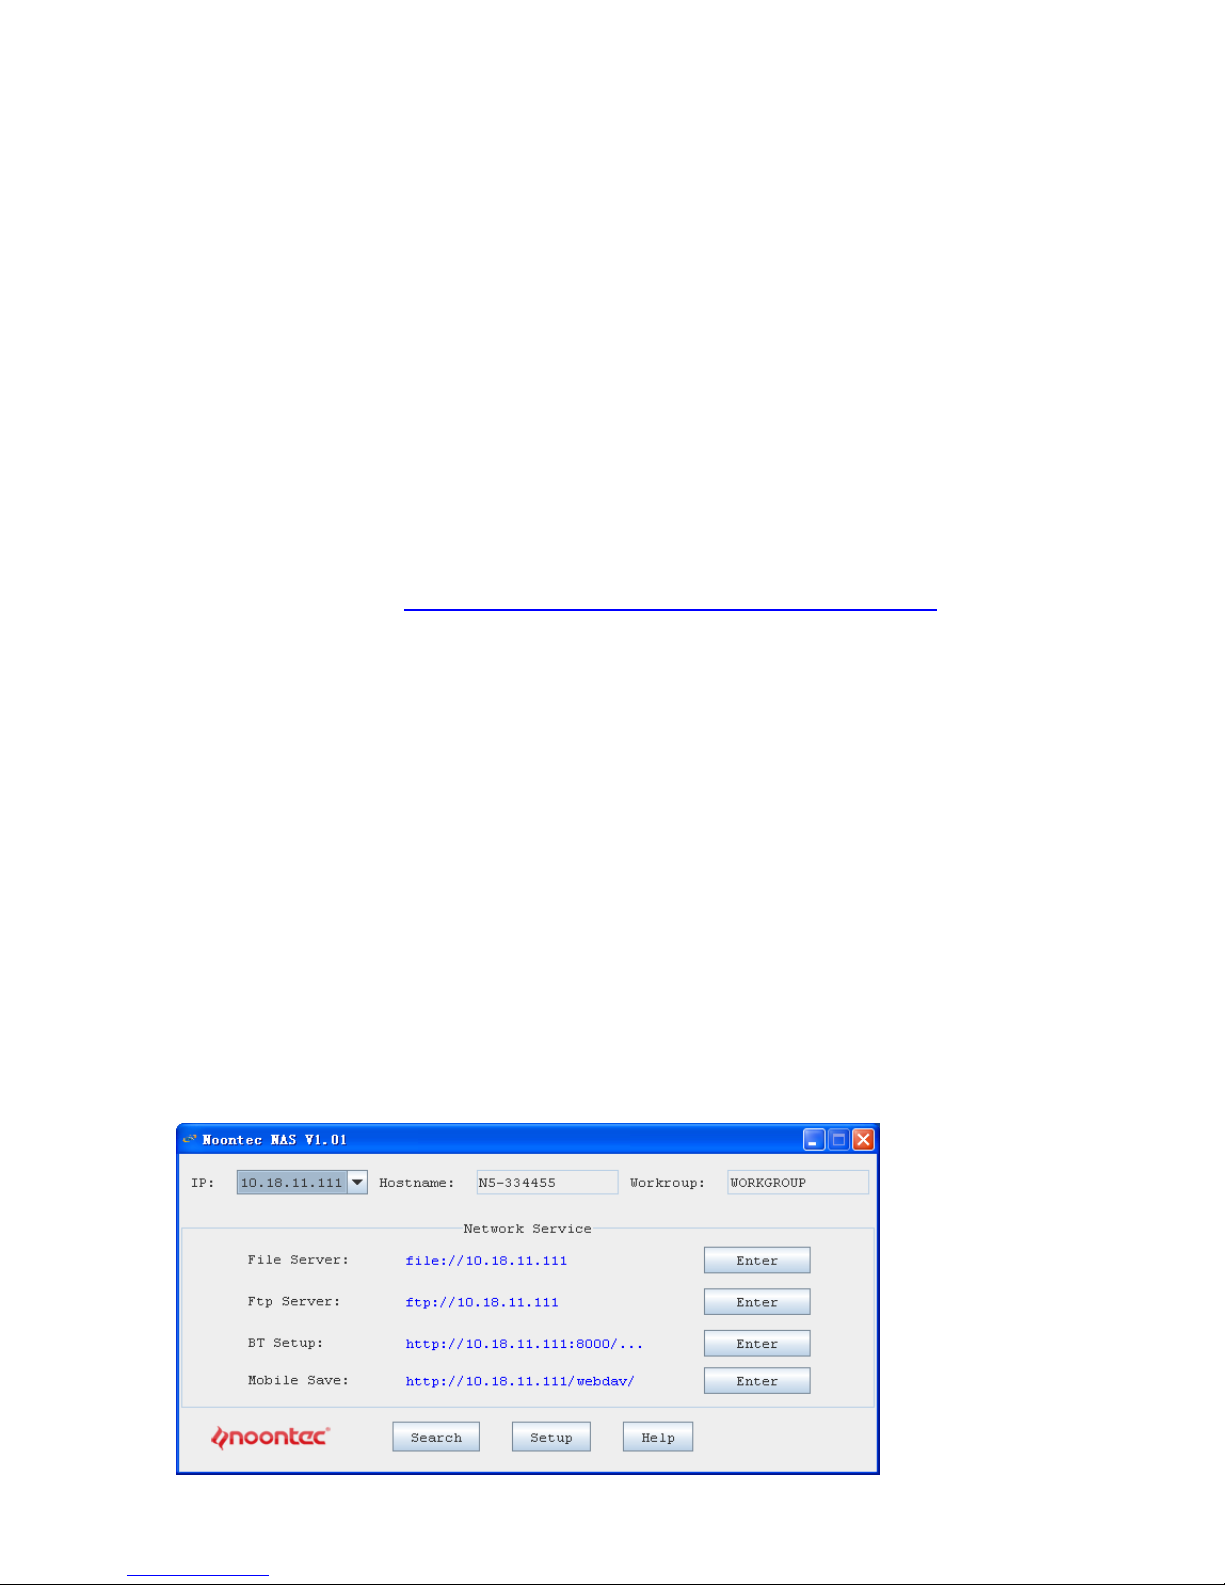
3、Double click “Noontec NAS” icon,you can find the corresponding information
of N5 shown as the following picture:

11
4. Through NOONTECH NAS software, you can search all the N5 products
quickly in the same network segment in the LAN. Firstly, enter product’s Setup
interface, in the Hard Drive Settings of System Tool to format the hard drive,
otherwise the product can’t be used normally.
①Now, there are two ways to set the management interface of product’s network
storage: Click “management” to directly enter. Or enter the storage IP address
which you want to access to in the browser IE address bar,such as
http://10.18.9.161/ . The factory default administrator and password are both
admin.
②File server: Click the shown IP address of file server or click Enter to enter file
server for reading and writing data and other corresponding operations. The
factory administrator is guest without password.
③FTP server: Click the shown IP address of FTP server or click Enter to enter
FTP server for reading and writing data and other corresponding operations. The
factory administrator is guest without password.
④BT management: Click the shown IP address of BT management or click Enter
to enter BT management for reading and writing data and other corresponding
operations. The factory administrator is guest without password.
⑤Mobile Sharing: Click the shown IP address of Mobile sharing or click Enter to
enter mobile sharing for reading and writing and other corresponding operations.
The factory administrator is guest without password.
Attention: When you using IE8 or more advanced browser, if you want to find
the FTP site in the Windows explorer, click “page” in the browser, and click “open
FTP in the Windows explorer”. Enter username and password for the

12
corresponding write and read operations, otherwise, you can only do read
operation.
For example: the FTP address of entering one piece N5 in the page is
ftp://10.18.9.161/
Enter username and password to log in.
If enter directory folder directly, you can only do read operation. If you want to do
read and write operations, click the “Page” in the browser menu bar, then click
“open FTP in the Windows explorer”. Enter username and password to enter to
do read and write operations in finding FTP site in Windows explorer
You can use the FTP download software to connect with N5 for files upload and
download.
④、BT management: Click the shown IP address of BT management or click
Enter to enter BT management interface to do corresponding operations or the
download task. The factory default username and password are both admin.
⑤、Mobile sharing: Click the shown IP address of mobile sharing or click Enter to
enter mobile sharing interface to do corresponding operations for the sharing
folder. For mobile phone, tablet PC(including ipad, iphone), user can enter the
IP address of mobile sharing in the browser for corresponding file management.
Meanwhile, you can also download free Webdav program in the APP Store or E
market。The factory default username is guest without password.
When using the product in Windows operating system, please log in our
official website download center to download Noontec NAS software of N5 in
Linux, MAC 05 or other operating systems. If your computer doesn’t support
JAVA environment, when double click Noontec NAS software, it will promote you
to install JAVA software, and automatically access to JAVA official website
http://www.java.com, then you can down corresponding JAVA software for
installation. Other operations please refer to the operation in Windows system.

13
Tips: this “Noontec NAS Jar” software also supports using under Windows
system, but need to install JAVA software in the Windows corresponding system
to get the corresponding environment。
WEB Management and Instruction
Click the “management” in Noontec NAS software, or enter the IP address of http:
// system in the browser address bar, it will enter user logging interface, enter
username and password (the system default username and password is admin).
As following picture:
The following operations are all operated in WINDOWS 7 system, and other
operation systems please refer to the following steps.
Attention: as the software continuously updates, it subject to your available
product.
Enter product’s homepage
System will enter GIGALINK N5 browser interface, which including six
functions: system status, network settings, user management, system
maintenance, application service and Exit. Click different buttons to
enter the management interface of current function.

14
System status: this section mainly shows system, network, service and their
settings.
Network settings: this section mainly sets network and other information.
User management: this section mainly introduces user corresponding settings.
System maintenance: this section mainly introduces the corresponding
operations of hard drive settings, software updates, reboot system and recover
factory settings.
Application service: this section mainly introduces SMB server, mobile sharing,
FTP server, BT download and multimedia service settings.
Exit: exit from Web management interface.
LAN
If in LAN environment,through Noontec NAS software or enter the product’s IP
address in the browser address bar to enter the product’s homepage.
Through the WAN to remote access

15
If you want to remote control this product through internet, please make sure that
you’ve already configured correctly in the network settings and opened the
options of UPnP and other functions of concentrator/ router.
Enter your applied domain name in the browser (such as
http://mytest.dyndns-home.com), and then enter product’s homepage, and
remote manage the product. As the following picture:
System status
System
Enter the system interface which shows system information and hard drive status,
as following picture:
Table of contents
Popular Network Hardware manuals by other brands

NETGEAR
NETGEAR ANT24BNA installation guide

Allen-Bradley
Allen-Bradley Rockwell Automation 1784-PKT Series user manual

Agora
Agora Fast2 user manual

Bryant
Bryant SYSTXBBNIM01 Installation and start-up instructions

NETGEAR
NETGEAR RND4475 - ReadyNAS NV+ NAS Server Software manual

MikroTik
MikroTik RouterBoard QRT Series Quick setup guide

CommScope
CommScope NG4access ODF Platform Value-Added Module installation instructions

DIAMOND MOTION
DIAMOND MOTION MEMO2GO Handling instructions

PACSystems
PACSystems RX3i Important product information

Concept Pro
Concept Pro VUHDIPE-8 quick start guide

AsGa
AsGa LightDrive Series user guide

ADTRAN
ADTRAN Total Access 300 Series instruction manual


