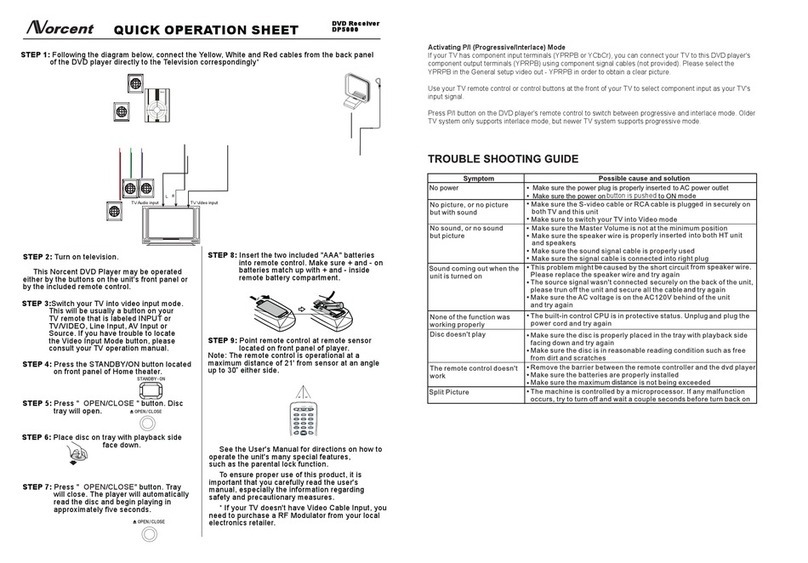
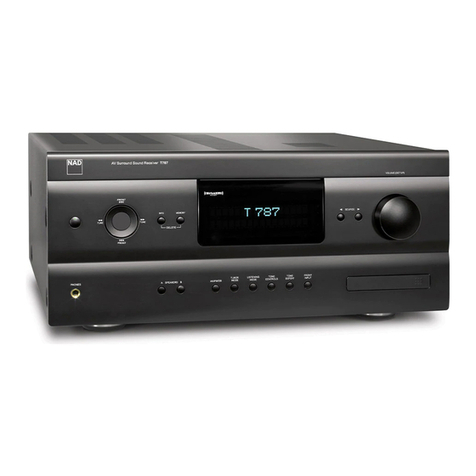
Norcent DP1800 Instruction Manual

DVD RECEIVER SYSTEM
DP1800
DVD RECEIVER SYSTEM
Operating Instruction Manual
Built-in DolbyDigital decodingfor maximumhome entertainmentenjoyment
Unique laser-headover-current protectionsystem doublesservice life
Special DVDdeck featuresfully dustpro ofand antishock designas wellas augmentederror
correction andbetter stability
Fully functionalDVD operatingsystem offersmany favoritefunctions anduser-friendly
operation
Integrated DVDand built-in6-channel Hi-Fiamplifier
Norcent Technology,Inc.
550 CliffsideDr.
San Dimas,CA91773
Customer Support:(800) 916-4011
2002 NorcentTechnology,Inc.All rightsreserved.
MAN-DP1800
www.norcent.net
C

Alightning boltwith anarrowhead symbolwithin
an equilateraltriangle isintended toalert the
user tothe presenceof uninsulated"dangerous
voltage" withinthe product'senclosure thatmay
be ofsufficient magnitudeto constitutea riskof
electric shockto persons.
The exclamationpoint withinan equilateral
triangle isintended toalert theuser tothe
presence ofimportant operatingand maintena-
nce (servicing)instructions inthe literature
accompanying theappliance.
WARNING:TOAVOIDTHE DANGEROF FIRE
OR ELECTRICSHOCK, DONOT EXPOSETHIS
APPLIANCETO RAINOR MOISTURE.NEVER
OPEN THECABINET,AS DANGEROUSHIGH
VOLTAGESARE CONTAINED INSIDE.ONLY
AQUALIFIED SERVICETECHNICIAN SHOULD
ATTEMPT TOOPEN THE CABINET.
CAUTION: TO PREVENTELECTRIC SHOCK,
MATCHWIDE BLADEOF PLUGTO WIDESLOT,
AND FULLY INSERTINTO ELECTRICALSOCKET.
CAUTION: This DVDreceiver unit employs
a lasersystem. To preventdirect exposureto the
laser beam,do notopen theenclosure. Visible
laser radiationis presentwhen enclosureis open.
DO NOTSTAREINTO BEAM.Additionally, the
use ofcontrols oradjustments orperformance of
procedures otherthan thosespecified herein
may resultin hazardousradiation exposure.
To ensureproper useof thisproduct, pleaseread
this owner'smanual carefullyand retainfor future
reference. Shouldthe unitrequire maintenance,
contact anauthorized servicelocation, orcontact
Norcent Technology.
Reorient orrelocate thereceiving antenna
Increase theseparation betweenthe
equipment andreceiver
Connect theequipment intoan outleton a
circuit differentfrom thatto whichthe
receiver isconnected
Consult thedealer oran experiencedradio/
TV technicianfor help
FCC Caution:Anychanges ormodifications not
expressly approvedby NorcentTechnology
could voidthe user'sauthority tooperate this
equipment.
INDUSTRYCANADA REQUIREMENT
This ClassB digitalapparatus meetsall
requirements ofthe CanadianInterference-
Causing EquipmentRegulations.
THE REGIONCODE FORTHIS UNITIS 1.
FCC NOTICE:This equipmenthas beentested
and foundto complywith thelimits fora Class
B digitaldevice, pursuantto section15 ofthe
FCC rules.These limitsare designedto provide
reasonable protectionagainst harmful
interference ina residentialinstallation.
This equipmentgenerates, uses,and can
radiate radiofrequency energyand, ifnot in-
stalled andused inaccordance withthe
instructions, maycause harmfulinterference to
radio communication.However,this isno
guarantee that interference willnot occurin a
particular installation.If thisequipment does
cause harmfulinterference toradio ortelevision
reception, whichcan bedetermined byturning
the equipmentoff andon, theuser isencouraged
to tryto correctthe interferenceby oneof the
following measures:
IMPORTANT: DVDsare dividedinto separate
regions. TheUnited Statesand Canadaare
designated asregion 1DVD. ThisDVD player
only playsregion 1DVDs. Sinceit iscommon
for DVDmovies tobe releasedat differenttimes
in differentregions ofthe world,all playershave
region codes,while discsmay havean optional
region code.If youload adisc ofa differentre-
gion codein thisunit, youwill seethe regioncode
notice onthe screen.The discwill notplay,and
should beunloaded.
PROTECT YOURSELF!
Record themodel andserial numbersfor this
unit whileit iseasy tosee them.These numbers
are locatedon theback ofthe unit'scabinet.
Retain thisinformation forfuture reference.
Model No. DP1800
Serial No._________________________
Retain thisinformation forfuture reference.
CAUTION
RISK OFELECTRIC SHOCKDO NOTOPEN
CAUTION: TO REDUCETHE RISKOF ELECTRIC
SHOCK, DONOT REMOVECOVER (ORBACK).
THERE ISNO USERSERVICEABLE PART
INSIDE. REFERSERVICING TO QUALIFIED
SERVICE PERSONNEL.
PRECAUTIONS
1
RISK OF ELECTRICSHOCK
DO NOT OPEN
WARNING
1
28

CAUTION: Isit importantthat youread and
follow allof theinstructions inthis bookletand
any markedon theunit itself.Retain this
booklet forfuture reference.
Accessories---Neverplace thisproduct onan
unstable platform, stand,cart, wall mount,shelf,
or table.The productmay fall,causing serious
personal injuryto personsand pets,as wellas
seriously damaging theproduct. Use onlywith
a stable platform,stand, cart, wallmount, shelf,
or table that hasbeen recommendedby Norcent
Technology orsold withthe product. Any mounting
of the product should follow themanufacturer's
instructions, and usea mounting accessoryrecom-
mended bythe manufacturer. Thisunit whilepositio-
ned onsome typeof cartmust bemoved with care.
Quick stops,excessive force,and unevensurfaces
may cause theproduct and cartcombination to
overturn.
Attachments---Useonly attachmentsrecommend-
ed by NorcentTechnology,as they maycause
hazards.
Cleaning---Always unplugthis unitfrom thewall
electrical outletbefore cleaning.Do notuse liquidor
aerosol cleaners;use adamp clothfor cleaning.
Grounding orPolarization -This productis
equipped witheither apolarized AC plug (a plug
having one bladewider than theother) or witha
three-wire grounding-typeplug. Theseplugs fit
into the poweroutlet only oneway.This isa safety
feature. If youare unable toinsert the plugfully into
the outlet,try reversingthe plug.If theplug should
still failto fit,contact anelectrician. Donot defeat
the safetypurpose ofthe polarizedplug inany way
or manner.
Lightning---For addedproduct protectionduring
a lightningstorm orwhen itis leftunattended and
unused forlong periodsof time,unplug itfrom the
wall outletand/or disconnectthe antenna orcable
system. Thiswill preventdamage tothe prod-
uct dueto lightningand power-linesurges.
Object andLiquid Entry---Neverpush
objects of any kindinto thisproduct through
openings as they maytouch dangerous
voltage pointsor short-outparts thatcould
result ina fireor electricshock. Neverspill
liquid ofany kindon orinto theproduct.
OutdoorAntenna Grounding---Ifan outside
antenna orcable systemis connectedto the
product, besure theantenna orcable system
is groundedso asto provideprotection
against
voltage surgesand built-upstatic charges.
Article 810of theNational ElectricalCode,
ANSI/NFPA 70, providesinformation with
regard toproper groundingof themast and
supporting structure,grounding ofthe lead-in
wire toan antennadischarge unit,size or
grounding conductors,location ofantenna-
discharge unit,connection togrounding
electrodes, andrequirements forthe grounding
electrode.
CAUTION: Isit importantthat youread and
follow allof theinstructions inthis bookletand
any markedon theunit itself.Retain this
booklet forfuture reference.
antenna orcable
system. Thiswill preventdamage tothe prod-
uct dueto lightningand power-linesurges.
Object andLiquid Entry---Neverpush
objects of any kindinto thisproduct through
openings as they maytouch dangerous
voltage pointsor short-outparts thatcould
result ina fireor electricshock. Neverspill
liquid ofany kindon orinto theproduct.
OutdoorAntenna Grounding---Ifan outside
antenna orcable systemis connectedto the
product, besure theantenna orcable system
is groundedso asto provideprotection
against
voltage surgesand built-upstatic charges.
Article 810of theNational ElectricalCode,
ANSI/NFPA 70, providesinformation with
regard toproper groundingof themast and
supporting structure,grounding ofthe lead-in
wire toan antennadischarge unit,size or
grounding conductors,location ofantenna-
discharge unit,connection togrounding
electrodes, andrequirements forthe grounding
electrode.
Accessories---Neverplace thisproduct on an
unstable platform, stand,cart, wall mount,shelf,
or table.The productmay fall,causing serious
personal injuryto personsand pets,as wellas
seriously damaging theproduct. Use onlywith
a stable platform,stand, cart, wallmount, shelf,
or table that hasbeen recommendedby Norcent
Technology orsold withthe product. Any mounting
of the product should follow themanufacturer's
instructions, and usea mounting accessoryrecom-
mended bythe manufacturer. Thisunit whilepositio-
ned onsome typeof cartmust bemoved with care.
Quick stops,excessive force,and unevensurfaces
may cause theproduct and cartcombination to
overturn.
Attachments---Useonly attachmentsrecommend-
ed by NorcentTechnology,as they maycause
hazards.
Cleaning---Always unplugthis unitfrom thewall
electrical outletbefore cleaning.Do notuse liquidor
aerosol cleaners;use adamp clothfor cleaning.
Grounding orPolarization -This productis
equipped witheither apolarized AC plug (a plug
having one bladewider than theother) or witha
three-wire grounding-typeplug. Theseplugs fit
into the poweroutlet only oneway.This isa safety
feature. If youare unable toinsert the plugfully into
the outlet,try reversingthe plug.If theplug should
still failto fit,contact anelectrician. Donot defeat
the safetypurpose ofthe polarizedplug inany way
or manner.
Lightning---For addedproduct protectionduring
a lightningstorm orwhen itis leftunattended and
unused forlong periodsof time,unplug itfrom the
wall outletand/or disconnectthe
Overloading---Do not overloadwall outlets,
extension cords, orintegral convenience receptacles,
as this mayresult in afire or electricshock.
Power-Cord Protection- Power-supplycords
should berouted sothat theyare notlikely to be
walked on orpinched by itemsplaced upon oragainst
them, paying particularattention to cordsat plugs,
convenience receptacles,and thepoint wherethey
exit from theproduct.
Power Lines---Anoutside antennasystem
should notbe locatedin thevicinity ofoverhead
power lines orother electric lightor power circuits,
or where itcan fall intosuch power linesor circuits.
When installing anoutside antenna system,extreme
care should betaken to keepfrom touching such
power linesor circuitsas contactwith themmight be
fatal.
IMPORTANT--SAFETY INFORMATION
227
Power Sources---This productshould be oper-
ated onlyfrom thetype ofpower sourceindicated
on themarking label.If youare notsure of the type
of power supplyto your home,consult yourproduct
dealer or localpower company. For products
intended tooperate frombattery powerorother
sources, referto theoperating instructions.This
DVD player operateson 120VAC/60Hz. Donot turn
off unitimmediately afterturning on;wait at least 10
seconds.
Replacement Parts--- Ifreplacement parts are
required, besure theservice technicianhas used
replacement partsspecified byNorcent Technology
or havethe samecharacteristics asthe original
part. Unauthorizedsubstitutions mayresult infire,
electric shock, orother hazards.
Safety Check---Upon completionof any service
or repairsto thisproduct, askthe servicetechnician
to performsafety checksto determinethat the
product isin properoperating condition.
Servicing---Do notattempt toservice this
product yourself asopening or removingcovers
may exposeyou todangerous voltageor other
hazards. Refer allservicing to qualifiedservice
personnel.
TV System---Thisunit is compatiblewith
television sets featuringeither the NTSCor PAL
color system.
Ventilation---Slotsand openingsin thecabinet
are providedfor ventilationand to ensure reliable
operation and protectionfrom overheating.These
openings shouldnever beblocked by placingthe
product ona bed,sofa, rug,or othersimilar
surface. Thisproduct shouldnot beplaced
in abuilt-in installationsuch asa bookcaseor
rack unlessproper ventilationis provided.Ne-
ver placethis productnear aheat source,
suchas heatregisters, stoves,radiators,or
any other product thatproduces heat.
Water andMoisture---Do notuse this
product near sources ofwater andmoisture,
such asbath tub,wash bowl,kitchen sink,or
wash machine;in awet, dampbasement; or
near aswimming poolor similarlocations. If
moisture condensationoccurs, removeany
disc, connectthe unit'spower cordto awall
outlet, turnthe uniton, and leave iton fortwo
to threehours. Bythen, the unit willhave
warmed upand evaporatedany moisture.
LIMITED WARRANTY
NORCENT DVDPLAYER
Warranty obligationsof NorcentTechnology,Inc. arelimited tothe termsset forthbelow:
1. NorcentTechnology warrantsto theoriginal consumerpurchaser thatthis NorcentDVD playerwill
be freefrom defectsin materialand workmanshipfor theStandard WarrantyPeriod ofone year. The
start ofthe warrantyperiod isthe dateof purchase,verifiable bya datedsales receipt.
2. Thewarranty ona replacementplayer isthe remainderof thewarranty periodon theoriginal player
or 90days, whicheveris longer.
3. Ifthe originalconsumer purchaserdiscovers adefect, NorcentTechnology will,at itsoption, repair
the DVDplayer atno chargeto theconsumer,provided itis returnedduring thewarranty period,with
transportation chargesprepaid, toNorcent Technology,Inc. atthe addressbelow.The unitmust be
sent properlypackaged inoriginal NorcentTechnology packagingor inNorcent Technology-approved
packaging.
4. Forwarranty service,contact NorcentTechnology at(800) 916-4011 (inthe U.S.A.)to obtaina
Return MaterialAuthorization(RMA) number.Acopy ofthe originaldated salesreceipt bearingthe
appropriate NorcentTechnology serialnumber maybe requiredfor warrantyservice.
The followingare notcovered underthis warranty:
Normal wearand tear
Abuse,unreasonable use,mistreatment, orneglect
Damage causedby theequipment orsystem withwhich thedisc playeris used
Damage causedby modificationor repairnot madeor authorizedby NorcentTechnology,Inc.
Disc playerwhose NorcentTechnology,Inc. serialnumber hasbeen removedor defaced
Damage causedby useof non-NorcentTechnology,Inc. packaging
Damage causedby improperor improperlyused packaging
Players thatare determinedto bestolen
THIS WARRANTYANDREMEDIES SETFORTHABOVEARE EXCLUSIVEANDIN LIEUOFALL
OTHERS, WHETHERORAL ORWRITTEN, EXPRESSEDOR IMPLIED.NORCENT TECHNOLOGY,
INC. SPECIFICALLY DISCLAIMSANYANDALLIMPLIED WARRANTIES,INCLUDING WITHOUT
LIMITAIONWARRANTYOF MERCHANTABILITYANDFITNESS FORAPARTICULARPURPOSE
AND AGAINSTINFRINGEMENT.
No NorcentTechnology,Inc. dealer, agent,distributor,or employeeis authorizedto makeany
modification, extension,or additionto thiswarranty.
NORCENT TECHNOLOGY, INC.IS NOTRESPONSIBLE FORSPECIAL, INCIDENTAL, INDIRECT,
OR CONSEQUENTIALDAMAGES RESULTING FROMANYBREACH OFWARRANTYOR UNDER
ANY OTHERLEGALTHEORY ,INCLUDING, BUTNOT LIMITEDTO, LOSSOF DATA,LOSS OF
PROPERTY,ANDANY COSTSOF RECOVERINGPROGRAMMING ORREPRODUCINGANY
PROGRAM ORDATASTORED INOR USEDWITH NORCENTTECHNOLOGY, INC.PRODUCTS.
Some statesdo notallow theexclusion oflimitation ofincidental orconsequential damagesor
exclusion ofimplied warranties,so theabove limitationsor exclusionsmay notapply toyou. This
warranty givesyou speciallegal rights;you alsohave otherrights thatvary fromstate tostate.
Norcent Technology,Inc.
550 CliffsideDr.
San Dimas,CA91773

26 3
TABLE OF CONTENTS
Precaution .................................................1
Safety Information.................................... ..2
Table ofContents ........................................3
About Your DVDPlayer ................................4
Best Location............................................................4
To Obtain aClear Picture.......................................... .4
Playable Discs..........................................................4
Digital AudioOutput ..................................................4
Laser-Head Over-Current ProtectionSystem ..............4
Disc Use.....................................................5
Handling...................................................................5
Cleaning...................................................................5
Storing.....................................................................5
Controls......................................................6
Front Panel...............................................................6
Back Panel...............................................................6
Remote Control...........................................7
Operating theremote control........................8
Connecting Devices....................................,9
Speakers...................................................10
Arrangement ofspeakers............................10
Connecting speakers..................................11
Connecting antenna...................................12
Connecting powersupply............................13
Playing theradio........................................14
Basic DVDoperation..................................15
Functions..................................................17
System setup.............................................19
Preference setup.......................................23
Mp3 function..............................................24
JPEG files.................................................25
Trouble shooting........................................25
DVD DP-1800technical specifications.........26
Warranty...................................................27
DVD Player
TV System NTSC/PAL
Compatible Discs DVD, CD,MP3,
CD-R, CD-RW
Resolution Ratio Greater Than500 lines
Video S/NRatio 65dB
Frequency Response fs (96KHz/24bit)
4Hz -44KHz:+/-2dB
Audio S/NRatio 95dB
Degree ofDistortion <0.01%
D/AConverter 192KHz/24bit
Video Out Y:1Vp-p(75 )
S-Video Out C: 0.3Vp-p(75 );
2.0V 0.2V
Audio Out 5.1 Channel,
DigitalAudio Output Coaxial
Connections CVBS
S-Video, 2Channel
Output
FM Tuner
Tuning Range 87.5-108MHz
(100kHz Space)
S/N Ratio >46dB
Monophonic >46dB
Stereo >50dB(DIN)
Selectance 50dB
THD
Monophonic 2%
Stereo 3%
Frequency Response 30Hz-10kHz +/-1dB
Stereo Resolution 35dB (1kHz)
30dB (100Hz-10kHz)
AM Tuner
Tuning Range 530-1710kHz (10kSpace)
S/N Ratio 35dB
THD 3%
Amplifier
Distortion LimitedOutput Power:
Main Speakers 15W+15W (4 )
Surround Speakers 15W+15W (4 )
Center Speaker 15W (4 )
Subwoofer 30W(8 )
DVD DP-1800 TECHNICAL SPECIFICATIONS
Frequency Response:
Main Speakers 20Hz-20kHz +/-3dB
Surround Speakers 20Hz-20kHz +/-3dB
Center Speaker 20Hz-20kHz +/-3dB
Subwoofer 20Hz-20kHz+/- 3dB
S/N Ratio > 76dB
Input Sensitivity 350mv,47k
Channel Resolution > 30dB(Normal)
Remote Control
Transmitter InfraredRay
Signal Range Approximately15'
Power Source 2 AAA Batteries
General
Power Supply AC110-240V/50/60Hz
Consumed Power 130W
Size (WxHxD)
DVD Player: 16.3 x2.8 x15.7
Speakers 4 x4.5 x5.3
Subwoofer: 8
Weight
DVD Player: 16.2 lbs.
Speakers: 0.75lbs.
Subwoofer: 11 lbs.
Because itsproducts aresubject to
continuous improvement,Norcent Technology
reserves theright tomodify productdesign
and/or specificationswithout noticeand without
incurring anyobligations.
""
"" "
"""
"x14.5"x17.2"
±

425
The followingwill helpyou getthe most
enjoyment fromyour NorcentDVD receiver
system.
BEST LOCATION
The unitshould beplaced ona firm,flat
surface, awayfrom VCRs,stereos, radios,or
large speakers,as themagnetic fluxfrom these
devices maycause distortionin thesound and
a poorpicture. Ifplaced ina cabinet,be sure
there isat least 1 of freespace completely
around theunit forproper ventilation.
TO OBTAINACLEAR PICTURE
ADVD receiveris aprecision device.If the
optical pick-uplens anddisc driveparts become
dirty orworn down,picture qualitywill become
poor.To obtaina clearpicture, regularinspection
and maintenanceare recommendedevery
1,000 hoursof use,depending onthe operating
environment. Contactdealer fordetails.
PLAYABLE DISCS
This NorcentDVD receiversystem willplay the
following typesof discs:DVD, MP3,CD, CD-R,
and CD-RWwith super-errorcorrection ability.
It isalso capableof displayingpicture CDsand
digital photoalbums. Itsupports eightlanguages,
up to32 subtitles,and multi-angleviewing. It
features easysetup andoperation withon-
screen menus.It hasfull functionCPU upgrade
able capability.
""
ABOUT YOUR DVD PLAYER
DIGITALAUDIO OUTPUT
The unit'scoaxial outputcapability enables
you toconnect anexternal six-channelAV
amplifier andprocessor withbuilt-in Dolby
Digital codesand MPEGor DTSmodulating
capacity withjust onecord. Thisenables you
to convenientlyenjoy differentDVD, CD,and
Mp3 discs.
ANALOG AUDIOOUTPUT
Speaker systemplug-and-play convenience
through thebuilt-in six-channelpower amplifier
eliminates theuse ofan externalpower amplifier.
LASER-HEAD OVER-CURRENT
PROTECTION SYSTEM
To extendthe servicelife ofthe laserhead,
the unitincludes aunique laser-headover-
current protectionsystem, ensuringa constant
laser current.
The JointPhotographic ExpertsGroup
(JPEG) producesstandards forcontinuous tone
image coding.It isa widelyused formatfor
compressing andsaving images.It useshigh-
efficiency compressiondata tocompress
images upto 15xto 20x.JPEG issupported by
most ofthe imageprocessing softwarein use
today,and issuitable forstoring photoimages.
This NorcentDVD playercan decodeJPEG
formatted pictureCDs.
Play byNumber Keys
1. Followthe basicoperating instructionsto
insert thepicture CDdisc. Oncethe disctray is
closed, themachine willautomatically search
for theinformation onthe discand showit on
the TVscreen.
2. Pressthe numberkeys toselect animage
album. Note:The numberkeys areonly
functional withinthe currentimage album.
Play byMenu
1. Followthe basicoperating instructionsto
insert thepicture CDdisc. Oncethe disctray is
closed, themachine willautomatically search
for theinformation onthe discand displaythe
main menuon theTV screen.
2. Pressthe directionalscroll buttonsto select
images andpress thePLAYbutton.
3. To selectother images,press STOP
button, thenpress directionalscroll keys.Once
image isselected, pressthe PLAY button.
Other JPEGFunctions
1. Whileplaying aJPEG file,functions such
as pause,random play, repeatplay andothers
are stillavailable.
2. Pressthe RESUMEbutton whenplaying
JPEG filesto selectvarious imagedisplay
modes.
3. Pressthe PREVor NEXTbuttons when
playing JPEGfiles toselect eitherthe previous
or nextimage.
4. Thezoom functionis operablewhile
showing JPEGimages. Pressthe ZOOMbutton
to usethe zoomfunction, pressagain toclose it.
5. PressFASTFORWARDor FAST RETURN
buttons whenin zoomfunction tozoom inor out.
6. Pressthe directionalscroll buttonswhen
in zoomfunction torotate animage.
JPEG FILES
This handytrouble-shooting guideis
provided tosave youtime incase you
experience anyinconvenience withthis
DVD player. Ifthe problemis notlisted orif
the providedsolution doesnot correctthe
problem pleasecall ourcustomer support
department at(800) 916-4011.
Problem PossibleSolution
No power
1. Checkto ensurethat thepower plugis
securely inthe walloutlet.
No sound
1. Checkthe connectionbetween the
DVD playerand theTV set,amplifier,
or anyother unitit isconnected to.
2. Checkto ensurethe TVand amplifier
are inthe correctmode (video1).
No picture
1. Checkthe connectionbetween the
DVD playerand theTV setor anyother
unit itis connectedto.
2. Checkto makesure TVis turnedon.
Disc doesnot play
1. Checkto makesure thedisc isloaded
correctly labelside facingup ondisc tray.
2. Checkthat discis cleanfrom dirt,dust,
fingerprints, andsmudges.
3. Checkto ensuredisc iswithin the
guides onthe tray.
4. Checkif parentallock functionis on.
5. Makesure discis foruse inregion 1.
Remote doesnot work. Checkbatteries;
possibly replace.
2. Checkto ensurethere isn'tany
obstacles betweenthe remotesensor on
the unit'sfront paneland theremote
control.
3. Besure theremote isaimed atthe
remote sensor.
Divided picture
1. Checkthat discis cleanand hasno
scratches.
2. Theunit iscontrolled bya micro
computer,which mayneed tobe reset.
Turnoff theunit's power, waitseveral
seconds, thenturn backon.
No colorpicture
1. Checkto seeif theS connectoris
damaged (bentpin).
MP3 discsdon't play
1. Useanother softwareedition to
reburn disc,as theedition usedmay not
be compatiblewith theplayer.
2. Usenew editionsof softwaresuch as
Audiostation4, asy CDCreator , Toast
Titanium,etc.
3. Makesure MP3file isnot encoded
with avariable bitrate, suchas provided
by RealNetworks.
"E "
TROUBLE SHOOTING

5
24
This pagecontains valuableinformation
regarding thehandling, cleaning,and storage
of discsplayed inthis unit.
Handling
Do nottouch theplayback sideof thedisc.
Do notattach paperor tapeto discs.
Do notstick orwrite anythingon thesurface.
Protect againstfingerprints.
Alwayshold adisc bythe centerand edge
portions.
Cleaning
Fingerprints anddirt onthe discmay cause
picture and/orsound deterioration.Wipe the
disc fromthe centeroutward witha softcloth.
Alwayskeep thedisc clean.
If youcannot wipethe dirtoff, lightlyuse a
slightly moistenedsoft clothand finishwith a
dry cloth.
Do notuse anytype ofsolvent suchas: Paint
thinner,benzene, commerciallyavailable
cleaners oranti-static sprayfor vinylLPs.
Storing
Do notstore discsin placessubject todirect
sunlight ornear heatsources.
Do notstore discsin placessubject to
moisture anddust.
Store discsvertically ina case.Stacking or
placing objectson discsoutside oftheir case
may causewarping.
NOTE: Norcent Technology isnot responsible
for damagethat mayoccur toany discthat is
operated inthis unitor nothandled, cleaned,
or storedas suggestedabove.
USE OFDISCS
Password
Follow theinstructions inDVD MenuSetup
in combinationwith thedesired optionfrom
graphic below.
The defaultpassword forthis featureis
0000 It maybe changedthrough thisoption.
Defaults
Follow theinstructions inDVD MenuSetup
in combinationwith thedesired optionfrom
graphic below.
The factorypreset defaultsmay beresumed
through thisoption.
Smart Navigation
Follow theinstructions inDVD MenuSetup
in combinationwith thedesired optionfrom
graphic below.
Select NOMENU ifplaying anMP3 orpicture
CD withouta menu;or selectMENU ifplaying an
MP3 orpicture CDwith amenu.
""
CHANGE
PIN EDITION
PREFERENCES SETUP
AUDIO
SUBTITLE
DISC MENU
LOCALE
PARENTAL
DEFAULTS
SMART NAV
MAIN PAGE
PASSWORD
RESET
DEFAULT ENTRY
PREFERENCES SETUP
AUDIO
SUBTITLE
DISC MENU
LOCALE
PARENTAL
PASSWORD
SMART NAV
MAIN PAGE
DEFAULTS
NO MENU
WITH MENU
SMARTNAN
PREFERENCES SETUP
AUDIO
SUBTITLE
DISC MENU
LOCALE
PARENTAL
PASSWORD
DEFAULTS
MAIN PAGE
SMART NAV
MP3 isan audiocompression technologythat
uses MPEG3standards, compressingat arate
of 12:1.Having CD-qualityaudio, anMP3 disc
can recordover 600minutes ofmusic.
Playing anMP3 Disc
1. Followthe basicoperating
instructions toinsert theMP3
disc. Oncethe disctray is
closed, themachine willauto-
matically searchfor the
information onthe discand
show iton theunit's display
panel.
2. Pressthe directionalscroll
button toselect thesubmenu to
be played,then pressthe directionscroll keyto
select thedesired track.Press thePLAYbutton.
Or,press theappropriate numberkeys toselect
a desiredtrack.
3. To selectanother submenu,press the
STOP buttonthen thedirectional scrollkey.
Repeat Play
With repeatplay,the samesong orall ofthe
songs onan MP3disc canbe playedover and
over.
1.Choosethe desiredsong tobe repeated.
2.Pressthe REPEAT key.
REPEATONE willappear on
the TVscreen.
3.Ifall songsare tobe
repeated, pressthe REPEAT
key asecond time.REPEAT
ALL willappear onthe TV
screen. PressPLAY.
4.To exitthe repeatfunction,
press theREPEATkey athird
time. EXITREPEATwill
appear onthe TVscreen.
Note: The mute,volume control,pause, and
forward/backward searchare stilloperable as
an MP3disc plays.
MP3 FUNCTION
REPEAT ONE
REPEAT ALL
EXIT REPEAT
REPEAT
1MP3 MP301
ROOT ROOT
1MP3
2MP3
3MP3
2MP3 Mp302
3MP3 Mp303
PREFERENCE SETUP

1. POWER
Before pluggingthe powercord intotheAC
outlet, checkto makesure allof theconnection
s havebeen properlycompleted. Whenthey
have been,carefully plugpower cordinto outlet.
Press thePOWER buttonon thefront panel
to powerthe unit.
When theunit isinitially powered,a briefsurge
of electricitymay causeinterference withother
electronic equipmenton thesame circuit.If this
occurs, connectthe unitto anoutlet ona
different circuit.
. /PRE/TUN
Use thisbutton toopen andclose thedisc tray
while inDVD mode.It isdisabled whenanother
signal sourceis used.
When inthe Tuner mode,this buttonis usedto
select presetingor tuningmode.
3. /AUTO
Use thisbutton tobegin playfunction whilein
DVD mode.
When inthe tunermode, youmay pressthis
button forautomatic search..
2
FRONTAND BACKPANELS
1
5 6 7
23 4
8
DVD/CD/MP3/CD-R/CD-RW
DP1800 DVD & AMPLIFIER SYSTEM
Front Panel Functions
4. /MEMO
Use this button to stop play function while
in DVD mode.
While in the tuner mode, this button is used to
memory station.
5. /DOWN
While in the DVD status, you may press this
button for previous track.
While in the tuner mode, you may press this bu-
tton for radio down search.
6. /UP Button.
While in the DVD status, you may press this
button for next track. .
While in the tuner mode, you may press this bu-
tton for radio up search.
7. INPUT SIGNAL SOURCE
Use this button to select the proper input
signal source. (Note: The selected input will
correspond to the selected input terminal on
the rear panel.
8. VOLUME
Use this button to control the unit's volume. It
controls all six channels simultaneously.
623
Back PanelFunctions
1. ANTENNA
Use toconnect theprovided indoorFM and
AM loopantennas.
2. AUXIN
Use toconnect inputfor bothauxiliary 1and
2 musicsources.
3. AUDIOOUT
Use toconnect boththe rightand leftchannel
line outputsas wellas subwooferoutput.
4. VIDEOOUTPUT
5. S-VIDEOOUTPUT
7. FRONT/MAIN
Use toconnect thefour terminalsof theleft
and rightfront ormain speakers.
8. CENTER/SUBWOOFER
Use toconnect thefour terminalsof the
center andsubwoofer speakers.
9. COAXIALOUTPUT
10. 110V/60Hz
This unitcomes withanAC powercord. Be
sure itsprongs aredry beforeplugging itinto
an electricaloutlet. Take cautionnot to
overextend thecord orwalk onit.
11.COMPONENT VIDEOOUTPUT
6. REAR
Use toconnect thefour terminalsof theleft
and rightsurround soundspeakers.
110V~60Hz110V~60Hz
C US
LISTED
Audio/VideoApparatus
E221338
58WJ
WARNING:SHOCK HAZARD- DO NOT OPEN
AVIS:RISQUE DE CHOC ELECTRIQUE- NE PASOUVRIR
CAUTION
RISKOF ELECTRIC SHOCK
DONOT OPEN
ATTENTION
RISQUED ELECTROCUTION
NEPASOUVRIR
50X15mm
1
Used by North
America only!
DOUBLEINSULATION-
WHENSERVICING USE ONLY
IDENTICALREPLACEMENT PARTS.
HongPuInternational Development(Shanghai) Co., Ltd.
Plant25, No.30 FuTeDongSan RD
WaiGaoQiaoFree Trade Zone PuDong Shanghai.P.R.C.
Model No.:
MADE IN CHINA
DP1800
4
67
10
1
23
5
8
9
11
While theDVD playeris inthe stopmode,
press theSETUP keyto accessthe initialsetup
menu, whichincludes audio,subtitle, disc
menu, locale,parental control,password,
defaults, smartnavigation, andthe mainmenu.
These presetvalues areessential toa DVD
player.These itemsmay bechanged asdesired.
Audio Language
Follow theinstructions inDVD MenuSetup
in combinationwith thedesired optionfrom
graphic below.
This NorcentDVD playerhas English,French,
Spanish, Chinese,and Japaneseas itsbuilt-in
disc-dubbing languageoptions.
Subtitle
Follow theinstructions inDVD MenuSetup
in combinationwith thedesired optionfrom
graphic below.
This NorcentDVD playerhas English,French,
Spanish, Chinese,and Japaneseas itsbuilt-in
subtitle languages.When aDVD discis played,
the subtitlefeature maybe selectedthrough this
menu. Itis alsopossible tohide thefeature
through thismenu.
ENGLISH
FRENCH
SPANISH
CHINESE
JAPANESE
GERMAN
ITALIAN
PREFERENCES SETUP
AUDIO
SUBTITLE
DISC MENU
LOCALE
PARENTAL
PASSWORD
DEFAULTS
SMART NAV
MAIN PAGE
DUBBING LANGUAGE
ENGLISH
FRENCH
SPANISH
CHINESE
JAPANESE
GERMAN
ITALIAN
OFF
SUBTITLE
PREFERENCES SETUP
AUDIO
DISC MENU
LOCALE
PARENTAL
PASSWORD
DEFAULTS
SMART NAV
MAIN PAGE
SUBTITLE
Disc Menu
Follow theinstructions inDVD MenuSetup
in combinationwith thedesired optionfrom
graphic below.
This NorcentDVD playerhas English,French,
Spanish, Chinese,Japanese, andoff asits
built-in film'smenu languageoptions.
Locale
Follow theinstructions inDVD MenuSetup
in combinationwith thedesired optionfrom
graphic below.
Since differentcountries havedifferent
language choices,this DVDunit offers
specific localechoices.
Parental Lock
Follow theinstructions inDVD Menu
Setup incombination withthe desiredoption
from graphicbelow.
By selectinga specificrating, filmsin that
group andabove areblocked frombeing shown.
DISC MENU LANGUAGE
PREFERENCES SETUP
AUDIO
SUBTITLE
LOCALE
PARENTAL
PASSWORD
DEFAULTS
SMART NAV
MAIN PAGE
DISC MENU
ENGLISH
FRENCH
SPANISH
CHINESE
JAPANESE
GERMAN
ITALIAN
CHINA
FRANCE
HONG KONG
JAPAN
TAIWAN
GBR
USA
REGION CODE
PREFERENCES SETUP
AUDIO
SUBTITLE
DISC MENU
PARENTAL
PASSWORD
DEFAULTS
SMART NAV
MAIN PAGE
LOCALE
1 G
2
3 PG
4 PG 13
5
6 PG-R
7 NC-17
8 ADULT
NO-PARENTAL
FILM CLASS
PREFERENCES SETUP
AUDIO
SUBTITLE
DISC MENU
LOCALE
PASSWORD
DEFAULTS
SMART NAV
MAIN PAGE
PARENTAL
PREFERENCE SETUP

PRE/TUN
SETUP REPEAT
VOLUME
+10
MUTE
OPEN/CLOSE
UP
DOWN
MEMO AUTO
DVD TUNER AUX 1 AUX 2
FM MODE
STOP PAUSE PLAY A-B
PBC STEP ZOOM RESUME
ENTER
PROG L/R
SLOW
DISPLAY
TIME
N/P SUBTITLELANGUAGEANGLE
MENU
TITLE
7
22
2
4
5
6
22
7
38
13
19
14
15
37
36
12
10
11
9
21
20
8
24
27
25
26
OPEN/CLOSE
MUTE
DVD SELECTOR
AM/FM TUNER
AUX1 SELECTOR
AUX2 SELECTOR
N/P SELECTOR
0-9 NUMBER KEYS
+10
VOL INCREASE
VOLUME DECREASE
PROG
SCREEN DISPLAY
SLOW MOTION
MENU
L/R CHANNEL SELECTOR
SUBTITLE
LANGUAGE
ANGLE
SETUP
ZOOM
RESUME PLAY
REPEAT
FM STEREO MODE
PRESET/TUNING
SCROLL UP
SCROLL RIGHT
SCROLL DOWN
SCROLL LEFT
ENTER
DOWN (search down for radio stations/rewind skip)
UP (search up for radio stations/forward skip)
TITLE
MEMO (memory/previous track)
AUTO (automatic search/next track)
STOP
PAUSE
PLAY
A-B REPEAT
TIME
PBC
STEP
1
28
29
32
31
30
33
35
34
17
18
39
16
23
42
40
41
3
REMOTE CONTROLLER
AUDIO SETUP
The audiosetting includesaudio out,OP
mode, L+R,dynamic, andLPCM out.
Audio Out
Follow theinstructions abovein DVDMenu
Setup incombination withthe desiredoption
from graphicbelow.
This DVDplayer providesthree typesof audio
output:
1.Analog Needsconnection ofterminals on
the backpanel tothe leftand rightspeakers.
2. SPDIF/RAW This surroundingform is
realized throughoptical andcoaxial outputof
Dolby Digitalsignals fromthe backpanel.
3. SPDIF/PCMThe sameas #2.
Note: This unitoutputs bothDolby Digitalsignal
and analogsignal. Ifyou wantto usethe unitfor
karaoke, selectthe analogsignal output.Also,
there isno DTSdecoder.If youplay aDTS
encoded disc,set theoutput toeither SPDIF/
RAW orSPDIF/PCM status.This willoutput the
digital audiosignal throughthe optical/coaxial
mode.
OP Mode
Follow theinstructions abovein DVDMenu Setup
in combinationwith thedesired optionfrom graphic
below.
ANALOG
SPDIF/RAW
SPDIF/PCM
AUDIO SETUP
AUDIO OUTPUT
MAIN PAGE
AUDIO OUT
OP MODE
L+R
DYNAMIC
LPCM OUT
DYNAMIC
LINE OUTPUT
RF ADJUSTMENT
OPERATIONAL MODE SETUP
AUDIO SETUP
MAIN PAGE
AUDIO OUT
L+R
DYNAMIC
LPCM OUT
OP MODE
Both ofthe lineoutput andRF adjustment
options areapplicable inall conditions.Due to
its suitabilityand conveniencein mostcases,
line outputis used.Insome conditions,for
instance whenheadphones areused, theRF
mode maybe used.
L+R
Follow theinstructions abovein DVDMenu
Setup incombination withthe desiredoption
from graphicbelow.
If anamplifier/decoder isbeing usedwith this
DVD playerand ithas DolbyDigital output,the
following selectionsmay bemade: stereo,left,
right, ormixed soundaccordingly.
Dynamic
Follow theinstructions abovein DVDMenu
Setup incombination withthe desiredoption
from graphicbelow.
To avoida disturbingtrembling sound,the
dynamic functionlowers thevolume without
changing theoriginal tone.
LPCM Out
Follow theinstructions abovein DVDMenu
Setup incombination withthe desiredoption
from graphicbelow.
SYSTEM SETUP
STEREO
L-MONO
R-MONO
MIX-MONO
L+R SETUP
AUDIO SETUP
MAIN PAGE
AUDIO OUT
OP MODE
DYNAMIC
LPCM OUT
L+R
DYNAMIC RANGECOMPRESSION
PULL
6/8
4/8
2/8
OFF
AUDIO SETUP
MAIN PAGE
AUDIO OUT
OP MODE
L+R
LPCM OUT
DYNAMIC
LPCM48K
LPCM96K
SET LPCM OUTPUT TO 48K OR 96K
AUDIO SETUP
MAIN PAGE
AUDIO OUT
OP MODE
L+R
DYNAMIC
LPCM OUT

821
OPERATING THEREMOTE CONTROL
Notes:
Do notdirect theremote sensortoward any
light source,such asdirect sunlightor a
strong fluorescentlight, asit maycause
the unitto notoperate correctly.
When otherremote controlsare used
nearby orwhen theremote isused near
equipment usinginfrared rays,interference
may occur.
Placing anobject onthe remotecontrol may
cause itto inadvertentlydepress abutton,
changing afunction andshortening battery
life.
Do notglaze thefront ofthe DVDreceiver
with coloredglass, asit maycause
interference withnormal operationof the
controller.
Make surethere isno barrierbetween the
remote controland remotesensor,as it
could preventthe unitfrom receivingthe
signal.
Do notspill wateror putwet itemson the
remote control.
Never disassembleremote control.
BATTERIES
INCORRECT USEOF BATTERIES MAY
CAUSE THEMTO LEAK,CORRODE OREXP
LODE.
This turnsthe centerspeaker onor off.
Rear Speaker
Follow theinstructions abovein DVDMenu
Setup incombination withthe desiredoption
from graphicbelow.
This turnsthe rearspeaker onor off.
ON
OFF
SPEAKER SETUP
CENTER SPEAKER
DOWNMIX
REAR
SUB WOOFER
CETR DELAY
REAR DELAY
TEST TONE
MAIN PAGE
CETR
ON
OFF
SPEAKER SETUP
REAR SPEAKER
DOWNMIX
CETR
SUB WOOFER
CETR DELAY
REAR DELAY
TEST TONE
MAIN PAGE
REAR
ON
OFF
SPEAKER SETUP
WOOFER SPEAKER
DOWNMIX
CETR
REAR
CETR DELAY
REAR DELAY
TEST TONE
MAIN PAGE
SUB WOOFER
ADolby Digital3-D surroundsound system
ideally deliversrealistic soundeffects,
enhancing theenjoyment ofviewers. Some
amplifying systemsneed helpin thisregards.
Delaying thesound outputof thecentral and
rear speakersis away toovercome thisproblem.
The centerdelay isused toset thedelay time
of thecenter speaker.
SPEAKER SETUP
CENTER DELAY
5ms
3ms
1ms
OFF
DOWNMIX
CETR
REAR
SUB WOOFER
REAR DELAY
TEST TONE
MAIN PAGE
CETR DELAY
Rear Delay
Follow theinstructions abovein DVDMenu
Setup incombination withthe desiredoption
from graphicbelow.
The soundoutput ofthe rearspeakers is
delayed toensure thebest qualityDolby Digital
3-D surroundsound systemis delivered.(See
Center Delayfor details.)
SPEAKER SETUP
REAR DELAY
15ms
9ms
3ms
OFF
DOWNMIX
CETR
REAR
SUB WOOFER
CETR DELAY
TEST TONE
MAIN PAGE
REAR DELAY
Test
Follow theinstructions abovein DVD
Menu Setupin combinationwith thedesired
option fromgraphic below.
This teststhe soundcoming fromeach
speaker inthe system.The speakerbeing
tested isindicated inthe lowerleft cornerof
the screen.
ON
OFF
SPEAKER SETUP
TEST TONE
DOWNMIX
CETR
REAR
SUB WOOFER
CETR DELAY
REAR DELAY
MAIN PAGE
TEST TONE
SYSTEM SETUP
Subwoofer
Follow theinstructions abovein DVDMenu
Setup incombination withthe desiredoption
from graphicbelow.
This turnsthe subwooferspeaker onor off.
Center Delay
Follow theinstructions abovein DVDMenu
Setup incombination withthe desiredoption
from graphicbelow.
Battery Installation
1. Pushdown andout onthe battery
Compartment coverto removeit.
2. Insertthe two AAA batteries intothe battery
compartment ofthe remotecontrol, making
sure the+ and- signson thebatteries and
inside thebattery compartmentmatch up.
3. Replacethe batterycompartment cover.
Notes:
Do notmix batteriesfrom differentmanu-
facturers, norold oneswith new.
If theremote controlwill notbe usedfor an
extended periodof time,remove the
batteries toprevent damage-causing
corrosion.
Remove deadbatteries immediatelyto
prevent damage-causingcorrosion.
If batteryleakage occurs,wipe thebattery
liquid fromthe batterycompartment, then
replace bothbatteries.
Alwaysreplace bothbatteries atthe same
time, usingnew,fully chargedbatteries.
Life expectancyof batteriesmay vary
depending onamount ofuse.
Using theRemote Control
Point theremote controlat theremote
sensor onthe DVDreceiver.When thesignal is
received fromthe remote,the unitwill function
accordingly.The remotewill operateto
approximately 16'from theremote sensorat an
angle ofaround 30 each direction.
""
1. Pushdown andout onthe battery
Compartment coverto removeit.
2. Insertthe two AAA batteries intothe battery
compartment ofthe remotecontrol, making
sure the+ and- signson thebatteries and
inside thebattery compartmentmatch up.
3. Replacethe batterycompartment cover.
Do notmix batteriesfrom differentmanu-
facturers, norold oneswith new.
If theremote controlwill notbe usedfor an
extended periodof time,remove the
batteries toprevent damage-causing
corrosion.
Remove deadbatteries immediatelyto
prevent damage-causingcorrosion.
If batteryleakage occurs,wipe thebattery
liquid fromthe batterycompartment, then
replace bothbatteries.
Alwaysreplace bothbatteries atthe same
time, usingnew,fully chargedbatteries.
Life expectancyof batteriesmay vary
depending onamount ofuse.
Point theremote controlat theremote
sensor onthe DVDreceiver.When thesignal is
received fromthe remote,the unitwill function
accordingly.The remotewill operateto
approximately 16'from theremote sensorat an
angle ofaround 30 each direction.
Battery Installation
Using theRemote Control
Notes:

9
20
AMPLIFIER
CD
CONNECTING DEVICES
Connection terminalsfor thisDVD receiver
are foundon therear panel.Read carefully
and followthe manufacturers'instructions
of anyvideo andaudio devicebeing
connected tothis unit.
Do notconnect thepower untilall connec-
tions havebeen properlycompleted.
Red terminal(marked R)is forconnecting
the rightchannel. Thewhite terminal(ma-
rked L)is forconnecting theleft channel.
The yellowterminal isfor videoconnection.
Make sureall connectionsare securely
made. Improperconnections maycause
noise, poorperformance, orcause damage
to theequipment.
Do nottie theAV cordwith anyother cords,
such asthe powercord orspeaker wires,as
it mayresult inpoor pictureand/or sound
quality.
110V~60Hz110V~60Hz
C US
LISTED
Audio/VideoApparatus
E221338
58WJ
WARNING:SHOCK HAZARD- DO NOT OPEN
AVIS:RISQUE DE CHOC ELECTRIQUE- NE PASOUVRIR
CAUTION
RISKOF ELECTRIC SHOCK
DONOT OPEN
ATTENTION
RISQUEDELECTROCUTION
NEPASOUVRIR
50X15mm
1
Used by North
America only!
DOUBLEINSULATION-
WHENSERVICING USE ONLY
IDENTICALREPLACEMENT PARTS.
HongPuInternational Development(Shanghai) Co., Ltd.
Plant25, No.30 FuTeDongSan RD
WaiGaoQiaoFree Trade Zone PuDong Shanghai.P.R.C.
Model No.:
MADE IN CHINA
DP1800
SYSTEM SETUP
This NorcentDVD playersupports output
of varioussystems, includingauto, NTSC,and
PAL.If theTV sethas onlyNTSC orPALsyst-
ems, thepicture willblink andbecome colorless
when thewrong systemis selected.Ifthis oc-
curs, pressthe SYSbutton onthe remote
control toreturn tothe normalscreen.
Remember toalways selectthe correctsystem.
For moreinformation onoutput format,refer
to theTV set'smanufacturer's instructions.
Video Output
Follow theinstructions abovein DVD
Menu Setupin combinationwith thedesired
option fromgraphic below.
There arethree videooutput choices:
Use theCVBS outputif theS-Video outputjack
has beenselected; usethe RGBoutput ifthe
RGB outputjack hasbeen selected;or usethe
YUV outputif thecomponent outputjack has
been selected.
Angle Mark
Follow theinstructions abovein DVDMenu
Setup incombination withthe desiredoption
from graphicbelow.
When aDVD withmultiple anglesis played,
a particularcamera anglemay beselected by
the viewer.
OSD Lang.
Follow theinstructions abovein DVDMenu
Setup incombination withthe desiredoption
from graphicbelow.
VIDEO OUTPUT
CVBS
GENERAL
TV DISPLAY
TV TYPE
ANGLE MARK
OSD LANG
CAPTIONS
VIDEO OUTPUT
MAIN PAGE
RGB
YUV
ANGLE MARK
ON
OFF
GENERAL
MAIN PAGE
TV DISPLAY
TV TYPE
VIDEO OUTPUT
OSD LANG
AUDIO OUTPUT
CAPTIONS
ANGLE MARK
This isused toset thelanguage ofthe setup
menu andscreen display.
Captions
Follow theinstructions abovein DVD
Menu Setupin combinationwith thedesired
option fromgraphic below.
SCREEN LANGUAGE
ENGLISH
GENERAL
MAIN PAGE
TV DISPLAY
TV TYPE
VIDEO OUTPUT
ANGLE MARK
CAPTIONS
OSD LANG
ON
OFF
GENERAL
CAPTIONS
MAIN PAGE
TV DISPLAY
TV TYPE
VIDEO OUTPUT
ANGLE MARK
OSD LANG
CAPTIONS
SPEAKER SETUP
This submenuoption includesdownmix mode,
center,rear,subwoofer,center delay, reardelay,
test, andmain.
Downmix Mode
Follow theinstructions abovein DVDMenu
Setup incombination withthe desiredoption
from graphicbelow.
LT/RT
STEREO
VSS
5.1CH
SPEAKER SETUP
DOWNMIX
CETR
REAR
SUB WOOFER
CETR DELAY
REAR DELAY
TEST TONE
MAIN PAGE
DOWNMIX
Center Speaker
Follow theinstructions abovein DVDMenu
Setup incombination withthe desiredoption
from graphicbelow.

19
10 1
2345
67
SPEAKERS
The configurationand arrangementof a
surround soundsystem's speakersis critical.
For maximumlistening enjoyment,refer tothe
Arrangement ofSpeakers sectionin thismanual
prior toconnecting speakers.
Surround SoundSpeakers
Front ormain rightand leftspeakers;
center speaker
These threespeakers provideextensive
sound imagingand augmentthe dynamiceffect
of theaudio.Amovie's principaldialogue comes
through thesespeakers.
Rear orsurround soundspeakers
These twospeakers provide3-D dynamic
sound effects,and createan enveloping
atmosphere, asthey addbackground sounds.
.
Subwoofer speaker
Provides richand powerfulbass, addinga
powerful dimensionof realism.
Note:Audio recordedfor thecenter speakerand
subwoofer willbe assignedto thefront and3-D
rear speakersto obtainthe optimum3-D
surround soundeffect.
The idealsurround soundspeaker
configuration mayvary accordingto roomsize
and wallmaterial. Thefigure below illustrates
a typicalarrangement.
Hints:
Front ormain speakersand centralspeaker
should beplaced atthe samelevel andin away
that soundis orientedtoward thelistener's ears.
3D surroundsound orrear speakersshould
be placed3' higherthan theheight oflistener's
ears.
Subwoofer speakermay beplaced anywhere
within theroom, asits locationproduces little
effect ona listener'ssensation tosound. To
obtain theoptimum basseffect, asubwoofer is
recommended inhome theatersystems.
ARRANGEMENT OFSPEAKERS
1.TVset orscreen
2. Frontor mainleft speaker
3.Subwoofer
4.Centerspeaker
5.Front ormain rightspeaker
6.3-Dsurround soundleft speaker
7.3-Dsurround soundright speaker
8.Viewer's location
The repeatmode changeseach timethe REPEAT
key ispressed (i.e.,from titlerepeat tochapter
repeat, etc.)
Zoom
Apicture maybe enlargedup tofour times
during eitherplayback orslow motionthrough
the unit'szoom function.Press theZOOM key
once andit enlargesthe image1.5x; pressa
second timeand theimage enlarges2x; while
a thirdpressing enlargesthe image4x. To
return tonormal-size playback,press the
ZOOM keya fourthtime. Enlargementtakes
place inthe centerof thepicture.
L/R
When aDVD discis played,the active
language willbe displayed.When aCD discis
played, theleft orright track,or stereowill be
displayed accordingly.
Volumeand Mute
The volumeon thisNorcent DVD receiver is
easily controlledwith theremote controlby
pressing eitherthe VOL+ keyto raisethe volume
or theVOL- keyto lowerit. Bypressing the
MUTE key, noaudio willbe heard.To reinstate
the audio,press theMUTE keyagain.
Program
Pressing thePBC buttonfollowed bypressing
the PROGbutton, theprogram statusof aplaying
DVD willappear.When aCD isplaying, by
pressing thePBC buttonfollowed bythe PROG
button allowsyou toprogram specifictracks in
a desiredorder ofplay.To exitthe Programmed
play mode,press thePBC buttonagain.
DVD MenuSetup
By pressingthe SETUPkey onthe remote
control, themain setupmenu appears.You will
be askedto enterthe PersonalIdentification
Number (PIN),which is“0000”. Fromthe
setup menu,you maychoose thefollowing
options: generalsetup, speakersetup, audio
setup, andpreferences setup.
1.After accessingthe setupmenu, pressthe
scroll keyfor upor downmovement toselect a
desired item.Once anitem isselected, press
the PLAY keyto confirmyour entryand tomove
to thesub-entry.
2. Usethe leftor rightscroll keyto movethe
pointer andthe upor downscroll keyto select
the desiredoption. Oncean itemis selected,
press thePLAYkey toconfirm yourselection.
This completesthe setupof theselected function.
3. To endthe setup,press theSETUP button
again.
FUNCTIONS SYSTEM SETUP
GENERAL SETUP
This optionis usedto setup theTV-screen
format, videofunctions, andDVD functionswith
options ofTV display, TVtype, videooutput,
angle mark,OSD lang.,and captions.
TV Display
Follow theinstructions abovein DVDMenu
Setup incombination withthe desiredoption
from graphicbelow.
TV DISPLAY
TV DISPLAY
TV TYPE
VIDEO OUTPUT
ANGLE MARK
OSD LANG
CAPTIONS
MAIN PAGE
NORMAL/PS
NORMAL/LB
WIDE SCREEN16:9
GENERAL
Note: Regardless ofwhat screenformat is
chosen, ifthe screendisplays in4:3 format,the
picture canonly beshown inthat format.With
DVDs, thescreen formatis convertible.If the
screen displaysonly in4:3 format,when aDVD
with 16:9display formatis used,the picturewill
be flattened.
TV
screen
Film
format Normal
4:3
4:3
16:9
16:9
Full view Mailbox Wide screen
SCREEN LANGUAGE
TV SYSTEM
TV DISPLAY
VIDEO OUTPUT
ANGLE MARK
OSD LANG
CAPTIONS
TV TYPE
MAIN PAGE
MULTI
NTSC
PAL
GENERAL
TV Type
Follow theinstructions abovein DVDMenu
Setup incombination withthe desiredoption
from graphicbelow.

11
18
1 2
3 4
5
Ö÷ÒôÏä
This well-designedDVD receiverprovides
optimum soundquality whenthe speakersused
are withinthe rangeof theirrated impedance.
Important
The minimumimpedance ofthe fivespeaker
terminals is4 ohm;for thesubwoofer,it is
8 ohm.
If youwant touse onlyone speakeror listen
to monophonicmusic, donot parallelconnect
individual speakersto theleft andright
channel terminals.See thefigure onthe left
below.
CONNECTING SPEAKERS
Connecting SpeakerCables
1.Peeloff approximately1/ 2¡±of cable
insulation
2.Tightenthe wireend (#2below)
3.Opencable terminalby pressingback ontab
4.Insertwire endinto terminal
5.Releasetab; makesure wireis interminal
securely
Note: To preventdamage tothe circuit,care
should betaken toprevent shortcircuiting from
occurring atthe positiveand negativepoles of
the speakercord.
12
110V~60Hz110V~60Hz
C US
LISTED
Audio/VideoApparatus
E221338
58WJ
WARNING:SHOCK HAZARD- DO NOT OPEN
AVIS:RISQUE DE CHOC ELECTRIQUE- NE PASOUVRIR
CAUTION
RISKOF ELECTRIC SHOCK
DONOT OPEN
ATTENTION
RISQUED ELECTROCUTION
NEPASOUVRIR
50X15mm
1
Used by North
America only!
DOUBLEINSULATION-
WHENSERVICING USE ONLY
IDENTICALREPLACEMENT PARTS.
HongPuInternational Development(Shanghai) Co., Ltd.
Plant25, No.30 FuTeDongSan RD
WaiGaoQiaoFree Trade Zone PuDong Shanghai.P.R.C.
Model No.:
MADE IN CHINA
DP1800
FUNCTIONS
Time
This DVDreceiver candisplay various data
regarding thedisc beingplayed. Pressthe
TIME buttonfor thefollowing.
1. Pressonce, thenumber oftitles and
chapters ineach titleappears
.
2. Pressagain, thetime ofa selectedtitle
appears.
Pressing theTIME buttonwhile playing a
CD discallows youto enter, usingthe number
keys, theamount oftime youwant theCD to
play.For example,55:50, standsfor 55 minutes
and 50seconds.
TIME TITLE 01/02 CHAPTER 06/28
TIME TITLE 01/02 TIME : :
TIME GOTO :
PBC
With thePBC functionon, choosinga song
on aCD canonly bedone whenat themain menu.
With thePBC functionoff, songselections can
be madeby enteringthe relevantnumber keys.
The formatcontent ofthe discwill appearwhen
the PBCbutton ispressed whilea DVDdisc is
playing.
PBC DISK
TOTAL TITLES: 12
PLAY ENTRIES: 21
PLAY TIME: 01:16:35
AUDIO STREAMS: 08
SUBPIC STREAMS: 08
MPG2.NTSC 4:3/16:9 LB/PS
AC3-2 AC3-5.1
2. PresstheA-B buttonagain whilethe
disc isplaying toset point B, theending
spot. Thesection betweenAand Bwill
replay.
3. PresstheA-B buttona thirdtime to
cancel.
A-B
A TO B SET A
A TO B SET B
A TO B CANCELLED
Repeat Play
This DVDreceiver allowsrepeated
playback ofspecific titles,chapters/tracks,
or segment.It evenallows switching
between twoitems thatare beingrepeated.
1. Selectthe itemto repeat.
2. Pressthe REPEAT key.
REPEAT CHAPTER REPEAT ON
REPEAT REPEAT ONE
A-B Repeat
TheA-B repeatfunction allowsyou to
reshow sectionsbetween twospecific points
(Aand B)on adisc.
1. PresstheA-B buttonwhile thedisc is
playing toset pointA,the beginningspot.
REPEAT ALL
Surround speaker Surround speaker
Main speaker
Main speaker
Center speaker
Subwoofer speaker

12 17
CONNECTING ANTENNA
AM
FM
FM
Outdoor AM antenna
Coaxial cable(75 ohm)
Coaxial cable (75 ohm)
Outdoor FM antenna
Radio signalsmay bedifficult toreceive in
some buildingsand undercertain conditions.
The providedantennas willhelp intheir rece-
ption.They areintended forindoor useonly.
AM LoopAntenna
The placementof theAMloop antennashould
be ina directionthat providesthe clearestrece-
ption. Keepas faras possiblefrom DVDreceiver,
TV set,and speakerand powercords. Ifrecep-
tion remainspoor,an outdoorantenna maybe
necessary.
Toconnect the AM loopantenna:
1.Holddown handle
2.Insertwire endinto hole
3.Releasehandle
Position forbest reception
FM IndoorAntenna
The FMantenna shouldbe fullyextended
and ina directionthat providesthe clearest
signal. Securethe antennaends ina location
where distortionis aminimum. Ifreception
remains poor, anoutdoor antennamay be
necessary.
Toconnect the FM antenna:
1.Opencable terminalby pressingback ontab
2.Insertwire end
3.Releasetab; makesure wireis interminal
securely
N/P
This NorcentDVD receiversupports output
of varioussystems, includingauto, NTSC,and
PAL.The picturewill blinkand becomecolorless
when thewrong systemis selected.If thisoccurs,
press theN/P keyon theremote control,then
select thecorrect system(NTSC forNorthAmer-
ica, PAL forEurope). Formore informationon
output format,refer tothe TVset's manufacturer's
instructions.
Subtitles
The unithas thecapability todisplay subtit-
les inany of32 differentlanguages.
1. Pressthe SUBTITLEkey.The subtitle
menu willappear.Scroll tothe desiredlang-
uage, thenpress theSUBTITLE keyagain.
2. To removethe subtitlesfrom view, press
the SUBTITLEkey untilthey disappear.
Note: Thedisc beingplayed mustbe multi-
subtitle encoded.
SUBTITLE OFF
SUBTITLE 02/08 ENGLISH
SUBTITLE
Camera Angle
The abilityto changethe cameraangle
allows viewerto playdirector andwatch a
movie fromdifferent perspectives.
1. PresstheANGLE keyon theremote
control. Witheach press,the cameraangle
changes.
2. Thekey maybe pressedonly whenthe
flashing angleicon appearsin theunit's display
panel.
Note: Camera anglemay bechanged onlyin
discs withmulti-angle capabilityencoded into
them.
Language
The unithas thecapability toshow moviesin
one ofeight languages.
1. Pressthe LANGUAGEkey.The language
menu willappear.Scroll tothe desiredlanguage,
then pressthe LANGUAGEkey again.
Note: The discbeing playedmust bemulti-lan-
guage encoded.
1/4
ANGLE
AUDIO 1/8 AC-3 2CH ENGLISH
LANGUAGE
LOCATINGATITLE
DVD discsare normallydivided intotitles,
which arethen sub-dividedinto chapters.A
specific titlecan beeasily foundwith thisunit.
Specific titlescan befound usingeither thetitle
menu function,if theDVD disccontains atitle
menu, orthrough itsunique titlenumber.
Title MenuFunction
1. Pressthe TITLE/RETURNkey.The title
menu willappear onthe TVscreen.
2. Pressthe appropriatescroll keyto select
the desiredtitle.Atitle mayalso belocated by
pressing itsassigned numberwith thenumber
buttons.
3. Pressthe TITLE/RETURNkey again.
This willstart playbackfrom chapter1 ofthe
selected title.
Note:
Some discsdo notrespond tothis function.If
different instructionsappear onthe TVscreen,
follow thoseinstructions. TheInstructions given
here describethe basicprocedure. Procedures
may varydepending onthe contentof theDVD
disc.
FUNCTIONS
Title Number
1. Pressthe appropriatenumbers inthe
number sectionof theremote control.
For example,for title15, pressthe 10
and the5 keys;for title25,press the10,
10, 5keys.
2
3
1

13
16
POWER
BASIC OPERATION
DVD/CD/MP3/CD-R/CD-RW
DP1800 DVD & AMPLIFIER SYSTEM
CONNECTING POWERSUPPLY
Before pluggingthe powercord intotheAC outlet,check tomake sureall ofthe connections
have beenproperly completed.When theyhave been,carefully plugpower cordinto outlet.
Press thePOWER buttonon thefront panel to powerthe unit.The displaypanel willlight.
When theunit isinitially powered,a briefsurge ofelectricity maycause interferencewith other
electronic equipmenton thesame circuit.If thisoccurs, connectthe unitto anoutlet ona different
circuit.
Selecting SoundSource
1. Pressany functionbutton (DVD,AM/FM,
VCR,AUX) toselect thedesired soundsource.
The appropriatesymbol willappear inthe display.
2. WhentheAM/FM tunerbutton ispressed,
the laststation listenedto willplay.
Note: The desiredprogram sourcewill notplay
unless itand theselected signalbutton coincide
with theactive programsource signalinput.
VolumeControl
The volumemay beadjusted byeither turning
the largevolume knobon thefront panelor
using theappropriate volumebutton onthe
remote control.
Mute
Pressing theMUTE buttontemporarily mutes
every speaker. To resumeaudio, pressMUTE
button again.
BASIC DVDOPERATION
To activateeither function,simply pressthe
FWD keyor REVkey onthe remotecontrol. The
speed changeseach timethe keyis pressed.
To resumenormal playback,press thePLAYkey.
Memory Playback
This unitallows theviewer tostop playback,
then latercontinue playbackfrom thatexact disc
location. Pressthe STOPkey tohalt playback.
The unitthen willmemorize thelocation where
playback wasstopped. To resumewatching,
press theRESUME keyand theunit willresume
playback fromthe exactlocation where
playback wasstopped.
FF2X
Slow Motion
This NorcentDVD receiverhas theability
to playdiscs inslow motionin eitherforward or
reverse direction.Each timethe SLOWkey is
pressed, thespeed willslow from1/2, to1/4, to
1/8 normalspeed. To resumenormal playback,
press thePLAYkey.
FR2X
REV
PLAY
RESUME
SLOW
Screen Display
While adisc isplaying, thestatus ofvarious
functions maybe checked,such asthe tile,track
number,and severaltime categories.
1. Pressthe DISPLAY keyonce andthe title
appears alongwith thechapter andhow much
time hasplayed.
2. Pressthe DISPLAY keyagain andthe
remaining timefor thatparticular titleappears.
3. Pressthe DISPLAY keyagain andthe total
elapsed timefor thatparticular titleappears.
4. Pressthe DISPLAY keyagain andthe
total remainingtime forthat particulartitle
appears.
5. Pressthe DISPLAY keyagain andthe
display turnsoff.
FUNCTIONS
DISPLAY TITLE 01/02 CHAPTER 02/028
00:21:05
SINGLE REMAIN
01 44 34
TOTAL ELAPSED
TOTAL REMAIN
17

14
PRE/TUN
SETUP REPEAT
VOLUME
+10
MUTE
OPEN/CLOSE
UP
DOWN
MEMO AUTO
DVD TUNER AUX 1 AUX 2
FM MODE
STOP PAUSE PLAY A-B
PBC STEP ZOOM RESUME
ENTER
PROG L/R
SLOW
DISPLAY
TIME
N/P SUBTITLELANGUAGEANGLE
MENU
TITLE
Memory number
Wave band Station frequency
PLAYING THERADIO
DVD/CD/MP3/CD-R/CD-RW
DP1800 DVD &LIFIER SYSTEM
Positioning
1.PressTUNER buttonto selectdesired
wave band(AM orFM).
2.PressUP orDOWN buttonto finda station.
The frequencywill changewith eachpress.
When astation's signalis received,it will
appear inthe display.
3.To lockonto astation quickly, holdthe UP
or DOWNbutton fortwo seconds.The unit
will startautomatic tuning.When astation
is found,automatic tuningstops.
4.To adda stationto memory, pressthe MEMO
button. Thememory storagenumber will
blink forfour secondsin thedisplay.Press
MEMO againto storethe station.
5. To reducenoise whenan FM-stereo
program hasbeen received,press theFM
button. Theword STEREOwill disappear
from thedisplay.The programis nowheard
in monographicform, reducingthe noise.
To resumestereo play, pressthe FMbutton
again.
Automatic Tuning
This unitwill storeup to30 individual AM and
30 individualFM radiostations inits memory.
1.PresstheAUTO button.The wordAUTO
will appearin thedisplay andthe automatic
tuning modeis activated.
2.Stationswill bestored inascending order
until 30stations ofthat particularwave band
have beensaved. Whena stationis stored,the
memory storagenumber,as wellas thestation's
frequency,will flashfor fourseconds in the
display.
3.Whenthe totalnumber ofstations reaches
30, ina particularwave's (AMor FM)memory,
no furtherstation inthat waveband willbe saved.
ToPlay Preset Stations
1.Pressthe TUNERbutton toselect the
desired waveband.
2.Pressthe PRE/TUNbutton.
3.Pressany ofthe numberedbuttons to
select thedesired station'smemory number.
For example,to playthe stationat memory
#5, simplypress the5 button;for memory
#17, pressthe 10button followedby the7
button.
4.Stations inthe memoryfunction mayalso
be accessedby pressingthe UPor DOWN
button.
15
NO DISC
DISC LOADING
POWER
If there is no disc, NO DISC shown on screen:
OPEN
OPEN/CLOSE
Once theunit isconnected toa television
set andany otheraccessory equipment,you
are readyto enjoythe excitementof DVD
videos oryour favoriteCDs andMP3 files.
Toplay a DVD video disc:
Turnon theTV andselect theA/Vmode. If
the setfeatures anS-Video connection,be sure
the S-Videomode isselected fromthe TVmenu.
Turn onamplifier,if connected.SelectAC-3 or
DVD mode.
Toplay an audio disc:
Turnon theaudio systemand choosethe
input sourcethat isconnected tothe DVDplayer.
Set theAUDIOOUTPUT toDIGITALOUTPUT
OFF fromthe SETUPMENU displayif youdon't
have theproper equipmentfor DolbyDigital
surround sound.
BASIC DVDOPERATION
1. Pressthe POWERkey onfront panel.
¡°DISC LOADING¡±appears onscreen.
1. Pressthe POWERkey onfront panel.
¡°DISC LOADING¡±appears onscreen.
2. Pressthe OPEN/CLOSEkey.The disc
tray willopen.
3. Placethe discon thedisc tray. Besure
play sideis facedown onthe tray.
4. PressOPEN/CLOSE keyto closetray.
The disctray willclose. Thedisc typewill appear
in theupper-left-hand cornerof thescreen.
Once ithas readthe disc,the unit
automatically willbegin playback.When playing
a DVD,the DVDor titlemenu willappear.CD
tracks areplayed insequence.
Note:
It ispossible todamage adisc ifit isnot
placed correctlyon theguides inthe disctray.
This mayalso causethe DVDplayer to
malfunction. Donot forceor placeanything
other thana 5 DVD orCD ontothe disctray.
Never movethe DVDplayer duringplayback,
as thismay causedamage tothe discas wellas
the player. To openand closethe disctray,only
use theOPEN/CLOSE keyfound onboth the
remote controland onthe unit'sfront panel.
"
Fast Forward/ReversePlayback
The unitfeatures bothfast forwardand fast
reverse playback.Either modewill speedup:
DVD discplaying 2x,4x, 6x,8x, or20x normal
play speed;MP3 discplaying 2x,4x, 6x,8x
normal playspeed; andother discplaying 2x,
3x, or4x normalplay speed.
PLAY
PAUSE
PREVIOUS
NEXT
Press PAUSE key:
Press PREV key:
Press NEXT key:
PLAY
PAUSE
PREV
NEXT
Table of contents
Other Norcent Receiver manuals

