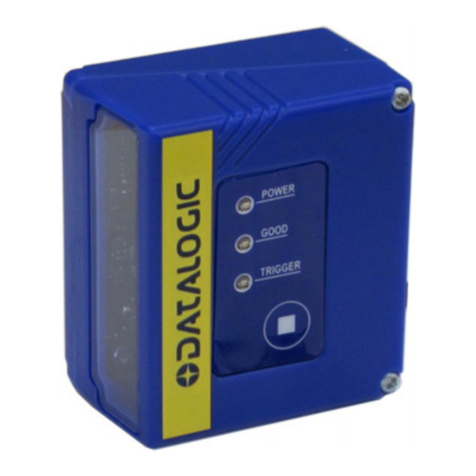
Nordic ID EXA51 User manual

2017-04-26
Nordic ID EXA51 User Guide
Version 1.3
NORDIC ID EXA51
USER GUIDE

2017-04-26
Nordic ID EXA51 User Guide
Version 1.3
CONTENTS
1. GETTING STARTED ...................................................................................................................................................................................................... 3
1.1. GENERAL............................................................................................................................................................................................3
1.2. AVAILABLE VARIANTS ........................................................................................................................................................................3
1.3. AVAILABLE ACCESSORIES...................................................................................................................................................................3
1.4. INBOX CONTENT................................................................................................................................................................................4
1.5. FEATURES OVERVIEW........................................................................................................................................................................ 4
1.6. INSTALLING BATTERY.........................................................................................................................................................................6
1.7. CHARGING.........................................................................................................................................................................................7
1.7.1. NORDIC ID EXA51 CHARGING..............................................................................................................................................7
1.7.2. HOST DEVICE CHARGING.....................................................................................................................................................8
1.7.2.1. WIRELESS CHARGING...................................................................................................................................................... 8
1.7.2.2. CHARGING VIA USB.........................................................................................................................................................9
1.7.3. BATTERY CHARGING..........................................................................................................................................................11
1.8. FASTENING ......................................................................................................................................................................................12
1.8.1. QUAD LOCK®FASTENING ..................................................................................................................................................12
1.8.2. MAGNET FASTENING.........................................................................................................................................................13
1.8.3. SCREW FASTENING............................................................................................................................................................13
1.9. CONNECTIONS.................................................................................................................................................................................14
1.9.1. CONNECTING WITH HOST DEVICE VIA HID MODE ............................................................................................................14
1.9.2. PAIRING NORDIC ID EXA51 WITH A HOST DEVICE............................................................................................................. 15
1.9.3. CONFIGURING HID MODE WITH BARCODE.......................................................................................................................15
1.9.4. CONFIGURING HID MODE VIA APPLICATION.....................................................................................................................16
1.10. USING THE READER .........................................................................................................................................................................16
1.10.1. KEYS AND BUTTONS .......................................................................................................................................................16
1.10.1.1. TRIGGER BUTTON ......................................................................................................................................................16
1.10.1.2. POWER KEY................................................................................................................................................................16
1.10.1.3. UNPAIR A BLUETOOTH DEVICE KEY ...........................................................................................................................17
1.10.2. LED INDICATORS.............................................................................................................................................................17
1.10.2.1. READ/HID/CONFIGURABLE LED .................................................................................................................................17
1.10.2.2. BLUETOOTH LED ........................................................................................................................................................17
1.10.2.3. POWER LED................................................................................................................................................................18
1.10.3. ANTENNAS .....................................................................................................................................................................18
2. APPLICATIONS AND APPLICATION DEVELOPMENT...................................................................................................................................................19
2.1. NORDIC ID RFID DEMO APPLICATIONS............................................................................................................................................19
2.1.1. NORDIC ID RFID DEMO FOR ANDROID ..............................................................................................................................19
2.1.2. NORDIC ID RFID DEMO FOR IOS........................................................................................................................................20
2.2. APPLICATION DEVELOPMENT..........................................................................................................................................................20
2.2.1. NUR API IN GENERAL.........................................................................................................................................................20
2.2.2. APPLICATION DEVELOPMENT ...........................................................................................................................................21
3. SERVICE AND SUPPORT.............................................................................................................................................................................................21
4. WARRANTY ...............................................................................................................................................................................................................22
5. RELATED DOCUMENTS AND CONTENT .....................................................................................................................................................................22
6. ABOUT NORDIC ID ....................................................................................................................................................................................................23
7. VERSION HISTORY.....................................................................................................................................................................................................23

2017-04-26
Nordic ID EXA51 User Guide
Version 1.3
1. GETTING STARTED
1.1. GENERAL
Nordic ID EXA51 provides UHF RFID reader capabilities and optional 1D/2D barcode scanning
functionalities for host devices. The Nordic ID EXA51 is used with the host devices via Bluetooth®
Low Energy wireless technology.
1.2. AVAILABLE VARIANTS
The Nordic ID EXA51 is available in 8 different variants that are
Code
Frequency
2D imager
Wireless charging
Quad Lock®
IWA00001
868MHz
Yes
No
Yes
IWA00002
915MHz
Yes
No
Yes
IWA00003
868MHz
No
No
Yes
IWA00004
915MHz
No
No
Yes
IWA00005
868MHz
Yes
Yes
No
IWA00006
915MHz
Yes
Yes
No
IWA00007
868MHz
No
Yes
No
IWA00008
915MHz
No
Yes
No
1.3. AVAILABLE ACCESSORIES
Code
Description
ACN00155
Nordic ID EXA51/Medea Desktop Charger DC USB Out
CWH00036
Nordic ID EXA51/Medea Micro-USB cable for device and desktop charger
(Length 1.8m, type A-Male –type Micro-B-Male –connectors)
ACN00162
Host device installation kit for Nordic ID EXA51. The kit includes counter
parts of magnets (2 pcs) and screws (2pcs) (Minimum order quantity 10 pcs)
ACP00097
Quad Lock Universal Adaptor v1. The Quad Lock Universal Adaptor with
3M™ adhesive is a super thin adaptor that is compatible with all Quad Lock™
mounts. The Quad Lock Universal Adaptor designed to be used only once, it
is not re-stick-able (link to product page)

2017-04-26
Nordic ID EXA51 User Guide
Version 1.3
1.4. INBOX CONTENT
The Nordic ID EXA51 inbox contains following items
•The Nordic ID EXA51
•Battery (installed)
•Counter parts of magnets for magnet fastening of host device
•Screws for screw fastening
•Safety and regulations guide
•Business card with link to quick guide
1.5. FEATURES OVERVIEW
Picture 1 Key features of wireless charging variant
NOTE! Quad Lock®universal adaptor is sold separately

2017-04-26
Nordic ID EXA51 User Guide
Version 1.3
Picture 2 Key features of Quad Lock variant

2017-04-26
Nordic ID EXA51 User Guide
Version 1.3
1.6. INSTALLING BATTERY
Picture 3 Installing battery

2017-04-26
Nordic ID EXA51 User Guide
Version 1.3
1.7. CHARGING
1.7.1. NORDIC ID EXA51 CHARGING
The Nordic ID EXA51 can be charged via cradle and USB charger. Maximum charging power via the
cradle is 10W (5V @ 2A). Charging time from 0 –100% via the cradle is about 5h. The USB charger
needs to have a micro USB connector and recommended charging power is 10W (5V @ 2A).
Charging status is indicated by Power LED. Please see section 1.10.2.3 for information how the Power
LED functions in different situations.
Picture 4 Charging of the Nordic ID EXA51 via cradle

2017-04-26
Nordic ID EXA51 User Guide
Version 1.3
Picture 5 Charging of the Nordic ID EXA51 via USB charger
1.7.2. HOST DEVICE CHARGING
Host device attached on the Nordic ID EXA51 can be charged via wireless charging or USB from the
cradle.
1.7.2.1. WIRELESS CHARGING
Wireless charging is based on inductive charging technology and is compliant with Qi v1.2
specification. With the inductive charging technology, the power is transmitted between a
transmitter and receiver coils placed closely together. The Nordic ID EXA51 acts as a transmitter and
host device acts as a receiver. The coils of the transmitter and receiver must be aligned well to make
the connection. Charging efficiency greatly depends on how well the coils are aligned. The wireless
charging may not work or may work unreliably if the coils are misaligned. Please see section 1.5 for
information about the coil location of the Nordic ID EXA51. When wireless charging is powered from
the battery of the Nordic ID EXA51 then wireless charging is disabled in following cases:
•Battery level of the Nordic ID EXA51 is < 10%
•The Nordic ID EXA51 goes to sleep mode
Please note that the Nordic ID EXA51 does not go into sleep mode and will keep wireless charging
enabled when charged via the cradle or USB charger. Maximum charging power via the wireless
charging when the Nordic ID EXA51 is charged is 5W. Maximum charging power via the wireless
NOTE! The cradle is sold separately by Nordic ID. The USB charger is not included
in the Nordic ID EXA51 inbox and is not sold by Nordic ID.

2017-04-26
Nordic ID EXA51 User Guide
Version 1.3
charging when the Nordic ID EXA51 is not charged is 2.5W 5W (wireless charging power is delivered
from the battery of the Nordic ID EXA51).
Picture 6 Wireless charging of host device
1.7.2.2. CHARGING VIA USB
Host devices can be charged via the cradle using a proper USB cable (the cradle contains an USB
type-A connector). Maximum charging power via the cradle depends on charge level of the Nordic
ID EXA51 battery. Maximum 7W charging power can be achieved when the battery of the Nordic ID
EXA51 is full/almost full. When the Nordic ID EXA51 charges at full power then the maximum
charging power of host device is limited to 4W.
NOTE! Host device needs to support Qi based inductive wireless charging
technology in order to charge from the Nordic ID EXA51. Please contact your
device manufacturer in order to make sure wireless charging is supported.

2017-04-26
Nordic ID EXA51 User Guide
Version 1.3
Picture 7 USB charging of host device

2017-04-26
Nordic ID EXA51 User Guide
Version 1.3
1.7.3. BATTERY CHARGING
The battery or spare battery of the Nordic ID EXA51 can be charged in the cradle. Please note that
when USB charging from the cradle is used, spare battery charging of the cradle is disabled. Please
find more information about charging from the Picture 8 Battery charging in cradle.
Picture 8 Battery charging in cradle

2017-04-26
Nordic ID EXA51 User Guide
Version 1.3
1.8. FASTENING
The Nordic ID EXA51 provides three different fastening methods for host devices. The fastening
methods are Quad Lock, magnets and screw fastenings.
1.8.1. QUAD LOCK®FASTENING
The Quad Lock fastening uses popular and easy to use Quad Lock fastening system. The Quad Lock
fastening system provides strong and secure fastening and is suitable for different kind of host
devices. Please visit Quad Lock web page for more information about different adapters.
Fastening of the host device on the Nordic ID EXA51 with the Quad Lock fastening system is easy.
The first step is to attach a Quad Lock adapter on the host device. Second step is to fasten the host
device on the Nordic ID EXA51 by attaching and locking the Quad Lock fastening system.
Picture 9 The first installation
NOTE! Quad Lock®universal adaptor is sold separately

2017-04-26
Nordic ID EXA51 User Guide
Version 1.3
1.8.2. MAGNET FASTENING
Magnet fastening is a tight but effortless option to fasten the host device on the Nordic ID EXA51.
Using magnet fastening is easy. The first step is to place the counter parts of magnets to the recesses
located on the top cover of the Nordic ID EXA51 (Note! protective tape should be pointing outwards
from the Nordic ID EXA51). The second step is to remove protective tape from the counter parts of
magnets. The third step is to place the host device on top of the Nordic ID EXA51 and ensure that
the magnet counter parts are securely attached to the host device.
Picture 10 The first installation
1.8.3. SCREW FASTENING
Screw mounting is a robust option to mount a host device on the Nordic ID EXA51. This option
requires a protective case or cover for the host device which is screwed on the Nordic ID EXA51. The
first step is to screw the case/cover to screw holes of the Nordic ID EXA51. The distance between
the screw holes is 68mm and the diameter of each screw is 3.5mm. The second step is to place the
host device into the case/cover.

2017-04-26
Nordic ID EXA51 User Guide
Version 1.3
Picture 11 The first installation
1.9. CONNECTIONS
The Nordic ID EXA51 supports only Bluetooth Low Energy Class 2 connection for host devices.
Supported Bluetooth Low Energy versions are 4.0 –4.2 and supported profiles are GATT and HID.
1.9.1. CONNECTING WITH HOST DEVICE VIA HID MODE
In this mode, the Nordic ID EXA51 functions and communicates in a similar manner as a keyboard.
Therefore, the device will work with any application that supports an active cursor fields, for example
web browser applications. When operating in HID mode, the Nordic ID EXA51 needs to be paired
with the host device and configured for the HID mode.
NOTE! Bluetooth Low Energy needs to be supported by host device

2017-04-26
Nordic ID EXA51 User Guide
Version 1.3
1.9.2. PAIRING NORDIC ID EXA51 WITH A HOST DEVICE
1. Turn Bluetooth of the host device ON. NOTE: Android 6.0 or newer needs location to be
enabled also
2. Power on the Nordic ID EXA51 by pressing the power button for 2...3 seconds
3. Open Bluetooth connection settings of host device and you should see “EXA51 XXXXXX” in
the list
4. Select “EXA51 XXXXXX” from the list in order pair your host device with the Nordic ID EXA51
1.9.3. CONFIGURING HID MODE WITH BARCODE
Read barcode below to configure the Nordic ID EXA51 to desired HID mode
•HIDMODE0 = HID disabled
•HIDMODE1 = HID barcode enabled
•HIDMODE2 = HID RFID enabled
NOTE! When the Nordic ID EXA51 is configured for HID mode: remember that
you will need to reconnect the Nordic ID EXA51 after using non-HID applications
(such as Nordic ID RFID Demo). This will enable the HID mode again. The easiest
way to do this is turn off/on Bluetooth of host device.
NOTE! XXXXX is a serial number of the Nordic ID EXA51

2017-04-26
Nordic ID EXA51 User Guide
Version 1.3
1.9.4. CONFIGURING HID MODE VIA APPLICATION
1. Install Nordic ID RFID Demo application (see section 2.1)
2. Connect your device
3. Turn on HID mode, RFID and/or barcode mode in reader settings
4. Close application and make sure Bluetooth connection is closed
5. Reboot your EXA51 device by pressing the power button for 2...3 seconds.
1.10. USING THE READER
1.10.1. KEYS AND BUTTONS
The Nordic ID EXA51 includes two capacitive buttons and one physical button for user interactions.
Location of the keys can be seen in the Picture 12.
Picture 12 Location of capacitive keys
1.10.1.1. TRIGGER BUTTON
The trigger button is located on the pistol grip and it can be used to start/stop UHF RFID/barcode
scanning. Depending on the application in use, the trigger button starts/stops UHF RFID or barcode
reading. By default, the first press of the button starts the reading and the second press of the button
stops it. There is no need to keep the button pressed at all times.
1.10.1.2. POWER KEY
Power key turns reader On/Off. The power key needs to be pressed for about 2…3 seconds before it
triggers, this ensures that accidental presses are avoided.
NOTE! Button usage depends on the application in use

2017-04-26
Nordic ID EXA51 User Guide
Version 1.3
1.10.1.3. UNPAIR A BLUETOOTH DEVICE KEY
If the Nordic ID EXA51 is paired to the host device, it stores information about the paired devices
and tries to connect automatically when turned on. Using the “Unpair a Bluetooth device”-key clears
paired device from the Nordic ID EXA51 memory. The “Unpair a Bluetooth device”key needs to be
pressed for about 2…3 seconds before it triggers: This ensures that accidental presses are avoided.
1.10.2. LED INDICATORS
The Nordic ID EXA51 includes three LEDs for user indications. Location of the LEDs can be seen from
the Picture 13.
Picture 13 Location of LEDs
1.10.2.1. READ/HID/CONFIGURABLE LED
By default, Read/HID/Configurable LED indicates whether RFID or barcode reading is active. The
Read/HID/Configurable LED can be configured via API if needed.
1.10.2.2. BLUETOOTH LED
The Bluetooth LED indicates whether the Bluetooth connection is On/Off or in search mode.
NOTE! The power key is disabled when the Nordic ID EXA51 has an active
Bluetooth connection with host device
NOTE! The “Unpair a Bluetooth device”key is disabled when the Nordic ID EXA51
has an active Bluetooth connection with host device

2017-04-26
Nordic ID EXA51 User Guide
Version 1.3
1.10.2.3. POWER LED
The Power LED indicates whether the reader is On/Off. It also indicates the battery level of the
reader. The battery level is indicated by the colour of the Power LED.
Blinking of the Power LED indicates that the device is charging. The battery level during charging is
indicated by the colour of the blinking Power LED.
1.10.3. ANTENNAS
The Nordic ID EXA51 includes Adaptive Cross Dipole antenna that includes four SW controllable (via
Nordic ID RFID demo application and NUR API) antenna modes that are
•Linear with horizontal polarization mode (nominal reading distance about 7m/22ft)
•Linear with vertical polarization mode (nominal reading distance about 7m/22ft)
•Circular polarization mode (nominal reading distance about 4m/13ft)
•Proximity mode (reading distance down to 1cm/0.4inch)
The linear antenna modes are intended for long range reading when tag density is high and tags are
in horizontal or vertical position (Picture 14). In most cases enabling both linear antenna modes do
provide the best performance. The circular polarization mode is intended for use cases requiring
medium range reading and alignment of tags is random (Picture 15). The circular polarization mode
works well if good performance tags are used and the tags easily readable. The proximity mode is
ideal for locate and tag writing functionalities but shouldn’t be enabled if not needed because it will
slow down reading speed.
NOTE! Wireless charging is disabled when battery level is low (Power LED is red)
Power On
Battery Full
> 20 %
Power On
Battery Medium
10–20 %
Power On
Battery Low
< 10 %
Power Off

2017-04-26
Nordic ID EXA51 User Guide
Version 1.3
Picture 15 Tags in random alignment
2. APPLICATIONS AND APPLICATION DEVELOPMENT
Nordic ID has taken an open source SW development approach in use with the Nordic ID EXA51.
Nordic ID provides the SDK along with the examples through the GitHub. The Nordic ID EXA51
supports powerful NUR API so developers can use familiar NUR API for application development.
2.1. NORDIC ID RFID DEMO APPLICATIONS
Nordic ID provides feature rich - yet easy to use -RFID demo applications for iOS and Android
platforms.
2.1.1. NORDIC ID RFID DEMO FOR ANDROID
Nordic ID RFID demo application for Android supports Android 5.0 and newer versions. The Nordic
ID RFID demo application is available from the Google Play store.
Picture 14 Tags in horizontal and vertical alignment

2017-04-26
Nordic ID EXA51 User Guide
Version 1.3
2.1.2. NORDIC ID RFID DEMO FOR IOS
Nordic ID RFID demo application for iOS supports iOS 9 and newer versions. The Nordic ID RFID demo
application is available from the Apple App store.
2.2. APPLICATION DEVELOPMENT
2.2.1. NUR API IN GENERAL
NUR API is an application programming interface for Nordic ID UHF RFID modules. It provides control
for all Nordic ID UHF RFID readers. The NUR API provides compatibility between Nordic ID UHF RFID
readers from RFID functions perspective. The NUR API consists of application, NUR API, transport
and HW layers as depicted in Picture 16.
Picture 16 NUR API architecture
APPLICATION
NUR API (C/C++, .NET and Java)
Transport layer: TCP, serial port, USB and Bluetooth Low Energy
Android devices: TCP, Bluetooth Low Energy and USB OTG
iOS devices: Bluetooth Low Energy
DEVICES CONTAINING NORDIC ID NUR MODULE:
Nordic ID EXA51, Nordic ID Sampo, Nordic ID AR series,
Nordic ID STIX and Nordic ID development kits
(even proprietary implementation using Nordic ID NUR modules)
Other manuals for EXA51
2
Table of contents
Other Nordic ID Scanner manuals

