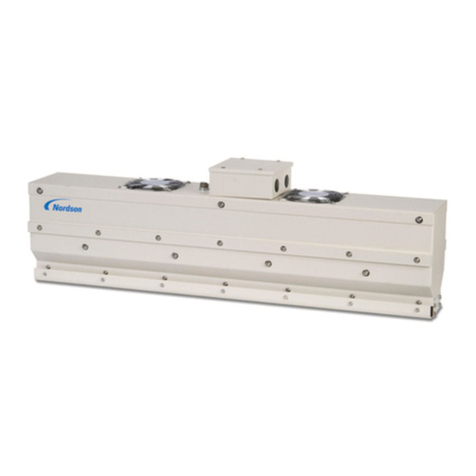
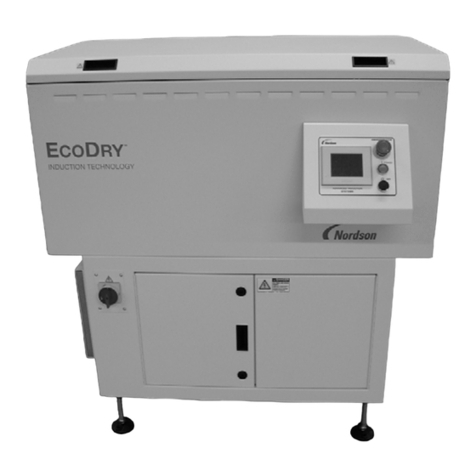
Nordson EcoDryr 2 Series Reference guide

EcoDryr2Series
Induction Dryers
Customer Product Manual
Part 1601792--01
Issued 5/12
NORDSON CORPORATION AMHERST, OHIO USA
For parts and technical support, call the
Finishing Customer Support Center at (800) 433-9319.
Check http://emanuals.nordson.com/finishing for the latest version.
This document is subject to change without notice.

Part 1601792--01 E2012 Nordson Corporation
tents
Table of Contents
Safety 1.......................................
Qualified Personnel 1.........................
Intended Use 1..............................
Regulations and Approvals 1...................
Personal Safety 2............................
Fire Safety 3.................................
Action in the Event of a Malfunction 3...........
Disposal 3...................................
Description 4.................................
Dryer Components 5.........................
Theory of Operation 6.........................
Specifications 8.............................
Manufacturing Date Code 8................
Operating Parameters 8....................
Operating Sound Levels 8..................
Installation 9..................................
Inspection 9.................................
Lift Points 9.................................
System Positioning and Mounting 10............
Coil and Tube Installation 11...................
System Wiring 12.............................
External Interlock 13..........................
Optional Status Contact 14.....................
Motion Sensor 14.............................
Magnetic Separator (Optional) 15...............
Exhaust Ducting (Optional, Customer-Supplied) 15
Return Shipping Instructions 15.................
Domestic/USA 15..........................
Export 15.................................
Setup 16.......................................
Preparation 16...............................
SICK Motion Sensor Sensitivity Adjustment 17....
Operator Interface 19...........................
Timer and Ramp Settings 20....................
Ramp Mode Power Level Adjustment 20......
Ramp Timer Setting 21.....................
Motion Timer Setting 22.....................
Motion Detect Sensitivity Setting 22..........
External Interlock Timer Setting (Optional) 22..
External Interlock Activation 23..............
Temperature Offset and Power Limit Settings 24..
PID Control Settings 25........................
Temperature Set point, Display,
and Alarm Settings 26.........................
Product Temperature Set point 26............
Alarm Set points 26........................
Temperature Alarm Delay 26................
Temperature Display Selection 26............
Option Setup 27..............................
Operation 28...................................
Dryer Controls 28.............................
Startup 28
...................................
Auto Mode 29................................
Adjusting the Temperature Setpoint 30........
Manual Mode 30..............................
Adjusting the Power Setpoint 31.............
High and Low Alarms 31.......................
Faults 32....................................
Navigation Screen 33.........................
Shutdown 33.................................
Ambient Temperature Compensation 34..........
Ambient Temperature Compensation Setup 34....
How to Change the Setpoint Temperature
from the Auto Run screen 37.................
Ambient Temperature Comp. Cancellation 37.....
Ambient Comp. Data Monitor 38.................
Maintenance 39................................
Monthly 39...................................
Quarterly 39..................................
Troubleshooting 40.............................
Thermocouple Troubleshooting 42..............
Repair 43......................................
Coil and Coil Tube Replacement 44.............
Thermocouple Replacement 46.................
Air Filter Replacement 46......................
Spare Parts 47..................................
Service and Parts Ordering Information 47........
Field Service Call Procedure 47.................
Parts Ordering Information 47..................
Temperature Conversions 48....................
Celsius--Fahrenheit Temperature Table 48........
Conversion Equations 48.......................
Factory Default Settings 49......................
NOTE: Insert application-specific data that was shipped
with the system in the tabbed sections of this manual.
Contact Us
Nordson Corporation welcomes requests for information, comments, and
inquiries about its products. General information about Nordson can be
found on the Internet using the following address:
http://www.nordson.com.
Address all correspondence to:
Nordson Corporation
Attn: Customer Service
555 Jackson Street
Amherst, OH 44001
Notice
This is a Nordson Corporation publication which is protected by copyright.
Original copyright date 2012. No part of this document may be
photocopied, reproduced, or translated to another language without the
prior written consent of Nordson Corporation. The information contained
in this publication is subject to change without notice.
Trademarks
Nordson, the Nordson logo, EcoDry are registered trademarks
of Nordson Corporation.
All other trademarks are the property of their respective owners.

EcoDry 2 Series Induction Dryers 1
Part 1601792--01
E2012 Nordson Corporation
EcoDry 2 Series Induction Dryers
Safety
Read and follow these safety instructions. Task- and equipment-specific
warnings, cautions, and instructions are included in equipment
documentation where appropriate.
Make sure all equipment documentation, including these instructions, is
accessible to persons operating or servicing equipment.
Qualified Personnel
Equipment owners are responsible for making sure that Nordson equipment
is installed, operated, and serviced by qualified personnel.
WARNING: The control enclosure and coil tray contain high voltages and
high power levels that can be fatal. Allow only qualified personnel to access
these enclosures.
Qualified personnel are those employees or contractors that
Shave experience operating and maintaining high-power and high-voltage
electrical equipment.
Scan safely perform their assigned tasks.
Sare familiar with all relevant safety rules and regulations and are
physically capable of performing their assigned tasks.
Intended Use
Use of Nordson equipment in ways other than those described in the
documentation supplied with the equipment may result in injury to persons
or damage to property.
Some examples of unintended use of equipment include
Susing incompatible materials and atmospheres
Smaking unauthorized modifications
Sremoving or bypassing safety guards or interlocks
Susing incompatible or damaged parts
Susing unapproved auxiliary equipment
Soperating equipment in excess of maximum ratings
Regulations and Approvals
Make sure all equipment is rated and approved for the environment in which
it is used. Any approvals obtained for Nordson equipment will be voided if
instructions for installation, operation, and service are not followed.
Refer to the CE Declaration of Conformity for approvals standards.

EcoDry 2 Series Induction Dryers
2
Part 1601792--01 E2012 Nordson Corporation
WARNING: Never disarm diagnostic devices including but not limited to:
SCurrent sensor
SOvertemperature switches
SAir pressure switch
SCoil tray lid safety switches
Disarming diagnostic devices will void the warranty and may cause
equipment failure.
Personal Safety
To prevent injury follow these instructions:
SDo not operate or service equipment unless you are qualified.
SDo not operate equipment unless safety guards, doors, or covers are
intact and automatic interlocks are operating properly. Do not bypass or
disarm any safety devices.
SMake sure that the ventilation system is operating properly to prevent
dangerous concentrations of volatile particles or vapors.
SKeep clear of moving equipment. Before adjusting or servicing moving
equipment, shut off the power supply and wait until the equipment
comes to a complete stop. Lock out power and secure the equipment to
prevent unexpected movement.
SDisconnect, lock out, and tag switches before servicing electrical
equipment.
SKeep parts of your body and metal implements away from the induction
heating zone while the system is energized. Metal objects will heat up
very quickly. Remove all jewelry, watches, and rings.
SObtain and read Material Safety Data Sheets (MSDS) for all materials
used. Follow the manufacturer’s instructions for safe handling and use
of materials, and use recommended personal protection devices.
STo prevent injury, be aware of less-obvious dangers in the workplace
that often cannot be completely eliminated, such as hot surfaces, sharp
edges, energized electrical circuits, and moving parts that cannot be
enclosed or otherwise guarded for practical reasons.
SHearing protection is recommended.

EcoDry 2 Series Induction Dryers 3
Part 1601792--01
E2012 Nordson Corporation
Fire Safety
To avoid a fire or explosion, follow these instructions:
SAll equipment must be grounded and bonded to the building ground.
SDo not heat materials to temperatures above those recommended.
Make sure heat monitoring and limiting devices are working properly.
SProvide adequate ventilation to prevent dangerous concentrations of
volatile particles or vapors. Refer to local codes or your material MSDS
for guidance.
SDo not disconnect live electrical circuits while working with flammable
materials. Shut off power at a disconnect switch first to prevent
sparking.
SKnow where emergency stop buttons, shutoff valves, and fire
extinguishers are located.
SClean, maintain, test, and repair equipment according to the instructions
in your equipment documentation.
SUse only replacement parts that are designed for use with original
equipment. Contact your Nordson representative for parts information
and advice.
Action in the Event of a Malfunction
If a system or any equipment in a system malfunctions, shut off the system
immediately and perform the following steps:
SDisconnect and lock out system electrical power.
SIdentify the reason for the malfunction and correct it before restarting the
system.
Disposal
Dispose of equipment and materials used in operation and servicing in
accordance with applicable laws, regulations, or codes.

EcoDry 2 Series Induction Dryers
4
Part 1601792--01 E2012 Nordson Corporation
Description
See Figure 1. The Nordson EcoDry 2 Series Induction Dryers provide
simple, efficient, and uniform drying of water--based end--sealing
compounds applied to can ends. The dryers use solid--state induction
heating to generate heat within the can ends and dry the sealing compound,
at line speeds of up to 2200 ends a minute. The dryers can be designed for
can end diameters from 57 to 110mm.
The dryers are available with single- or dual-channels and can be
configured to mate to almost any line height. Each dryer is designed to
handle a particular material and can end size or limited range of can end
sizes, according to the customer’s specifications.
Figure 1 EcoDry 2--9 Series Induction Dryer
Heading
Instant On / Off When the line starts, heating within the can ends instantly starts. Since heat is
created directly within the ends, there is no thermal inertia. When the line
stops, heating instantly stops. This produces a very uniform product.
No Jams The short length of the dryer and the straight-through design minimizes jams.
Energy Savings Solid state induction heating is extremely efficient. Greater than 80% of the
power consumed is directly realized as heat in the can ends. When the line
stops, almost no power is consumed.
Reliability The solid-state design of the dryers minimizes downtime. There are few
moving parts to wear out.
Small Footprint Because induction drying is so effective, the dryer is much smaller than
conventional ovens.
Temperature Control The dryer continuously monitors the temperature of the can ends as they exit
the dryer and adjusts coil power to maintain the desired set point temperature,
providing uniform control of product quality.
Magnetic Separator An optional magnetic separator can be installed at the dryer exit.

EcoDry 2 Series Induction Dryers 5
Part 1601792--01
E2012 Nordson Corporation
Dryer Components
SeeFigure2.
DANGER
5
6
3
2
1
4
Figure 2 EcoDry 2 Series Induction Dryer (Shown with Optional Magnetic Separator)
Item
1Motion Sensor: A laser sensor that monitors the movement of can ends at the entrance to
the dryer. The controller will only apply power to the induction coil when the motion sensor
detects can ends moving through the dryer.
2Coil Tray: Contains the induction coil, glass coil tube, auxiliary air heater, heater blower, and
exhaust blower. The can ends travel through the glass tube and are heated by the induction
coil. Cabinet air is heated and forced through the tube to carry off the moisture vaporizing out
of the sealing compound. The exhaust blower draws the heated air and moisture out of the
tube. The coil tray attaches to the customer infeed and outfeed system.
3Operator Control Console: Contains the operator interface terminal (touch screen) which
contains all operator control functions including warnings and faults. The console includes an
Emergency Stop button and system on/off push-buttons.
4Control Enclosure: Contains the system controller (PLC), cooling air filters and fan, and
power inverter devices and circuit boards.
5Temperature Sensor: Senses the can end temperature as the ends exit the coil tray. The
temperature controller then regulates the power applied to the induction coil to produce the
desired can end exit temperature. The sensor is a low-mass Type-K thermocouple.

EcoDry 2 Series Induction Dryers
6
Part 1601792--01 E2012 Nordson Corporation
Theory of Operation
See Figures 3 and 4.
The can ends move through a glass coil tube inside the coil tray. The tube
is surrounded by the induction coil. As can ends enter the dryer, the motion
sensor at the entrance signals the controller. The controller causes the
power inverter to apply alternating current to the coil windings. The coil
windings generate an alternating magnetic field that creates large eddy
currents in the can ends. The resistance to the eddy currents generates
heat within the can ends and dries the sealing compound. If the can end
line stops, the motion sensor signals the controller, which shuts off power to
the coil windings.
The temperature sensor (thermocouple) at the exit senses the can end
temperature and signals the temperature controller, which adjusts the power
going to the coil windings to maintain the temperature at the set point. The
controller uses a PID (Proportional--Integral--Derivative) algorithm that
automatically adjusts the amount of power supplied to the coil to eliminate
temperature variations due to line voltage fluctuations, applied compound
weight, and can end start temperature.
A blower in the controller/power inverter enclosure pulls in room air and
directs it over the electrical components to cool them. A second blower in
the coil tray cools the induction coil. An air heater mounted on the tube hub
at the entrance end of the coil tray interior then adds additional heat to the
air as it enters the coil tube to carry off moisture vaporizing out of the
sealing compound. If an optional magnetic separator is installed at the tube
exit, heated air is also ducted directly into the separator.
Safety interlocks include thermocouples, and a pressure switch. A
customer interlock is also provided. Interlock status is indicated on the
operator control panel.

EcoDry 2 Series Induction Dryers 7
Part 1601792--01
E2012 Nordson Corporation
WARNING: Never disarm diagnostic devices including but not limited to:
SCurrent sensor
SOvertemperature switches
SAir pressure switch
Disarming these devices will void the warranty and may cause
equipment failure.
DANGER
FEED DIRECTION
ENTRANCE
MOTION SENSOR
COIL TRAY
COIL AND
TUBE ASSEMBLY
EXIT
THERMOCOUPLE
Figure 3 Theory of Operation
Coil Windings
Can Ends
Eddy Current
Coil Current
Figure 4 Coil Operation

EcoDry 2 Series Induction Dryers
8
Part 1601792--01 E2012 Nordson Corporation
Specifications
Manufacturing Date Code
Serial Number: BKXXXX--XXX
year month
Operating Parameters
Ambient Temperature Range -5 to 45 _C(40--112_F)
Humidity 0--70% for full system functionality
Elevation (Altitude) Less than 1524 meters (5000 ft)
Above 5000 ft system must be de-rated.
Contact your Nordson representative.
Power Supply Requirements
380--480 VAC 50/60 Hz, 3 PH
Class J fusing required. (Buss LPJ 35SP or equal)
System Weight (Crated)
Varies, 363--635 kg (800--1400 lbs)
Operating Sound Levels
SeeFigure5.
39.40 IN. (1. MM)
74 DB
74 DB 72 DB
74 DB
TOP VIEW
Measurements taken 1.6 m (5.3 ft) from floor. 39.40 IN. (1. MM)
39.40 IN. (1. MM)
39.40 IN. (1. MM)
Figure 5 Operating Sound Levels

EcoDry 2 Series Induction Dryers 9
Part 1601792--01
E2012 Nordson Corporation
Installation
WARNING: Allow only qualified personnel to perform the following tasks.
Follow the safety instructions in this document and all other related
documentation.
Inspection
The EcoDry 2 system is shipped partially assembled. The glass coil tube
and coil, which are packed separately to prevent breakage must be
installed. Unpack and carefully inspect the dryer, coil tube, and coil for
obvious shipping damage and shortages. If you see any damage or
shortages, notify the shipper and your Nordson representative immediately.
The EcoDry 2 Model 9 may be shipped with coil trays separated. This
requires assembly of the tandem tray to the primary tray and wiring.
Lift Points
SeeFigure6.
CAUTION: Never lift or move dryers with the glass coil tube installed. If
installed, remove the coil tube before lifting and moving dryer. When lifting
dryers with tandem coil trays (EcoDry 2 Model 9), both coil trays must be
supported.
PRODUCT ENTRANCE END
DENOTES LIFT POINT
TEMPORARY BEAMS
CAUTION: UNBALANCED LOAD;
HEAVIER ON ENCLOSURE SIDE.
SECURE ENCLOSURE WHEN LIFTING.
2 TEMPORARY BEAMS REQUIRED.
FORK UNDER TEMPORARY BEAMS. OPTIONAL LIFTING POINTS
Figure 6 Lift Points (Shown with optional magnetic separator.)

EcoDry 2 Series Induction Dryers
10
Part 1601792--01 E2012 Nordson Corporation
System Positioning and Mounting
See Figure 6 for lift points.
Flow Direction
The dryer must be positioned so that can ends pass through it in the correct
direction. When moving the dryer into position in the production line, note
the position of the motion sensor head. This is the dryer entrance. A flow
direction arrow is also located inside the coil tray.
NOTE: Optional magnetic separators are always installed at the exit end of
the dryer.
Clearances
Provide clearances around dryer as follows:
SMake sure blower intake (filters) and vents are not obstructed.
SProvide 1 meter (39 in.) of space at the operator side of the dryer for
access to control panel for power and interlock connections and repairs.
Mounting and Line Connections
The dryer legs are set at the factory to approximately the height listed on
the customer approval form supplied with the purchase order. Level the
dryer and bolt it to the floor.
See Figure 7. Six evenly spaced 1/4-20 NCB threaded holes are provided in
the dryer exit and entrance hubs. Secure your can end rod cages or trays
to the entrance and exit hubs as required.
CAUTION: Do not apply excessive force to the hub assemblies. The
ancillary track work or rod cage assemblies must carefully fitted to prevent
applying strain to the hubs, which will be transmitted to the glass coil tube
and cause the tube to fracture.
105 mm (4.13 in.)
to 175 mm (6.89 in.) End Sizes 100 mm (3.94 in.) End Sizes Up to 83 mm (3.26 in.) End Sizes
1/4--20 NCB Threaded Insert
(6) holes eq. sp. on 9.00 B.C.
1/4--20 NCB Threaded Insert
(6) holes eq. sp. on 6.50 B.C.
1/4--20 NCB Threaded Insert (6)
holes eq. sp. on 5.50 B.C.
60_
60_
60_
Figure 7 Entrance and Exit Hub Mounting Hole Pattern

EcoDry 2 Series Induction Dryers 11
Part 1601792--01
E2012 Nordson Corporation
Coil and Tube Installation
See Figure 8. Install the coil and glass coil tube as follows:
1. Disconnect and lockout power to the dryer.
2. Remove the fourteen screws securing the lid to the coil tray. Lift the lid
slightly to find the ground wire. Disconnect ground wire and remove lid.
3. Remove the screws (1) securing the air heater / fan and exhaust vent to
the entrance hub. Move the air heater/fan away from the hub.
4. Remove the coil tube hold-down screws and cushions (2) from the
entrance and exit hubs.
5. Unpack the coil (4) and glass coil tube (3). Carefully insert the tube
through the coil.
6. Carefully install the coil and tube assembly in the coil tray, positioning
the ends of the tube into the hubs. Unless the coil is marked with the
flow direction, it does not matter which end of the coil is at the entrance
or exit.
7. Reinstall the coil tube cushions and hold-down screws (2) on the exit
and entrance hubs.
8. Reinstall the heater blower and exhaust vents on the entrance and exit
hubs with the screws (1).
9. Connect the coil wiring to the bus bar terminals (5). Attach the wiring
per the markings on the insulation jacket and the bus bar numbering.
One end of the coil attaches to the first bus bar while the opposite end
attaches to the second bus bar.
NOTE: Bi--Filar and multiple terminated coils have more than one terminal
at each end of the coil. Attach all terminations at one end to the common
bus bar, and all terminations at other end to other common bus bar.
1
2
3
4
5
Figure 8 Coil and Tube Installation
1. Air heater and exhaust vent screws
(4 on each hub)
2. Cushion and hold--down screws
3. Glass coil tube
4. Coil
5. Bus bar terminals

EcoDry 2 Series Induction Dryers
12
Part 1601792--01 E2012 Nordson Corporation
System Wiring
Schematics and Wiring Diagrams
System wiring is application-specific. Refer to the schematics and wiring
diagrams that shipped with the system.
Power Input
See Figure 9 for connections. Service requirement is 380--480 VAC
50/60Hz, 3 phase at 35 amp current limited. Class J fusing required.
WARNING: Install a locking breaker or disconnect in the electrical supply
line ahead of the dryer so that power to the dryer can be disconnected and
locked out when repairs are made. All electrical connections must be made
according to code, including a proper ground connection. Failure to
observe this warning could result in severe personal injury or death from
electrical shock.
See Figure 9. Line power is supplied to the system through a 3/4-- i n .
(1.9--cm) conduit fitting in the upper right--hand corner of the control
enclosure.
NOTE: Wire gauge must be copper and comply with local and national
electrical codes.
1. Route three #8 AWG (8.4 mm2) wires to the input terminal block (TBL)
on the input side of the line filter.
2. Route one #8 AWG (8.4 mm2) ground wire to the cabinet grounding
terminal (PE) located next to the input terminal block.
L1 L2 L3
GROUND
Figure 9 Power and Ground Connections

EcoDry 2 Series Induction Dryers 13
Part 1601792--01
E2012 Nordson Corporation
External Interlock
The external interlock is an optional connection that indicates to the dryer
that the production line is running. When the interlock is used, the dryer
controller will not apply power to the induction coil if there is no interlock
signal.
CAUTION: Nordson engineering recommends that the external interlock be
connected and enabled. Without the interlock, random line motion can
cause the controller to apply power to the coil while the line is stopped,
which could overheat and damage stationary can ends inside the coil.
Connecting the External Interlock
The external interlock requires an external 24 Vdc source at 100 mA to
power an internal relay coil (refer to Note below). The external 24 VDC
power source is not referenced to the dryer ground. The interlock indicates
to the dryer system that the production line is running. Without this signal,
the controller will not apply power to the induction coil.
NOTE: The interlock relay coil is relay CR4 (IDEC part number RY22S).
Additional relay voltages are available through an IDEC distributor.
The interlock terminals are located behind the control enclosure doors, in
the front of the enclosure.
1. See Figure 10. Drill a hole or use a knockout tool to bring your interlock
cable into the enclosure. Install a properly sized strain relief or conduit
connector in the knockout.
2. Connect your interlock wiring to terminal TB19.
19
CUSTOMER
20
INTERFACE
19 20
External Interlock Terminal (TB19) Status Contact Terminal (TB20)
Figure 10 External Interlock and Status Contact Connections

EcoDry 2 Series Induction Dryers
14
Part 1601792--01 E2012 Nordson Corporation
Disabling Customer Interlock
If you do not wish to use the customer interlock, you can set the EcoDry 2
system to run with the signal from the motion sensor only.
1. Use the touch screen to go to the Navigation page.
2. Select CONFIG. The Configurations/Options Setup screen appears.
3. Touch the External Run Signal button to toggle it to IGNORED.
Optional Status Contact
See Figure 10. The status contact provides a Dryer Ready signal. It is
used in conjunction with the customer interlock. The contact indicates when
the dryer is off or in a fault condition. The contact is off when:
SThe dryer is turned off.
SAny fault on the operator panel is activated.
Status Contact Connection: Terminal 20 Output Contact (output)
Motion Sensor
See Figure 11. Mount the motion sensor as shown. If a rod cage entry is
used with a rod at 12:00 o’clock or if an overhead guide interferes with the
sensor line of sight, reposition the motion sensor as necessary.
Adjust the motion sensor sensitivity as described on page 17.
Figure 11 Motion Sensor Position

EcoDry 2 Series Induction Dryers 15
Part 1601792--01
E2012 Nordson Corporation
Magnetic Separator (Optional)
Refer to the Magnetic Separator Adjustments instruction sheet, part number
1040053, for instructions on adjusting the magnetic separator for correct
operation.
Exhaust Ducting (Optional, Customer-Supplied)
Small amounts of water vapor and hot air are released from the exit end of
the induction tubes. Exhaust hoods and ducting is not required but can be
installed if desired. Do not restrict the air flow from the tubes.
Return Shipping Instructions
Refer to page 9 for lift points.
Domestic/USA
1. Remove the glass coil tube and coil. Carefully pack the tube and
coil separately.
2. Remove the leveling pads and place the system on a heavy duty
shipping skid. Bolt the system to the skid through the leveling pad
mounting holes.
3. Secure the coil tube and coil packages to the skid.
4. Wrap the system with plastic wrap or shrink wrap.
Export
Prepare the system as described in the Domestic/USA return shipping
instructions. In addition, do the following:
SFully crate the system with all sides protected with 13 mm (1/2in.)
minimum OSB material or equivalent.
SIf shipping by ocean freight, wrap entire system add silica gel inside the
wrapped system before crating.

EcoDry 2 Series Induction Dryers
16
Part 1601792--01 E2012 Nordson Corporation
Setup
WARNING: Allow only qualified personnel to perform the following tasks.
Follow the safety instructions in this document and all other related
documentation.
Setup consists of:
SMotion sensor sensitivity adjustment
SRamp mode power level adjustment
SRamp timer setting
SMotion timer setting
SExternal interlock timer setting (optional)
STemperature setting
STemperature offset and limits setting
SPID control setting
SAlarm settings
SAmbient Temperature Compensation Setup
NOTE: The screens used during setup can be locked from the
Configuration/Options screen, which is a password protected screen. If you
do not have access to the screens required for setup, contact your Nordson
representative.
Setup normally needs to be performed at initial startup. Refer to Dryer
Controls on page 28 for an overview of the controls used for setup.
WARNING: The dryer contains high voltages which can be fatal. Do not
touch any electrical terminals or connections inside the enclosure while the
dryer is powered up. Do not attempt to operate the dryer with the coil tray
lid open.
Preparation
1. Make sure your production line is ready to start. For both motion sensor
sensitivity adjustment and ramp mode power level adjustment you must
run can ends through the dryer.
2. Turn the main disconnect to the ON position.
3. Press the POWER button on the operator panel. The dryer powers up.
NOTE: With the enclosure doors open and the door interlock switch
overridden, the Cooling Blower Fault LED lights. The motion sensor will
remain powered for making adjustments. The inverter will not turn on, so
product in the dryer while the fault LED is on will not be cured and must be
removed from production.

EcoDry 2 Series Induction Dryers 17
Part 1601792--01
E2012 Nordson Corporation
SICK Motion Sensor Sensitivity Adjustment
WARNING: Laser radiation. Do not look directly into the laser beam or its
reflection from can bodies. Doing so can result in serious eye injury.
The SICK laser sensor focal point is adjustable between
30--60 mm (1.2--2.4 in.) from the sensor face.
Adjust the distance screw for the optimum distance while observing the
reception indicator.
Distance/Gain
Adjustment
LED Operating Indicator: Green
LED Reception Indicator: Yellow
Figure 12 SICK Motion Sensor Module

EcoDry 2 Series Induction Dryers
18
Part 1601792--01 E2012 Nordson Corporation
Notes:
Table of contents
Other Nordson Dryer manuals