Page
Introduction
...........................
. 2
Controls
and
Connections
............
. 3-4
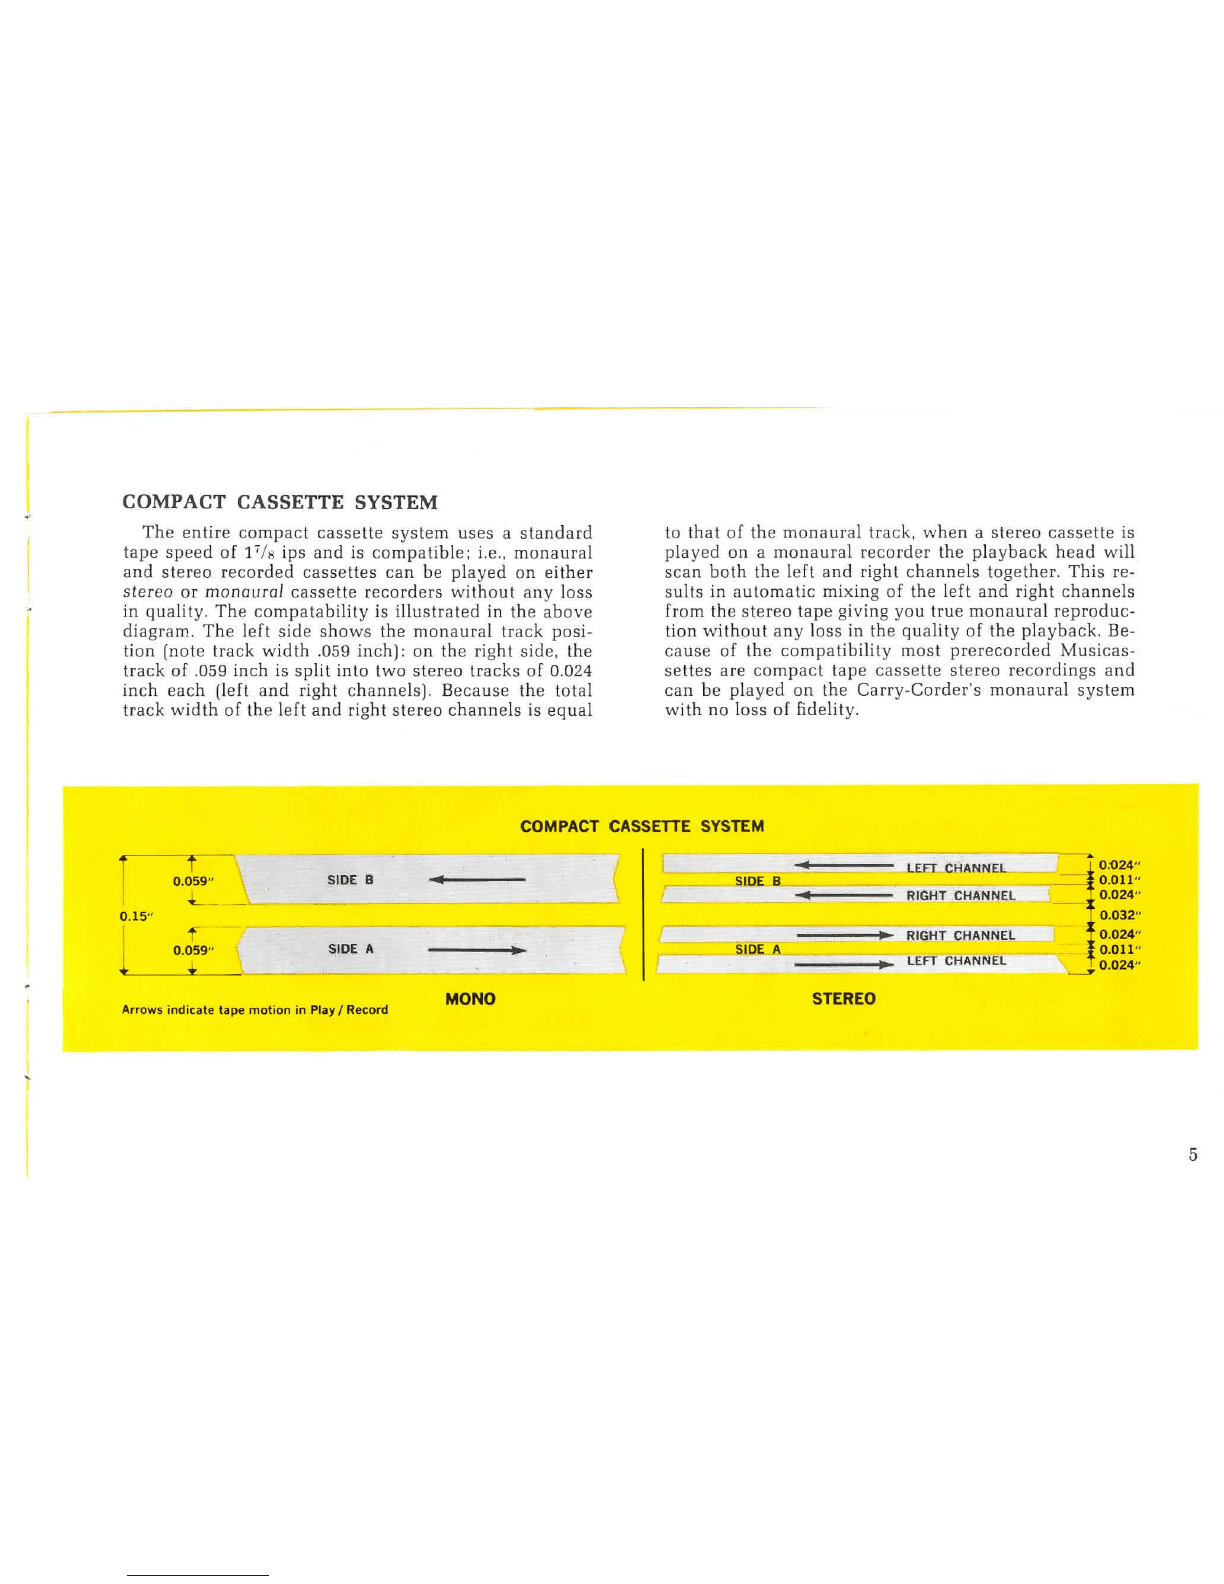
Compact
Cassette
System
................
. 5
Compact
Cassette
...
....
...
.....
. .
......
. 6
Inserting the
Cassette
....................
. 6
Removing
the
Cassette
.............
. . . 6
Compact
Cassette
Index
............
. . . . 7
Cassette
Index
Card
..
......
..
...
.
..
.
...
. 7
Compact
Cassette
Storage
....
...........
. . 7
Batteries
and
Installation
...........
.
...
. . 7
Batteries
..............
..
...............
. 7
Removing
Battery Compartment
Cover
8
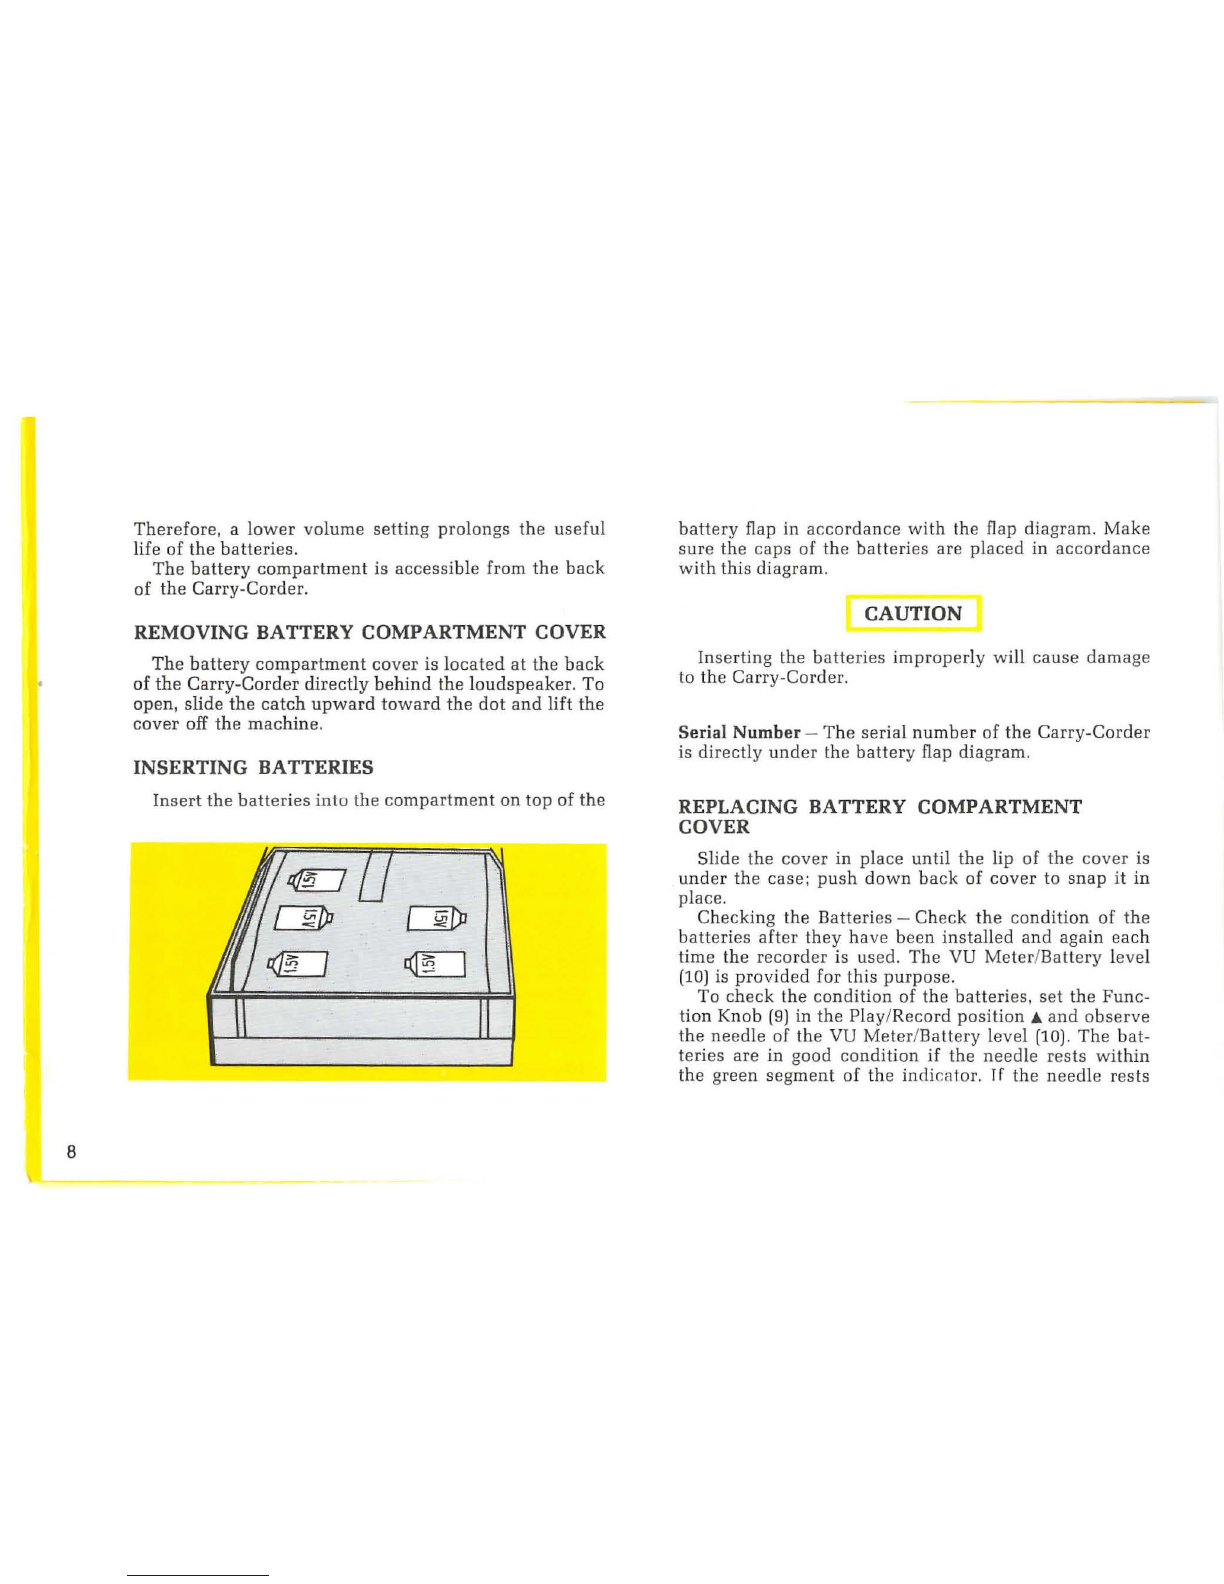
Inserting Batteries
..
....
...........
.....
. 8
Replacing Battery Compartment
Cover
..
. 8
How
To
Use
The
Patch Cord .
...
.
........
. 9
Fast
Wind
and
Rewind
.......
.
..
.
.......
. 9
Rewind
................
. 9
INDEX
Wind
Page
9
PLAYBACK . . . . . . . . . . . . . . . . . . . . . . . . . . .
10
Playback
Through External
Amplifying
Equipment
.........
..
.......
.
10
RECORD
..
.
.........
. 11
How
To
Use
The
Microphone
......
...
..
.
..
11
REMOTE CONTROL . . . . . . . . . . . . . . . . . . . . . 11
Remote
Control
Microphone
Switch
. . . . . . . 11
LOUDSPEAKER/HEADPHONE PLUG . . . . . .
12
Accidental
Erasure
Safety
Feature . . . . . . . . .
12
Erasing
Tapes
. . . . . . . . . . . . . . . . . . . . . . 13
RECORDING STEPS . . . . . . . . . . . . . . . . . . . . . 13
Maintenance
. . . . . . . . . . . . . . . . . . . . . . . .
14
Technical
Specifications
. . . . . . . . . . . . . .
15
Schematic
of
Carry-Corder '150', EL3302
16
Warranty . . . . . . . . . . . . . . . . . . . . . . . . . . . . . . .
17
INTRODUCTION
Y
ou
are
now
the
o\\'ner
of
the
Norelco
Carrv-Corder
'150'
, a
portable.
fully
transistorized
tape
rrr·o~clrr
thnt
is
pr
ecis
ion
engineered
to
meet
lhf'
highest
mer.hanical
and
electronic:
standards.
Understanclnhl~·.
you
<He
nnxious to
begin
using
your
nr1v
tape
rer.order.
howt'\·rr,
\\'r'
ur
ge
you
to takP
the
lime
lo
n'ad
llw
se
simp!!' inslrur.l
ions
.
Thry
arr
dP
signed
lo
lwlp
~Oll
.Qain
the
utmost
in
Pn
j
o~·menl
and
pprfo
rm-
anr.t• from
your
:'\lorelco
lnpr
n•cordPr. In
this
hookiPI
\'Ou
\\ill
find
the
bas
ic
opt>rdtJn~
and
mainlr•nanc:e
pro-
c:Prl
ures. pi us
nddil
ionnl in
forma
Iion
you
shou
ld
know
ahoul
your
:\'orelco
Carry-Corder
'1:J(J'.
n~
rPaclin~
lhPS('
inslrur.lions,
vou
will
be
ff'W<lrded
with
a knowlt•dge
of
tht
rapahilitit's
of
~our
I
ape
rPr.ordrr,
and
with
mnn:v
hours
of
lroublelreP
rer.orcling
and
l
istening
plPasure.
Your
:'\ore
leo
Carr~
-CordPr
'150'
is a
r;omp<~c
t
portiiblP
unll
which
opernles
any\\
hPn'
...
\\
ithout
any r.xiPrnal
JHl\\'t'r
sou
reP.
No\\
~
Oll
r.nn
makP
r
rcordmgs
while
tril\'r!ling. in
your
backyard
-
nny
pl<lCP.
,
\notlwr
outstanding
fP<llurP
of
your
:-Jorelco
Carry
-
Cord<'r
·1
~o·
permits
\'OU
to make'
rPcordings
of
~·our
fa\
mite
mustr. at
home.
<1nd
lake
them
\\·ith
vou
to
the
c.tHtntn·; \·ou cnn li
siPn
to
yo
ur
fa\·orile
music
in
your
r:a
r.
lei~
I.
~r
boat.
2
Drs. Nicholas and Dorothy Cummings Center for the History of Psychology
Special Interest Collection, The University of Akron