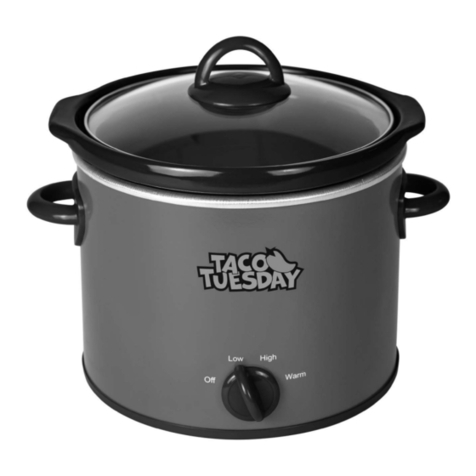
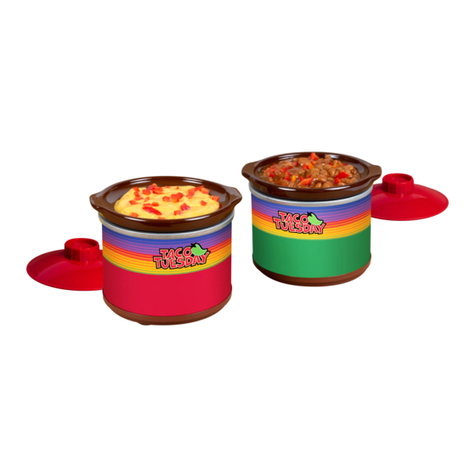
Nostalgia Electrics TACO TUESDAY TTRDP2RD Quick guide

All products are trademarks of Nostalgia Products LLC.
Worldwide design & utility patented or patents pending.
© 2020 Nostalgia Products LLC.
www.nostalgiaproducts.com
(rev. 01/03/20)
All products are trademarks of Nostalgia Products LLC.
Worldwide design & utility patented or patents pending.
© 2019 Nostalgia Products LLC.
www.nostalgiaproducts.com
(rev. 01/03/20 YD)

All products are trademarks of Nostalgia Products LLC.
Worldwide design & utility patented or patents pending.
© 2019 Nostalgia Products LLC.
www.nostalgiaproducts.com
(rev. 01/03/20 YD)
TTRDP2RD
2-Quart Chili & Nacho Cheese Fiesta Pot
Pot Pour Fromage 2-Litres Fiesta Chili & Nacho
Olla de Fiesta para queso, nachos y chile
Instructions and Recipes
Instructions et Recettes
Instrucciones y Recetas


ENGLISH
2
SAFETY
Appliance Specications:
120 Volts, 60 Hz, 100 Watts
THIS PRODUCT IS FOR USE IN 120V AC OUTLET ONLY.
Refer to www.nostalgiaproducts.com/user-manuals/ for the most updated manual.
Your safety and the safety of others are very important.
We have provided many important safety messages in this manual and
on your appliance. Always read and obey all safety messages.
This is the safety alert symbol.
This symbol alerts you to potential hazards that
can kill or hurt you and others.
All safety messages will follow the safety alert symbol.
All safety messages will tell you what the potential hazard is, tell you how to reduce the
chance of injury, and tell you what can happen if the instructions are not followed.
Make every day a party!
Visit www.nostalgiaproducts.com for more fun products.
CONTENTS
SAFETY. . . . . . . . . . . . . . . . . . . . . . . . . . . . . . . . . . . . . . . . . . .2
IMPORTANT SAFEGUARDS . . . . . . . . . . . . . . . . . . . . . . . . . . . . . .3
INTRODUCTION . . . . . . . . . . . . . . . . . . . . . . . . . . . . . . . . . . . . . 4
PARTS & ASSEMBLY . . . . . . . . . . . . . . . . . . . . . . . . . . . . . . . . . . .5
HOW TO OPERATE . . . . . . . . . . . . . . . . . . . . . . . . . . . . . . . . . . . .5
HELPFUL TIPS . . . . . . . . . . . . . . . . . . . . . . . . . . . . . . . . . . . . . .6
CLEANING & MAINTENANCE . . . . . . . . . . . . . . . . . . . . . . . . . . . . .6
RECIPES . . . . . . . . . . . . . . . . . . . . . . . . . . . . . . . . . . . . . . . . . .7
RETURNS & WARRANTY . . . . . . . . . . . . . . . . . . . . . . . . . . . . . . .11

ENGLISH
3
IMPORTANT SAFEGUARDS
A person who has not read and understood all operating and safety instructions
is not qualied to operate this appliance. All users of this appliance must read and
understand this Instruction Manual before operating or cleaning this appliance.
When using electrical appliances, basic safety precautions
should always be followed, including:
1. Read all instructions before operating this appliance.
2. DO NOT TOUCH the hot surfaces. Use handles or knobs.
3. This appliance is NOT A TOY.
4. Unsupervised young children and cognitively challenged
individuals should never operate this appliance.
5. Close supervision is necessary when any appliance is used by or near children.
6. To protect against electrical shock do not immerse cord, plug
or any part of this unit in water or other liquids.
7. Unplug from outlet when not in use, before removing parts and before cleaning.
Allow to cool before putting on or taking o any parts, and before cleaning.
8. DO NOT operate any appliance with a damaged cord or plug, or after the appliance
malfunctions, or if the appliance has been damaged in any manner. Return the
appliance to the nearest repair shop for examination, repair or adjustment.
9. The manufacturer does not recommend the use of accessory attachments other than
what is provided by the manufacturer. Use of attachments may cause injuries.
10. DO NOT use the appliance for other than its intended use.
11. DO NOT use outdoors. FOR HOUSEHOLD USE ONLY.
12. DO NOT place on or near a hot gas or electric burner, or in a heated oven.
13. DO NOT put in dishwasher.
14. DO NOT let cord hang over edge of table or counter, or touch not surfaces.
15. NEVER leave unit unattended while in use or when plugged into an outlet.
16. Extreme caution must be used when moving an appliance containing hot food or liquid.
17. Always attach plug to appliance rst, then plug cord in the wall outlet. To
disconnect, turn any control to "o," then remove plug from wall outlet.
SAVE THESE INSTRUCTIONS!
ENGLISH
4
INTRODUCTION
Thank you for purchasing the TACO TUESDAY 2-QUART CHILI & NACHO CHEESE FIESTA
POT from Nostalgia™. With this unit, you can slow cook your favorite recipes, easily heat
your favorite chili and cheese combinations and more! Make every Fiesta a Taco Tuesday!
• Perfect for making nachos, chili, queso, carnitas, shredded chicken, beef & more!
• High, Low and Warm cook settings
• Tempered glass lid with cool-touch handles
• Removable round ceramic pot for easy cleaning

ENGLISH
5
PARTS & ASSEMBLY
PARTS
HOW TO OPERATE
1. Before rst use, wipe down all surfaces with a non-abrasive, damp cloth and dry.
2. Find a clean, dry, non-slippery, level surface near an electrical outlet.
3. Allow about eight inches of cleared space all around the exterior of the unit.
4. Make sure the thermostat is turned OFF.
5. Plug the power cord into the wall outlet.
6. Prepare the ingredients for the food to be cooked. See the Recipes section for meal ideas.
7. NEVER leave the appliance unattended.
8. Always wear oven mitts or use a potholder while using the 2-QUART
CHILI & NACHO CHEESE FIESTA POT to prevent burns.
9. The cooking time depends on the dish that is being made.
10. Remove foods from the removable bowl using plastic or wooden spoons. DO
Removable bowl
Tempered Glass Lid
Stay-Cool Handles
Housing
Temperature Control

ENGLISH
6
NOT use metal utensils, as they may scratch and damage the bowl.
11. Keep foods warm by setting thermostat on the "warm" setting.
12. Before unplugging the appliance, make sure the thermostat is
turned OFF to prevent any sparking from the outlet.
13. Once the appliance is completely cool, remove the bowl to empty and clean. It is important
to match the temperature of the water used to clean to the temperature of the bowl.
HELPFUL TIPS
1. Unit will get very HOT. Always use pot holders or oven
mitts when cooking with this appliance.
2. NEVER use a scouring pad or other abrasive sponges or cloths
on this unit, as this will scratch the appliance.
3. Do not wash the removable bowl in hot water if the bowl is cold. Likewise, do not
wash in cold water if the bowl is hot. Doing so may result in the ceramic cracking.
CLEANING & MAINTENANCE
Please take care of your 2-QUART CHILI & NACHO CHEESE
FIESTA POT by following these simple instructions:
• Turn thermostat to the OFF position.
• Unplug cord from the wall outlet.
• Allow unit to cool completely.
• Once unit is completely cool, remove lid and bowl.
• Clean bowl and lid in warm, soapy water. Rinse and dry.
• Wipe the housing surface with a damp, non-abrasive cloth and dry.
• To prolong the life of your appliance, never stack objects other than food on the surface of
the housing or in the removable bowl and never use a metal spoon to stir or serve foods.
• Never put the appliance in a dishwasher, nor immerse in
water. Always keep the cord away from water.
Removable bowl

ENGLISH
7
RECIPES
Creating your favorite dips and sauces is easy with the 2-QUART CHILI
& NACHO CHEESE FIESTA POT! These recipes are a great starting point,
but don't forget to be creative and cook to your own tastes!
*All recipes are measured to ll the 2-QUART CHILI & NACHO CHEESE FIESTA POT to
its suggested 3/4 ll capacity. Feel free to adjust for smaller batches as needed.
EASY CHEESE-Y CHILI DIP
• 6 cups processed
cheese
• 5½ cups (45 oz)
canned chili
Combine chili and cubed cheese in removable bowl.
Heat on LOW setting until cheese is melted
(approximately 15 minutes)
Stir together until well blended and
keep heated on "warm" setting.
VEGETARIAN CHILI DIP
• 20 oz (2 ½ cups)
cream cheese,
softened
• 5½ cups (45
oz) canned
vegetarian chili
• 2½ cups shredded
cheese
• 1½ cups raw diced
bell peppers
• 5 medium-sized
scallions
Mix cream cheese in removable bowl with
chili and sprinkle with cheese.
Heat on HIGH setting until cheese is
melted (approximately 15 minutes).
Sprinkle with peppers and scallions before serving.

ENGLISH
8
DOUBLE CHILI CHEESE DIP
• 20 oz (2 ½ cups)
cream cheese,
softened
• 5½ cups (45 oz)
canned chili
• 6 thinly sliced
green onions
• 1½ cups diced and
drained green chile
• 2½ cups shredded
cheese
Combine all ingridients in removable bowl.
Heat on HIGH setting for 15 to 20
minutes, stirring occasionally.
SPICY HEAT DIP
• 2 pounds of
ground beef
• olive oil for cooking
• 8 teaspoons of
chili powder
• 1½ teaspoons of
ground cumin
• 1½ teaspoons of
garlic powder
• 2 jars of salsa (32
ounces total)
• 2 pounds of
processed
cheese, cubed
• 1 large tomato,
chopped
• 2 scallions, nely
chopped
In a medium sauce pan, drizzle olive oil over ground beef.
Brown ground beef and drain after cooking.
Transfer meat to removable bowl and set on LOW heat.
Add in chili powder, ground cumin, garlic powder, salsa
and processed cheese and heat until cheese melts.
Add chopped tomatoes and scallions before serving.
PULLED PORK WITH SALSA VERDE
• 4lbs pork tenderloin
• 32 oz salsa verde
• Cilantro to taste
Shred pork with a fork and add to removable bowl.
Add in salsa verde and mix.
Heat at LOW setting for 8 hours. Stir and
top with cilantro before serving.

ENGLISH
9
SLOW-COOK TANGY CHILI DIP
• 1 medium onion,
nely chopped
• 3 teaspoons
canola oil
• 3 garlic cloves,
minced
• 5½ cups (45 oz)chili
without beans
• 2½ cups salsa
• 24 oz (3 cups) cream
cheese, cubed
• 6 oz sliced ripe
olives, drained
In a small skillet, saute onion in oil until tender.
Add garlic; cook 1 minute longer.
Transfer mixture to removable bowl.
Stir in the chili, salsa, cream cheese and olives.
Cover and heat on LOW setting for 4 hours or
until heated through, stirring occasionally.
BLACK BEAN DIP
• 7½ cups black beans
(rinsed and drained)
• 3½ tbsp balsamic
vinegar
• 8 tbsps (½ cup)
ketchup
• 2 tsp apple
cider vinegar
• 2 tsp salt
• 1 tsp onion powder
• 1½ tsp chili powder
Combine all ingredients and mix until creamy.
Heat at LOW setting for 15 minutes before
serving, stirring occasionally.

ENGLISH
10
REFRIED BEANS
• 1½ medium sized
onion, peeled
and halved
• 4½ cups dry pinto
beans, rinsed
• 3 tablespoons
minced garlic
• 4½ teaspoons salt
• 2¼ teaspoons fresh
ground black pepper
• ¼ teaspoon
ground cumin
• ¾ fresh jalapeno
pepper, chopped
and seeded
• 13½ cups water
Mix the onion, rinsed beans, jalapeno, garlic, salt,
pepper, and cumin in the removable bowl.
Add in water and stir to.
Heat on HIGH setting for 7-8 hours.
Once the mixture has cooked, pour o most of the liquid,
and set aside, as you will need this in the last step.
Remove the onion and mash the bean mixture.
Add the water mixture back to the removable
bowl until the consistency is reached.
CREAMY ENCHILADA
• 15 large our tortillas
• 4 large chicken
breasts
• 10 ¾ oz cream of
chicken soup
• 15 oz sour cream
• 4-5 cups shredded
cheddar and
monteray jack cheese
• 9 oz green chilis
• 3 green onions diced
• Sliced olives, to taste
• Olive oil
• Cooking spray
Cut chicken into small chunks and cook
in a frying pan with olive oil
Mix soup, sour cream, green chilis and 2 cups of cheese in
separate bowl, then add cooked chicken chunks to mixture.
Spray the bottom of the removable bowl with
cooking spray. Tear tortillas into small pieces and
layer bottom of bowl with half of the tortilla strips.
Pour and spread half of the chicken/soup mixture over the
tortilla strips, then add a layer of cheese and diced onion.
Cover with tortilla strips and repeat layering
steps with remaining mixture and cheese.
Top with sliced olives and serve.

ENGLISH
11
RETURNS & WARRANTY
SHOULD YOUR UNIT NOT WORK OR IF DAMAGED WHEN YOU FIRST TAKE IT OUT OF
THE BOX, PLEASE RETURN IT TO THE PLACE OF PURCHASE IMMEDIATELY.
2-QUART CHILI & NACHO CHEESE FIESTA POT / TTRDP2RD
Should you have any questions, please contact us via email or at the customer service number listed
below between the hours of 8:00 AM and 5:00 PM, Monday through Friday, Central Standard Time.
Distributed by:
Nostalgia Products LLC
1471 Partnership Dr.
Green Bay, WI 54304-5685
Customer Service
Phone: (920) 347-9122
Web: www.nostalgiaproducts.com
Customer Service Inquiry
To submit a Customer Service inquiry, go to www.nostalgiaproducts.com and ll
out the Customer Service Inquiry form and click the Submit button.
A representative will contact you as soon as possible.
Product Warranty Terms
Nostalgia Products LLC (the“Company”) hereby warrants that for a period of one (1) year from the
date of original purchase, this product will be free of defects in material and workmanship under
normal home use, provided that the product is operated and maintained in accordance with the
operating instructions. As the sole and exclusive remedy under this warranty, the Company will
at its discretion either repair or replace the product found to be defective, or issue a refund on the
product during the warranty period. This warranty is only available to the original retail purchaser of
the product from the date of initial retail purchase, and is only valid with the original sales receipt, as
proof of purchase date is required to obtain warranty benets. All warranty claims must be brought
to the attention of the Company within the warranty period and no later than 30 days of the failure
to perform. This warranty does not cover normal wear or damage caused by shipping, mishandling,
misuse, accident, alteration, improper replacement parts, or other than ordinary household use.
You may be required to return the product (with shipping prepaid by you) for inspection and
evaluation. Return shipping costs are not refundable. The Company is not responsible for returns
damaged or lost in transit. Unless otherwise specically permitted by the operating instructions, this
warranty applies to indoor household use only. In order to obtain service under this warranty, please
contact the Company at the telephone number listed above or by lling out the Customer Service
Inquiry Form located at www.nostalgiaproducts.com. Warranty valid only in USA and Canada.
This warranty is in lieu of all other warranties, expressed or implied, including warranties of
merchantability and tness for a particular purpose, which are hereby excluded to the extent
permitted by law. In no event shall the Company be liable for any indirect, incidental, consequential,
or special damages arising out of or in connection with this product or the use thereof. Some
states, provinces or jurisdictions do not permit the exclusion or limitation of incidental or
consequential damages, so the foregoing exclusion or limitation may not apply to you.
This warranty does not apply to re-manufactured merchandise.
Please read the operating instructions carefully. Failure to comply
with the operating instructions will void this warranty.
For more information, visit us online at www.nostalgiaproducts.com.
Like us on Facebook at www.facebook.com/NostalgiaElectrics.
Follow our boards on Pinterest at www.pinterest.com/nostalgiaelctrx.
Tweet along with us on Twitter at www.twitter.com/NostalgiaElctrx.

12
FRANÇAIS
12
SÉCURITÉ
Spécications de l’Appareil :
120 Volts, 60 Hz, 100 Watts
CE PRODUIT DOIT ÊTRE UTILISÉ UNIQUEMENT DANS UNE PRISE DE COURANT DE 120 V CA.
Reportez-vous à www.nostalgiaproducts.com/user-manuals/
pour la version la plus récente.
Votre sécurité tout comme celle des autres est primordiale.
Nous vous orons plusieurs messages importants relatifs à la
sécurité de votre appareil dans le présent manuel. Lisez toujours les
messages de sécurité et observez les consignes de sécurité.
Ceci est le symbole d’alerte de sécurité.
Ce symbole vous signale les dangers potentiels qui
peuvent blessures graves à vous et à d'autres.
Tous les messages de sécurité suivront ce symbole d’alerte de sécurité.
Tous les messages de sécurité vous informeront de la nature du danger
potentiel, vous diront comment réduire les possibilités de blessures et vous
diront ce qui pourrait arriver si les instructions ne sont pas suivies.
Faire une fête tous les jours!
Visiter le site Web www.nostalgiaproducts.com pour d’autres
produits agréables.
TABLE DES MATIÈRES
SÉCURITÉ . . . . . . . . . . . . . . . . . . . . . . . . . . . . . . . . . . . . . . . .12
PRÉCAUTIONS IMPORTANTES . . . . . . . . . . . . . . . . . . . . . . . . . . .13
INTRODUCTION . . . . . . . . . . . . . . . . . . . . . . . . . . . . . . . . . . . . 14
PIÈCES ET ASSEMBLAGE . . . . . . . . . . . . . . . . . . . . . . . . . . . . . . . 15
MODE D’UTILISATION . . . . . . . . . . . . . . . . . . . . . . . . . . . . . . . .15
CONSEILS PRATIQUES . . . . . . . . . . . . . . . . . . . . . . . . . . . . . . . . 16
NETTOYAGE ET ENTRETIEN . . . . . . . . . . . . . . . . . . . . . . . . . . . . .16
RECETTES . . . . . . . . . . . . . . . . . . . . . . . . . . . . . . . . . . . . . . . . 17
RETOURS ET GARANTIE . . . . . . . . . . . . . . . . . . . . . . . . . . . . . . . 21

13
FRANÇAIS
13
PRÉCAUTIONS IMPORTANTES
Une personne n'ayant pas lu et compris toutes les instructions de
fonctionnement et de sécurité n'est pas qualiée pour faire fonctionner cet
appareil. Tous les utilisateurs de cet appareil doivent lire et comprendre
ce mode d'emploi avant d'utiliser ou de nettoyer cet appareil.
Lorsque l'on utilise un appareil électrique, il faut toujours
respecter des précautions de base, y compris celles-ci :
1. Lisez toutes les instructions avant d'utiliser cet appareil.
2. NE TOUCHEZ PAS aux surfaces chaudes. Utilisez les poignées ou les boutons.
3. Cet appareil N'EST PAS UN JOUET.
4. Les jeunes enfants non supervisés ainsi que les personnes intellectuellement
atteintes ne doivent jamais faire fonctionner cet appareil.
5. Une surveillance accrue est nécessaire lorsque tout appareil
est utilisé par ou à proximité d'enfants.
6. Pour protéger contre les chocs électriques ne pas submerger le cordon, la
che ou une partie de cet appareil dans l'eau ou d'autres liquides.
7. Toujours débrancher la prise lorsque l'appareil n'est pas en fonctionnement,
avant de retirer les pièces et faire le nettoyage. Laisser refroidir avant de
remettre ou de retirer les pièces et avant de faire le nettoyage.
8. NE PAS utiliser l'appareil ayant un cordon ou une che électrique endommagée, ni
suivant un mauvais fonctionnement ou une détérioration quelconque de l'appareil.
Retournez-le à l’atelier de réparation le plus proche pour examen, réparation ou réglage.
9. Le fabricant ne recommande pas l’utilisation d’accessoires autres que ceux
fournis par le fabricant. L'utilisation d’accessoires peut causer des blessures.
10. N'employez PAS l'appareil à d'autres ns que son usage prévu.
11. N’utilisez PAS l'appareil à l'extérieur. UNIQUEMENT POUR USAGE DOMESTIQUE.
12. NA PAS placer sur ou près d'un brûleur à gaz ou électrique ou dans un four chaué.
13. NE JAMAIS laisser le cordon dépasser sur le côté d'une table
ou d'un comptoir ou toucher les surfaces chaudes.
14. NE JAMAIS laisser l'appareil sans surveillance tout en cours
d’utilisation ou lorsqu’il est branché sur une prise.
15. Toujours brancher la prise de l’appareil tout d’abord, puis branchez dans
la prise murale. Pour débrancher l’appareil, remettre tous les boutons en
mode « arrêt » (o), puis débranchez la che de la prise murale.
CONSERVEZ CES INSTRUCTIONS !

14
FRANÇAIS
14
INTRODUCTION
Merci d'avoir acheté le POT POUR FROMAGE 2-LITRES FIESTA CHILI &
NACHO de Nostalgia MC. Avec cet appareil, vous pouvez cuire lentement
vos recettes préférées, chauer facilement vos combinaisons de chili et de
fromage préférées et plus encore ! Les couleurs festives le rendent prêt pour
la fête et le pot amovible simplie le nettoyage après l'événement.
• Parfait pour faire des nachos, du piment, du fromage, des
viandes, du poulet râpé, du bœuf et plus encore !
• Réglages de cuisson ÉLEVÉE, FAIBLE ET CHAUDE
• Couvercle en verre trempé avec poignées cool-toucha
• Pot en céramique rond amovible pour un nettoyage facile

15
FRANÇAIS
15
PIÈCES ET ASSEMBLAGE
PIÈCES
COMMENT FAIRE FONCTIONNER
1. Avant la première utilisation, essuyer toutes les surfaces
avec un chion humide, non abrasif et sec.
2. Trouver une surface plane, sèche, non glissante, propre et à proximité d'une prise électrique.
3. Prévoir environ huit pouces d'espace dégagé autour de l'extérieur de l'unité.
4. Assurez-vous que le thermostat soit ÉTEINT.
5. Brancher le cordon d'alimentation dans la prise.
6. Préparer les ingrédients pour l'aliment à cuire. Voir la
section des recettes pour des idées de repas.
7. NE JAMAIS laisser l’appareil sans surveillance.
8. Portez toujours des gants de cuisine ou utilisez un gant à four lorsque vous utilisez
le POT DE FROMAGE 2-LITRES FIESTA CHILI & NACHO pour éviter les brûlures.
9. Le temps de cuisson dépend du plat cuisiné.
Bol amovible
Couvercle en verre trempé
Poignées Stay-Cool
Logement
Contrôle de la température

16
FRANÇAIS
16
10. Retirez les aliments du bol amovible à l'aide de cuillères en plastique ou en bois.
N'UTILISEZ PAS des ustensiles en métal, car ils pourraient rayer et endommager le bol.
11. Gardez les aliments au chaud en réglant le thermostat sur le réglage « chaud ».
12. Avant de débrancher l’appareil, assurez-vous que les thermostats
sont ÉTEINTS an de prévenir les étincelles dans la prise.
13. Une fois l'appareil complètement refroidi, retirez le bol pour le vider et le nettoyer. Il est
important d'adapter la température de l'eau utilisée pour nettoyer à la température du bol.
CONSEILS UTILES
1. L'appareil deviendra très CHAUD. Toujours utiliser les poignées (gants pour le
four) ou des mitaines de four lorsque vous cuisinez avec cet appareil.
2. NE JAMAIS utiliser un tampon à récurer ou autres éponges abrasives
ou chions sur cet appareil, car cela rayerait l’appareil.
3. Ne pas laver le bol amovible à l'eau chaude si le bol est froid. De même, ne pas laver à
l'eau froide si le bol est chaud. Cela pourrait entraîner la ssuration de la céramique.
NETTOYAGE ET ENTRETIEN
Veuillez prendre soin de votre POT DE FROMAGE 2 LITRES FIESTA
CHILI ET NACHO en suivant ces instructions simples :
• Tournez le thermostat en position ÉTEINTE.
• Débrancher le cordon de la prise murale.
• Laisser l'appareil refroidir complètement.
• Une fois l'unité complètement refroidie, retirez le couvercle et le bol.
• Nettoyez le bol et le couvercle dans de l'eau chaude savonneuse. Rincer et sécher.
• Essuyez la surface du boîtier avec un chion humide non abrasif et séchez.
• Pour prolonger la durée de vie de votre appareil, ne jamais empiler des objets autres
que la nourriture sur la surface du buet ou dans les marmites en céramique et
ne jamais utiliser une cuillère en métal pour mélanger et servir les aliments.
• Ne jamais mettre l'appareil dans un lave-vaisselle, ni submerger
dans l'eau. Toujours tenir le cordon éloigné de l’eau.
Bol amovible

17
FRANÇAIS
17
RECETTES
Il est facile de créer vos trempettes et sauces préférées avec le POT DE FROMAGE 2-LITRES
FIESTA CHILI & NACHO CHEESE ! Ces recettes sont excellentes comme point de départ,
mais n'oubliez pas de faire preuve de créativité et de cuisiner selon vos goûts !
* Toutes les recettes sont mesurées pour remplir le POT DE FROMAGE 2-LITRES
FIESTA CHILI & NACHO CHEESE à sa capacité de remplissage suggérée de 3/4.
Ne pas hésiter à les ajuster pour de plus petites quantités, selon le besoin.
TREMPETTE CHILI ET FROMAGE FACILE
• 6 tasses de
fromage fondu
• 5½ tasses (45 on.)
de piments chili
en conserve
Mélanger le chili et le fromage en
cubes dans un bol amovible.
Chauer à feu BAS jusqu'à ce que le fromage
soit fondu (environ 15 minutes)
Mélanger jusqu'à homogénéité et maintenir
au chaud sur réglage " chaud ".
TREMPETTE DE CHILI VÉGÉTARIEN
• 20 on. (2 ½ tasses)
de fromage à la
crème, ramolli
• 5½ tasses (45 on.)
de piments chili
en conserve
• 2½ tasses de
fromage râpé
• 1½ tasse de poivrons
en dés crus
• 5 oignons verts de
taille moyenne
Mélanger le fromage à la crème dans un bol amovible
avec du piment et saupoudrer de fromage.
Chauer à feu ÉLEVÉ jusqu'à ce que le fromage
soit fondu (environ 15 minutes)
Saupoudrer de poivrons et d'oignons verts avant de servir.

18
FRANÇAIS
18
TREMPETTE DE FROMAGE DOUBLE CHILI
• 20 on. (2 ½ tasses)
de fromage à la
crème, ramolli
• 5½ tasses (45 on.)
de piments chili
en conserve
• 6 oignons verts
tranchés nement
• 1½ tasse de chili
vert coupé en
dés et égoutté
• 2½ tasses de
fromage râpé
Mélanger tous les ingrédients dans un bol amovible.
Chauer à intensité ÉLEVÉE pendant 15 à 20
minutes, en remuant de temps en temps.
TREMPETTE ÉPICÉE
• 2 livres de
bœuf haché
• huile d'olive,
pour la cuisson
• 8 cuillères à café de
poudre de chili
• 1½ cuillères à café
de cumin moulu
• 1½ cuillères à café
de poudre d'ail
• 2 pots de salsa (32
onces au total)
• 2 livres de fromage
fondu, en cubes
• 1 grosse tomate,
hachée
• 2 oignons verts,
hachés nement
Dans une casserole moyenne, arroser
d'huile d'olive le bœuf haché.
Faire revenir le bœuf haché et l'égoutter après la cuisson.
Transférer la viande dans un bol
amovible et cuire à FAIBLE feu.
Ajouter la poudre de chili, le cumin moulu, la
poudre d'ail, la salsa et le fromage fondu et
chauer jusqu'à ce que le fromage fonde.
Ajouter les tomates et les oignons
verts hachés avant de servir.
PORC EFFILOCHÉ AVEC SALSA VERDE
• 4 lb de let de porc
• 32 on (946.35 ml)
de salsa verde
• Coriandre au goût
Déchiqueter le porc avec une fourchette
et ajouter dans un bol amovible.
Ajouter la salsa verde et mélanger.
Chauer au réglage BAS pendant 8 heures.
Remuer et garnir de coriandre avant de servir.
Table of contents
Languages:
Other Nostalgia Electrics Kitchen Appliance Accessories manuals

Nostalgia Electrics
Nostalgia Electrics TACO TUESDAY TTTCSB10BR Quick guide

Nostalgia Electrics
Nostalgia Electrics TACO TUESDAY TTFD220RG Quick guide

Nostalgia Electrics
Nostalgia Electrics TACO TUESDAY TTRDP4RD Quick guide

Nostalgia Electrics
Nostalgia Electrics TACO TUESDAY TTLSTB10 Quick guide

Nostalgia Electrics
Nostalgia Electrics TACO TUESDAY TTTH4SS Quick guide

Nostalgia Electrics
Nostalgia Electrics TACO TUESDAY TTMP5GRNT Quick guide

Nostalgia Electrics
Nostalgia Electrics TACO TUESDAY TTLJ3LG Quick guide

Nostalgia Electrics
Nostalgia Electrics TACO TUESDAY TTCHP2RD Quick guide