Novacor Diasys Integra Access User manual

Diasys
Integra Access
English
NOVACOR SA.
4 passage Saint-Antoine
92508 Rueil-Malmaison cedex - France
Manual Diasys Integra Access ©1999 NOVACOR SA.
All rights reserved
Manuel Access GB.qxd 24/02/2004 11:32 Page 1

2• Diasys Integra Access - Manual - GB - Rev 2
1. Introduction 4
2. Guarantee 5
2.1. Specific Guarantees concerning units 5
2.2. Accessories 5
2.3. Restrictions of the Guarantee 5
2.4. Responsibilities 5
2.5. User Information 6
2.6. Rights 6
3. How the Diasys Integra Access Functions 7
4. Description of the equipment 8
Diasys Integra Access and Standard Accessories 8
Optional accessories 8
4.1. The Diasys Integra Access recorder 9
4.2. The battery charger 10
4.3. The cuff and the connecting tube to the Diasys Integra Access 11
5. Preparing the Diasys Integra Access for monitoring 12
5.1. Preparing the battery 13
5.1.1. The battery charger 13
5.1.2. The battery 15
5.1.3. Charging the battery 15
5.1.4. End of charge 16
5.2. Inserting the battery into the recorder 17
5.2.1. Insertion 17
5.2.2 Safeguard battery (non-rechargeable lithium) 18
5.3. Programming the Diasys Integra Access 18
5.3.1. Programming the time 20
5.3.2. Programming the date 21
5.3.3. Programming the intervals 22
5.4. Placing the unit on the patient 23
5.4.1. Positioning 23
5.4.2. Recommendations for placing the cuff 25
5.4.3. Changing arms 26
5.4.4. Positioning the Diasys Integra Access with the integrated position
sensor (optional) 27
Manuel Access GB.qxd 24/02/2004 11:32 Page 2

Diasys Integra Access - Manual - GB - Rev 2 • 3
Summary
6. How the unit functions 28
6.1. Start up 28
6.2. Test measurements 28
6.3. Manually activated measurements 29
6.4. Palliative measurements 29
6.5. “Suspend” mode 30
6.6. Measurements which are not memorised 30
6.7. Display of measurements 30
6.8. Stopping measurements 31
6.9. Display codes 32
7. Reading the recordings 33
7.1. Transfer to a PC or a printer 33
7.2. Modem Data Transmission (optional) 34
8. Maintenance 36
8.1. Handling the equipment 36
8.2. Cleaning the equipment 36
8.3. Maintenance 36
8.4. Calibration test 37
8.5. Replacing the safeguard battery 38
8.6. Storing and dispatching 38
8.7. Preventative maintenance 39
8.8. Electrical safety standards 39
8.9. Precautions of use 40
8.10. Physical specifications 41
8.11. Technical specifications 41
8.12. Accessories 42
English
Manuel Access GB.qxd 24/02/2004 11:32 Page 3

1. Introduction
The Diasys Integra Access is a non-invasive
ambulatory system for measuring and recording blood
pressure in oscillometric mode. It measures the
systole, the diastole, mean blood pressure and the heart
rate for up to 48 hours.
The Diasys Integra Access unit weighs about 200g and
contains the electronic system and pneumatic inflation
module. It is linked to the patient’s cuff with a tubing
system.
The measurements made by the Diasys Integra Access
can be printed out directly in report form by a printer
connected to the unit.
If a computer is used, recording conditions and criteria
can be fixed, and the results of the procedure can be
selected, organised, stored and printed out in a fully
customised report.
4• Diasys Integra Access - Manual - GB - Rev 2
Manuel Access GB.qxd 24/02/2004 11:32 Page 4

2. Guarantee
NOVACOR undertakes to deliver merchandise conforming
to the technical specifications mentioned and to replace any
merchandise recognised as being defective.
2.1. Specific guarantees concerning units
Each unit is identifiable by a specific serial number.
NOVACOR guarantees the unit (Diasys Integra Access and
charger) for one year from the date of delivery against any
defect resulting in abnormal functioning of the unit.
2.2. Accessories
Equipment which is not an integral part of the unit, in
particular the accessories and cables, are not covered by the
guarantee. Cables with serial numbers are guaranteed for
three months.
2.3. Restrictions of the guarantee
The guarantee does not apply to:
1. units repaired or opened outside our workshop.
2. units damaged by negligence, by accident or if the user
instructions have not been followed correctly.
If necessary contact your distributor or our after sales
service. We do not accept units returned without prior
agreement.
2.4. Responsibilities
NOVACOR will not, under any circumstances, be held
responsible for physical or material damage of whatever
nature, arising either directly or indirectly from improper
use of the unit or from failure to follow the instructions in
the user manual.
Although NOVACOR manufactures products to the highest
standards, it cannot be held responsible for the validity or
the accuracy of the measurements made by its units.
Diasys Integra Access - Manual - GB - Rev 2 • 5
2. Guarantee
English
Manuel Access GB.qxd 24/02/2004 11:32 Page 5

2.5. User information
All customers duly registered with NOVACOR, or where
applicable, with one of its distributors, will be kept
informed, to the best of NOVACOR’s ability, of any
upgrades and developments to the Diasys Integra Access as
they become available.
2.6. Copyrights
Diasys Integra Access Manual © 1999 Novacor S.A.-
All rights reserved.
Diasys Integra Access, DiasySoft, and their respective
logos, are registered trademarks of NOVACOR S.A.
Macintosh is a registered trademark of Apple Computer
International.
MS-DOS and Windows are registered trademarks of
Microsoft Corporation.
6• Diasys Integra Access - Manual - GB - Rev 2
Manuel Access GB.qxd 24/02/2004 11:32 Page 6

3. How the Diasys Integra
Access functions
The Diasys Integra Access is a non-invasive automatic
ambulatory blood pressure recorder operating in
oscillometric mode.
The oscillometric measurement is based on analysis of
the shape of the oscillometric curve of the cuff
pressure, of which the maximum point represents the
mean pressure.
The patient’s arm must stay still during measurement.
The Diasys Integra Access also has an optional
integrated position sensor enabling the unit to detect
whether the patient is vertical (awake) or horizontal
(resting).
Diasys Integra Access - Manual - GB - Rev 2 • 7
3. How the Diasys Integra Access functions
English
Manuel Access GB.qxd 24/02/2004 11:32 Page 7

4. Description
of the equipment
Diasys Integra Access and standard accessories
• Diasys Integra Access recorder,
• Two rechargeable NiMH batteries
(same as Diasys Integra batteries),
• Standard adult sized cuff,
• Protective pouch and belt.
Optional accessories
• Battery charger,
• DiasySoft software, customised according to the
programming options required and the user’s language
and access key,
• Printer,
• Diasys-Printer or Diasys-Computer linking cabl,e
• Diasys-Modem linking cable.
8• Diasys Integra Access - Manual - GB - Rev 2
Manuel Access GB.qxd 24/02/2004 11:32 Page 8

4.1. The Diasys Integra Access recorder
Air connector
Mode selector
M = measurement / P= program
Battery cover
P mode: display switched on (On)
and validation of options (Valid)
M mode: monitoring started (On)
and activation of a manual recording (Rec)
P mode: next choice (Select)
M mode: stop measurements (Stop)
RS232 connector for printer or modem
PM
Stop
Rec
On/Valid
Select
Diasys Integra Access - Manual - GB - Rev 2 • 9
4. Description of the equipment
English
Manuel Access GB.qxd 24/02/2004 11:32 Page 9
10 • Diasys Integra Access - Manual - GB - Rev 2
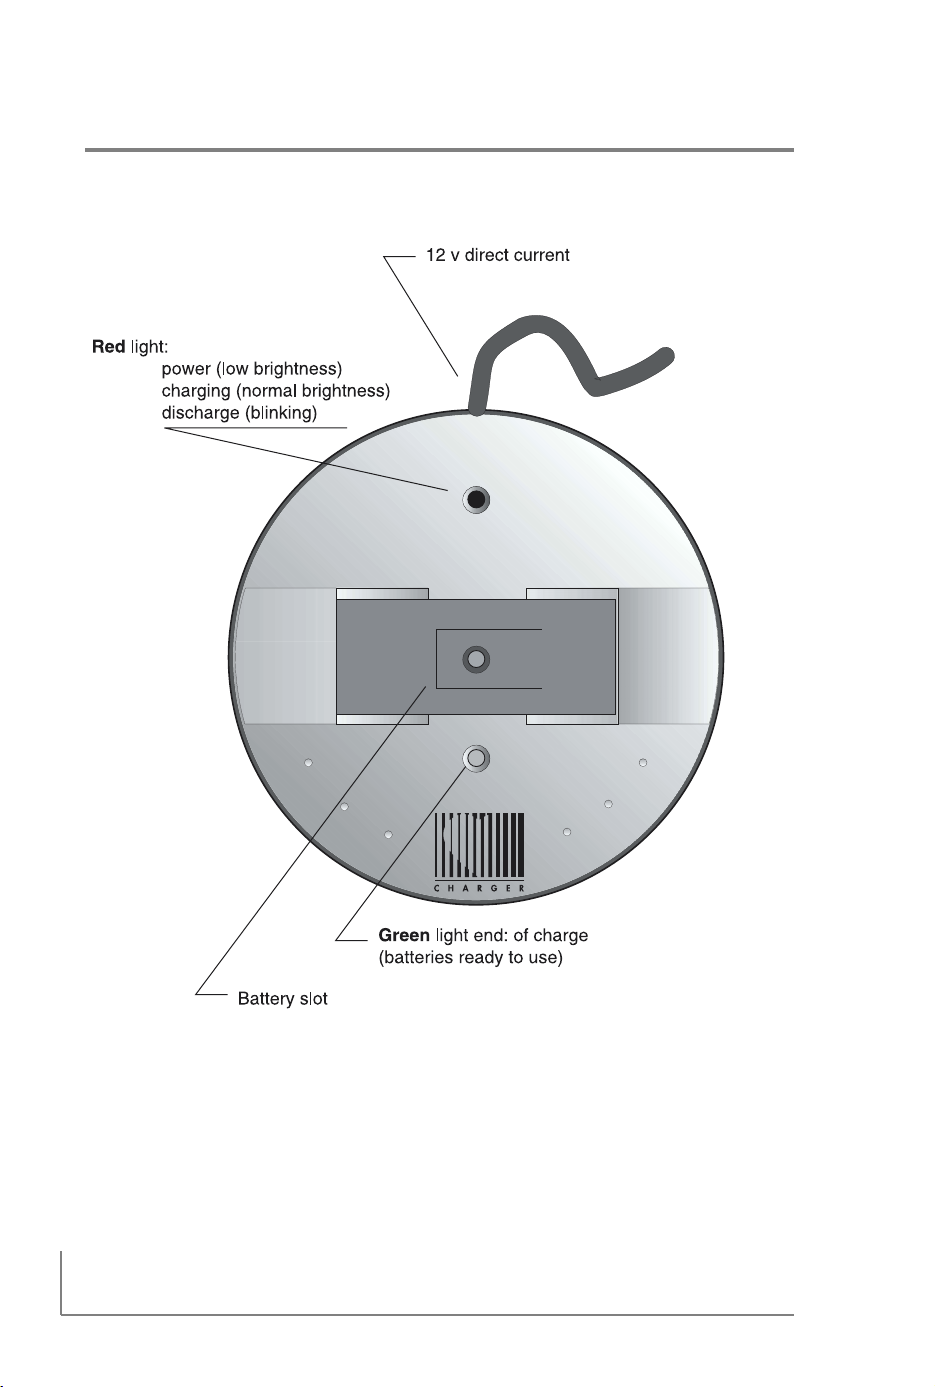
4.2. The battery charger
The Diasys Integra Access functions exclusively with a
high capacity rechargeable battery (NiMH), making it
economical and environmentally friendly.
Batteries are recharged with a fast battery charger specially
designed for the Diasys to ensure optimum performance
and long-life.
The charger is connected to the mains outlet via a
transformer and has two lights on the front panel.
Manuel Access GB.qxd 24/02/2004 11:32 Page 10

4.3. The cuff and the connection tube
to the Diasys Integra Access
The Diasys Integra Access cuff offers features specially
designed for ambulatory recording:
• Cone-shaped for better ergonomics
• Stabilising flap for optimal positioning, to be used with
adhesive pads
• Easy handling
• Washable material
Diasys Integra Access - Manual - GB - Rev 2 • 11
4. Description of the equipment
English
Manuel Access GB.qxd 24/02/2004 11:32 Page 11

5. Preparing the Diasys
Integra Access for
monitoring
To prepare the unit, follow the instructions below.
• Charge the battery
• Insert the battery
• Program the unit
• Place the unit on the patient
• Start up the unit and carry out the test measurements
12 • Diasys Integra Access - Manual - GB - Rev 2
Manuel Access GB.qxd 24/02/2004 11:32 Page 12
Diasys Integra Access - Manual - GB - Rev 2 • 13
5. Preparing for monitoring
5.1. Preparing the battery
5.1.1. The battery charger
The Diasys charger is fast, fully automatic and easy to use.
The front panel
There is an indicator light (LED) on each side of the slot
into which the battery is placed.
The RED light indicates:
• That the charger is working correctly when it is plugged
into the mains outlet: fixed light - low brightness
• That the battery is being discharged, when discharge prior
to charge has been programmed (see chapter 5.1.3):
blinking light- normal brightness
• That the battery is being charged: fixed light - normal
brightness
Green light: end of charge
low brightness : power
normal brightness blinking: discharging
normal brightness fixed: charging
Red light
English
Manuel Access GB.qxd 24/02/2004 11:32 Page 13
14 • Diasys Integra Access - Manual - GB - Rev 2
The green light indicates that the operation is finished and
the battery is charged.
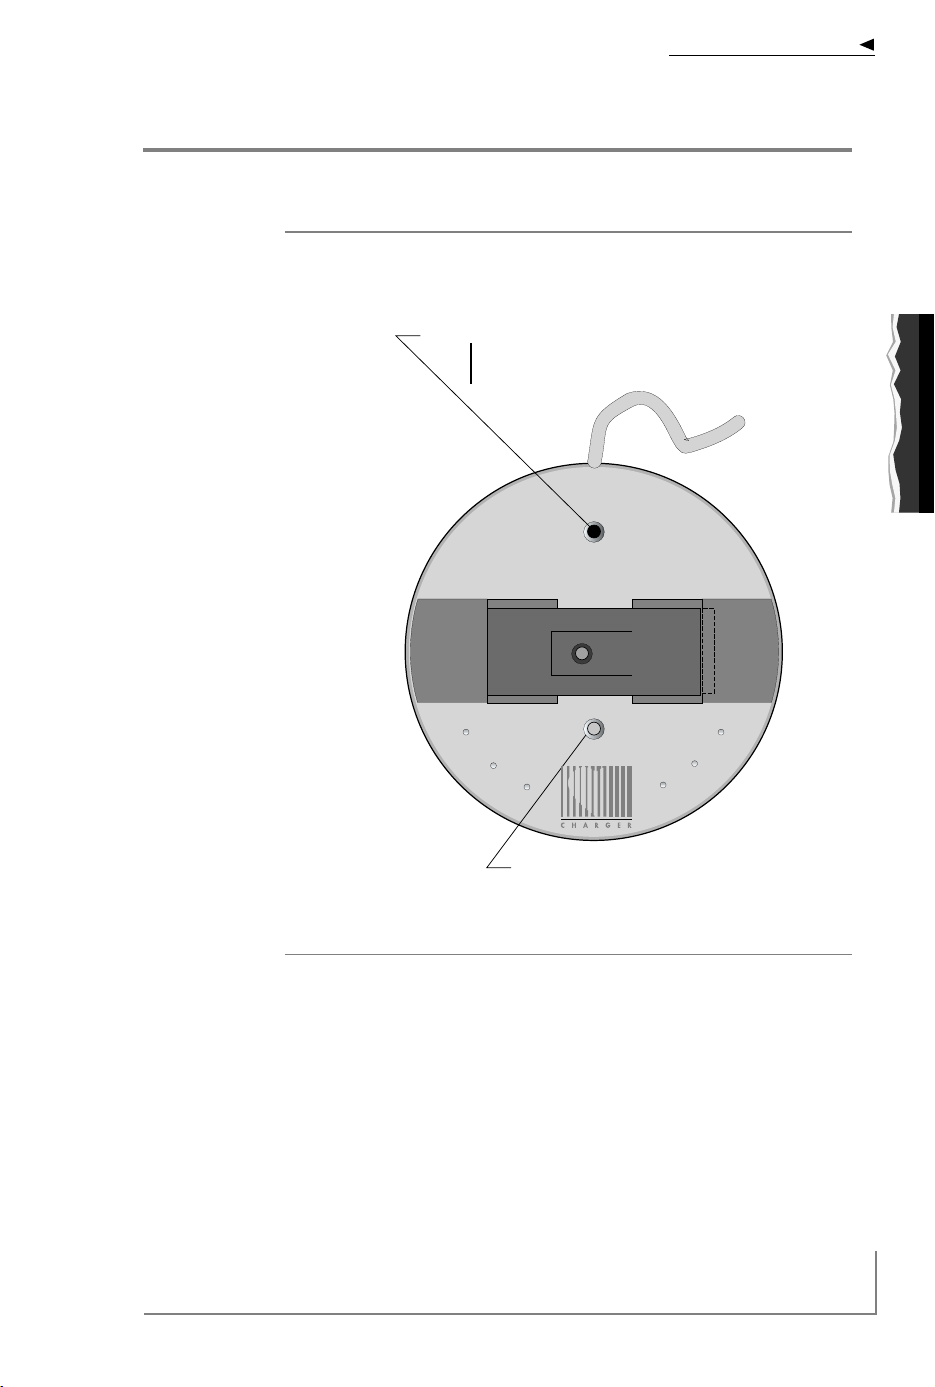
The back panel (base)
A selector (2 red switches) determines the charge mode to
ensure a long life of the batteries, it is advisable not to
change the position of these switches.
It is, however, possible to implement an immediate charge
by changing the position of switch 1:
SWITCH 1 /ON discharges the battery before
recharging it (factory setting)
SWITCH 1 /OFF immediate charge
• Whichever mode is chosen, the green light comes on
when the battery is charged indicating that it is ready
to be used.
• The position of switch 2 should never be changed and
should always remain in the position shown above.
• Never use the charger with any batteries other than
those supplied by NOVACOR.
• External power sources must comply with EN 60-601
standards.
ON
12
ON
12
Manuel Access GB.qxd 24/02/2004 11:32 Page 14

Diasys Integra Access - Manual - GB - Rev 2 • 15
5. Preparing for monitoring
5.1.2. The battery
The Diasys Integra Access is delivered with two
rechargeable Nickel-Metal Hydride (NiMH) batteries.
These batteries have been specially developed for the
Diasys series and can be recharged about 500 times if used
according to the recommendations in this manual.
Precautions to be taken with the batteries:
• Take care not to invert the polarities.
• Do not store at over 45°C.
• Do not exceed the recommended recharge time,
otherwise the unit risks stopping during a recording.
5.1.3. Charging the Battery
• Plug the charger into a compatible mains outlet (check
carefully that the voltage marked on the charger
transformer corresponds to the voltage of your mains
supply): the red light will come on immediately with low
brightness.
• Place the battery in the charger, taking care to match
the + and - signs with those on the charger.
• Insert the battery into its slot.
12
Specially
manufactured
by Panasonic.
Ref. D10-1000
BATTERIE
RECHARGEABLE
NiMH- 3,6 V - 550mAH
English
Manuel Access GB.qxd 24/02/2004 11:32 Page 15

16 • Diasys Integra Access - Manual - GB - Rev 2
• When the battery is placed in the charger the red light
will become brighter and will be either:
-fixed (immediate charge),
-flashing (discharge before recharge).
• Duration of charge cycle:
- Without prior discharge: about a maximum of
1 hour.
- With prior discharge: discharge (up to 1½ hrs)
plus charge (about 1 hr).
• Do not use a different non-Novacor charger to
recharge Diasys Integra Access batteries.
• Go through the charge cycle:
- Systematically when new batteries are used for
the first time.
- At least once a year if the batteries are not in
regular use.
- If the battery has been stored out of the charger
for more than 2 weeks since last being charged
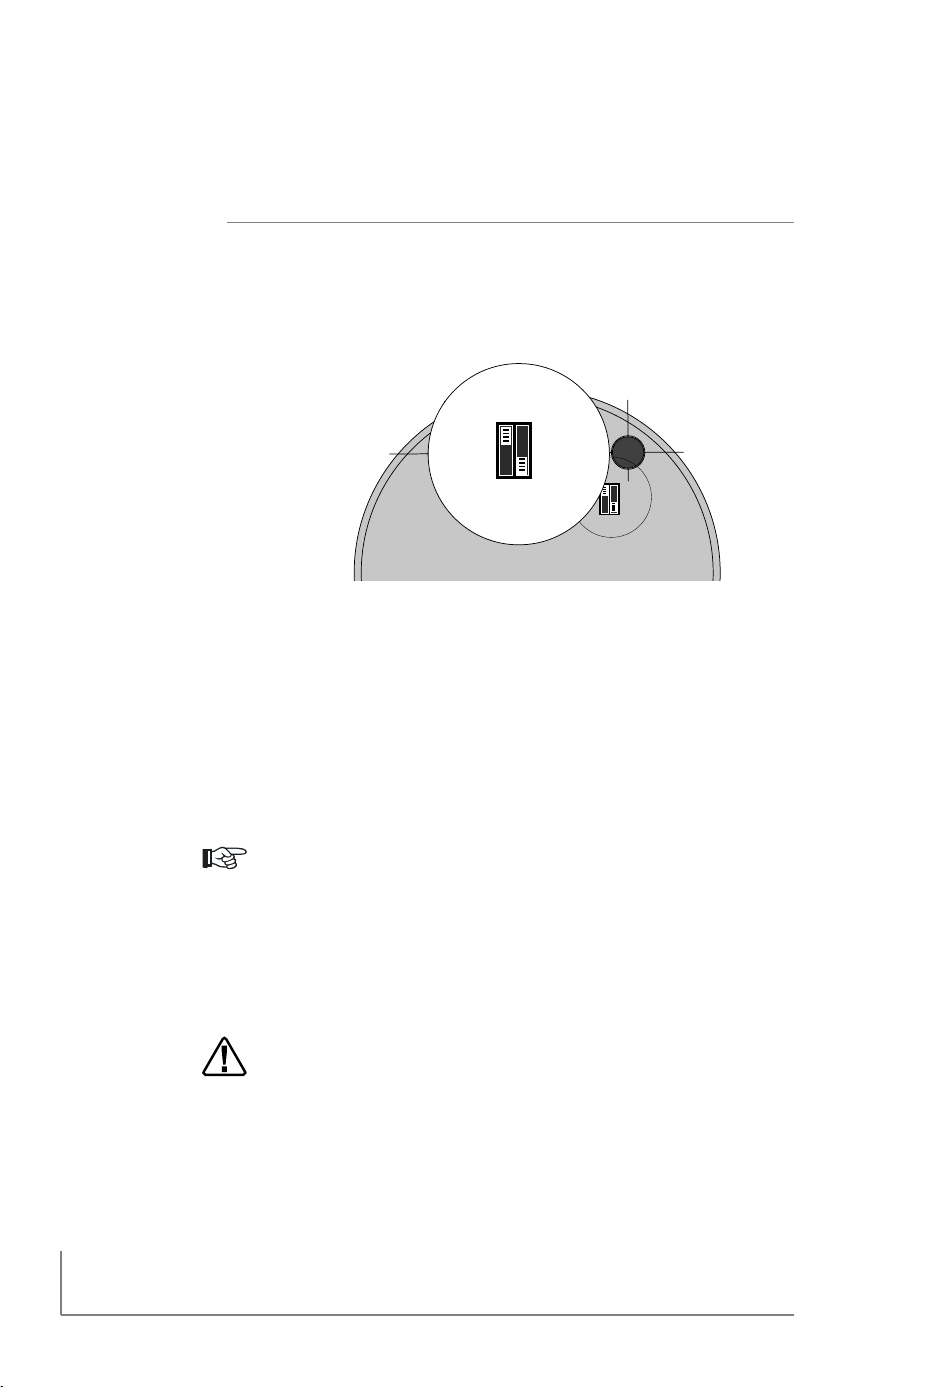
5.1.4. End of charge
When the green light is on the battery is ready to be used
and can be removed for storage or left in the charger up to
one week until required.
Caution: if a charged battery is removed from the charger
and not used for more than two weeks, we recommend that
it be recharged.
• Do not leave a battery in the charger if it is not
plugged into the mains, it will quickly lose its charge!
• Do not leave the charger plugged into the mains
for a long period of time.
• Do not leave a charged battery in a charger plugged
into the mains for a long period of time.
• Do not start a recording using a battery only part-
charged, the unit may stop during a measurement.
Manuel Access GB.qxd 24/02/2004 11:32 Page 16

Diasys Integra Access - Manual - GB - Rev 2 • 17
5. Preparing for monitoring
5.2. Inserting the batteries into the recorder
5.2.1. Insertion
Slide off the battery cover, if there is already a battery in
the unit, remove it. Insert a recharged battery into the unit
taking care not to invert the polarities.
• Slide off the battery cover.
• The arrow on the battery should be pointing towards the
bottom of the compartment (as shown below). If it is
difficult to insert the battery do not force it. Check that
the above instructions have been carefully followed
before trying again.
• Holding the battery in place, slot the battery cover back
into the grooves and slide it into place.
• The battery must be replaced before each new clinical
procedure.
• Do not store the Diasys with a discharged battery
inside. Do not leave a recharged battery in the Diasys
for more than 2 weeks without using it.
BATTERIE
RECHARGEABLE
NiMH - 3,6 V - 550 mAH
Ref. D10-1000
Specially
manufactured
byPanasonic.
English
Manuel Access GB.qxd 24/02/2004 11:32 Page 17

18 • Diasys Integra Access - Manual - GB - Rev 2
5.2.2. Safeguard battery (non-rechargeable lithium)
The Diasys Integra Access has a safeguard battery enabling
program settings and data in memory to be protected if the
main battery fails or is missing, thus providing the user with
maximum security.
The safeguard battery will normally last for 3 to 5 years.
It is not accessible to the user. Its status is systematically
tested every time an NiMH battery is placed in the unit, as
follows:
When the battery is inserted, the Diasys Integra Access
automatically tests the safeguard battery and displays one
of the following messages for 3 seconds
either
indicating that the lithium battery is functioning properly,
or
indicating that the lithium battery is not functioning (see
chapter 8 “replacing the safeguard battery”).
5.3. Programming the Diasys integra Access
(mode selector in Programming position)
This manual only concerns manual programming. Software
programming is fully explained in the DiasySoft manual.
We recommend that a recharged battery be inserted each
time before programming. If the battery is run down, the
Diasys Integra Access will display the message (ER 14), if
it is dead, the unit’s keys will be blocked (safeguard mode).
PM
Manuel Access GB.qxd 24/02/2004 11:32 Page 18

Diasys Integra Access - Manual - GB - Rev 2 • 19
5. Preparing for monitoring
English
During programming, if the selector or the two
programming keys are not used for a certain time, the
screen will switch off to save battery power. Press one
of the keys to retrieve the time screen.
Manuel Access GB.qxd 24/02/2004 11:32 Page 19

20 • Diasys Integra Access - Manual - GB - Rev 2
5.3.1. Programming the time
Note that the AM/PM setting is only proposed if the time is
programmed before midday.
Stop
Select
Stop
Select
Stop
Select
Stop
Select
Stop
Select
Stop
Select
Stop
Select
Stop
Select
Press Valid to display the time.
Press Select and the first digit will
flash.
Press Select to obtain the correct digit.
Press Valid to confirm. The second
digit will flash.
Adjust the second digit and press valid
to confirm.
The AM/PM setting will flash. Press
Valid to make AM flash. If PM is
required, press Select, then Valid.
Adjust the two minute digits as above.
When the last digit has been validated,
all four digits will flash. Press Valid to
confirm the time. The date will be
displayed.
Rec
On/Valid
Rec
On/Valid
Rec
On/Valid
Rec
On/Valid
Rec
On/Valid
Rec
On/Valid
Rec
On/Valid
Rec
On/Valid
Manuel Access GB.qxd 24/02/2004 11:32 Page 20
Table of contents
Other Novacor Medical Equipment manuals

Popular Medical Equipment manuals by other brands


Alleva
Alleva extriCARE 3600 operating manual

Drive
Drive Inspired Poziform P-AP100XS Installation & user's instructions

Cardinal Health
Cardinal Health ALLY Clinician Quick Reference Guide

Simulaids
Simulaids 500 manual

Orliman
Orliman A-132 INSTRUCTIONS FOR USE AND PRESERVATION

Stryker
Stryker SYSTEM G 7309-120-000 Instructions for use