manuals.online logo
Brands
  1. Home
  2. •
  3. Brands
  4. •
  5. Cardinal Health
  6. •
  7. Medical Equipment
  8. •
  9. Cardinal Health ALLY User manual

Cardinal Health ALLY User manual

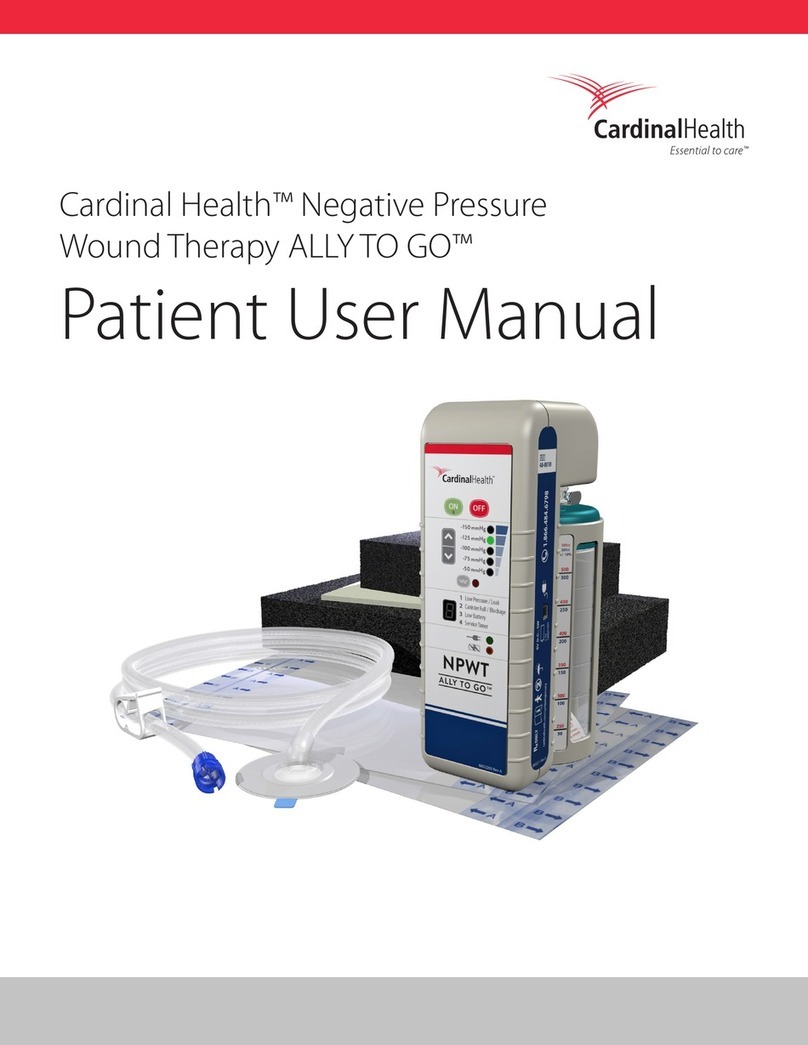
Cardinal Health™ ALLY™/ALLY TO GO™
Negative Pressure Wound Therapy
Clinician Quick
Reference Guide
NOTE: Please refer to the Cardinal Health™ ALLY™/ALLYTO GO™ Negative Pressure
Wound Therapy (NPWT) Clinician User Manual for detailed instructions before use,
which can be found at cardinalhealth.com/npwt.
Insert/Remove Canister
To insert the canister, line up the two ports on the canister with the two ports on the
ALLY™/ALLY TO GO™. Press the canister up and into the ALLY™/ALLY TO GO™ until it“clicks”
and locks into place. Before removing the canister, remove the tubing by holding the blue
Twist N’Connect™ end of the tubing, gently twist counterclockwise and pull up to remove
the tubing from the canister. Press Canister Release Button and pull canister down and
out of the ALLY™/ALLY TO GO™.
Connect the Tubing
Gently line up the blue Twist N’Connect™ end of the tubing to the Twist N’Connect™
port on the canister, push down and twist clockwise to lock into place. Make sure that the
clamp is open on the tubing.
NOTE: Please refer to the Cardinal Health™ ALLY™/ALLY TO GO™ NPWT Clinician User
Manual for instructions on how to properly dress the wound.
Turning ALLY™/ALLY TO GO™ ON
Press the ON Button to start therapy. Select desired Pressure Setting by pressing the
UP or DOWN Button. A green light ashes next to the selected Pressure Setting.
The light stops ashing and remains lit when set pressure is reached.
NOTE: If the light continues to ash on the Pressure Setting selected, the therapy
pressure is not reached. SeeTroubleshooting section to resolve.
Pressure Setting Lockout
To lock the Pressure Setting, press and hold the ON button for 3 seconds.
The ALLY™/ALLY TO GO™ beeps three times to indicate that the Pressure Setting
is locked. Repeat process to unlock the Pressure Setting.
Simultaneous Irrigation™ Technology
Simultaneous Irrigation™ Technology can be used with ALLY™/ALLY TO GO™.
For more information, please refer to the ALLY™/ALLY TO GO™ NPWT Clinician User Manual.
Intermittent Mode
Press the Intermittent Mode Button to place the ALLY™/ALLY TO GO™ into Intermittent
Mode. The amber light next to the Intermittent Mode Button indicates the ALLY™/ALLYTO GO™
is in Intermittent Mode. Press the Intermittent Mode Button to change Intermittent Mode
to Continuous Mode.The amber light next to the Intermittent Mode Button turns o to indicate
the ALLY™/ALLYTO GO™ is in Continuous Mode.
Adjust Alert Volume
Press and hold the ON Button and tap the UP or DOWN Button to adjust the
volume. The numbers 1 to 5 appear in the Alert Display. 1 is the lowest volume level, 5 is the
highest volume level.
Troubleshooting Alerts
If the ALLY™/ALLY TO GO™ begins to alert, refer to the Troubleshooting
section on the back to identify and correct the alert.
Turning ALLY™/ALLY TO GO™ OFF
Press the OFF Button to stop therapy. The display ashes a set of
numbers and then“o-f-f”three times while the ALLY™/ALLY TO GO™ shuts down.
Magnetic Resonance Imaging (MRI): The Cardinal Health™
ALLY™/ALLY TO GO™ is not MRI-compatible. Do not take into the
MRI area.
Hyperbaric Oxygen Therapy (HBO): Do not take the
ALLY™/ALLY TO GO™ — whether on or o — inside a hyperbaric
chamber. The ALLY™/ALLY TO GO™ must be disconnected from the
patient prior to HBO treatment.
Notice to Users: As with any prescription medical device, failure
to follow product instructions or adjusting settings and performing
therapy applications without the express direction of your trained
clinical caregiver may lead to improper product performance and
the potential for serious or fatal injury.
Debrillation: Remove the wound dressing if debrillation is
required in the area of dressing placement. Failure to remove the
dressing may inhibit electrical current transmission and/or patient
resuscitation.
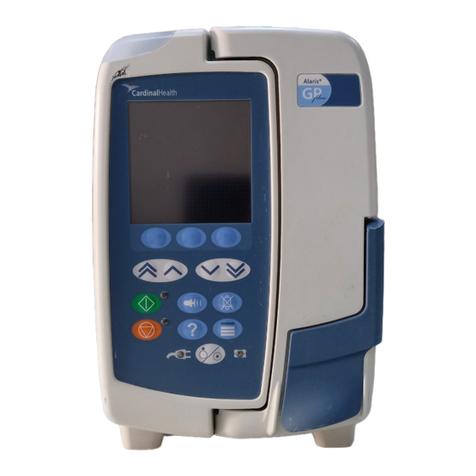
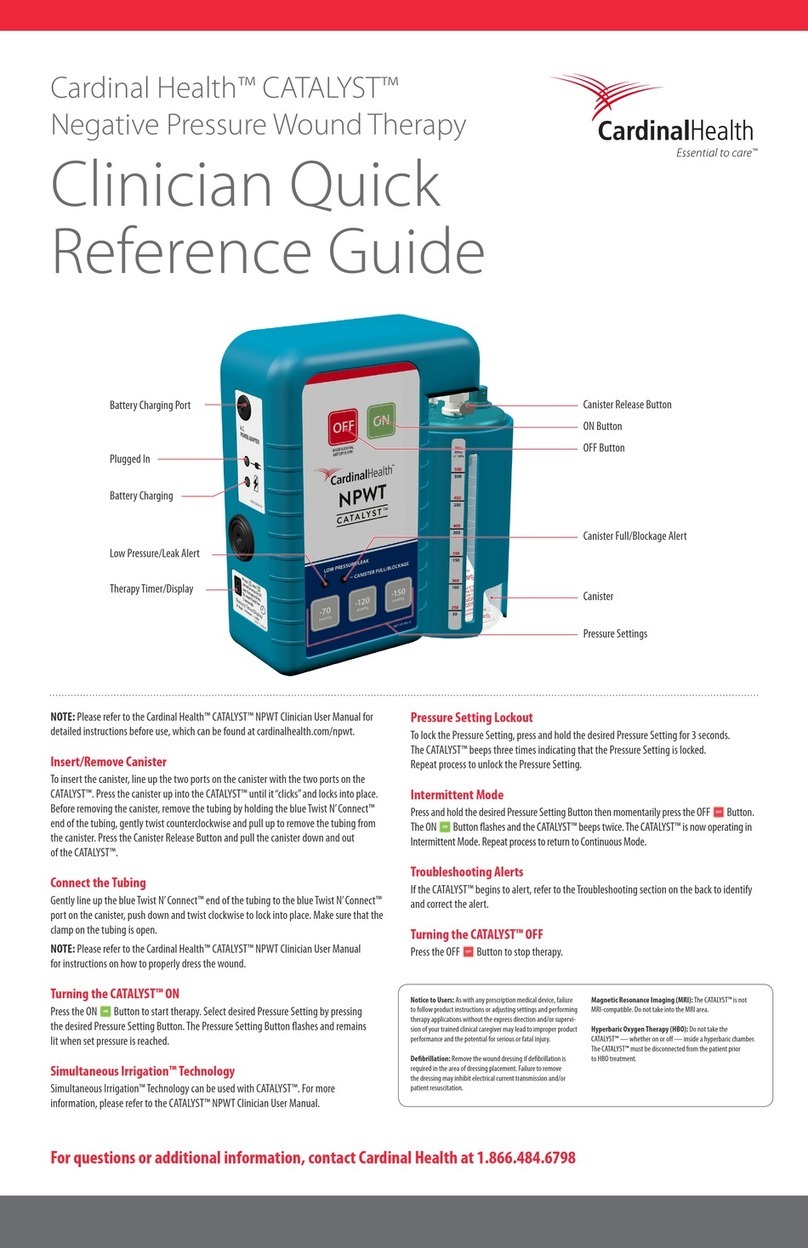
Canister Release Button
OFF Button
Intermittent Mode
Battery Charging Port
Plugged In
Canister
ON/Mute Button
Up Button
Down Button
Pressure Settings
Alert Display
Battery Charging
For questions or additional information, contact Cardinal Health at 1.866.484.6798
What you see or hear Problem What to do More information
“1” ashing in Alert Display.
Single beep.
ALLY™/ALLY TO GO™ is making
more noise.
Possible air leak in either
the dressing or the tubing
connections.
Leaks often occur over areas
of moist skin, creases or
folds in skin and wrinkles in
the drape.They can occur if
the drape snags on clothing
or bed sheets.
• Ensure the top of the clamp is centered on the
black line on the tubing approximately 4 inches
from theTwist N’Connect™ end of the tubing.
Clamp the tubing.
• If audible alert resets, there is a leak between the
clamp and the dressing — often in the dressing.
Reopen the clamp before addressing the leak.
Gently press around drape to check for leaks. If
leak is found, patch with extra drape material.
• If“1”continues ashing in the Alert Display and
alert beep continues, there is a leak between the
clamp and the ALLY™/ALLY TO GO™. Check tubing
connection at the canister. Check to ensure the
canister is fully sealed and locked. Check for
cracks in the canister or lid separation. If found,
replace the canister.
• If clamp is present, open the clamp.
If the leak is properly sealed, the pump
becomes quiet and the alert stops. If
alert continues, call Cardinal Health at
1.866.484.6798 for more assistance.
“2” ashing in Alert Display.
Two beeps.
The canister is full or there
may be a blockage in the
tubing and/or dressing.
• Visually assess the canister to see if full.
If the canister is full, change the canister.
See“Insert/Remove Canister”on front page.
• If the canister is not full, turn the
ALLY™/ALLY TO GO™ o by pressing the OFF
Button and then turn the ALLY™/ALLY TO GO™
back on to resume therapy.
• If changing the canister and/or turning the
ALLY™/ALLYTO GO™ o and then back on does not
resolve the alert, look for occlusions in the tubing
or possibly in the dressing. Change the tubing
and/or dressing as needed to resolve the alert.
The Canister Full alert begins when
the canister is 90 percent full, but the
ALLY™/ALLY TO GO™ continues to work
until the canister completely lls.
If the ALLY™/ALLY TO GO™ is placed on its
front, uid entering the canister causes a false
Canister Full alert and the canister must
be changed.
If alert continues after changing the
canister and/or dressing, call Cardinal Health
at 1.866.484.6798 for more assistance.
“3” ashing in Alert Display.
Three beeps.
The battery is low and has
approximately 30 minutes
before the battery is too
low to support continued
operation of the
ALLY™/ALLY TO GO™.
Plug in the ALLY™/ALLY TO GO™. A green light
shows next to the Plugged In symbol and a yellow
light shows next to the Battery Charging symbol
to indicate that the battery is charging.The yellow
light turns o after the battery is fully charged.
Use only the A.C. Power Adapter that came
with the ALLY™/ALLY TO GO™.
If alert continues or replacement A.C. Power
Adapter is needed, call Cardinal Health at
1.866.484.6798 for more assistance.
“4” ashing in Alert Display.
Four beeps.
ALLY™/ALLY TO GO™
therapy has timed out.
Call Cardinal Health at 1.866.484.6798 for
assistance.
This alert cannot be muted or manually
reset by turning the ALLY™/ALLY TO GO™ o
and on.
Pressure Setting will not
change.
Pressure lock-out is
engaged.
Unlock the ALLY™/ALLY TO GO™ by pressing
and holding the ON Button for 3 seconds.
The ALLY™/ALLY TO GO™ beeps 3 times indicating
that the setting is unlocked. Pressure Setting can
now be changed.
To lock pressure setting, press and hold
theON Button for 3 seconds.
The ALLY™/ALLY TO GO™ beeps three times
indicating Pressure Setting is locked.
ALLY™/ALLY TO GO™ is quiet
and uid is not moving in the
tubing.
This is NOT a problem.
The dressing has a
good seal and the
ALLY™/ALLY TO GO™ is
maintaining target pressure.
No action needed. Change the ALLY™/ALLY TO GO™ to
Intermittent Mode to move uid from the
tubing to the canister.
An amber light is showing on the
front of the ALLY™/ALLY TO GO™
below the Pressure Setting.
The ALLY™/ALLY TO GO™ is
making more noise every
5 minutes.
This is NOT a problem.
The ALLY™/ALLY TO GO™ is
operating in Intermittent
Mode.
No action needed. Intermittent Mode maintains target pressure
for 5 minutes and decreases to -25mmHg
for 2 minutes before returning to the
target pressure.
Cardinal Health
Waukegan, IL 60085 USA
Rev C 2019-05 • cardinalhealth.com
68-08-0010
© 2019 Cardinal Health. All Rights Reserved. CARDINAL HEALTH, the Cardinal Health LOGO, ALLY, ALLY TO GO andTWIST N’CONNECT are trademarks or registered trademarks
of Cardinal Health and may be registered in the US and/or in other countries. All other marks are the property of their respective owners. US Pat. 7,608,066
REF 68-8888, 48-0010
Troubleshooting
This manual suits for next models

1

Other Cardinal Health Medical Equipment manuals

Cardinal Health Kangaroo ePump User manual

Cardinal Health

Cardinal Health Kangaroo ePump User manual

Cardinal Health CHB-AGS Manual

Cardinal Health

Cardinal Health CHB-AGS Manual

Cardinal Health SVED PW596 User manual

Cardinal Health

Cardinal Health SVED PW596 User manual

Cardinal Health SVED 6701132 User manual

Cardinal Health

Cardinal Health SVED 6701132 User manual

Cardinal Health Alaris PK Manual

Cardinal Health

Cardinal Health Alaris PK Manual

Cardinal Health Kangaroo User manual

Cardinal Health

Cardinal Health Kangaroo User manual

Cardinal Health ALLY TO GO NPWT User manual

Cardinal Health

Cardinal Health ALLY TO GO NPWT User manual

Cardinal Health Kangaroo Joey Assembly instructions

Cardinal Health

Cardinal Health Kangaroo Joey Assembly instructions

Cardinal Health NPWT PRO User manual

Cardinal Health

Cardinal Health NPWT PRO User manual

Cardinal Health Kangaroo Joey User manual

Cardinal Health

Cardinal Health Kangaroo Joey User manual

Cardinal Health Kendall SCD 700 User manual

Cardinal Health

Cardinal Health Kendall SCD 700 User manual

Cardinal Health KANGAROO JOEY Installation guide

Cardinal Health

Cardinal Health KANGAROO JOEY Installation guide

Cardinal Health InPower User manual

Cardinal Health

Cardinal Health InPower User manual

Cardinal Health CATALYST NPWT User manual

Cardinal Health

Cardinal Health CATALYST NPWT User manual

Cardinal Health Kangaroo Joey User manual

Cardinal Health

Cardinal Health Kangaroo Joey User manual

Cardinal Health Alaris GP Operating manual

Cardinal Health

Cardinal Health Alaris GP Operating manual

Cardinal Health Kangaroo Connect Enteral Feeding Pump Manual

Cardinal Health

Cardinal Health Kangaroo Connect Enteral Feeding Pump Manual

Cardinal Health Kangaroo Connect User manual

Cardinal Health

Cardinal Health Kangaroo Connect User manual

Cardinal Health Kangaroo ePump User manual

Cardinal Health

Cardinal Health Kangaroo ePump User manual

Cardinal Health AirLife 006900 User manual

Cardinal Health

Cardinal Health AirLife 006900 User manual

Cardinal Health Cordis RAILWAY User manual

Cardinal Health

Cardinal Health Cordis RAILWAY User manual

Cardinal Health Alaris 8000 Series Manual

Cardinal Health

Cardinal Health Alaris 8000 Series Manual

Cardinal Health CATALYST User manual

Cardinal Health

Cardinal Health CATALYST User manual

Cardinal Health AirLife nCPAP User manual

Cardinal Health

Cardinal Health AirLife nCPAP User manual

Popular Medical Equipment manuals by other brands

Lucimed luminette user manual

Lucimed

Lucimed luminette user manual

AGFA ADC Solo maintenance

AGFA

AGFA ADC Solo maintenance

ADC Diagnostix 2100 Directions for use

ADC

ADC Diagnostix 2100 Directions for use

Otto Bock 3R106 Instructions for use

Otto Bock

Otto Bock 3R106 Instructions for use

Fukuda Denshi FX-7302 Service manual

Fukuda Denshi

Fukuda Denshi FX-7302 Service manual

Xhorse MVCI User Manual and Workout

Xhorse

Xhorse MVCI User Manual and Workout

Zimmer Biomet Vanguard  ID Total Knee SURGICAL TECHNIQUE

Zimmer Biomet

Zimmer Biomet Vanguard ID Total Knee SURGICAL TECHNIQUE

Huvitz HOCT-1F/1 user manual

Huvitz

Huvitz HOCT-1F/1 user manual

Physio Control HeartStart MRx user guide

Physio Control

Physio Control HeartStart MRx user guide

Interactive Metronome Portable Pro Unit Setup instructions

Interactive Metronome

Interactive Metronome Portable Pro Unit Setup instructions

KERN MCC 250K100NM operating instructions

KERN

KERN MCC 250K100NM operating instructions

Medstrom Aria PRO Quick user guide

Medstrom

Medstrom Aria PRO Quick user guide

AREX CHIROBLOC CBM INSTRUCTION FOR USE AND STERILIZATION

AREX

AREX CHIROBLOC CBM INSTRUCTION FOR USE AND STERILIZATION

Planmeca Compact I Technical manual

Planmeca

Planmeca Compact I Technical manual

Otto Bock 5R9 Instructions for use

Otto Bock

Otto Bock 5R9 Instructions for use

GlobalMIND VeinWalker pro quick start guide

GlobalMIND

GlobalMIND VeinWalker pro quick start guide

Boston Scientific precision spectra Information for Prescribers

Boston Scientific

Boston Scientific precision spectra Information for Prescribers

Otto Bock 3R32 TITAN Instructions for use

Otto Bock

Otto Bock 3R32 TITAN Instructions for use

manuals.online logo
manuals.online logoBrands
  • About & Mission
  • Contact us
  • Privacy Policy
  • Terms and Conditions

Copyright 2025 Manuals.Online. All Rights Reserved.