Novodes LoriSense Basic User manual

USER MANUAL
Basic Single Axis Solar Panel Tracking System
LoriSense Basic (Controller + Sensor)

User Manual LoriSense Basic Single Axis Solar Tracker
© 2021 Novodes Ltd. Page 2 of 14
Important
This User Guide is subject to periodic review, update and revision.
LoriSenseTM is a brand wholly owned by Novodes Ltd:
The user of this product has sole responsibility for any malfunction that results from improper use, faulty
maintenance, improper repair, unauthorized service, damage, or alteration by anyone other than
Novodes Ltd.
The safety, reliability, and performance of this product can only be assured under the following
conditions:
1. The product has been used according to the accompanying operating instructions.
2. All updates, extensions, readjustments, changes, or repairs have been carried out by Novodes’
authorized representatives.
© Copyright 2021 Novodes Ltd. All rights reserved.
No part of this publication may be reproduced, stored in a retrieval system or transmitted in any
form by any means, electronic, mechanical, photo reproductive, recording or otherwise without the
express prior written permission of Novodes Ltd.
Novodes Ltd. reserves the right to change or improve its products and accompanying technical
literature without specific notice of changes or improvements.
Document information: Rev. 3.0 January 2021
Manufactured by Novodes Ltd.
Facility Address: 17 HaKramim St. Bnei Atarot, 6099100, Israel
Tel: +972 –(0)52-4873130
E-mail: [email protected]om
www.novodes.com
Additional product information may be found at: www.lorisense.com

User Manual LoriSense Basic Single Axis Solar Tracker
© 2021 Novodes Ltd. Page 3 of 14
Disclaimer
Information provided by Novodes Ltd. is believed to be accurate and reliable. However, Novodes Ltd.
assumes no responsibility for the use of such information, nor for any infringements of patents or
other rights of third parties, that may result from its use.
PLEASE READ THIS USER GUIDE BEFORE
OPERATING THE SYSTEM

User Manual LoriSense Basic Single Axis Solar Tracker
Table of Contents
CONTENTS
1. Introduction 5
1.1. ABOUT THIS USER GUIDE ....................................................................................................................................5
1.2. THE LORISENSE BASIC SYSTEM .............................................................................................................................5
1.3. FEATURES OF THE LORISENSE BASIC SYSTEM ........................................................................................................... 5
1.4. ADVANTAGES OF THE LORISENSE BASIC SYSTEM COMPARED TO COMPETING SYSTEMS.................................................... 5
2. Safety 7
2.1. TYPES OF WARNINGS,CAUTIONS AND NOTES..........................................................................................................7
2.2. GENERAL SAFETY INSTRUCTIONS ...........................................................................................................................7
3. Overview of System components 9
3.1. DESCRIPTION OF THE SYSTEM............................................................................................................................... 9
3.2. MAIN SYSTEM COMPONENTS............................................................................................................................... 9
4. Setting up the Device for the First Time 10
4.1. CONNECT SYSTEM TO DC POWER .......................................................................................................................10
4.2. CONNECT SYSTEM TO ACTUATOR........................................................................................................................ 10
5. Possible Installation Setup 11
5.1. SOLAR PANEL POLE MOUNT INSTALLATION........................................................................................................... 11
6. Repair Policy 13
6.1. OBTAINING SERVICE.........................................................................................................................................13
7. Warranty 14

User Manual LoriSense Basic Single Axis Solar Tracker
© 2021 Novodes Ltd. Page 5 of 14
1.
INTRODUCTION
1.1.
ABOUT THIS USER GUIDE
This User Guide provides the information necessary to operate the LoriSense Basic System.
PLEASE READ THIS USER GUIDE BEFORE OPERATING THE SYSTEM. If any part of this User Guide is not
clear, contact the product distributor for assistance.
1.2.
THE LORISENSE BASIC SYSTEM
This system lets your solar panel follow the sun by controlling an actuator attached to it. The system
includes a sensor and the control circuit within an IP65 grade enclosure. The sensor should be placed near
the solar panel facing up and it allows the controller to "know" where the sun is and how to adjust the
actuator in order to align the solar panel with the sun. Using this system, your solar panel is always facing
the sun and is producing energy at its highest level. The product is not sold with an actuator.
1.3.
FEATURES OF THE LORISENSE BASIC SYSTEM
•IP65 grade for all system components and accessories –complete protection against ingress of
dust (dust tight) and is protected against low pressure water jets from any direction.
•This system receives a supply of 12V-24V and outputs a matching supply to the actuator.
•Max current to the actuator is 8A with 12V or 4A with 24V.
•Max controller Wattage is: 96W
•No configuration is required. Just plug everything correctly and you can use it immediately.
•Compact size of controller box and sensor.
•Ambient light sensor to detect sun location for single axis tracking.
1.4.
ADVANTAGES OF THE LORISENSE BASIC SYSTEM COMPARED TO COMPETING SYSTEMS
1. All components including connectors meet IP65 grade or higher (complete protection against
ingress of dust (dust tight) and is protected against low pressure water jets from any direction.).
Many of the competitors have sensors that are entirely exposed or are in an enclosure that does
not meet IP65 grade and as a consequence, their sensors suffer from corrosion and rust after a few
weeks or months.
2. Our system has a warranty for three months. Competitors usually have no warranty.
3. Our system can receive any voltage between 12 and 24 volts. Only some competitors support 24
volts.
4. Safety, robustness, and reliability of the system:
•Our system can support up to 3 amperes of continuous current at 12 volts to the actuator. In
case of higher current up to 8 amperes, our system automatically regulates the delivery of the
current to the actuator at timely bursts of current to prevent overheating and destruction of
the controller. Above 8 amperes a fuse cuts off the current to prevent the destruction of the
controller in which case requires servicing the circuit to replace the fuse (the fuse may only be
replaced by us). The competitors only have (in the best case) a fuse but no overheating
protection.
•Our system has a dedicated IC driver for driving current to the actuator and has integrated
protecting mechanisms for spikes that originate from the actuator and from switching the
current on and off. The competitors usually have simple relays with no protection and that's
why they die out after a while (usually a few weeks or a few months).
•Our system has protection against ESD, external spikes and noise that originate from the power
voltage line that powers the controller. The competitors usually have no such thing.

User Manual LoriSense Basic Single Axis Solar Tracker
© 2021 Novodes Ltd. Page 6 of 14
•The items listed above enable our customers to connect their own actuators with no worry,
giving them more flexibility with their final application.

User Manual LoriSense Basic Single Axis Solar Tracker
© 2021 Novodes Ltd. Page 7 of 14
2.
SAFETY
2.1.
TYPES OF WARNINGS, CAUTIONS AND NOTES
Three types of special message appear in this User Guide:
Warning: A warning indicates precautions to avoid the possibility of personal injury or
death.
Caution: Acaution indicates a condition that may lead to damage to equipment, or a
lower quality of performance.
Note: Anote provides other important information.
2.2.
GENERAL SAFETY INSTRUCTIONS
Warnings:
DO NOT USE BEFORE READING THIS USER GUIDE.
Power the system with accordance to the voltage and current ratings
provided in this user manual.
When connecting or disconnecting the system make sure that the electricity
is turned off.
Ensure that only LoriSense Basic authorized components are connected to
the system.
Don’t operate the system with exposed wires or open enclosures.
Make sure the components of the system are properly secured in place
before beginning operation.
Cautions:
If the system is not working correctly, discontinue use and refer servicing to
qualified service personnel.
The device is not immersible in water –do not immerse in water.
Do not attempt to service the product yourself. This system is not user-
serviceable.
Do not use the system if the one or more of the power indication LEDs are not
working.

User Manual LoriSense Basic Single Axis Solar Tracker
© 2021 Novodes Ltd. Page 8 of 14
Do not use the system if the enclosure is cracked or broken in any way or if any
conductors are exposed.

User Manual LoriSense Basic Single Axis Solar Tracker
© 2021 Novodes Ltd. Page 9 of 14
3.
OVERVIEW OF SYSTEM COMPONENTS
3.1.
DESCRIPTION OF THE SYSTEM
The LoriSense Basic System is an instrument for improving the efficiency of the power conversion of solar
panels by aligning the solar panels along a single axis to face the sun at all times of the day. The system
utilizes a sensor that recognizes the sun location on a single axis (East-West) and provides relevant
feedback to the controller. The controller drives an actuator accordingly in order to align the solar panel
with the sun. The system should be powered from a 12V power supply of the user’s choice.
3.2.
MAIN SYSTEM COMPONENTS
The system includes the following:
1. LoriSense Basic Single Axis Solar Tracking Controller.
2. LoriSense Basic Single Axis Solar Tracking Sensor.
3. One-meter cable connector between the sensor and the controller.
4. Two-meter cable for supply voltage to the controller + output to the actuator
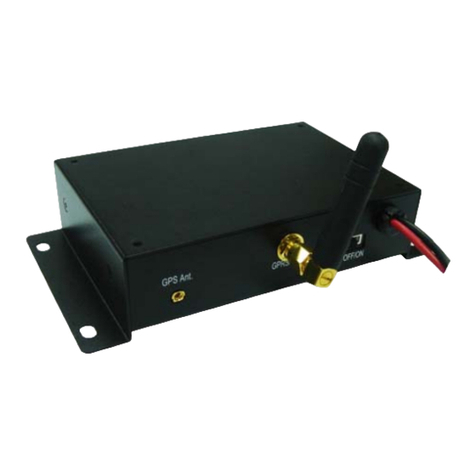
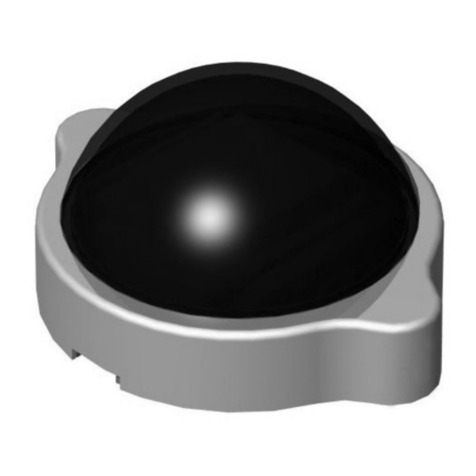
The LoriSense Basic System consists of the following main components: (1) LoriSense Basic Single Axis Solar
Tracking Controller, (2) LoriSense Basic Single Axis Solar Tracking Sensor. These items are shown below.
*Note: The tracking sensor image shown here is one possible option of how it might look. Several types of
sensors have been made with different types of solar cells all providing the same quality of functionality. In
any case, the encloser is the same for all sensor types.
Caution: Ensure that the solar panel is free to move without any disturbance
and verify that the axis of rotation on which the solar panel is mounted is free
of debris and dirt.
Caution: Do not use the system if your actuator has malfunctioned.
Tracking Sensor*
Controller Box

User Manual LoriSense Basic Single Axis Solar Tracker
© 2021 Novodes Ltd. Page 10 of 14
4.
SETTING UP THE DEVICE FOR THE FIRST TIME
4.1.
CONNECT SYSTEM TO DC POWER
Connect the red wire to a voltage between 12V-24V and connect the black wire to 0V (Ground). While
connecting the wires have the power turned off to avoid possible electrocution.
The Tracking sensor is already connected to the controller and, therefore, no special connection is required
with regards to the sensor.
4.2.
CONNECT SYSTEM TO ACTUATOR
Connect the Two remaining wires to the actuator.
The polarity of the connection is not relevant.
That is because if the direction the actuator is
pushing is not correct, then simply rotate the tracking
sensor by 180 degrees or simply switch the
connection to the two wires of the actuator.
Don’t attempt to connect your actuator while the system
is connected to power in order to avoid electrocution.
Don’t attempt to connect the system to power when the
power is on in order to avoid electrocution.
Actuator Illustration –it is not provided
with the system

User Manual LoriSense Basic Single Axis Solar Tracker
© 2021 Novodes Ltd. Page 11 of 14
5.
POSSIBLE INSTALLATION SETUP
The LoriSense Basic may be installed in your solar panel array fixture in various ways. The following is just
one of the possible ways the LoriSense Basic solar tracker may be installed.
5.1.
SOLAR PANEL POLE MOUNT INSTALLATION
5.1.1.
CONNECTING THE CONTROLLER BOX
Drill two 6mm holes into the pole mount at a difference that matches the controller box profile holes.
Connect the controller box to the solar panel pole mount by inserting two 6mm stainless steel screw bolts
and securing them on the other side of the pole with two 6mm stainless steel nuts.
See the following image as an example:

User Manual LoriSense Basic Single Axis Solar Tracker
© 2021 Novodes Ltd. Page 12 of 14
5.1.2.
CONNECTING THE TRACKING SENSOR
Screw the two stainless steel Z brackets to the solar panel frame with two 6mm bolts and 6mm washers
and nuts.
Then connect the tracking sensor box to the two Z brackets, again, with two 6mm bolts and 6mm washers
and nuts.
See the following images as an example:
5.1.3.
ADJUSTING THE SENSOR SENSITIVITY
Technically, no configuration is required. Just plug everything correctly and you can use it immediately.
However, if you want, you may configure the sensitivity of the sensor by turning the screw (potentiometer)
on the controller board with a small screwdriver. As you turn the screw, the number of LEDs on the
controller board that turn on increases or decreases. The less LEDs that are on, the more sensitive the
sensor becomes. See image below:

User Manual LoriSense Basic Single Axis Solar Tracker
© 2021 Novodes Ltd. Page 13 of 14
6.
REPAIR POLICY
When under warranty, repair and service must be performed only by Novodes Ltd or its authorized
representatives.
6.1.
OBTAINING SERVICE
6.1.1.
SERVICE QUESTIONS
For technical support or service, please, contact Novodes Ltd or its authorized representatives.
Novodes Customer Service and Technical Service:
Email: service@novodes.com
Telephone:+972-(0)52-4873130
Website: www.novodes.com
Additional product information may be found at: www.lorisense.com
6.1.2.
SHIPPING INSTRUCTIONS
Please enclose the following items when shipping the system for service:
•Warranty information: device serial number, a copy of the invoice, or other applicable
documentation
•Ship to and bill to information
•Purchase order number
•Name and phone number of the person to contact for questions
•A brief description of the problem encountered, or the repairs felt necessary.
•Pack the system and its accessories carefully with suitable protection to prevent shipping
damage.
Warning: Do not attempt to perform repair procedures yourself. Only perform maintenance
procedures specifically described in this User Guide.

User Manual LoriSense Basic Single Axis Solar Tracker
© 2021 Novodes Ltd. Page 14 of 14
7.
WARRANTY
Warranty Period
The warranty period of the LoriSense Basic System is for three months from the moment the product was
received by the customer.
Service Support
Repairs of the LoriSense Basic System under warranty must be made by authorized repair centers. If the
device needs repair, contact the product distributor.
Warranty Void
Any sign of misuse not in accordance with the instructions in the user manual may void all product
warranty.
Table of contents
