manuals.online logo
Brands
  1. Home
  2. •
  3. Brands
  4. •
  5. Nuaire Group
  6. •
  7. Fan
  8. •
  9. Nuaire Group NA-SRHR-100 Instruction Manual

Nuaire Group NA-SRHR-100 Instruction Manual

1.0 The Nuaire NA-SRHR-100 Single Room
Heat Recovery Fan
The fan is suitable for refurbishment or new build in Kitchen,
Bathroom and Toilet applications. The fan can be directly installed
into existing 100mm fan holes.
The fan will run continuously at a 6l/s trickle extraction rate with
an automatic boost to 15l/s when activated by the integral
humidistat sensor.
2.0 Where to install the fan
1 In walls 380mm maximum thickness.
2. ocate it as high as possible.
3. At least 100mm from the edges of the mounting surface to
sides/top of unit.
4. As far away as possible from and opposite to the main
source of air replacement to ensure airflow across the room
(e.g. opposite the internal doorway.
5. Near the source of steam or odours.
6. Not where ambient temperatures are likely to exceed 50°C
or are below -20°C.
7. If installed in a kitchen fans must not be mounted immediately
above a cooker hob, or eye level grill.
8. If installing in a room containing a fuel burning device which
has a non-balanced flue, it is the installer's responsibility to
ensure that there is enough replacement air to prevent fumes
being drawn down the flue when the fan is operating up to
maximum extract. Refer to Building Regulations for specific
requirements.
9. Exhaust air must not be discharged into a flue used for
exhausting of fumes from appliances supplied with energy
other than electric. Requirements of all authorities concerned
must be observed for exhaust air discharge and intake flow
rates.
10.Not suitable for use in possible chemical corrosive
atmospheres.
11.Do not site where the fan is exposed to water spray for
extended periods.
3.0 What the installer will need
3mm electrician’s screwdriver and No.1 or 2 Pozidrive screwdrivers.
A 115mm dia. prepared hole with a slope to the outside, cut with a
minimum 115mm dia. core drill.
4.0 Fan Installation
Installation should be carried out by competent personnel in
accordance with the appropriate authority and conforming to
all statutory and governing regulations.
Installing the isolating switch and cable.
lIsolate the mains supply.
lLay in the cable from the isolating switch to the fan location.
lLay in the cable from the isolating switch to the point of
connection to the mains supply.
lInstall the isolating switch and make connections required.
Installing in the wall of maximum thickness 380mm.
lUse the dimensions in fig 1. to mark the wall with the centre
of the duct hole, the 4 wall fixing positions and the cable inlet.
lUse the centre line to cut a 115mm dia. hole through the wall
for the wall tube using a core drill (if replacing the tube of an
existing 100mm dia. fan ensure the wall tube fits without
distortion.
lENSURE THAT THE DUCT SLO ES DOWN, away from the fan at
an angle of 3oto allow drainage of any incoming rain water to
the outside.
lDrill 4 holes for wall fixings (not supplied), in positions shown
and fit wall plugs. (see fig 1.)
lAlign the fan in the duct hole and ensure the fan wall box fits
flat and flush to the wall.
Nuaire Limited Western Industrial Estate Caerphilly United Kingdom CF83 1NA
T: 029 2085 8400 F: 029 2085 8444 E: info@nuaire.co.uk W: www.nuaire.co.uk
NA-SRHR-100
Single Room Heat Recovery Fan
Installation and Maintenance
The EMC Directive
2004/108/EC
The Low Voltage
directive
2006/95/EC
Figure 1. Wall fixing positions and cable inlet.
127. 04. 15 eaflet Number 671677
Cable
entry
Centre
line of
duct
Isolation - Before commencing work
make sure that the unit is electrically isolated
from the mains supply.
4.0 Installation cont.
Remove the Front Cover / Baffle assembly by removing the two
screws on the underside of the cover and lifting off the cover by
unhinging from the top of the Wall Box. (see fig 2.)
lKnock out the cable entry hole in the back of the Wall Box and
feed the flexible mains cable through.
lAlign Wall Tube to hole in wall and present fan to wall square
and flat. Secure to wall with four fixing screws (not supplied).
lMake good the hole around the wall tube on the outside wall
and seal in place to prevent water ingress.
lSeal the Wall Box to the inner wall.
lAllow to set before continuing the fan installation.
5.0 Wiring
A means for disconnection in all poles must be incorporated in the
fixed wiring in accordance with the wiring rules.
lThe cross-sectional area of the supply cord used should be in
the range 1-1.5mm².
lUse the cable grip provided to secure the cable.
See fig 3. for connection position and fig 4. for wiring diagram.
lRe-fit Front Cover / Baffle assembly before connecting the
cable from the isolating switch to the electrical supply.
For fixed wiring circuits the protective fuse for the appliance must
not exceed 5A.
227. 04. 15 eaflet Number 671677
Installation and Maintenance NA-SRHR-100 Single Room Heat Recovery Fan
Isolation - Before commencing work
make sure that the unit is electrically isolated
from the mains supply.
Figure 2. Removing the front cover.
Figure 4. Wiring diagram.
Cable
clamp
Customer
connection
Figure 3. Connection position.
FAN TERMINALS
FUSE
DOUBLE POLE
ISOLATING SWITCH
L
N
LIVE
NEUTRAL
L
N
This appliance is intended for
connection to fixed wiring.
Check that the electrical rating
shown on each fan matches the
mains supply.
THIS A LIANCE IS DOUBLE
INSULATED AND DOES NOT
REQUIRE AN EARTH
CONNECTION.
All installations must be supervised
by a qualified electrician.
Installations and wiring must
conform to current IEE Regulations
(UK), local or appropriate regula-
tions (other countries).
7.0 Using the fan
The fan is fully automatic and has no user adjustments.
The fan will run continuously at 6l/s flow rate and will boost to 15l/s
when activated by the integral active humidistat.
The fan automatically adjusts to slow changes in natural humidity
levels without operating the fan. If the humidity
levels increase at a rate slower than 5% RH in 5 minutes, the fan will
not be triggered by humidity. This is to prevent nuisance triggering of
the fan. If humidity levels increase quicker than 5% RH in 5 minutes
the fan will operate.
When relative humidity drops the fan continues to operate for a
fixed time delay.
7.1 Summer by-pass
Should the air temperature within the room exceed 25°C, the heat
exchanger will be switched off. The fan will continue to run to
provide extraction of stale air but fresh incoming air will not be
warmed by the heat exchanger.
When the temperature drops below 25°C the heat exchanger will be
switched back on and heat recovery will recommence.
The humidistat function remains active throughout the summer
by-pass period.
7.2 Winter setting
The fan is capable of operating down to -20°C without the need
for frost protection. The fan continues to operate to comply with
building regulations.
8.0 Maintenance
Cleaning
Before cleaning, isolate the fan completely from the mains supply.
Remove the front cover / baffle assembly by removing the two
screws on the underside of the cover and lifting off the cover by
unhinging from the top of the Wall Box.
To clean the cover, either wipe it with a damp, lint free cloth or wash
it in warm soapy water. Thoroughly dry the cover and re-fit.
Do not immerse the fan in water or other liquids to clean any other
parts of the fan.
Never use strong solvents to clean the fan.
The Air Supply and Extract filters should be checked regularly and
cleaned or replaced when necessary.
Filter life is dependent on environmental operating conditions. We
recommend filter replacement every 12 months. Should the filters
become excessively dirty beforehand they can be removed and
shaken clean. (see fig 6)
The fly screen filter is designed to prevent insects and large dust par-
ticles entering the heat exchanger. Due to the self cleaning nature of
the heat exchanger it should not be necessary to replace this filter.
The unique triple filtering and self cleaning heat exchanger means no
maintenance is required on the heat exchanger matrix.
Use only genuine RXG filters.
327. 04. 15 eaflet Number 671677
Installation and Maintenance NA-SRHR-100 Single Room Heat Recovery Fan
6.0 Dimensions
Figure 5. Dimensions.
AIR SUPPLY FILTER
EXTRACT FILTER
Figure 6. Filter locations.
427. 04. 15 eaflet Number 671677
Western Industrial Estate
Caerphilly United Kingdom
CF83 1NA
T: 029 2088 5911
F: 029 2088 7033
E: [email protected].uk
W: www.nuaire.co.uk
Installation and Maintenance NA-SRHR-100 Single Room Heat Recovery Fan
9.0 Replacement of arts
Should any component need replacing Nuaire keep extensive stocks
for quick delivery. Ensure that the unit is electrically isolated, before
carrying out any work. When ordering spare parts, please quote the
serial number of the unit and the ARC number of the purchase if
possible. (This information will be available on the fan label).
10.0 Warranty
The fan unit has a 2 year warranty which starts from the day of
delivery. The motor is covered with a 5 year warranty.
11.0 Service Enquiries
Nuaire can assist you in all aspects of service. Our Technical Support
department will be happy to provide any assistance required.
Technical Support Department
on 029 2085 8400
Technical or commercial considerations may, from time to time, make it necessary to alter the design, performance and
dimensions of equipment and the right is reserved to make such changes without prior notice.

Other Nuaire Group Fan manuals

Nuaire Group MRXBOXAB-ECO4-SC User manual

Nuaire Group

Nuaire Group MRXBOXAB-ECO4-SC User manual

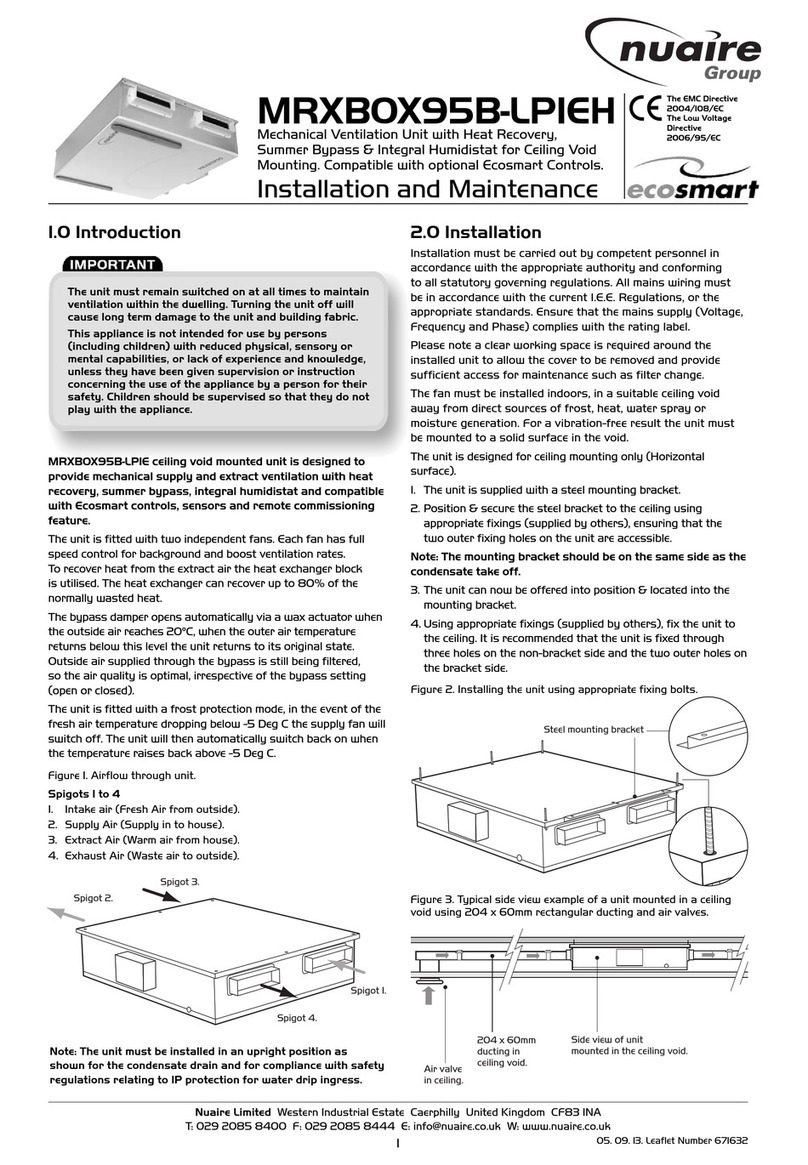
Nuaire Group MRXBOX95B-LP1EH Instruction Manual

Nuaire Group

Nuaire Group MRXBOX95B-LP1EH Instruction Manual

Nuaire Group DRIMASTER Instruction Manual

Nuaire Group

Nuaire Group DRIMASTER Instruction Manual

Nuaire Group MRXBOX95B-WMI Instruction Manual

Nuaire Group

Nuaire Group MRXBOX95B-WMI Instruction Manual

Nuaire Group MRXBOX95AB-WM2QA11665 Instruction Manual

Nuaire Group

Nuaire Group MRXBOX95AB-WM2QA11665 Instruction Manual

Nuaire Group MRXBOXAB-ECO4-OHSC User manual

Nuaire Group

Nuaire Group MRXBOXAB-ECO4-OHSC User manual

Nuaire Group XS6WA Instruction Manual

Nuaire Group

Nuaire Group XS6WA Instruction Manual

Nuaire Group COOKERXBOX Instruction Manual

Nuaire Group

Nuaire Group COOKERXBOX Instruction Manual

Nuaire Group MRXBOX95-WM2 Instruction Manual

Nuaire Group

Nuaire Group MRXBOX95-WM2 Instruction Manual

Nuaire Group CYFAN Instruction Manual

Nuaire Group

Nuaire Group CYFAN Instruction Manual

Nuaire Group AXUS Series Instruction Manual

Nuaire Group

Nuaire Group AXUS Series Instruction Manual

Nuaire Group XBOXER-MICRO Instruction Manual

Nuaire Group

Nuaire Group XBOXER-MICRO Instruction Manual

Nuaire Group BPC MRXBOX95-WM1 Instruction Manual

Nuaire Group

Nuaire Group BPC MRXBOX95-WM1 Instruction Manual

Nuaire Group MRXBOX90 S Instruction Manual

Nuaire Group

Nuaire Group MRXBOX90 S Instruction Manual

Nuaire Group MRXBOX95AB-WM2QA11179 Instruction Manual

Nuaire Group

Nuaire Group MRXBOX95AB-WM2QA11179 Instruction Manual

Nuaire Group LPXBOXAC-2 Instruction Manual

Nuaire Group

Nuaire Group LPXBOXAC-2 Instruction Manual

Nuaire Group MRXBOX95AB-WH1 Instruction Manual

Nuaire Group

Nuaire Group MRXBOX95AB-WH1 Instruction Manual

Nuaire Group CYFAN Series Instruction Manual

Nuaire Group

Nuaire Group CYFAN Series Instruction Manual

Nuaire Group MRXBOX95AB-WH1QA11178 Instruction Manual

Nuaire Group

Nuaire Group MRXBOX95AB-WH1QA11178 Instruction Manual

Nuaire Group MRXBOX95-WH1 Instruction Manual

Nuaire Group

Nuaire Group MRXBOX95-WH1 Instruction Manual

Nuaire Group MRXBOX95-WALL Instruction Manual

Nuaire Group

Nuaire Group MRXBOX95-WALL Instruction Manual

Nuaire Group MRXBOX95B-LP1 Instruction Manual

Nuaire Group

Nuaire Group MRXBOX95B-LP1 Instruction Manual

Nuaire Group MRXBOX95B-LOFT Instruction Manual

Nuaire Group

Nuaire Group MRXBOX95B-LOFT Instruction Manual

Nuaire Group LPXBOXDC-2 Instruction Manual

Nuaire Group

Nuaire Group LPXBOXDC-2 Instruction Manual

Popular Fan manuals by other brands

Goldair GCPHF15 operating instructions

Goldair

Goldair GCPHF15 operating instructions

Nordic Home FT-530 user manual

Nordic Home

Nordic Home FT-530 user manual

Xpelair 100MM/4" RANGE DX100 Installation and maintenance instructions

Xpelair

Xpelair 100MM/4" RANGE DX100 Installation and maintenance instructions

Penlon AV-S introduction

Penlon

Penlon AV-S introduction

Carrier CRECOMZR077A00 installation instructions

Carrier

Carrier CRECOMZR077A00 installation instructions

KDK K15YC Operating and installation instructions

KDK

KDK K15YC Operating and installation instructions

System air BR 355D2 IE3 Installation and operating instructions

System air

System air BR 355D2 IE3 Installation and operating instructions

WHISPER KOOL XLT Series installation guide

WHISPER KOOL

WHISPER KOOL XLT Series installation guide

LUCCI Air AIRFUSION A Installation, operation, maintenance & warranty information

LUCCI Air

LUCCI Air AIRFUSION A Installation, operation, maintenance & warranty information

minkaAire DREAM STAR F788L Instruction manual warranty certificate

minkaAire

minkaAire DREAM STAR F788L Instruction manual warranty certificate

Manrose EXTRACT-A-LITE Installation instructions manual

Manrose

Manrose EXTRACT-A-LITE Installation instructions manual

Ebmpapst K3G710-PW06-01 operating instructions

Ebmpapst

Ebmpapst K3G710-PW06-01 operating instructions

Ebmpapst G4E180-AB01-01 operating instructions

Ebmpapst

Ebmpapst G4E180-AB01-01 operating instructions

Delta breez Smart SMT150-200 Installation and operating instructions

Delta

Delta breez Smart SMT150-200 Installation and operating instructions

Ebmpapst S2D200-BA02-02 operating instructions

Ebmpapst

Ebmpapst S2D200-BA02-02 operating instructions

Ebmpapst A3G910-AO83-03 operating instructions

Ebmpapst

Ebmpapst A3G910-AO83-03 operating instructions

Air King 9214 Operating instructions and parts manual

Air King

Air King 9214 Operating instructions and parts manual

Monte Carlo Fan Company 5SWR54XXD Series owner's manual

Monte Carlo Fan Company

Monte Carlo Fan Company 5SWR54XXD Series owner's manual

manuals.online logo
manuals.online logoBrands
  • About & Mission
  • Contact us
  • Privacy Policy
  • Terms and Conditions

Copyright 2025 Manuals.Online. All Rights Reserved.