9
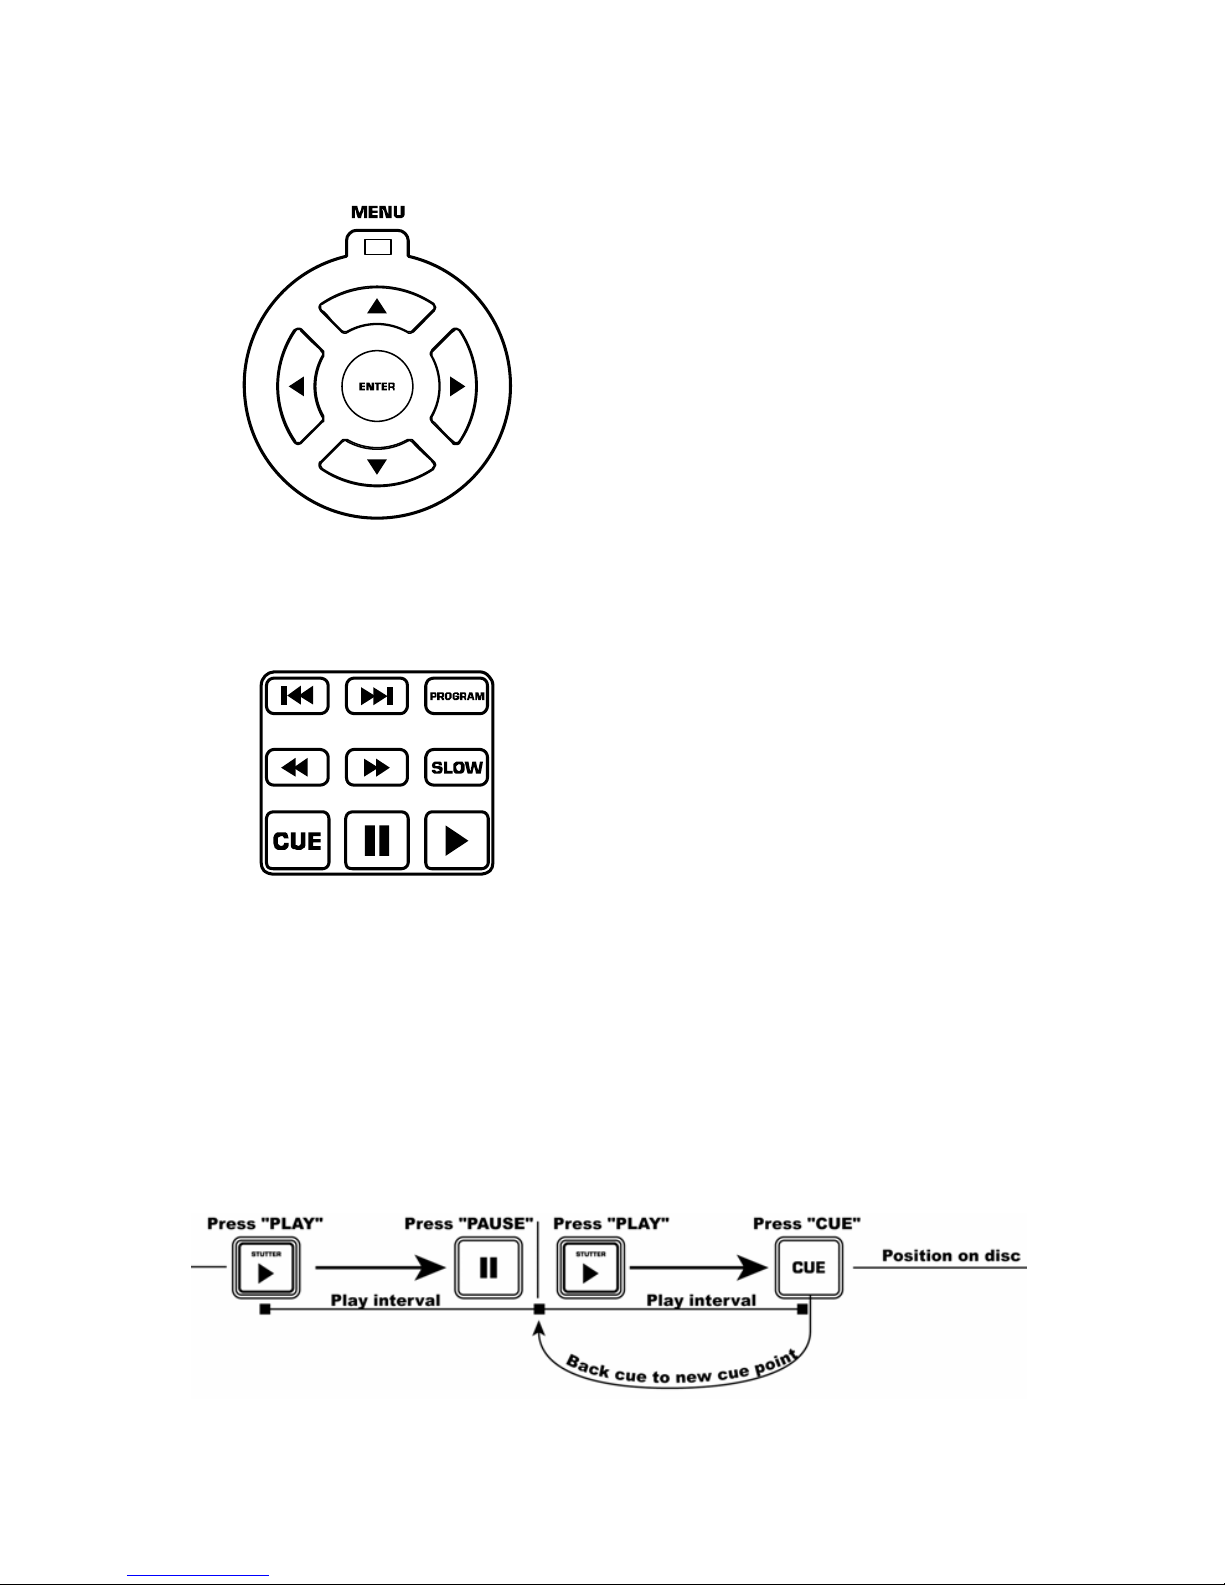
Características del panel frontal
1. Botones de navegación del menú: Use
estos botones para navegar por el menú del
DVD y las páginas de los ajustes.
2. Botones de Playback: Contiene Play
(Reproducir), Pause (Pausa), Cue
(Señalizar), Fast Forward (Avance rápido),
Rewind (Rebobinar), Next Track (Pista
siguiente), Previous Track (Pista anterior),
Slow Motion (Movimiento lento) y la función
Program (Programa).
3. Pitch Fader: Ajusta el pitch/velocidad del
playback. Esta característica puede ser
desactivada presionando el botón de Pitch
(7).
4. Botón de configuración: Selecciona el
modo de configuración (Setup), que puede
navegarse usando los controles de
navegación del menú.
5. Botones de funciones: Alterna entre el
título y subtítulo del DVD, cambia la salida
del volumen, ajusta la clave, cambia el
ángulo, y/o acerca o aleja.
6. Pantalla: Este producto cuenta con una
pantalla estilo matriz VFD. Consulte la
sección de la pantalla de este manual para
encontrar más información.
7. Botones de Pitch Bend, Pitch Lock y
Looping:Estas características se usan
para igualar los ritmos y se describen en
más detalle en este manual.
8. Botones de expulsión, modo aleatorio,
modo de repetición, y de pantalla:
Estos botones dan funcionalidad al
reproductor de DVD y se describen en más
detalle en este manual.
9. Botones del conmutador de video
Master y de visualización en pantalla
(OSD): Esta sección le permite alternar la
salida Master entre el Video 1 y el Video 2.
El conmutador de la visualización en
pantalla suprime el texto generado por el
reproductor de DVD de la salida de video.
10. Bandeja para discos: Aquí se coloca el
disco.
11. Botón de encendido: Enciende y apaga la
unidad.
12. Botones de expulsión: Abre y cierra la
bandeja para discos. ASEGÚRESE DE
USAR EL BOTÓN PARA ABRIR Y CERRAR
LA BANDEJA.
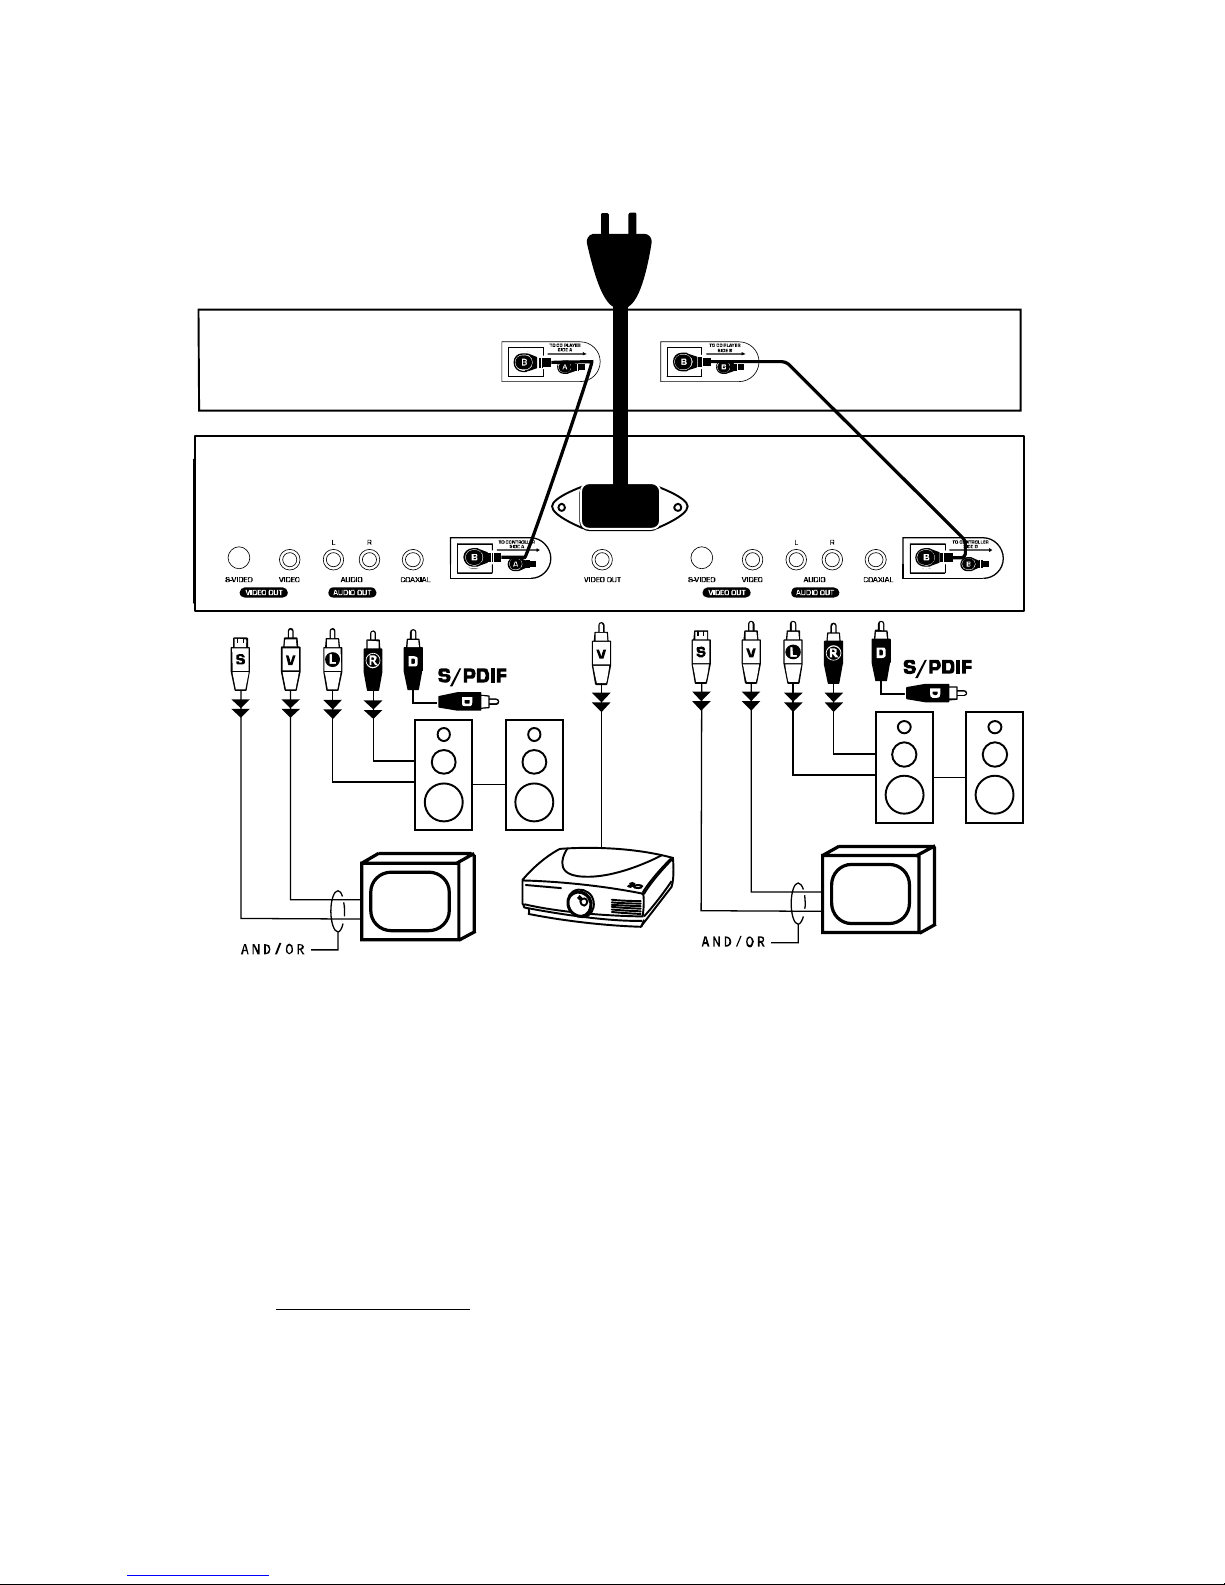
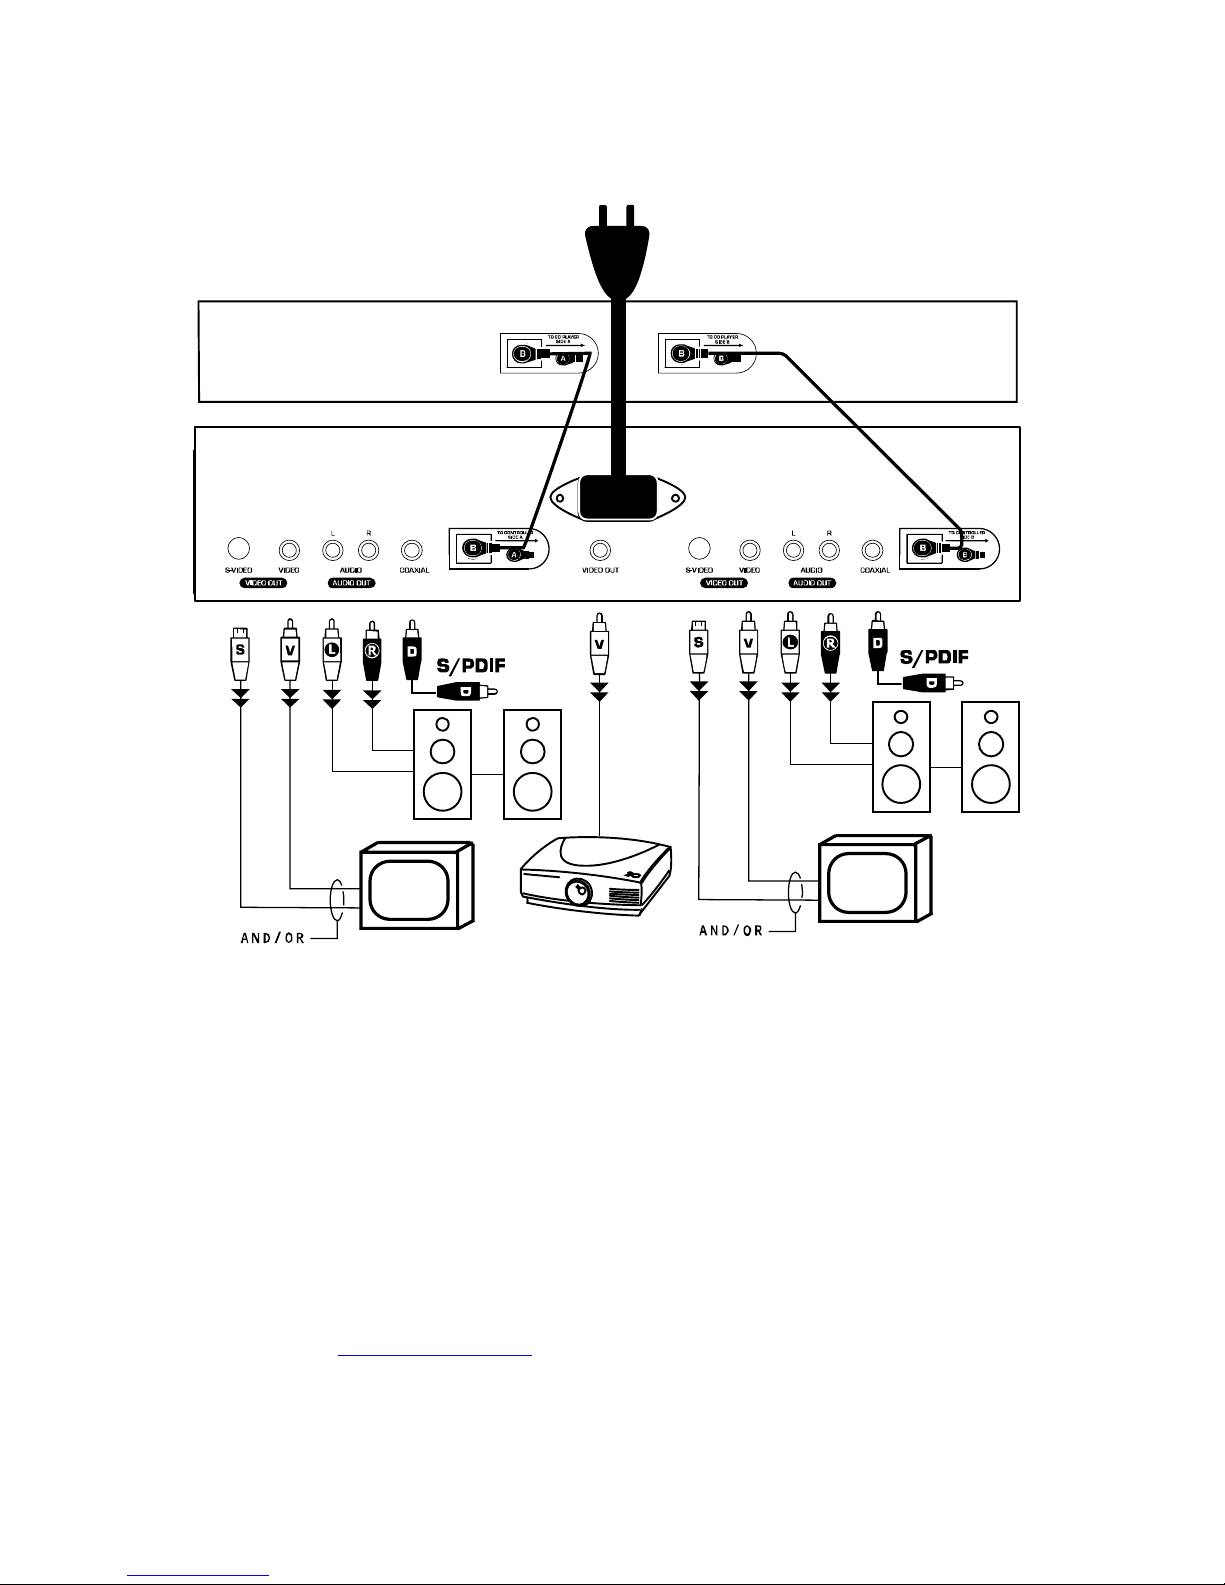
Conexiones traseras
1. Entrada de alimentación: Enchufe aquí el cable de
alimentación provisto.
2. Salida de video Master: Ésta es una salida de
video compuesto conmutado que enviará sea el
Video 1 y el Video 2. Puede usarla para monitoreo o
como salida principal si no tiene un mezclador de
video.
3. Salida de S-Video: Para conectar a un dispositivo
de monitoreo con entradas de S-Video.
4. Salida de video compuesto: Para conectar a un
dispositivo de monitoreo las entradas de video
compuesto.
5. Salida de audio estéreo RCA: Para conectar a un
mezclador o amplificador de audio.
6. Salida coaxial de audio digital: Para conectar a
un decodificador compatible.
7. Conectores de los controladores: Para conectar
al lado correspondiente de la sección del controlador.
Consulte la Guía de instalación rápida.