Nuprodx multiCHAIR 3000tx User manual

!ATTENTION: READ BEFORE ASSEMBLING/OPERATING!
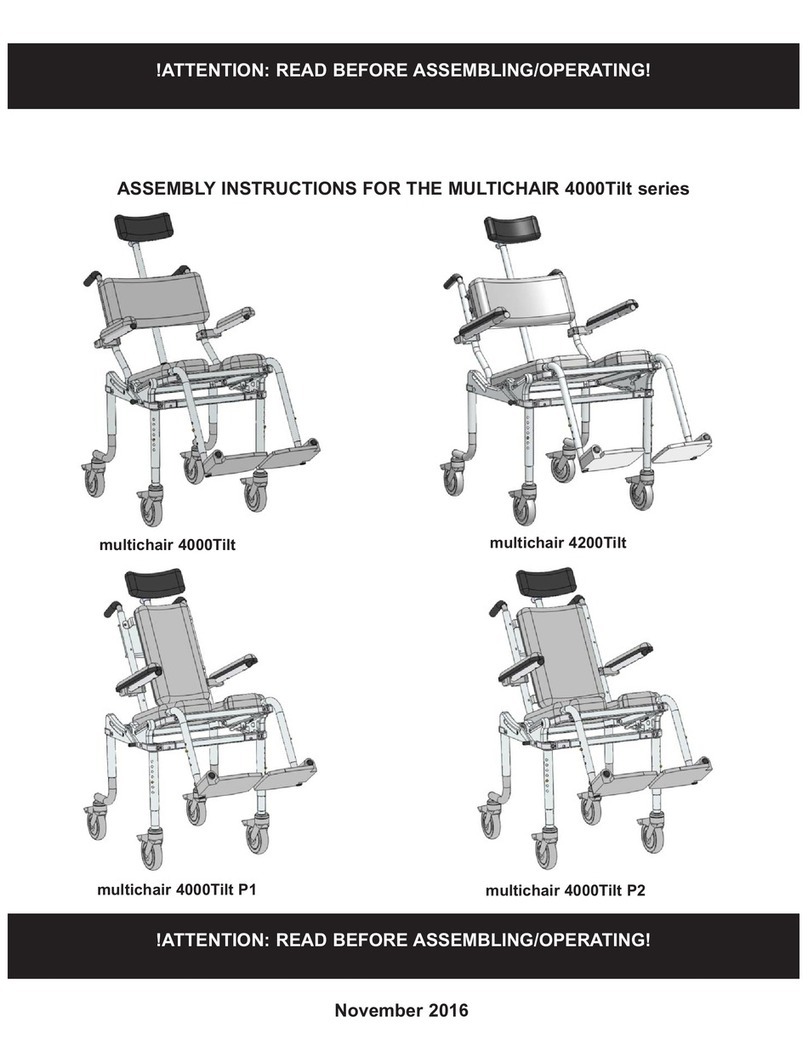
ASSEMBLY & PACKING INSTRUCTIONS FOR THE MULTICHAIR 3000tx
!ATTENTION: READ BEFORE ASSEMBLING/OPERATING!
November 2012

AStandard multiCHAIR 3000tx with transfer cushion installed on
user’s right side is shown in Figure 1.
BUnpack all parts from the shipping carton. Remove all tape
and/or packing from the chair. Keep shipping materials for future
use. Note the location of padding materials and sheet plastic
which protects parts of your chair.
COpen the seat frame, lock the slide bolts, and
position the frame upside down (Refer to Figures 2 & 3).
DPosition the seat frame upside down and install the four legs.
Note that the top of each leg has a machined portion approxi-
mately one inch wide. The top end of each leg should fit easily
into the socket of the frame. Make sure that the legs slide
"home" into the sockets. Use the included ¼" Allen wrench to
tighten the bolts located at the corners of the frame. For ease
of future leg height adjustment, position each leg in the socket
so that the adjustment holes face outward (Refer to Figures 3).
Slide bolts
ASSEMBLY INSTRUCTIONS
!ATTENTION: PLEASE READ!
Please see Page 6: LIMITED WARRANTY of these instructions. If the warranty is not acceptable, contact Nuprodx, Inc. for information
about returning the chair for a refund (Restocking fees and shipping charges will be applied). This chair is designed and intended for
indoor shower and bathroom use. It is not designed for outdoor use and will void the warranty if used in this fashion.
multiCHAIR 3000tx
and carrying case
Figure 2
Figure 3
SAFETY PRECAUTION!
If any of the legs are not fitted correctly into the socket of the seat
frame or are not securely tightened there is an extreme risk of the
legs dislodging completely from the chair. This could cause seri-
ous injury or even death!
SAFETY PRECAUTION!
Failure to ensure that the slide bolts are correctly positioned and
locked into place will cause the chair to become unstable. This
could cause serious injury or even death!
slide bolts
- PAGE 2 -
Figure 1

ETurn the chair right side up and install the backrest assem-
bly. Slide the two backposts into the back of the seat frame and
then install the cloth back. Next tighten the two socket head
cap screws using the ¼" Allen wrench (Refer to Figure 4 & 5).
If desired, the saddle washers can be turned upside down and
mated with the corresponding semi-circle located on the frame.
This can help prevent the back posts from rotating while in use
(Refer to Figure 6).
F Install the swing-away arms by first slipping the end of the
arm with the steel pin into matching holes in the frame. Lower
down the arms until the latch engages around the black plastic
ball attached to either side of the frame (Refer to Figure 7).
Figure 5
SAFETY PRECAUTION!
Both backrest posts must be completely engaged with the seat
frame and securely tightened. If they are not fitted correctly, there
is a risk of the posts dislodging from the seat frame. This could
cause serious injury or even death!
Figure 6
Figure 7
SAFETY PRECAUTION!
The swing-away arms are not designed to support the entire body
weight of the user. Using the arms as a support for transferring
into the chair and/or putting extreme amounts of pressure on
them could result in damaging the arms and is not recommended.
- PAGE 3-
saddle washer
semi-circle
Figure 4

G Transfer Cushion Assembly:
1) Insert the rubber adjusting feet into the aluminum blocks
attached to the cushion (Refer to Figure 8).
2) Depending on which side of the multiCHAIR you need to
transfer to, insert the stainless steel pin into the appropriate
aluminum block and tighten using the 1/4” Allen wrench (Refer
to Figure 8).
3) Remove the swing-away arm on the side in which you
intend to transfer to. Next, insert the transfer cushion assembly
into the appropriate side of the multiCHAIR by first slipping the
end with the stainless steel pin into matching hole in the
frame. Then lower down the assembly until the block engages
around the black plastic ball attached to either side of the
frame. Adjust the rubber adjusting feet accordingly to secure
the transfer cushion onto the top of the tub wall (Refer to
Figure 9).
SAFETY PRECAUTION!
Failure to securely tighten the stainless steel pin into the transfer
block could cause the entire transfer cushion assembly to dis-
lodge from the multiCHAIR while in use. This could result in seri-
ous injury or even death!
SAFETY PRECAUTION!
The transfer cushion assembly should only be used when proper-
ly seated on top of a bath tub wall. If seated incorrectly while
transferring, the multiCHAIR could tip to one side causing the
user to fall. This could result in serious injury or even death!
Figure 9
Figure 8
ADDITIONAL ASSEMBLY INSTRUCTIONS
A Seat Cushion Orientation: The standard seat cushion orien-
tation is with the commode opening in the front of the
multiCHAIR. If desired, the commode opening can also be ori-
entated left/right/rear. This can be accomplished by unscrewing
the four button head cap screws that attach the cushion to the
frame, orientating the commode opening to the desired location
and then re-attaching the cushion to the frame with the four
screws using the 5/32” Allen wrench (Refer to Figure 10).
Figure 10
- PAGE 4 -

AEnsure all fasteners (bolts/washers) are securely tightened
and all chair parts have been assembled correctly (Refer back
to Assembly Instructions if needed. Contact Nuprodx, Inc. if
unsure of anything).
B Commode Chair: Position the multiCHAIR over the toilet, so
that the center of the commode opening is directly above the
center of the toilet bowl. Adjust the height of the multiCHAIR
accordingly by setting the position of the brass buttons on the
four inner legs to the various adjustment holes on the outer
legs (Refer to Figure 11).
C Shower Chair: Position the multCHAIR inside the
bathtub/shower. Adjust the height of the multiCHAIR according-
ly by setting the position of the brass buttons on the four inner
legs to the various adjustment holes on the outer legs.
OPERATING INSTRUCTIONS
Figure 11
SAFETY PRECAUTION!
Ensure that the height of each inner leg is set to make the
multiCHAIR level. If this is not properly done, the multiCHAIR
could tip to one side causing the user to fall. This could result in
serious injury or even death!
ADDITIONAL SAFETY PRECAUTIONS
!ATTENTION: PLEASE READ!
WARNING! Failure to account for the afformentioned and the following safety precautions can result in serious
injury to the user or even death!
Figure 13
Figure 12
A Leg Height Adjustment: When making height adjust-
ments to any of the legs, make sure that the brass but-
tons are fully engaged into the outer legs. If pushed too
hard the button could become stuck inside the inner leg
(Contact Nuprodx, Inc. if this occurs). Leg height adjust-
ment should only be made before transferring the user
into the chair (Refer to Figure 12).
BCrutch Tips: Before transferring into and out of the
chair, all four crutch tips must be securely planted onto
the floor. Failure to do so could cause the chair to
become unstable.
CFasteners: Over time the screws and washers on the
chair may become loose. It is very important that these
are checked and securely tightened before each use.
Failure to do so could cause a part to dislodge from the
chair (Refer to Figure 13).
- PAGE 5 -

Figure A - Put the folded seat frame, hinge side
down, inside the carrying case and alternate the
legs, as shown, in the cavity of the folded seat
frame
Figure B - Insert the transfer cushion assembly
in front of the seat frame
Figure C - Locate the upturned side arms in
front of the transfer cushion. Overlay the
arms with one on one side of the aluminum
block and the other arm on the other side
Figure D - Stow the cloth back assembly on
top of the arms, along with the tool set
PACKING INSTRUCTIONS
- PAGE 6 -

A WARRANTY ACTIVATION Please read this warranty before operating or using your multiCHAIR. To activate the
warranty on your multiCHAIR register it online or by phone. By operating or using the chair, you agree to the terms of
this warranty.
B WARRANTY: Nuprodx, Inc. warrants this product against defects in material and workmanship as follows: There is
a 10-Day conditional money-back warranty. During this time period, the customer is permitted to try out the
multiCHAIR, fully-clothed, keeping the chair in “like new” condition (NOTE: “Like new” condition, in terms of the
multiCHAIR, is defined by Nuprodx, Inc. as no visible wear/usage/water marks for the multiCHAIR to be accepted and
refunds issued when returned to Nuprodx, Inc.). If the customer decides that the multiCHAIR will not work for them,
before the 10-Day period has passed and with the authorization of Nuprodx, the chair can be returned for a full refund
minus a 10% restocking charge (NOTE: The customer is responsible for both in-bound and out-bound freight). After
the initial 10-Day period has passed, there is a two-year limited warranty for all parts of the chair, with the exception of
the seat and back cushions (NOTE: Because of the fragile nature of the foam, there is no warranty for the cushions).
The warranty does not cover normal “wear and tear” from everday use of the product and custom parts/custom cushions
are also excluded from the warranty and cannot be returned for a refund under any circumstances. Please see section E
WARRANTY LIMITATION AND EXCLUSIONS for more info on warranty exclusions.
C The warranty period begins on the date you receive the chair. For warranty service, please contact Nuprodx, Inc. no
later than one month following the applicable warranty term. The chair will be repaired or replaced at the discretion of
Nuprodx, Inc. with no charges to you for parts and labor, provided you have proof of purchase and of purchase date.
D DISCLAIMER: Except for the above warranty, and the acknowledgement by Nuprodx, Inc. that the chair, as manu-
factured by it, is fit for the general purpose for which most persons acquire a chair of its kind, Nuprodx, Inc. provides
that you accept the chair as is, without warranties, either express or implied. Nuprodx, Inc. makes no warranty of fit-
ness for your particular purpose and no warranty of merchantability beyond that already stated. No warranties extend
beyond the duration of the express warranty stated above.
E WARRANTY LIMITATIONS AND EXCLUSIONS: The only obligation of Nuprodx, Inc. is to provide the purchaser
with free repair and replacement as described above. This exclusive warranty remedy will not have failed as long as
Nuprodx, Inc. is willing and able to repair or replace as described, but if this remedy should be held to have failed, the
only remaining warranty obligation of Nuprodx, Inc.
shall be to refund the acts beyond the control of Nuprodx, Inc. The
warranty does not cover normal “wear and tear” from everday use of the product. Standard seat/back cushions/custom
parts/custom cushions are not covered under the warranty.
F This warranty gives you specific legal rights, and you may have other rights that may vary from state to state.
G This warranty does not apply to problems arising from normal wear, improper operation, improper maintenance,
improper storage or similar disclaimer of implied warranties, and some do not allow limitations on how long an implied
warranty may last. Some do not allow exclusion or limitation of incidental or consequential damages. So the above
limitations or exclusions may not apply to you.
H RETURN INSTRUCTIONS In the event that you need to return the Nuprodx multiCHAIR, please follow the instruc-
tions below:
1) Review the information contained in your warranty to see if this applies to you
2) Obtain a Return Authorization # from Nuprodx, Inc
3) Re-package the entire chair and its contents in the original packaging and ship to the following address:
LIMITED WARRANTY
- PAGE 6 -
Table of contents
Other Nuprodx Bathroom Aid manuals