NuvoH2O Manor Duo User manual

INSTALLATION GUIDE
MANOR DUO
WATER SOFTENER + TASTE SYSTEM

Welcome to the NuvoH2O Family
of Whole-Home Water Softener Systems.
Congratulations on your purchase of the NuvoH2O Manor Duo System. A premium carbon filter improves your water's taste. And, instead of
using salt or potassium to soften your home's water, NuvoH2O uses CitraCharge—a proprietary, all-natural citrus formulation to soften and
condition your home's water. Initially developed for the foodservice industry in the early 1980s, this technology has been solving complex
water problems for some of the nation's largest businesses.
You are about to enjoy healthier, better tasting, and softer water that both prevents and removes hard water buildup that clogs and corrodes
water heaters, appliances, and plumbing fixtures—each critical to your home and expensive to replace.
What to Expect from Your Manor Duo System
The Manor Duo System softens and improves your water’s taste. It prevents hard water buildup by binding naturally occurring minerals
without removing them. Naturally mineralized water is healthy and is not affected by the NuvoH2O softening process.
NuvoH2O-softened water requires less soap in your dishwasher and less detergent when doing laundry. In fact, you can decrease up to half
the amount of both. Avoid using pre-soaks or rinse-aids since too much of either can cause a fine white film or spots to form on dishes.
This spotting can also be aggravated by some of the non-phosphate detergents found in many states.
The Manor Duo System’s softener cartridge is supplemented by the taste filter. The taste filter removes chlorine, providing a notable
improvement in your water’s taste and smell.
The NuvoH2O’s Manor Duo System was created foremost with optimum efficacy and simple design; offering both superior, eco-friendly
water softening with solutions for other common water issues. Systems do not require drains, electricity, calibration, and require little
maintenance. Since the softening formula is citric-acid based, an FDA-approved ingredient, it is safe for all household uses, including
drinking, bathing, and watering plants.
1

Simple & Effective
Your new system mounts directly to your home’s main internal water line and does not require a soft-water loop. We strongly encourage
hiring a professional plumber to install your system.
However, if you are experienced with home plumbing, we’ve included these instructions to install your Manor Duo System. Please note that
by choosing to install your system yourself, you assume the liability for its installation.
Package Contents
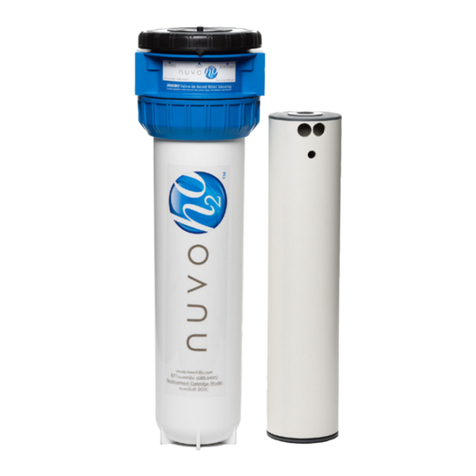
• System housing (1 head and 2 sumps)
• Mounting bracket
• 1 Softener cartridge
• 1 Carbon filter
• 1 Wrench
• Tapcon screw pack
• System head screw pack
• 2 O-rings
• Lubricant
• Warranty/registration card
Due to varying plumbing standards, other bushings and connectors are not included.
System Maintenance
Once installed, your Manor Duo System requires minimal maintenance. The only maintenance you should expect to perform is replacing the
filter and cartridge as needed (about every six months). You should also replace the O-rings annually. When you replace your cartridge
and/or filters, disinfect the sump with bleach and warm water using a sponge or cloth. Wearing protective gloves, clean the inside of the
sump with 1/3 cup of bleach and 3 quarts of warm water. Rinse thoroughly.
Again, thank you for choosing NuvoH2O. We look forward to providing you with better tasting, convenient, eco-friendly, and salt-free soft
water for many years to come!
2

Before Installation
• Ensure that any electrical plugs in the area are covered or disconnected.
• Ensure that the existing plumbing is up to code.
• Turn off water main.
• Acquire and install a pressure regulator if you don't already have one.
Warnings & Cautions
• The NuvoH2O softener is intended for the treatment of hard water with alkaline pH; do not install if inlet water has a pH of 7.2 or less
• Do not use with water that is micro-biologically unsafe or of unknown quality without adequately treating or disinfecting water before
the system.
• Do not allow cartridge contents to come in contact with surfaces comprised of copper, stone (natural or unsealed), carpet, cement, or
other flooring
• Head must be installed with the water flowing through the filter side first. If water flows through the softening media, CitraCharge will be
filtered out and will have no effect on your water.
• Insulate any outside pipes that can reach extreme temperatures (higher than 80° F (27° C) or lower than 32° F (0° C).
• Do not install near electrical appliances.
• Maximum working water temperature is 113° F (45° C). Minimum working water. temperature is 39° F (4°C). Maximum working water
pressure is 100 PSI (6.8 bar). Minimum working water pressure is 7.25 PSI (0.5 bar).
• Ensure that the plumbing has been installed according to the plumbing code. Installation must comply with all state and local
laws and regulations.
• Ensure that the water main has been shut off prior to installation.
• Replace the filter and the cartridge at least every six months or as needed based on water usage. Failure to replace the cartridges in
recommended intervals may result in poor softener performance and/or cracks in the housing, causing leakage and possible flooding.
• Failure to maintain your system may result in poor performance and/or cracks in the housing, causing leakage and possible flooding.
• Lubricate (included) O-rings.
• If water leaks between sump and head, re-lubricate the O-ring or replace the O-ring with a new one.
• If the system is unused for an extended period, replace the filter and cartridge before use.
• After prolonged periods of non-use (such as during a vacation), it is recommended that the system be flushed thoroughly. Let the water
run for five to six minutes before using.
• The system sump should be replaced every 7 years to prevent costly repairs or possible water damage.
• Do not use aerosol sprays (e.g., bug sprays, cleaning fluids, etc.) near the system. They contain organic solvents, which may cause
cracking or other damage.
• Avoid dropping, hitting, or scratching sumps. Minor damage from inappropriate handling can lead to cracks and eventual failure.
Note: Cannot be added behind an ion exchange system.
3

Installation Instructions
1. Verify the water main has been shut off.
2. sing a stud finder, attach mounting bracket to the studs in the wall.
3. Remove the system from package. Remove the filter and cartridge from the housing. Be sure to check inside the system for loose
foam, plastic, or package contents.
4. With the filter side of the head near the inlet pipe, install the system by attaching the head to the mounting bracket. Ensure that
the system is installed vertically with the blue head at the top of the system. Do not invert the system.
5. If needed, install a pressure regulator (E) ahead of the NuvoH2O system. Set for 45-65 PSI. A pressure spike, though unlikely, can
still damage the system if it is not protected and potentially result in leaks.
6. Install a bypass. See the diagram below.
7. Use 3-4 wraps of Teflon tape to seal the connections.
8. Use flexible hoses to connect the inlet pipe to the inlet port on the system head and connect the outlet port of the system head to
the outlet pipe. Failure to use flexible hoses may result in water leakage.
9. Lubricate (included) the O-rings at the top of the housing sump.
10. Remove the protective plastic wrap from the cartridge and filters before inserting back into housing.
11. Insert and seat the cartridge and filter into the sump. Water softening cartridge: the small, round holes on the side of the cartridge
must be at the top. See the cartridge replacement instructions for more details.
12. One at a time, attach sumps (now with the filter and cartridge inside) to head by rotating counterclockwise. Secure with the wrench provided.
13. Loosen the pressure release valves on the top of the heads using a screwdriver. Do NOT remove the pressure release valves.
14. Open the first bypass valve (A), allowing the sumps to fill with water. When water leaks from the pressure release valves at the top of
the heads, tighten to close (B). Do not overtighten.
15. Close the first bypass valve (A), allow cartridge to sit in the housing without water flow. After one hour open for main valve (C), thus
allowing water to flow throughout the household while the filter and cartridge sit idle.
16. After one hour, close the top bypass valve (C) and slowly open the first and last bypass valves (A & D), allowing water to flow
through the system.
4
*FOR ORDER PLACEMENT OF YOUR FILTERS SEE #12 IN INSTALLATION INSTRUCTIONS
C
E
A
FILTER SOFTENER
B B D
WATER FLOW DIRECTION WATER FLOW DIRECTION
D

NuvoH2O Filter and Cartridge Replacement
1. Before replacing your filter and cartridge, we recommend having a towel on hand and placing a bucket underneath your softener
system to catch any water that may spill. The bucket should also be used to carry your spent cartridge as the concentrated solution
can damage flooring if it drips from the cartridge.
2. Discontinue water flow to the system by closing valves A and D (see diagram on page 3). Open valve C, allowing water to flow to the
home. Loosen pressure release valve in the head of the system with a screwdriver. Use towel to absorb water that leaks from the valve.
3. Using the black plastic wrench provided, turn the sump clockwise (left) to loosen the sump from the head of the system. CAUTION:
The sump will be heavy and full of water!
4. Remove the spent cartridge and place in a bucket. Turn it upside down into a porcelain sink or tub and let it drain completely. The
outside of the cartridge can be rinsed with warm water. The water that empties from the cartridge will be very concentrated. DO NOT
allow it to come in contact with copper, stone (natural or unsealed), carpet, cement, or other flooring.
5. Wash the sumps with bleach and warm water using a nonabrasive sponge or cloth. Clean the inside of the sump with 1/3 cup of
bleach and 3 quarts of warm water. Rinse thoroughly.
6. Remove the plastic shrink wrap from your new filter and cartridge and insert them into the sumps. The small, round holes on the side
of the cartridge must be at the top.
7. Inspect O-ring, on the top of the sump, for wear. Ensure it is seated properly. Lubricate O-ring with a water-based lubricant or
replace as needed.
8. Be sure to align the filter and cartridge properly in the sumps and heads. Failure to do so may cause them to crack when tightening
the sumps back onto the heads.
9. One at a time, carefully attach the sumps (now with the cartridge and filters inside) to head by rotating the sumps counterclockwise.
Secure with the wrench provided.
10. Open the first bypass valve (A), allowing the sump to fill with water. When water leaks from the pressure release valve at the top of
the head, tighten to close (B).
11. Close the first bypass valve (A), allow cartridge to sit in the housing with no water flow. After one hour open the main valve (C), thus
allowing water to flow throughout the household while the filter and cartridge sit idle.
12. After one hour, close the top bypass valve (C) and open the first and last bypass valves (A&D), allowing the water to flow through the system.
13. After installation, allow water to flow through the system without consuming the water, i.e., a shower for at least an hour. This will
allow any excess carbon from the filter to exit the system.
Note: If the system is unused for an extended period replace the filter and cartridge before use.
5

Money-Back Guarantee
We’re so confident in the performance of the Manor Trio System, that if you are not completely satisfied within the first 90 days from the date
of purchase, you may return it for a full refund of your purchase price, less shipping and handling. Visit NuvoH2O.com/policies to learn more.
Everyone’s water quality is different. If you’re not getting results you expect, we may be able to help you adjust the treatment level from
your softener to improve your water quality. Please contact us if we can be of any assistance. Call 877-688-6426 or email
Purchases made through third-party resellers and retail partners must be returned through those partners and are subject to their return policies.
5-Year Limited Warranty
In the unlikely event that you experience a manufacturing defect with your system, NuvoH2O may either modify, or exchange your softener.
To qualify for warranty, you must purchase the system directly from NuvoH2O or an authorized NuvoH2O reseller, register your system with
NuvoH2O, and use only genuine NuvoH2O replacement cartridges and parts. For full warranty details, visit NuvoH2O.com.
Product Registration
To register your NuvoH2O Manor Trio System, visit: NuvoH2O.com/register. If you do not have access to a computer, please call one of our
helpful customer service agents at: 877-688-6426. Or you can mail the registration card included with your system.
6
Other manuals for Manor Duo
1
Table of contents
Other NuvoH2O Water Dispenser manuals
Popular Water Dispenser manuals by other brands

Pure Water
Pure Water 300 Series owner's manual

Clear Water
Clear Water HDO3-I Installation & operation manual

Cooper & Hunter
Cooper & Hunter CH-V118Fn user manual

Water Care
Water Care Evolve EV1-1044TW Installation instructions & owner's manual

Elkay
Elkay EHFA8 1E Series Installation, care & use manual

Elkay
Elkay EZOTL8 1 Series Installation, care & use manual