Installation and Operating Instructions
Using this pr duct:
ALWAYS check the shower seat is fitted securely to the wall prior to use. The seat is folded down from the
wall by ently pullin on one of the le supports before carefully lowerin the seat to its horizontal position.
Care should be taken to ensure the area under the seat is clear prior to operation. To fold the seat up a ainst
the wall, carefully lift the seat up towards the wall until it reaches the vertical position.
Cleaning and maintenance:
The shower seat must be checked monthly by qualified personnel to ensure that it is in perfect workin
order. This seat can be cleaned usin only a very mild deter ent. Do not use acidic, alkaline, chlorine based
or abrasive cleanin materials. If the seat has a pad it is recommended that this is removed periodically for
thorou h cleanin . This is done by unclippin the plastic seat and back from the frame before unclippin
the pads.
Disclaimer:
We accept no liability whatsoever for personal injury or dama e to property that is or has been caused
due to incorrect assembly, installation, or use of this product.
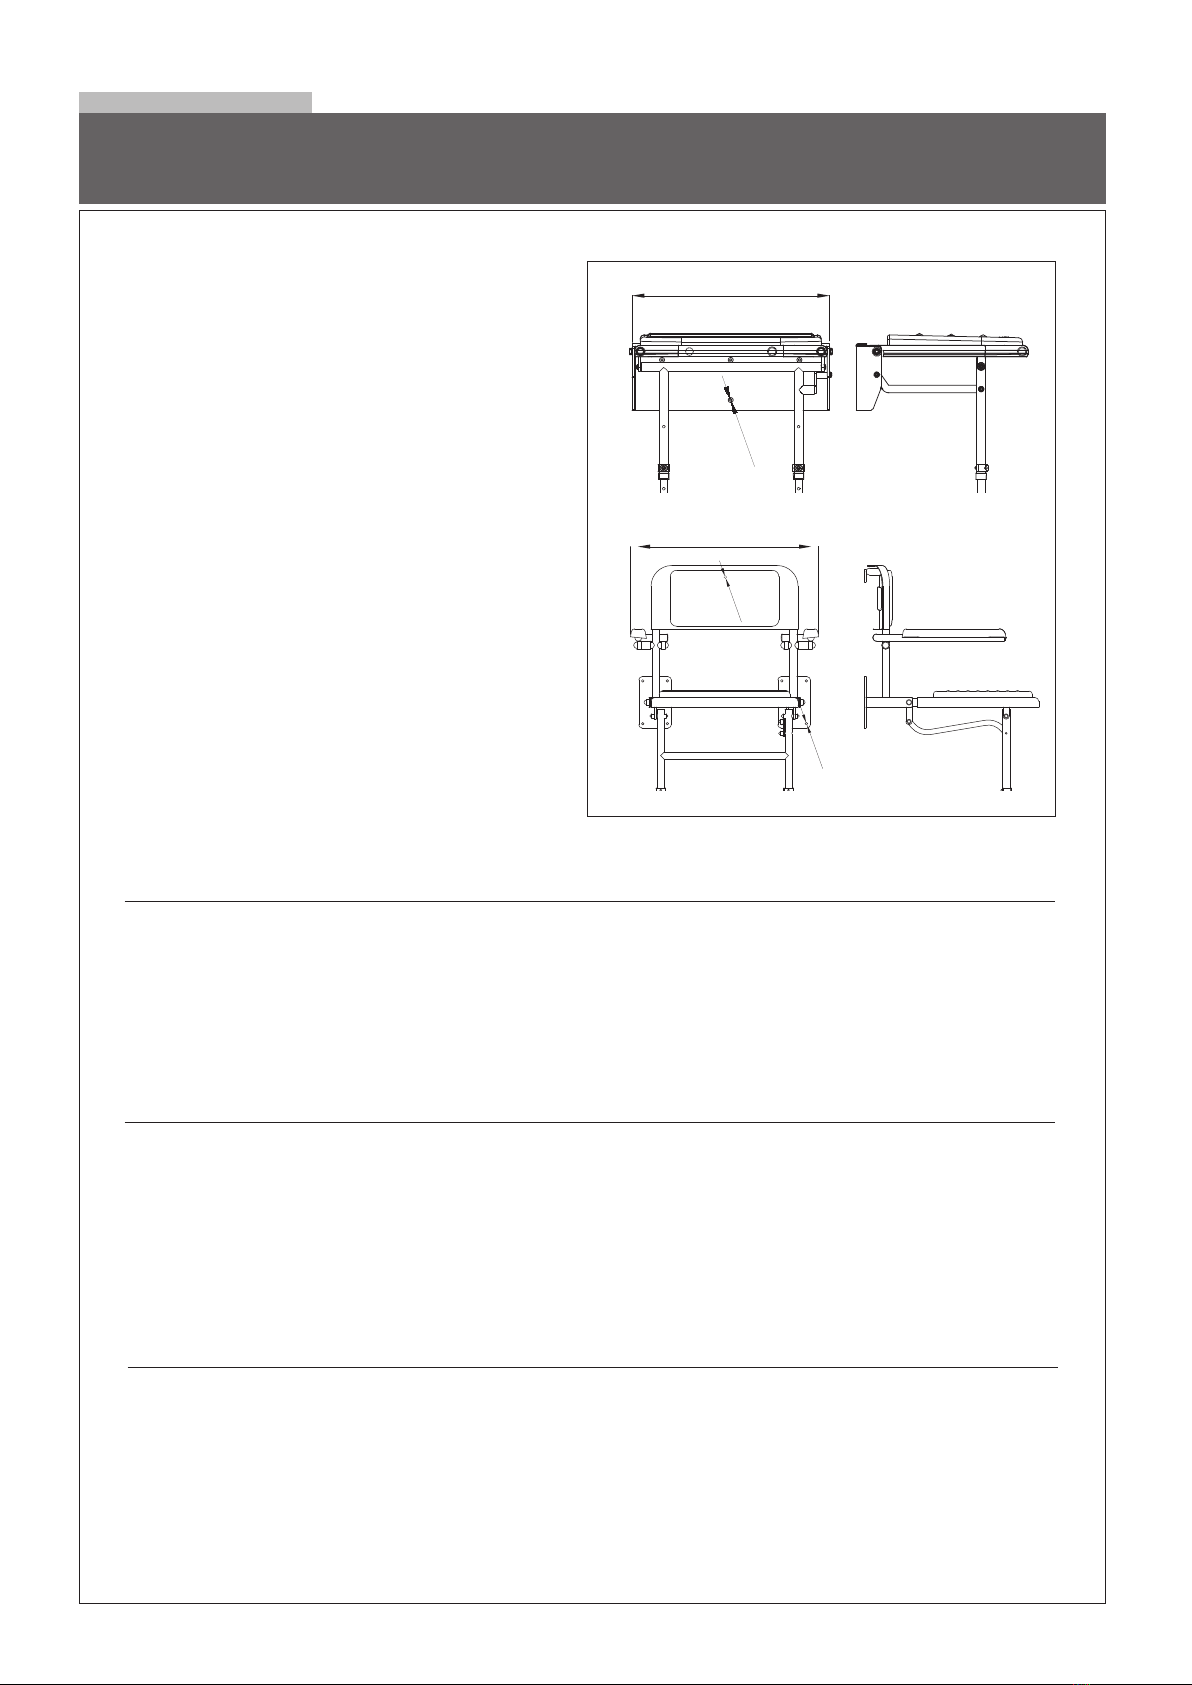
1. Once the correct wall fixin has been selected,
the required number should be employed in the
locations shown opposite.
2. Slide the complete plastic backrest off the frame.
3. Offer shower seat up to wall at the correct hei ht
and carefully mark the hole locations.
4. Drill the holes in the wall of a diameter and
depth recommended by supplier of wall fixin s.
5. Adjust the le support so that the seat is
horizontal when restin on the le s.
6. Slide the complete plastic backrest back down
onto the frame.
Installati n:
Ins alla ion should be carried ou by a sui ably
qualified radesman using correc fixing for he
wall subs ra e. No fixings are supplied wi h his
produc o allow he correc fixing me hod o
be selec ed for he specific ins alla ion.
Note: fixings not included
QI0006/01


