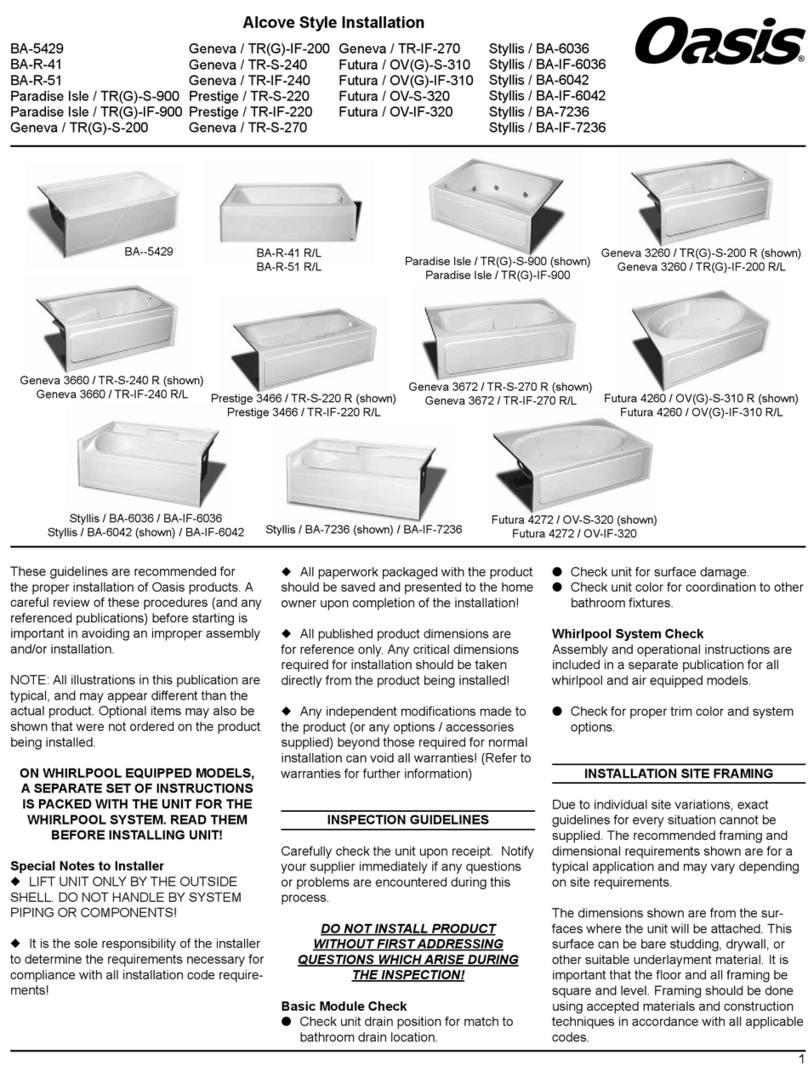
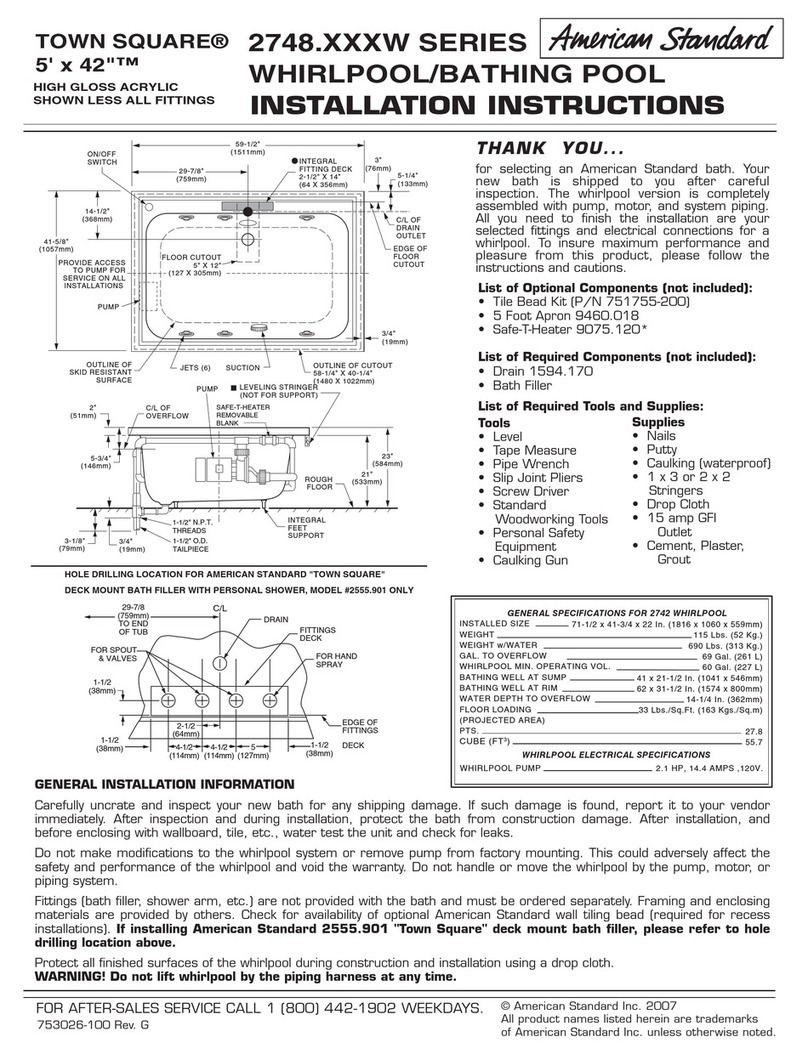
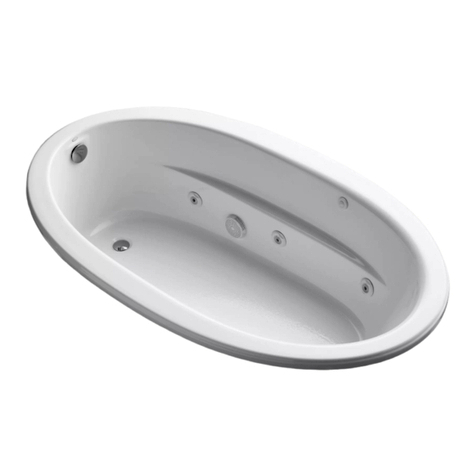
Oasis Builder Series User manual

1
These guidelines are recommended for
the proper installation of Oasis products. A
careful review of these procedures (and any
referenced publications) before starting is
important in avoiding an improper assembly
and/or installation.
NOTE: All illustrations in this publication are
typical, and may appear different than the
actual product. Optional items may also be
shown that were not ordered on the product
being installed.
ON WHIRLPOOL EQUIPPED MODELS, A
SEPARATE SET OF INSTRUCTIONS
IS PACKED WITH THE UNIT
FOR THE WHIRLPOOL SYSTEM.
READ THEM BEFORE INSTALLING UNIT!
Special Notes to Installer
uLIFT UNIT ONLY BY THE OUTSIDE
SHELL. DO NOT HANDLE BY SYSTEM
PIPING OR COMPONENTS!
uIt is the sole responsibility of the installer
to determine the requirements necessary for
compliance with all code requirements!
uAll paperwork packaged with the product
should be saved and presented to the home
owner upon completion of the installation!
uAll published product dimensions are
for reference only. Any critical dimensions
required for installation should be taken
directly from the product being installed!
u Anyindependentmodicationsmadeto
the product (or any options / accessories
supplied) beyond those required for normal
installation can void all warranties! (Refer to
warranties for further information)
INSPECTION GUIDELINES
Carefully check the unit upon receipt. Notify
your supplier immediately if any questions
or problems are encountered during this
process.
DO NOT INSTALL PRODUCT
WITHOUT FIRST ADDRESSING
QUESTIONS WHICH ARISE DURING
THE INSPECTION!
Basic Module Check
lCheck unit drain position for match to
bathroom drain location.
lCheck unit for surface damage.
lCheck unit color for coordination to other
bathroomxtures.
Whirlpool System Check
Assembly and operational instructions are
included in a separate publication for all
whirlpool and air equipped models.
lCheck for proper trim color and system
options.
INSTALLATION SITE FRAMING
WARNING!
Oasis self-rimming models ARE NOT
designed for insertion into a
pre-nished deck or platform.
Any unit or system damage resulting
from the ‘drop-in’ installation technique
may void all warranties.
When the installation involves a deck or
platformarea,framingand/ornishingthe
deck or platform is NOT RECOMMENDED
until the unit has been secured in position.
NOTE: A pump access MUST BE
PROVIDED for all whirlpool equipped units.
Additional access may be required to
comply with local codes.
NOTE: ‘Wet-set’ is not required to support
theoorunderanOasisproductduetothe
encapsulated Balsa wood construction.
®
Self-Rimming Installations - Builder Series
Paradise Isle TR-B-900 Andros Isle TR-B-400
Geneva 3260 TR-B-200/TRG-200 Geneva 3672 TR-B-270/TRG-270
Geneva 3660 TR-B-240/TRG-240 Vincennes 2 / HGG-490
San Salvador 1 TR-B-100 Classic 4060 OV-B-340/OVG-340
San Salvador 2 TR-B-150 Futura 4260 OV-B-310/OVG-310
Prestige 3466 TR-B-220 Classic 4472 OV-B-380
Prestige 4272 TR-B-140 Futura 4272 OV-B-320/OVG-320
Prestige 4872 TR-B-850
Paradise Isle / TR-B-900
Andros Isle / TR-B-400
Geneva 3260 / TR-B-200, TRG-200
Geneva 3660 / TR-B-240, TRG-240
Geneva 3672 / TR-B-270, TRG-270
San Salvador 1 / TR-B-100
San Salvador 2 / TR-B-150
Prestige 3466 / TR-B-220
Prestige 4272 / TR-B-140
Prestige 4872 / TR-B-850
Futura 4260 / OV-B-310, OVG-310 Futura 4272 / OV-B-320, OVG-320
Classic 4060 / OV-B-340, OVG-340 Classic 4472 / OV-B-380
Vincennes 2 / HGG-490

2
Rim-To-Wall Installation
Position the unit in the bath area with the
rim edge against the wall framing. Check
foranyframingmodicationswhichmaybe
requiredtoaccommodatepipesorttings
on whirlpool equipped models.
With the unit properly positioned, check for
the following items: (Illust. 1)
l Conrmthepre-leveledbaseblocksare
restingushontheoor
l Conrmdrainposition.
l Conrmtheunitislevelalongeachside
and across each end.
If required, place material under the base
blocks to maintain the unit in a level posi-
tion. After leveling the unit, place a mark
along the bottom edge of the unit rim at
each framing member. Remove the unit and
apply a 3/4” rail to the framing, 1/16” below
the rim mark on the framing (illust. 1). DO
NOT install the 3/4” rail as a rim support.
After repositioning and re-leveling the unit,
securethebaseblockstotheoorbyapply-
ing a bead of construction adhesive to the
underside of each block (illust. 2).
NOTE: Any material place under the base
blocks to keep the unit level must be
structurally sound and applied to ensure the
unit’s weight will be equally distributed over
the entire base.
Deck Surround Framing
Withtheunitsecuredtotheoorstruc-
ture, as shown in illustrations1 and 2, the
framework surrounding the unit can now be
constructed. Due to the design possibilities,
itisimpossibletoprovideexactguidelines
for every type of installation.
The following guidelines apply to every
self-rimming unit regardless of the installa-
tionconguration.Acarefulreviewofthese
guidelines before continuing is important in
avoiding unnecessary problems resulting in
an improper installation (illust. 3, 4, 5, & 6).
a) All materials and construction techniques
must comply with applicable codes for
the installation site.
b) All framing must be square, level, and
adequately designed to provide the
structural (weight bearing) support nec-
essary for the areas use.
c) Provide all acess areas required to com-
ply with applicable codes for the installa-
50-1/4”
9-3/4”
60”
16”
16”
2” Dia. Drain
32”
16-3/4“
4-1/4”
2-1/2” Dia. Overflow
7/8“ Drain
Clearance
Drain CenterOverflow Center 6“
21
”
Arm Rest
Arm Rest
15-7/8“
Beveled Edge
Leveling Supports
2” Rim
19”
11”x 3”
Faucet Area
11”x 3”Faucet Area
Geneva 3260 / TR-B-200, TRG-200
50”
10”
60”
17-3/4”
18-1/4”
2” Dia. Drain
36”
16-3/4“
4-1/4”
2-1/2” Dia. Overflow
1“ Drain Clearance
Drain CenterOverflow Center
6-1/2“
2 Rim”
21”
Arm Rest
Arm Rest
15-3/4“
Beveled Edge
19”
15”x 3”
Faucet Area
15”x 3”Faucet Area
Geneva 3660 / TR-B-240, TRG-240
51-3/4”
8-1/2”
60-1/4”
15-5/8”
16-5/8”
2” Dia. Drain
32-1/4”
18“
3”
2-1/2” Dia. Overflow
2-1/4“ Drain
Clearance
Drain CenterOverflow Center 6“
21”
15-3/4“
Leveling Supports
19”
2” Rim
15”x 4”
Faucet Area
15”x 4” Faucet Area
San Salvador 1 / TR-B-100
51-7/8”
8-3/8”
60-1/4”
18”
18”
2” Dia. Drain
36”
18“
3”
2-1/2” Dia. Overflow
2-1/2“ Drain
Clearance
Drain CenterOverflow Center
5-3/4“
21”
15-1/2“
Leveling Supports
19”
2” Rim
15”x 4”
Faucet Area
15”x 4” Faucet Area
San Salvador 2 / TR-B-150
2” Dia. Drain
3”
2-1/2”Dia.
Overflow
2“ Drain
Clearance Leveling Supports
2“ Rim
19”
30“
41-3/4”
12-3/8”
29-3/8”
18”
16”
59-5/8”
21”
29-5/8”
15”x 4”
Faucet Area
Paradise Isle / TR-B-900

3
tion site. A service access is mandatory
at the pump location on all whirlpool
models for all installations (illust. 4).
d) Appropriate clearances between the
framing and the bottom edge of the rim
must be maintained for the application
ofunderlaymentandthenishmaterial,
plus a 1/16” to 1/8” gap to allow for ap-
plication of a waterproof sealant.
NOTE: Oasis recommends a high qual-
ity silicone based sealant with a mold and
mildew resistant content.
Deck Surround Finishing
Install and seal an appropriate underlay-
mentfortheselectednishmaterialsas
instructed by the manufacturer. Make sure
theunderlaymentextendsunderthetubrim
far enough to provide adequate backing for
thenishmaterial(illust.5).
Applythenishmaterialandsealaccording
tothemanufacturersspecications(illust.5).
Afterallthenishworkiscompleted,care-
fully clean the area and apply an appropri-
ate waterproof sealant between the tub rim
andthenishmaterial.Consultthesealant
container for application instructions (illust. 5).
Rim-To-Wall Finishing
Install and seal an appropriate underlay-
ment to the wall framing for the selected
nishmaterialasinstructedbythemanufac-
turer. On rim-to-wall installations it is recom-
mended that a double layer of underlayment
beappliedtoinsurethenishmaterialedge
willendaboveaatunitsurface(illust.6).
Applythenishmaterial,leaving1/16”to
1/8”clearancebetweenthenishmaterial
edge and the tub surface to allow for seal-
ant application (illust. 6).
Afterallthenishworkiscompleted,care-
fully clean the area and apply an appropri-
ate waterproof sealant between the tub rim
andthenishmaterial.Consultthesealant
container for application instructions (illust. 6).
WARNING!
THE INSIDE UNIT SURFACE SHOULD
BE CLEAR OF ALL LOOSE DEBRIS
AND THE SURFACE PROTECTED
BEFORE STEPPING INSIDE.
Water Supply and Drain Connections
Refer to, and follow, the assembly and
installation instructions provided with the
supply valves and drain system. Carefully
check all connections for leaks.
57-1/4”
8-3/4”
66”
17-1/8”
2” Dia. Drain
34-1/4”
18“
3 ”
2-1/2” Dia. Overflow
2-1/4“ Drain
Clearance
Drain CenterOverflow Center 6“
21”
15-3/4“
Leveling Supports
17-1/8”
1-3/4” Rim
19-1/4”
Arm Rest
Arm Rest
15”x 4”
Faucet Area
15”x 4” Faucet Area
Prestige 3466 / TR-B-220 Prestige 4272 / TR-B-140
63-1/8”
7-5/8”
71-3/4”
21”
21”
2” Dia. Drain
42”
18“
3”
2-1/2” Dia. Overflow
2-1/4“ Drain
Clearance
Drain CenterOverflow Center
4-7/8“
21”
15-3/4“
Leveling Supports
19-1/4”
1-3/4”
Arm Rest
Arm Rest
15”x 4”
Faucet Area
15”x 4” Faucet Area
63-1/2”
8-1/8”
71-5/8”
24”
24”
2” Dia. Drain
48”
18“
3”
2-1/2” Dia. Overflow
2-3/4“ Drain
Clearance
Drain CenterOverflow Center
5-1/4“
21
”
15-1/4“
Leveling Supports
19-1/4”
1-3/4
Rim”
15”x 4”
Faucet Area
15”x 4” Faucet Area
Arm Rest
Arm Rest
Prestige 4872 / TR-B-850
2” Dia. Drain
3”
2-1/2” Dia.
Overflow
1-3/4“ Drain
Clearance Leveling Supports
2“
Rim
19”
36“
41-3/4”
12”
29-3/4”
16-1/4”
18”
71-1/2”
35-1/2”
21”
15”x 4”
Faucet Area
Andros Isle / TR-B-400

4
UNIT SURFACE CARE
WARNING!
NEVER USE ABRASIVE MATERIALS,
OR ABRASIVE CLEANERS
ON THE UNIT SURFACE!
EXTREME CAUTION is urged regarding
the use of any cleaner, acid or solvent
on the unit surface.
READ AND FOLLOW PACKAGE
INSTRUCTIONS FOR ALL
PURCHASED CLEANING PRODUCTS!
Through routine use the surface can col-
lect residues from soap, bath additives
and natural body oils. Additional deposits
can also collect from minerals or particles
found in the water. After each use, wipe the
excesswaterfromtheunit.Thispractice
will reduce the buildup of deposits and help
maintain the natural unit lustre.
Following a thorough surface cleaning,
anapplicationofqualityautomotivewax
will help reduce major accumulations. The
actualscheduleforcleaningandwaxingwill
depend on unit usage and water quality.
WARNING!
NEVER APPLY WAX TO THE FLOOR!
uRoutine Cleaning: Mild, non-abrasive
cleanerspecicallyformulatedforgelcoat
and acrylic surfaces recommended. (Rinse
surface thoroughly)
uHeavy Soap Deposits: Liquid ammonia
household cleaner, applied full strength.
(Rinse surface thoroughly)
uStubborn Stains: Liquid household
cleanerorhydrogenperoxideapplied
full strength. Place a saturated clean rag
directly on stain and let stand several hours.
(Rinse surface thoroughly)
uHard Water Scales: Liquid scale remover
or white vinegar, applied full strength.
(Rinse surface thoroughly)
uMold/Mildew: Liquid mildew remover or
baking soda and water paste. (Apply paste
andallowtozzseveralminutes.)(Rinse
surface thoroughly)
uConstruction Adhesive: Soften with a
hand held hair dryer and peel off adhesive.
(Caution is advised when using any electri-
cal device near water.)
60-5/8”
11-3/8”
72”
18-1/8”
18-1/8”
2” Dia. Drain
36-1/4”
16-3/4“
4-1/4”
2-1/2” Dia. Overflow
1-1/8“ Drain Clearance
Drain CenterOverflow Center
7-1/4“
Leveling Supports
19”
Arm Rest
Arm Rest
15-5/8“
Beveled Edge
21”
2” Rim
15”x 4”
Faucet Area
15”x 4” Faucet Area
Geneva 3672 / TR-B-270, TRG-270
2” Dia. Drain
4-1/4”
2-1/2” Dia. Overflow
1“ Drain
Clearance
Drain CenterOverflow Center
5-3/4“
Leveling Supports
2“
Rim
Beveled Edge
16-1/2”
15-1/2” 20-3/4”
18-3/4”
51-1/2”
60”
9“
42”
21”
21”
15”x 4”
Faucet Area
15”x 4” Faucet Area
Futura 4260 / OV-B-310, OVG-310
2” Dia. Drain
2-3/4”
2-1/2” Dia.
Overflow
1-3/8“ Drain
Clearance Leveling Supports
2“ Rim
18”
16-5/8”
18-3/4”
40”
59-3/4”
20”
20-3/4”
9-1/4”
20”
50-1/2”
Drain CenterOverflow Center
6-1/4”
Classic 4060 / OV-B-340, OVG-340
2” Dia. Drain
3” 2-1/2” Dia. Overflow
1-1/8“ Drain
Clearance Pre-Leveled Base
2-1/4“
Rim
Arm Rest
19-3/4”
36“
42”
10-7/8”
31-1/8”
22”
36“
72“
19”
17-7/8”
Neck Rest
Neck Rest 1-1/4”
Arm Rest 15”x 4”
Faucet Area
Vincennes 2 / HGG-490

5
For adhesive residue, apply rubbing alcohol
or nail polish remover, full strength. (Rinse
surface thoroughly)
WARNING!
BATH MATS AND OTHER ITEMS
HELD IN PLACE USING SUCTIONS
MUST BE REMOVED FROM THE UNIT
SURFACE AFTER EACH USE.
OVER AN EXTENDED PERIOD,
FAILURE TO REMOVE
SUCTION ATTACHED ITEMS
WILL DAMAGE THE UNIT SURFACE.
2” Dia. Drain
4-1/4”
2-1/2” Dia. Overflow
1-3/4“ Drain
Clearance Leveling Supports
2“ Rim
Beveled Edge
18 -3/4”
36“
42”
8-5/8”
33-3/8”
14-3/4”
16-1/2”
71-3/4”
35-3/4”
20-3/4”
15”x 4”
Faucet Area
15”x 4”
Faucet Area
Futura 4272 / OV-B-320, OVG-320
2. The factory-leveled block base MUST fully
rest on the floor and be used as the unit support.
Shimming of one or more blocks may be
necessary to maintain level.
3/4” rail
positioned
1/16”
below rim
Confirm drain position.
Confirm leveling blocks are flush on floor
Confirm top of tub is level along both
sides and at each end of unit
3. The base and/or whirlpool
system may extend to the outer edge
of the unit, making it impossible to
insert the unit in a deck cut out without
causing damage.
4. Selective placement of
framing members may be
required to avoid damaging
whirlpool system components.
1. The installation CANNOT allow the
rim to support the weight of the unit.
3/4” rail positioned
1/16” below rim
2” Dia. Drain
2-3/4”
2-1/2” Dia. Overflow
1-1/4“ Drain Clearance Leveling Supports
2“
Rim
18”
16-3/4”
18-3/4”
43-3/4”
71-3/4”
11-3/4”
32”
20-3/4”
35-3/4” 36”
15”x 2”
Faucet Area
Classic 4472 / OV-B-380

6
Finish
Layer
Wall Framing
Waterproof
Sealant
Tub
Rim
Double Layer
Underlayment
3/4 inch
Rail
Illustration 6
All framing must be square and level using the
appropriate framing material and construction
techniques for adequate support.
Allow spacing under rim for the underlayment, the
finish material plus 1/16 to 1/8 inch for sealant.
Illustration 3
A 16 inch high x 21 inch wide
clear access opening is required
at the pump location for all
whirlpool equipped units.
Illustration 4
Underlayment
Deck
Framing
Finish Layer
Waterproof
Sealant
Tub Rim
Illustration 5
Underside
of Bathing
Well
Pre-Leveled Block Bases
Site Applied Construction Adhesive
Underside
of Deck
Unit Rim
Illustration 2
2. The factory-leveled block base MUST fully
rest on the floor and be used as the unit support.
Shimming of one or more blocks may be
necessary to maintain level.
3/4” rail
positioned
1/16”
below rim
Confirm drain position.
Confirm leveling blocks are flush on floor
Confirm top of tub is level along both
sides and at each end of unit
3. The base and/or whirlpool
system may extend to the outer edge
of the unit, making it impossible to
insert the unit in a deck cut out without
causing damage.
4. Selective placement of
framing members may be
required to avoid damaging
whirlpool system components.
1. The installation CANNOT allow the
rim to support the weight of the unit.
3/4” rail positioned
1/16” below rim
Illustration 1

7
INST-0720.02 / 101514
Oasis Lifestyle, LLC - 1400 Pidco Drive - Plymouth, Indiana 46563
Oasis Lifestyle Product Assurance Program
Bathing and Shower Unit Structure & Surface Finish Limited Warranty
OasisLifestyleprovidesaperformanceassuranceprogramforunitstructuralintegrityandsurfacenishcoveringave
(5) year period from the date-of-purchase on GELCOAT, and covering a ten (10) year period from the date-of-purchase on
VACUUM FORMED ACRYLIC product, for the original purchaser and subsequent consumer. This Oasis limited warranty pro-
gramaddressesspecicdefectsintheproduct,andtheworkmanshipassociatedwiththemanufactureoftheOasisbathing
andshowerproduct.Thespecicdefectscoveredmustresultinasignicantlyalteredappearanceand/oraffecttheintended
performance standards for the product under normal residential use.
Hydro-Massage Systems (water recirculation & air), Option & Accessories Limited Warranty
Oasis Lifestyle provides a performance assurance program for their hydro-massage systems (herein called ‘system’), and
their options and accessories covering a two (2) year period from the date-of-purchase for the original purchaser and subse-
quentconsumer.ThisOasislimitedwarrantyprogramaddressesspecicdefectsinthesystemcomponents,andthework-
manship associated with the assembly of the systems, along with offered options and accessories installed by Oasis, on an
Oasisunit.Thespecicdefectscoveredmustresultinasignicantlyalteredappearanceand/oraffecttheintendedperfor-
mance standards for the system, the option and/or the accessory.
Duringthecoverageperiod,Oasiswill,atitsdiscretion(followingavericationbyanauthorizedOasisrepresentative),either
provideserviceorsupplyareplacementproductwithoutcharge,butexcludinganycostassociatedwiththetransportation,
removalofand/orreinstallationoftheunit(module).FailuretoallowrequestedinspectionbyanauthorizedOasisrepresenta-
tive,and/orfailuretoprovideadequateaccessibilityforanauthorizedinspection,and/orserviceperformedpriortodocument-
edauthorizationfromOasisLifestyle,LLC.,maydelayservice,and/orpossiblyterminateanywarrantycoverage,andremove
any liability to Oasis Lifestyle, LLC.
This ‘Product Assurance Program’ does not cover service resulting the following:
a) Impropereldinstallationoftheproduct,system,option,accessory,and/orsurroundingstructure
modications,and/orutilityserviceconnectionsbeyondtherecommendationssuppliedbyOasisandwithinthe
scope of applicable codes and ordinances; or
b) Carelessness,damage,abuse,misuse,negligence,impropercare,re,ood,oractsofGod;or
c) Non-conforming use, including any use beyond those intended for the product, system, option and/or
accessory, including failure to follow the Prescribed Care and Maintenance Instructions; or
d) Anyunauthorizedalterationsormodicationstotheproduct,system,option,accessoryand/ortheindividual
parts or components supplied by Oasis.
e) Any surface and/or component staining, discoloration, component failure and/or build-up caused as a result of
water chemistry or water quality at the site.
f) Service resulting from normal use and wear for the product, system, option and/or accessory.
Repairorthesupplyingofreplacementproductand/orcomponents,underthislimitedwarrantyprogram,shallbetheex-
clusive remedy. Oasis Lifestyle, LLC., shall not be liable for any incidental or consequential damages, including damages to
thebuilding/structure,thecontents,theoccupants,orbreachofanyexpressedorimpliedwarranties.OasisLifestyle,LLC.,
doesnotrecognize,norauthorizesanypartytoprovideimpliedorwrittenwarrantiesregardingaproduct,system,optionand/
oraccessoriestnessforaparticularpurpose,normodifythetermsofthelimitedwarrantybeyondthosestated.
Somestatesdonotallowtheexclusionorlimitationofincidentalorconsequentialdamages,orallowlimitationsonthedura-
tionofanyimpliedwarranty.Therefore,theaboveexclusionsand/orlimitationsmaynotapply.
THIS WARRANTY PROVIDES SPECIFIC LEGAL RIGHTS, WHICH CAN VARY FROM STATE-TO-STATE.
800.638.8556
HomeInnovation.com
The manufacturer represents that the product to which this
label is affixed (a) duplicates samples independently
tested by Home Innovations Research Labs and certified
to conform to the requirements of HUD UM Bulletin 73a
and the appropriate ANSI Z124 and ICC/ANSI A117.1
standards, and (b) has been manufactured under quality
controls deemed appropriate by the manufacturer and
periodically reviewed by the certifier.
Oasis Lifestyle, LLC
Plymouth, IN
6006
800.638.8556
HomeInnovation.com
The manufacturer represents that the product to which this
label is affixed (a) duplicates samples independently
tested by Home Innovations Research Labs and certified
to conform to the requirements of HUD UM Bulletin 73a
and the appropriate ANSI Z124 and ASME A112.19.7
standards, and (b) has been manufactured under quality
controls deemed appropriate by the manufacturer and
periodically reviewed by the certifier.
Oasis Lifestyle, LLC
Plymouth, IN
6006
®
This manual suits for next models
21
Other Oasis Bathtub manuals
Popular Bathtub manuals by other brands

Crosswater
Crosswater Sontuoso US-N8ECS installation instructions

Kohler
Kohler K-1165 Roughing-In Guide

Laufen
Laufen ILBAGNOALESSI H220972 manual

Kohler
Kohler Mariposa K-1239-GRF manual

JASON Hydrotherapy
JASON Hydrotherapy forma owner's manual

Victoria + Albert
Victoria + Albert Monaco Fitting instructions

Kohler
Kohler K-1106 installation guide

VIGOUR
VIGOUR derby Installation instruction

American Standard
American Standard TownSquare Whirlpool 2748.018 parts list

JASON Hydrotherapy
JASON Hydrotherapy Forma AirMasseur AC635P owner's manual

Kingkraft
Kingkraft 1700 installation instructions

agape
agape VIEQUES XS AVAS0912 Assembly instructions