3
Operating Instructions and Parts Manual 24670
11/18
2018 OEMTOOLS™
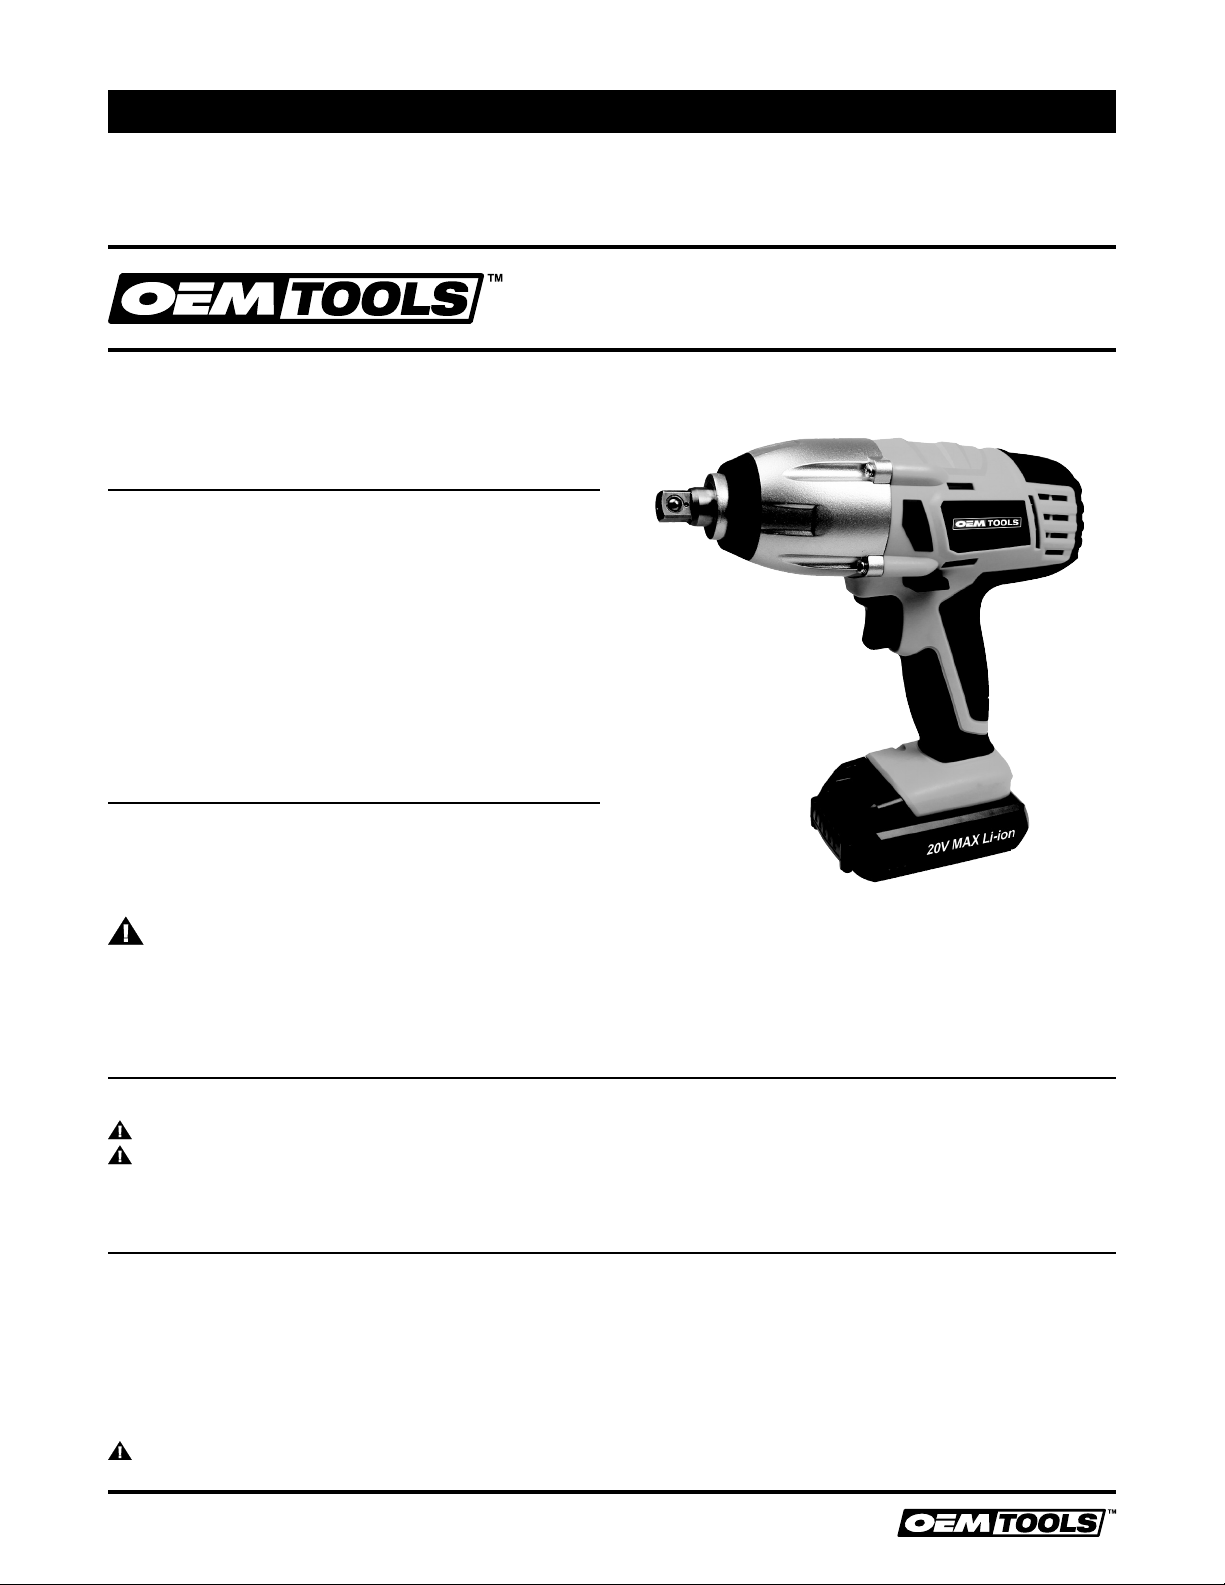
20V MAX* LITHIUM-ION CORDLESS
1/2" DRIVE IMPACT WRENCH
7. Use the power tool, accessories and tool bits, etc.
in accordance with these instructions, taking into
account the working conditions and the work to be
performed. Use of the power tool for operations
different from those intended could result in a
hazardous situation.
BATTERY TOOL USE AND CARE
1. Recharge only with the charger specified by the
manufacturer. A charger that is suitable for one type of
battery pack may create a risk of fire when used with
another battery pack.
2. Use power tools only with specifically designated
battery packs. Use of any other battery packs may
create a risk of injury and fire.
3. When battery pack is not in use, keep it away from
other metal objects, like paper clips, coins, keys, nails,
screws or other small metal objects that can make a
connection from one terminal to another. Shorting the
battery terminals together may cause burns or a fire.
4. Under abusive conditions, liquid may be ejected from
the battery; avoid contact. If contact accidentally
occurs, flush with water. If liquid contacts eyes, seek
medical help. Liquid ejected from the battery may
cause irritation or burns.
SERVICE
DO NOT disassemble the Impact Wrench. Have your
power tool serviced by a qualified repair person using
only identical replacement parts. This will ensure that the
safety of the power tool is maintained.
SPECIFIC SAFETY RULES
WARNING
1. Know your cordless Impact Wrench. DO NOT plug in
the charger or install the battery in the tool until you
have read and understand this Instruction Manual.
Learn the tool’s applications and limitations, as well
as the specific potential hazards related to this tool.
Following this rule will reduce the risk of electric
shock, fire, or serious injury.
2. Always wear eye protection. Any power tool can throw
foreign objects into your eyes and cause permanent
eye damage. ALWAYS wear safety goggles (not
glasses) that comply with ANSI safety standard Z87.1.
Everyday glasses have only impact resistant lenses.
They ARE NOT safety glasses.
3. Glasses or goggles not in compliance with ANSI Z87.1
could cause serious injury when they break.
4. Always use hearing protection when operating the
Impact Wench.
5. Use only impact sockets and accessories that
are designed for use with an Impact Wrench. DO
NOT use chrome plated sockets and accessories.
Chrome plated sockets and accessories are
designed for hand use only and MUST NOT be
used with an Impact Wrench. They may shatter and
possibly cause serious injury.
6. Before each use, check the Impact sockets and
accessories for excessive wear or cracks. Worn or
damaged sockets or accessories may shatter and
possibly cause serious injury. Worn accessories may
allow the socket to come off during operation of the
Impact Wrench.
7. After installing any accessory in the hex drive, pull
outward on the accessory to ensure it is properly
installed and cannot be pulled out of the hex drive.
8. Never use the Impact Wrench as a torque wrench.
Always use a torque wrench to adjust the fastener to
the specified torque.
9. Keep the Impact Wrench handle and body clean and
free of oil and grease. Always use a clean dry cloth
when cleaning. DO NOT use solvents, brake fluid,
gasoline or other petroleum products to clean the tool.
They will damage the tool.
10. DO NOT wear neckties or loose clothing.
11. When wearing gloves, they must be tight fitting and
slip resistant type. Leather gloves offer the best
protection.
12. Always use two hands when operating the Impact
Wrench. Use one hand on the handle and the other on
the front of the tool body.
13. Never place your hand so it is touching the socket
or accessory when the tool is turned ON. Your hand
could be seriously injured.
14. Always remove the battery from the tool before installing
or removing any socket or accessory.
15. Be ready for components to shift when removing any
fastener. The speed of the fastener removal could cause
unexpected shifting of the components.
WARNING:WEAR A DUSK MASK THAT IS
DESIGNED TO BE USED WHEN OPERATING A POWER
TOOL IN A DUSTY ENVIROMENT.
Dust that is created by power sanding, sawing, grinding,
drilling, and other construction activities may contain
chemicals that are known to cause cancer, birth defects,
or other genetic abnormalities. These chemicals include:
• Lead from lead-based paints
• Crystalline silica from bricks, cement, and other
masonry products
• Arsenic and chromium from chemically treated lumber
The level of risk from exposure to these chemicals varies,
according to how often this type of work is performed. In
order to reduce exposure to these chemicals, work in a
well-ventilated area, and use approved safety equipment,
such as dust mask that is specifically designed to filter
out microscopic particles.
IMPORTANT SAFETY INSTRUCTIONS
The warnings, precautions, and instructions discussed
in this manual cannot cover all possible conditions
and situations that may occur. The operator must
understand that common sense and caution are factors
which cannot be built into this product but must be
supplied by the operator.
DISPOSAL
At the end of the useful life of the OEMTOOLS™Impact
Wrench, dispose of the components according to all state,
federal, and local regulations.